Fixing Iron Deficiency in Hostas
You walk out after a week of warm weather and spring rain, and your hostas—usually the calm, reliable backbone of your shade garden—look oddly washed out. The new leaves are pale, almost yellow, but the veins stay greener. Your first instinct is “They need fertilizer.” So you feed them… and they get worse. I’ve seen this play out more times than I can count. In hostas, that telltale yellowing on the newest leaves is often iron deficiency (or, more accurately, iron unavailability), and throwing more general fertilizer at it can push the problem harder.
Iron issues in hostas are rarely about a true lack of iron in the soil. Most garden soils contain plenty. The real culprit is usually pH, saturated roots, cool soil, or competing nutrients that tie iron up so the plant can’t use it. The good news: once you diagnose it correctly, hostas usually rebound within 10–21 days after the right fix—often in the same season.
What iron deficiency looks like in hostas (and what it doesn’t)
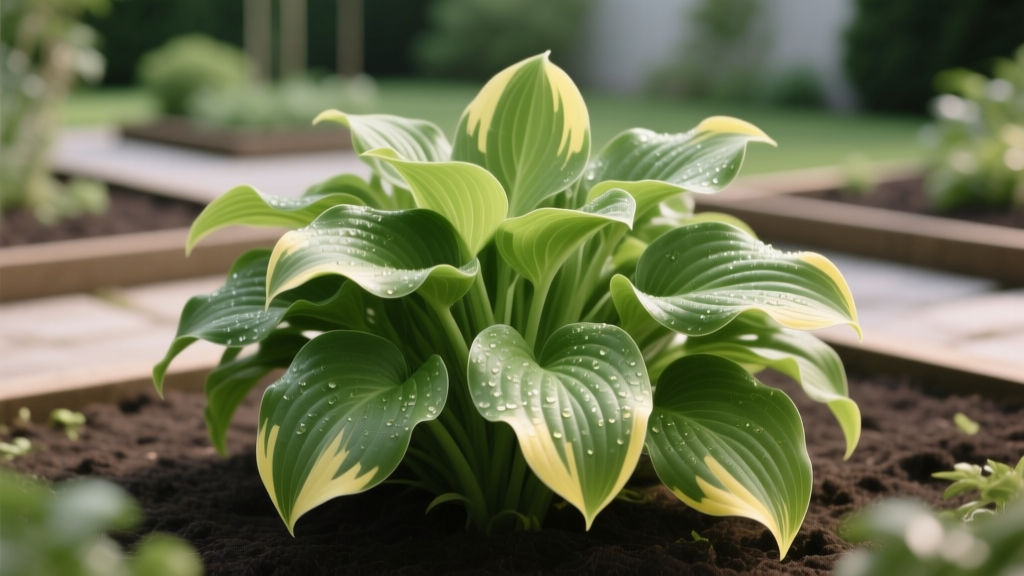
Iron deficiency shows up as interveinal chlorosis: leaf tissue turns yellow while veins remain greener. The giveaway is where it starts: iron problems show first on newest leaves because iron is not very mobile in the plant.
Classic symptoms
- Newest leaves emerge pale yellow or chartreuse when they should be deeper green.
- Leaf veins remain green longer than the tissue between them.
- In moderate cases, leaves look “bleached” in patches, especially under bright shade or morning sun.
- In severe cases, new leaves may be small, thin, and scorched at the edges.
Symptoms that point to something else
- Oldest leaves yellowing first: more likely nitrogen deficiency or normal aging.
- Speckled stippling and silvering: often mites or thrips.
- Yellowing with mushy crown: crown rot from waterlogged soil.
- Yellowing plus chewed margins: slugs/snails, not nutrition.
“Interveinal chlorosis on young leaves is a hallmark of iron deficiency, but in landscapes it is often driven by soil pH and poor root function rather than a lack of iron in the soil.” — University of Minnesota Extension nutrient disorder guidance (2023)
Before you treat: confirm the cause (quick checks that save money)
I’m all for fast fixes, but iron products can be pricey—so do these checks first. You can diagnose most cases in 15 minutes with a trowel, a cheap pH kit, and your eyes.
Step-by-step diagnosis (do this in order)
- Check which leaves are yellow. Newest leaves = iron suspect. Oldest leaves = look at nitrogen, watering, or root stress.
- Dig a small inspection hole about 6 inches deep near the drip line. If the soil is sour-smelling, sticky, or saturated, you likely have oxygen-starved roots tying up iron.
- Test soil pH. Hostas tolerate a range, but iron availability drops as pH climbs. If pH is above 7.2, iron chlorosis becomes much more common.
- Look for recent triggers: lime applications, new concrete edging, heavy composted manure, high-phosphate “bloom” fertilizer, or weeks of rain.
- Consider irrigation water. If you have hard water, you may be steadily raising pH. A quick clue is white mineral crust on pots or soil.
For lab certainty, a soil test is worth it if this is a recurring issue. Many university labs report pH, organic matter, and key nutrients; some also flag high phosphorus, which can worsen iron lockout. The general relationship between pH and iron availability is well documented in extension literature; for example, iron chlorosis is strongly associated with alkaline conditions in many ornamentals (University of California Agriculture and Natural Resources guidance, 2020).
Watering: the sneaky driver of “iron deficiency” in hostas
Hostas like consistent moisture, but they hate suffocating roots. When soil stays saturated, roots can’t take up nutrients efficiently—including iron—no matter how much is present.
How much to water (real numbers that work)
- Established hostas generally do best with about 1 inch of water per week from rain or irrigation during active growth.
- In hot spells (days consistently above 85°F), aim for 1.5 inches per week, but delivered in fewer, deeper waterings.
- Water in the morning, ideally between 6–10 a.m., so foliage dries quickly and slugs are less active on wet leaves.
Best watering method for iron-chlorotic hostas
If chlorosis is showing, switch to a root-friendly pattern for the next month:
- Deep soak every 4–7 days depending on soil type (shorter interval in sand, longer in loam).
- Keep water off leaves if possible—drip or soaker hose is ideal.
- Do a simple “squeeze test”: soil at 4–6 inches should feel cool and slightly damp, but not ooze water when squeezed.
Scenario #1: The rainy spring problem
A very common case: a wet spring followed by a warm week. The hostas push fast new growth, but the root zone is still cold and wet. Iron uptake lags, so new leaves yellow. In this situation, iron products help less than drainage and patience. Let the soil dry to “damp sponge” moisture, lightly cultivate the top 1 inch to increase oxygen exchange (careful around shallow roots), and avoid heavy fertilizer until growth steadies.
Soil and pH: where most iron problems start
If I had to bet on one cause of iron chlorosis in a typical home garden, it’s pH drift into alkaline territory. Iron becomes less available as pH rises, especially above about 7.0. You’ll see this a lot near concrete, mortar, limestone gravel, or where lime has been applied to “sweeten” soil.
Ideal soil conditions for hostas (practical targets)
- pH target: roughly 6.0–7.0 (hostas tolerate slightly outside this, but iron issues climb with alkalinity).
- Texture: moisture-retentive but draining—think rich loam, not heavy clay soup.
- Organic matter: steady additions of leaf mold or compost improve root health and micronutrient cycling.
How to lower pH safely (when alkalinity is the real culprit)
If your pH test comes back at 7.5–8.0, you have two tracks: short-term greening and long-term correction.
- Short-term: use chelated iron (more on that below).
- Long-term: gradually acidify with elemental sulfur or acid-forming fertilizers, and stop adding lime.
Elemental sulfur rates depend heavily on soil texture. If you’re serious about changing pH, follow a soil test recommendation. Overdoing sulfur can stress roots. For many home beds, I prefer a gentle approach: apply 1/2 to 1 inch of leaf mold annually and use an acid-forming nitrogen source if your soil test supports it.
Scenario #2: The “new walkway” hosta bed
You install a concrete paver path, and the hostas along the edge yellow the next season. Concrete and mortar dust can raise pH locally. The fix is often localized too: pull back any gravel or limestone mulch, topdress with compost, and treat the affected clumps with a chelated iron drench. If you can, install a small barrier strip and avoid washing concrete dust into the bed.
Light: too much sun can mimic nutrient problems
Hostas in too much sun often look pale and tired, and gardeners misread that as iron deficiency. Sun stress can also reduce root performance, making real iron uptake worse.
Light targets (so your iron treatment actually sticks)
- Most green hostas prefer 2–4 hours of morning sun or bright, dappled shade all day.
- In climates with strong summer heat, avoid afternoon sun when temps exceed 90°F.
- Gold or chartreuse cultivars can tolerate more light, but they won’t look “deep green” even when healthy—know your variety.
If chlorosis shows up mainly on the sunniest-exposed leaves, provide shade cloth (even 30–40% shade cloth helps) or relocate in fall.
Feeding hostas without causing iron lockout
This is where gardeners accidentally make the problem worse. High phosphorus fertilizers can interfere with micronutrient uptake in some situations, and over-fertilizing pushes soft growth that’s more sensitive to stress.
A sensible feeding schedule (numbers you can use)
- Spring: when shoots are 2–4 inches tall, topdress with 1 inch compost OR apply a balanced, slow-release fertilizer.
- Early summer: one light re-feed if plants are pale and growth is slow; otherwise skip it.
- Stop feeding: about 6–8 weeks before your average first frost so plants harden off.
Iron products: what works, what’s a waste, and what’s risky
Not all “iron” is equal. In alkaline soils, some forms become unavailable quickly. Here’s the practical comparison I use when choosing a method.
| Method | Typical Form | Speed of Results | Best Soil pH Range | Pros | Cons / Watch-outs |
|---|---|---|---|---|---|
| Soil drench with chelated iron (EDDHA) | Iron chelate labeled Fe-EDDHA | Often 7–14 days | Works well up to about pH 9.0 | Most reliable in alkaline beds; longer-lasting greening | Costs more; can stain hardscapes if spilled |
| Soil drench with chelated iron (EDTA/DTPA) | Fe-EDTA or Fe-DTPA | 7–21 days | Best below about pH 7.0–7.5 | Effective in slightly acidic to neutral soil; widely available | Less effective as pH rises; may need repeat applications |
| Foliar iron spray | Iron sulfate or chelated iron spray | 3–10 days | Any (bypasses soil temporarily) | Fast cosmetic improvement; helpful during wet/cold root conditions | Short-lived; can spot leaves if too strong or sprayed in heat |
| Iron sulfate in soil | Ferrous sulfate | Variable; often slow | Best in acidic soil | Inexpensive; adds sulfur | Often ties up in alkaline soil; can acidify too sharply in small beds |
Comparison analysis with actual data: soil drench vs foliar spray
If you want the most practical “A vs B” decision:
- Foliar spray can green up leaves in as little as 3–10 days, but it doesn’t fix the root cause. Think of it as a temporary patch, useful when soils are cold/wet or you need a quick visual improvement.
- Chelated iron soil drench (especially EDDHA) typically shows improvement in 7–14 days and lasts longer because it supports new growth, not just the leaves you sprayed.
My rule: if your pH is high (>7.2) or the problem returns every year, invest in EDDHA as the main tool and use foliar sprays only as a quick assist.
How to apply chelated iron (a method that avoids the usual mistakes)
Always read your product label first, but this approach is broadly reliable:
- Water the area first if soil is dry. You want damp soil so the drench moves evenly into the root zone.
- Mix the drench at label rate in a watering can. Apply to the soil, not the leaves.
- Target the drip line around the clump where feeder roots are active, not right on the crown.
- Apply in cool conditions: morning is best, especially if daytime highs exceed 80°F.
- Wait 10–14 days before deciding it didn’t work. New leaves should emerge greener first; older yellow leaves may not fully recover.
Extension references consistently point out that chelates differ in pH stability; EDDHA is commonly recommended for high pH soils because it remains available longer (University of California Agriculture and Natural Resources, 2020).
Common problems that mimic iron deficiency (and how to tell fast)
Here are the misdiagnoses I see most in hosta beds, with quick fixes that actually move the needle.
Troubleshooting: symptom-to-solution
-
Symptom: New leaves pale yellow with green veins; soil pH 7.5.
Fix: Apply Fe-EDDHA soil drench; stop lime; topdress 1 inch compost; reassess in 14 days. -
Symptom: Whole plant looks pale; older leaves yellow first; growth is slow.
Fix: Consider nitrogen. Apply a light, slow-release feeding in spring; avoid high-phosphorus products. Check watering consistency. -
Symptom: Yellowing + brown mush at crown; plant pulls out easily.
Fix: Crown rot. Improve drainage, remove affected tissue, replant in raised area. Iron won’t help until roots recover. -
Symptom: Yellowing mainly on sun-exposed side; leaf edges scorch in heat.
Fix: Provide afternoon shade; increase mulch to 2 inches (keep off crown); maintain 1–1.5 inches/week water in heat. -
Symptom: Leaves show fine stippling, dullness, and bronzing; not vein-related.
Fix: Check undersides for mites. Hose off, improve plant vigor, and treat if needed.
Three real-world hosta iron-deficiency cases (and what actually solved them)
Scenario #3: Container hostas that suddenly go yellow
Container hostas can flip to chlorosis quickly because potting mixes drift in pH and nutrients wash out. If you’re using hard tap water, pH can creep up over a season. The fix I’ve used repeatedly:
- Repot every 2–3 years into fresh mix.
- Use a chelated iron drench (EDDHA if pH is high).
- Switch to rainwater when possible, or leach the pot monthly by running water through for 2–3 minutes to flush salts.
- Keep pots out of hot afternoon sun; containers overheat fast.
Scenario #4: Hostas near a septic field or driveway runoff
Runoff areas often bring alkalinity (concrete dust) or stay overly wet (oxygen-starved roots). You may see chlorosis plus stunted growth. In these spots, correcting drainage and soil structure matters more than any iron product:
- Raise the bed by 3–6 inches with a loamy topsoil/compost blend.
- Redirect runoff with a shallow swale or edging.
- Then treat with chelated iron only after the root zone is no longer waterlogged.
Scenario #5: The “I used bloom fertilizer and now they’re yellow” bed
High-phosphorus fertilizers (the middle number) are common in “bloom booster” blends. In shade beds, they’re rarely needed and can contribute to micronutrient issues. If your hostas yellow soon after a high-P application:
- Stop fertilizing for 4–6 weeks.
- Water deeply a few times to move excess salts through the root zone (assuming drainage is good).
- Use a chelated iron drench if symptoms match iron chlorosis.
- Next season, stick with compost or a balanced slow-release fertilizer.
How to prevent iron deficiency from coming back next year
Once you’ve greened them up, prevention is mostly about keeping the root zone steady and avoiding pH creep.
My prevention checklist (simple, effective habits)
- Mulch: Maintain 2 inches of shredded leaves or bark, pulled back from the crown. This stabilizes moisture and supports healthier roots.
- Watering: Aim for consistent moisture—about 1 inch/week—but never let the bed stay swampy.
- Skip lime in hosta beds unless a soil test specifically calls for it.
- Compost annually: Topdress 1/2–1 inch in spring or fall.
- Watch what’s uphill: Concrete dust, gravel, or hardscape runoff can change pH in a narrow strip where your hostas live.
If your soil naturally runs alkaline and you’re always fighting chlorosis, consider planting the most sensitive hostas in slightly raised beds amended with organic matter, and reserve the alkaline edge zones for plants that shrug off higher pH.
Hostas are forgiving plants, but they’re honest: when roots are stressed or pH is off, they show it in the newest leaves first. Get the root zone breathing, keep moisture even, and choose the right chelated iron for your pH. When you see those next leaves emerging a cleaner green within a couple of weeks, you’ll know you fixed the cause—not just the color.