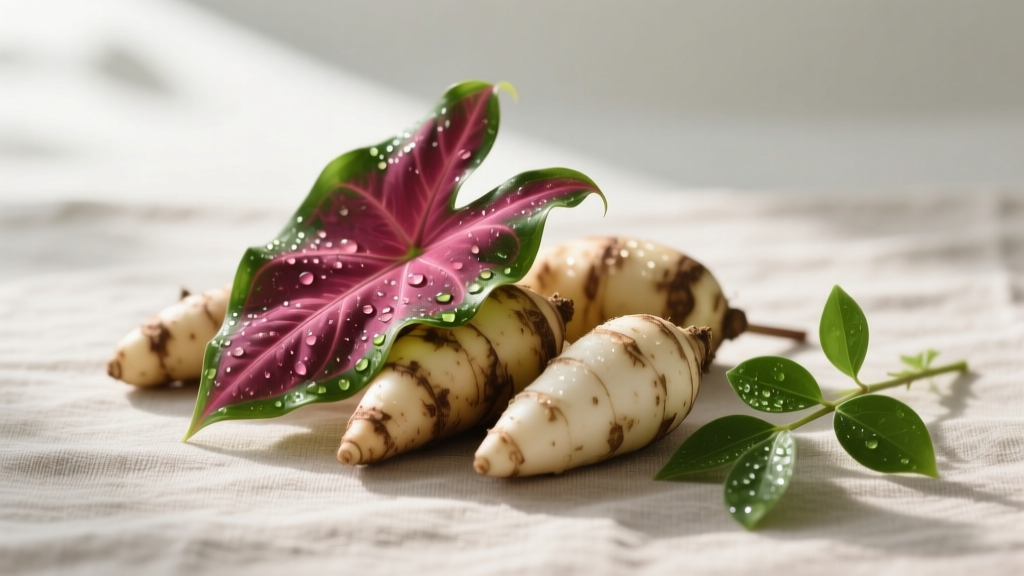
How to Flush Caladiums Before Harvest
The first time I “lost” a batch of caladium tubers, it wasn’t rot, insects, or bad timing—it was salt. The foliage looked fine until late season, then edges browned like they’d been held to a candle. When I dug the tubers, they were smaller than expected and the roots were rough and stubby. A soil test later told the story: fertilizer salts had built up in the potting mix, and I’d never flushed the containers. If you grow caladiums in pots or in beds that get regular feeding, a good flush before harvest can be the difference between plump tubers and disappointing ones.
“Flushing” is simply running enough clean water through the soil to dissolve and carry away excess soluble salts (from fertilizers and sometimes from hard irrigation water). For caladiums, the goal is to reduce stress as the plant transitions toward dormancy, keep roots functioning longer, and avoid salt burn that shrinks tuber size.
This is a practical, hands-in-the-dirt guide to doing it right—when to flush, how much water to use, what to watch for, and how to avoid common mistakes.
What “harvest” means for caladiums (and when flushing matters)
Home gardeners usually “harvest” caladiums by digging tubers for storage once foliage naturally declines. Caladiums are tender perennials; in warm zones they can overwinter in the ground, but many gardeners lift and store them.
Flushing matters most in three situations:
- Containers (salts concentrate quickly and drainage is limited).
- Raised beds where you fertilize often and soil volume is shallow.
- Any setup using soluble fertilizers (including “blue crystal” blends and frequent liquid feeding).
Timing-wise, you’re aiming for a flush 10–14 days before you plan to dig (or before you expect cold weather to force dormancy). That window gives the plant time to re-balance, keep leaves working a bit longer, and finish sizing tubers.
Temperature cues help. Caladiums slow down when night temps consistently fall below 60°F (15.5°C). Many gardeners dig when nights approach 50–55°F (10–13°C) to avoid chilling injury. Flushing too late (right before digging) can leave tubers overly wet and more prone to damage during handling.
How flushing works (and what it can’t do)
Flushing primarily removes soluble salts. It can’t fix poor drainage, chronic overwatering, or a soil mix that’s broken down into muck. It also won’t “detox” pesticides or cure disease. What it can do is reduce fertilizer burn, help roots keep absorbing water, and prevent the last few weeks of growth from being sabotaged by high EC (electrical conductivity—basically saltiness).
“Soluble salts from fertilizers can accumulate in container media over time; periodic leaching with clear water helps reduce the risk of salt injury.” — University of Minnesota Extension (2020)
That’s the backbone of why we flush—especially when caladiums are finishing their season.
Quick pre-check: do you actually need to flush?
If you grow caladiums in the ground with minimal feeding, you may not need a formal flush. But if any of these are true, it’s worth doing:
- White crust on soil surface or pot rim
- Leaf edges turning brown while the center looks healthy
- Plants “wilt” even though the soil is moist
- You’ve been fertilizing more than every 2 weeks with a soluble feed
- You’re using hard water (lots of mineral deposits on faucets or hoses)
If you like numbers, use a simple conductivity meter. Many home meters read in mS/cm. In containers, if leachate EC is above roughly 2.0–2.5 mS/cm late in the season, I consider flushing. (Targets vary by crop and media, but high readings plus symptoms are a solid cue.)
Watering: step-by-step flushing methods that actually work
There are two good flushing approaches for caladiums. The right one depends on whether you’re in a pot or the ground.
Method A (best for containers): the “3x pot volume” flush
This is the most reliable method in pots, and it’s easy to measure.
- Stop fertilizer for 7–10 days before you flush. (If you fertilize right up to the flush, you’re chasing your tail.)
- Water once normally the day before, so the mix is evenly moist. Dry peat-based mixes can channel water and flush unevenly.
- Flush with 3 times the container volume using clean water.
- Let it drain completely. Never leave the pot standing in runoff.
- Return to normal watering (no fertilizer) until harvest.
Example: A typical 10-inch pot holds about 3 gallons of potting mix. A flush would use roughly 9 gallons of water, applied steadily so it soaks through rather than overflowing off the top.
Practical pace: Pour in 1–2 quarts, wait 1–2 minutes, repeat. The pause helps dissolve salts and prevents runoff from bypassing the root zone.
Method B (best for garden beds): deep leaching irrigation
In beds, you’re not trying to “flood” the surface; you’re trying to move salts down below the root zone with slow, deep watering.
- Stop fertilizing 2 weeks before digging.
- Water slowly so moisture penetrates 8–12 inches deep.
- Repeat 2–3 days later if you’ve been feeding heavily or the soil is sandy.
A soaker hose run for 60–120 minutes (depending on flow and soil type) is usually more effective than overhead watering for leaching. The goal is steady infiltration, not puddling.
Soil: drainage first, salts second
Flushing doesn’t excuse a poor mix. Caladium tubers hate sitting in cold, saturated soil. Before you flush, make sure drainage is decent—otherwise you’re trading salt stress for rot risk.
For containers, a caladium-friendly mix typically includes:
- 60–70% high-quality potting mix (peat/coir-based)
- 20–30% perlite or pine bark fines for air space
- 10% compost (optional; don’t overdo it late season)
For beds, amend heavy clay with organic matter and consider planting on a slight mound. If you dig tubers each year, you’ll see quickly whether the soil is packing down around them.
Salts accumulate faster in:
- Small pots (less media to buffer fertilizer)
- Warm patios (more evaporation pulling salts upward)
- Drip systems that deliver frequent, small doses (salts stay in place if you never water deeply)
Light: how sun exposure changes flushing and harvest timing
Light affects how fast caladiums use water and nutrients. A caladium in bright shade may need less flushing simply because it’s been fed less and evaporates less. A caladium in morning sun or brighter conditions tends to transpire more and can concentrate salts faster if you fertilize routinely.
Use light as a scheduling tool:
- Bright shade / indoor bright light: flush closer to harvest (about 10 days ahead).
- Outdoor, warm, brighter light: flush earlier (about 14 days ahead) so the root zone has time to re-stabilize before dormancy.
Feeding: when to stop fertilizer (and why it’s part of flushing)
If you want good tubers, you want steady growth earlier in the season, then a gentle taper. “One last feed” right before harvest is a common mistake—it keeps salts high and can push tender growth when the plant is trying to slow down.
A practical approach:
- Stop liquid fertilizer 2 weeks before digging.
- If using slow-release granules, avoid top-dressing after mid-season; late applications keep releasing when you’re trying to reduce salts.
Salt injury is well documented in container culture. Penn State Extension notes that soluble salts can build up from fertilizers and irrigation water, and leaching is a standard corrective practice (Penn State Extension, 2023).
If you’re using tap water and it leaves scale, consider doing the flush with rainwater or filtered water. You don’t need laboratory purity—just avoid adding more minerals while you’re trying to remove salts.
Method comparison: which flushing approach is best?
| Method | Best for | Water amount (typical) | Time required | Pros | Cons |
|---|---|---|---|---|---|
| 3x Pot Volume Flush (Method A) | Containers (6–14" pots) | ~9 gallons for a 10" pot holding ~3 gallons media | 20–45 minutes including drain time | Most effective salt removal; measurable and repeatable | Uses a lot of water; messy without a drain area |
| Deep Leaching Irrigation (Method B) | Raised beds / in-ground | Enough to wet 8–12" deep (often 60–120 minutes with soaker hose) | 1–2 hours per session | Gentle on plants; improves whole bed moisture profile | Harder to measure; less effective in compacted clay |
| “Light Rinse” Top Watering | Not recommended as a flush | 1–2 watering-can refills | 5–10 minutes | Easy | Usually doesn’t move salts below roots; can worsen salt crust at surface |
Three real-world scenarios (and exactly what I’d do)
Scenario 1: Patio caladiums in 10–12" pots with weekly feeding
What usually happens: Gorgeous leaves all summer, then crispy edges in late August/September. The potting mix is loaded with soluble salts.
My plan:
- Stop fertilizer immediately.
- After 7 days, do Method A: flush with 3x pot volume.
- Water normally afterward, letting the top 1 inch dry between waterings.
- Dig tubers about 10–14 days after the flush, when leaves begin to yellow naturally.
Scenario 2: Caladiums in a raised bed with drip irrigation and slow-release fertilizer
What usually happens: Beds look fine, but tubers are smaller than expected. Drip delivers frequent, shallow water; salts from slow-release prills accumulate where the water sits.
My plan:
- Turn off any injector or liquid feed.
- Run a soaker hose (or drip longer) to wet soil 10–12 inches deep.
- Repeat deep watering 72 hours later if the bed has been heavily fertilized.
- Dig when nights stay near 55°F (13°C).
Scenario 3: Indoor caladiums (houseplants) you’re “harvesting” into dormancy
What usually happens: Indoor caladiums often get regular liquid fertilizer and are prone to salt buildup because there’s no rain to naturally leach the pot.
My plan:
- Stop feeding for 2 weeks.
- Move the pot to a sink or shower and flush with 3x pot volume using room-temperature water (65–75°F is comfortable).
- Let drain for at least 30 minutes.
- Reduce watering afterward as leaves fade; don’t keep the mix soggy “out of kindness.”
Common problems after flushing (and how to fix them)
Flushing is straightforward, but a few predictable issues pop up. Here’s how to read the plant and respond.
Symptom: Leaves droop right after flushing
- Most likely cause: You flushed in strong sun/heat and the plant temporarily lost oxygen around roots.
- Fix: Move containers to shade for 24 hours. Ensure the pot drains freely. Next time, flush early morning and make sure the mix was pre-moistened the day before.
Symptom: Soil stays wet for days; sour smell
- Most likely cause: Poor drainage or compacted media. Flushing exposed a bigger issue.
- Fix: Increase airflow and warmth; do not water again until top 1–2 inches dry. If the potting mix is old and collapsed, plan to repot next season with more perlite/bark. If you suspect rot, dig and inspect tubers early.
Symptom: White crust returns a week after flushing
- Most likely cause: Hard water deposits, not just fertilizer salts.
- Fix: Use rainwater for routine watering when possible. Bottom-water occasionally then discard runoff. Avoid letting water evaporate on the surface repeatedly—mulch the top with a thin layer (about 1/2 inch) of fine bark to reduce evaporation.
Symptom: Brown leaf edges continue even after flushing
- Most likely causes: Natural seasonal decline, low humidity, or the damage occurred earlier and won’t reverse.
- Fix: Judge new growth, not old leaves. If it’s late season and nights are cooling, a little crisping is normal. Focus on steady moisture (not wet feet) and let the plant wind down.
Harvest prep after flushing: getting tubers ready without inviting rot
Once you’ve flushed and the plant is coasting, harvest becomes more about timing and handling than feeding.
When to dig
Use plant signals plus weather:
- Leaves yellowing and slowing down naturally
- Night temperatures trending toward 50–55°F (10–13°C)
- Soil not saturated (digging wet soil damages skins)
How dry should soil be before digging?
For containers, I like the mix slightly on the dry side—think “needs water tomorrow,” not bone dry. Typically, stop watering 2–4 days before digging, depending on pot size and weather. In beds, wait for a dry spell if possible.
Simple harvest steps
- Cut foliage back to 2–3 inches once it yellows.
- Lift tubers carefully; avoid punctures.
- Brush off loose soil—don’t wash unless absolutely necessary.
- Cure in a warm, airy place around 70–80°F (21–27°C) for 7–10 days.
- Store dry tubers in breathable material (paper bag or dry peat/coir) at 55–65°F (13–18°C).
Those curing and storage ranges line up with standard bulb/tuber handling advice used by many extension offices; the big idea is warm curing, then cool (not cold) storage with moderate dryness to prevent shrivel and rot.
Flushing “don’ts” I’ve learned the hard way
- Don’t flush a cold, slow plant. If the plant is already shutting down and soil temps are low, extra water lingers and invites rot. Flush earlier while roots are still active.
- Don’t flush with softened water. Water softened with sodium can worsen soil structure and add salts in a different form.
- Don’t assume one rinse fixes months of buildup. If EC is very high or crusting is severe, a second flush 5–7 days later may be needed—only if the mix drains well.
- Don’t leave pots sitting in runoff. You’re trying to remove salts, not re-absorb them.
Citations you can trust (and why they matter)
Two extension references I regularly point gardeners to because they’re clear and practical:
- University of Minnesota Extension. “Soluble salts in soils and potting mixes” (2020). Notes salt accumulation in containers and recommends leaching with clear water when needed.
- Penn State Extension. Guidance on soluble salts and managing EC in container media, including leaching as a corrective step (2023).
Extension publications don’t always talk about caladiums specifically, but the physics and chemistry of salts in potting media apply directly—and caladiums show salt stress faster than many “tough” ornamentals.
If you take only one habit from all this, make it this: build a flush into your late-season routine for potted caladiums. Stop feeding, flush with a measured amount, then let the plant ease into dormancy. When you dig, you’ll usually see cleaner roots, firmer tubers, and fewer of those mystery crisped edges that show up right when you want the plant to finish strong.