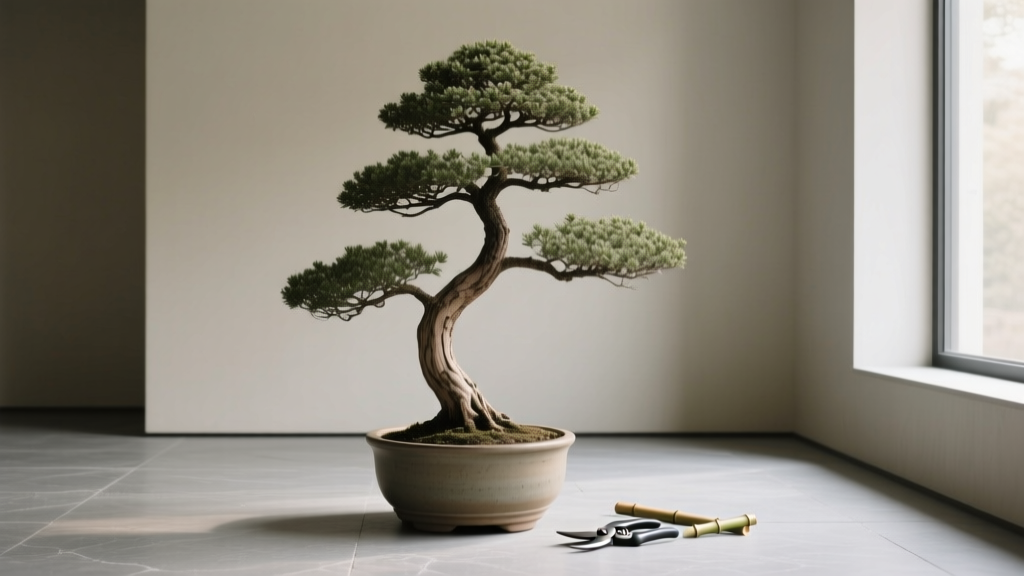
How to Stake Tall Bonsai
The first time a tall bonsai leans, it doesn’t do it politely. You water one morning, come back that evening, and your tree has shifted like it’s trying to crawl out of its pot—soil cracked on one side, roots tugged loose on the other. A 24-inch juniper can topple from a gust that wouldn’t bother a patio chair, and once the rootball breaks contact with the soil, the tree can dry out fast. Staking isn’t about “making it stand up straight.” It’s about stabilizing the trunk and root mass so the tree can keep growing, healing, and holding its design.
I’ve staked tall bonsai after windstorms, after repotting, and after a well-meaning friend “rotated it for the light” and left it perched on the lip of the pot. The technique matters because tall bonsai combine three risky traits: a high center of gravity, a shallow container, and wiring that can scar quickly if you do it wrong. This is the grounded, practical way to stake—securely, gently, and with the least interference to the tree.
When a Tall Bonsai Actually Needs Staking (and When It Doesn’t)
Staking is a tool, not a badge of honor. Use it when stability is the limiting factor to health or design.
Signs you should stake
- The rootball shifts when you lightly press the trunk 1–2 inches from the soil line.
- The soil pulls away from the pot edge after wind or watering.
- Fresh repot (first 4–8 weeks) on a tree over 18 inches tall or any tree with a narrow base.
- Leaning increases weekly even though the trunk was straight after styling.
- Top-heavy canopy after pruning (you removed counterbalancing branches) or after strong new growth flush.
When staking can be skipped
- Short, compact trees with a wide nebari (root flare) that don’t shift when touched.
- Trees secured correctly with tie-down wires through drainage holes during repotting and already immobile in the pot.
- Weak trees in recovery where extra manipulation risks cracking brittle wood (in that case, stabilize the pot and location instead).
Surprising fact: many “needs staking” situations are really “needs better anchoring.” Traditional bonsai practice relies more on tie-down wires than a visible stake. If you’re seeing movement at the soil line, assume the root mass is moving too—and that’s where problems start.
Tools and Materials (Use the Right Stuff)
You can stake with almost anything, but tall bonsai punish flimsy materials. A good setup uses firm support and soft contact points.
- Stake options: bamboo cane, fiberglass plant stake, or anodized aluminum rod. For most home setups, a 3/8-inch fiberglass stake is plenty for trees up to 30 inches.
- Ties: bonsai wire wrapped in raffia, rubber bonsai tubing, silicone plant tie, or soft cloth strips. Avoid bare wire directly on bark.
- Anchors: pot tie-down wire (aluminum or copper), guy wires, or a heavy training pot.
- Cutters: wire cutters, scissors, and a small pair of pliers.
- Optional protection: raffia, felt pads, or a strip of bicycle inner tube.
For tall bonsai, I prefer a two-part approach: anchor the rootball first, then stabilize the trunk. If you only stake the trunk while the root mass is loose, the tree still rocks in the pot—roots tear, fine feeder roots die back, and watering becomes unpredictable.
Step-by-Step: How to Stake a Tall Bonsai Without Scarring It
This method works for most species (juniper, pine, ficus, Chinese elm, maple). Adjust tension and tie material based on bark sensitivity.
1) Stabilize the pot and rootball first
- Check tie-down wires through drainage holes. If the tree moves, tighten or replace the tie-down. For repotted trees, tie-down wires should immobilize the root mass—no wobble.
- If you can’t access tie-downs (or the pot design limits you), use guy wires from the trunk to anchor points on the pot rim or bench.
- After tightening, test again: press the trunk gently. You want less than 1/4 inch movement at the soil surface.
2) Choose a stake position that supports, not fights, the design
Place the stake on the side opposite the lean or wind pressure, usually just behind the trunk line from the viewing angle. If your bonsai has a formal front, keep the stake visually hidden behind the trunk or in the back corner of the pot.
- Depth: push the stake down to near the pot bottom, but avoid punching through drainage mesh.
- Distance: keep the stake 1–2 inches from the trunk to allow room for padding and avoid rubbing.
3) Pad the trunk contact point
This is where most people lose bark. Wrap the trunk where the tie will sit with raffia or a soft strip. On thin-barked species (maple, beech), double the padding.
4) Tie in two points (not one)
Tall bonsai twist when you only tie once. Use two ties:
- Lower tie: around the trunk 1–3 inches above the soil line (or at the first stable section above the flare).
- Upper tie: around the trunk about 1/2 to 2/3 of the total height (for a 24-inch tree, place it around 12–16 inches up).
Each tie should be snug enough to stop rocking, but not so tight that it compresses bark. If you can’t slide a thin strip of paper under the tie, it’s probably too tight.
5) Tension gradually and re-check after watering
- Tighten the lower tie first until the base stops shifting.
- Tighten the upper tie to remove sway.
- Water thoroughly, then re-check. Wet soil can settle, and the tree may loosen again within 24 hours.
6) Set a calendar reminder to inspect ties
Inspect ties every 7–10 days during active growth. Fast growers (ficus, elm) can scar in under 3 weeks if ties are tight.
“Stakes and ties must be inspected frequently—plants grow, and ties that were safe last week can girdle a stem this week.” — University of Minnesota Extension (2023)
Comparison: Staking Methods That Actually Work (With Real Tradeoffs)
There isn’t one best method—there’s the right method for your tree’s height, pot, and exposure. Here’s how the common approaches stack up.
| Method | Best for | Stability (wind/bumps) | Scar risk | Typical time in place |
|---|---|---|---|---|
| Pot tie-down wires (through drainage holes) | Fresh repots; any tall bonsai in shallow pots | High (rootball immobilized) | Low (no bark contact) | 4–8 weeks after repot; sometimes longer |
| Single stake + one tie | Shorter trees; temporary support | Medium (stops lean, not twist) | Medium (tie can bite) | 2–6 weeks |
| Stake + two ties (lower + upper) | Most tall bonsai (18–30 inches) | High (controls sway and twist) | Medium-Low (with padding + checks) | 3–10 weeks |
| Guy wires (trunk to pot rim/bench anchors) | Very tall trees; awkward shapes; outdoor windy sites | Very High (triangulated support) | Low-Medium (depends on padding) | 4–12 weeks |
Comparison analysis with actual data: In a breezy, exposed patio spot, a 28-inch juniper in a 3-inch-deep pot may experience repeated sway. A single tie reduces lean but often allows torsion (twist), which still shears feeder roots. Two ties or guy wires reduce movement to under the target 1/4 inch at the soil line. If you’re checking every 7–10 days, two ties are usually enough; if you travel or forget, guy wires can be safer because they often distribute pressure more gently across multiple points.
Watering: The Staking-Watering Connection Most People Miss
Staking changes how water moves through a pot because it reduces movement and soil cracking—good—but it can also hide problems because the tree “looks stable” while roots struggle.
How to water a newly staked tall bonsai
- First week after staking or repot: water when the top 1/2 inch of soil is dry. For many outdoor trees in mild weather, that’s often every 1–2 days.
- Soak thoroughly: water until it runs freely out of drainage holes for at least 10–20 seconds.
- Windy or hot days: check twice daily. A staked tree may transpire normally while roots are still re-establishing.
Symptoms your staked tree is under-watered
- New tips droop by afternoon and don’t recover by morning.
- Soil pulls away from the pot edge (even with staking).
- Leaves crisp at edges (maple/elm) or scale foliage dulls (juniper).
Fix
- Deep water; then shade for 3–5 days (bright shade, not dark). This reduces stress while roots re-grip the soil.
- Check that tie-down wires didn’t lift the rootball slightly—if the root mass is suspended, water can run down the sides and miss the center.
Soil and Pot Stability: What Works for Tall Bonsai
Tall bonsai punish soft, peat-heavy mixes. You want a soil that holds moisture but doesn’t slump when watered.
Soil texture matters more than the brand name
- For many species, aim for a granular mix where most particles are around 2–6 mm.
- Too fine: soil compacts, roots suffocate, and staking becomes a crutch.
- Too coarse: water runs through, roots dry, and the tree never anchors.
If you’ve repotted into fresh bonsai mix and the tree still wobbles, the issue is usually tie-down technique, not soil quality.
Pot depth and footprint (real-world rule of thumb)
Very shallow pots (2–3 inches deep) look great but demand better anchoring and a calmer location. If your tree is over 24 inches tall and lives outdoors, a slightly deeper training pot for a season can save you repeated staking and root disturbance.
Light: Keeping Growth Balanced While the Tree Is Supported
Light drives growth, and growth changes tension on ties. A tall bonsai in strong light can swell quickly at the tie points.
Outdoor trees
- After staking or repotting, give morning sun + afternoon shade for about 7–14 days, especially in heat above 85°F (29°C).
- Once stable, return to species-appropriate sun (junipers generally want strong sun; many maples prefer protection from harsh afternoon sun).
Indoor tropical bonsai (ficus, schefflera)
- Keep near a bright window and rotate the pot 1/4 turn weekly—but only if the rootball is secured. Rotation without anchoring is a toppling risk.
- Aim for stable indoor temps around 65–80°F (18–27°C).
Feeding: Don’t Force a Newly Stabilized Tree to “Bulk Up” Overnight
Fertilizer won’t fix wobble. It can make it worse by pushing soft growth while roots are still regaining purchase.
A practical feeding schedule
- After repotting: wait 2–4 weeks before feeding (species and vigor dependent). Many bonsai growers hold off until they see new growth hardening slightly.
- Then feed lightly: a balanced fertilizer at 1/2 strength every 2 weeks during active growth.
This aligns with common extension guidance that fertilization is best timed to active growth and avoided during stress or root disturbance. For general fertilizer timing and plant stress considerations, see Penn State Extension (2023) guidance on fertilizing and plant growth cycles.
Common Problems After Staking (Troubleshooting You Can Use Immediately)
Problem: Bark scarring or tie marks
Symptoms: a depressed line around the trunk, darkened bark, or swelling above the tie.
Likely causes: tie too tight; no padding; ties left unchecked during a growth spurt.
Fix:
- Remove and re-tie immediately with padding.
- Move tie to a slightly different spot (don’t re-seat into the same groove).
- Inspect every 7 days during peak growth.
Problem: Tree still wobbles even with a stake
Symptoms: trunk sways; soil line shifts; stake seems firm but tree moves.
Likely causes: rootball not anchored; tie too high (base still rocks); soil settled after watering.
Fix:
- Add/retighten tie-down wires through pot holes.
- Add a lower tie near the base and re-tension.
- Top-dress with the same soil particles and water in to reduce voids.
Problem: Leaves wilt after staking
Symptoms: wilting within 24–72 hours of staking; foliage looks dull; tips droop.
Likely causes: root disturbance from movement; rootball lifted; watering uneven; tree placed in too much sun while recovering.
Fix:
- Confirm the root mass is seated firmly and not suspended.
- Water thoroughly; then keep in bright shade for 3–5 days.
- Do not fertilize until vigor returns.
Problem: Stake rubs the trunk in wind
Symptoms: scraped bark on the stake side; clicking sound in gusts.
Likely causes: stake too close; tie allows lateral movement; no padding.
Fix:
- Increase distance to 1–2 inches and add padding.
- Add a second tie to reduce twisting.
- If outdoors, move the tree to a spot with less direct wind for a couple of weeks.
Real-World Scenarios (What I’d Do in Each Case)
Scenario 1: A 26-inch juniper topples after a thunderstorm
You find it leaning, with the soil cracked on one side. Don’t just “stand it up.”
- First, slide the pot into a sheltered spot for 48 hours.
- Check for rootball movement; if it shifts, tighten tie-down wires or add guy wires.
- Use a stake + two ties to stop sway, then water thoroughly to settle soil back around roots.
- Hold off on pruning for 2–3 weeks. Let it recover and re-anchor.
Scenario 2: A tall ficus indoors keeps leaning toward the window
This is common: phototropism plus soft indoor growth. Staking can help, but you also need light balance.
- Stake with soft ties (ficus bark marks easily).
- Rotate 1/4 turn weekly only after the rootball is secure.
- Move it 6–12 inches closer to the brightest window or add a grow light to reduce stretching.
Scenario 3: A newly repotted Japanese maple (22 inches) wobbles despite careful watering
Maples hate movement after root work. If the trunk rocks, the fine roots break faster than they regrow.
- Re-check tie-down wires through drainage holes—this is usually the missing piece.
- Add a lower tie with extra padding and keep in morning sun only for 10–14 days.
- Watch ties closely; maples can swell quickly in spring.
Season and Timing: When Staking Works Best
Staking is easiest when the tree is in active growth but not in extreme heat. For many temperate bonsai, early spring through early summer is ideal—right when repotting and growth spurts happen. In heat above 90°F (32°C), avoid major adjustments unless you can protect the tree from stress.
Extension materials often emphasize preventing mechanical damage and girdling when staking and tying, particularly the need for frequent inspection. That’s not just for landscape trees—it applies even more to bonsai where the trunk is thin and the visual quality of bark matters. See University of Minnesota Extension (2023) staking guidance and general plant support recommendations from University of California Agriculture and Natural Resources (UC ANR) (2020) resources on preventing tie damage.
How Long to Leave Stakes On (and How to Remove Them Safely)
Most tall bonsai only need staking until the root system re-establishes and the trunk holds its position without rocking.
- Typical duration: 4–8 weeks after repotting, or until there’s no movement at the soil line.
- Fast growers (ficus/elm): check sooner; you may need to loosen ties within 2–3 weeks.
- Conifers: often stay stable once anchored, but still inspect ties routinely.
Removal method: don’t yank. Snip ties, remove padding, and test stability by gently pressing the trunk. If it moves more than 1/4 inch at the base, re-stake for another 2–3 weeks or improve the rootball tie-down.
Once you’ve staked a few tall bonsai, you start to see the pattern: the best staking is the kind you barely notice—no bark damage, no awkward hardware from the front, and a tree that settles back into its pot like it belongs there. That’s the goal. Stable roots, steady trunk, and a design that can mature without constant rescue missions.
Sources: University of Minnesota Extension (2023); University of California Agriculture and Natural Resources (UC ANR) (2020); Penn State Extension (2023).