How to Harvest Seeds from Gardenias
You’ve babied your gardenia all summer—kept it watered, fought the yellow leaves, protected the buds—and then the flowers fade. A few months later, you notice a strange, lumpy green “fruit” where the bloom used to be. Most gardeners pinch it off, thinking it’s a problem. Surprise: that bump can be a seed pod, and if you handle it right, you can collect viable gardenia seed. Handle it wrong (too early, too wet, too cold), and you’ll end up with moldy pods and empty seed coats.
Gardenias can be stubborn from seed—slow, variable, and not always true-to-type—but it’s still a satisfying project. It’s also a practical one if you’re breeding, experimenting, or simply want more plants without taking cuttings. This is the approach I use when I want the best odds: let the pod mature fully, keep the plant steady (no drought swings), and process the seed cleanly.
Know what you’re looking at: flower vs. seed pod
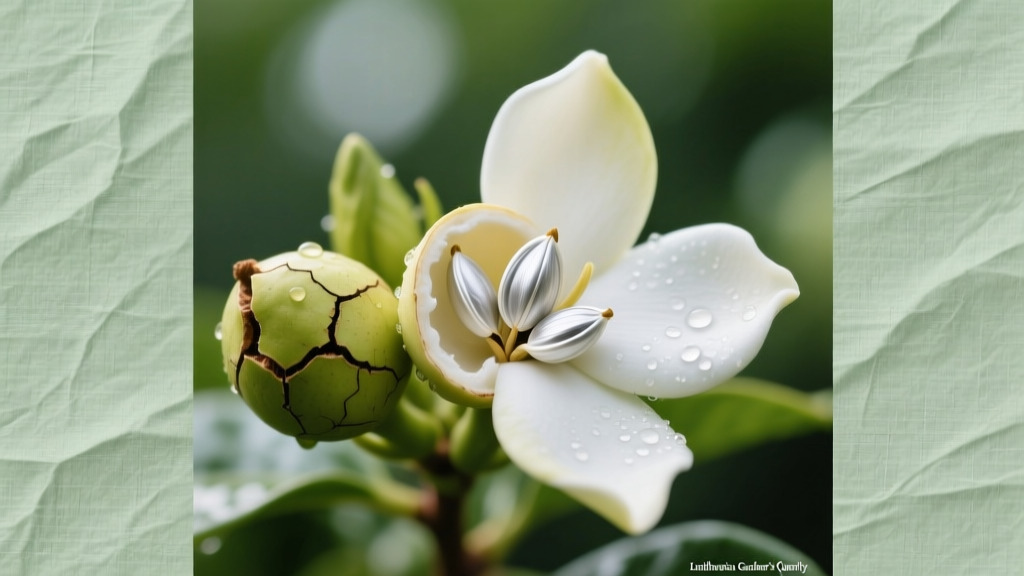
Gardenia seed forms inside a fruit (often called a “pod”) that develops after a flower is pollinated. Indoors, that may not happen unless you hand-pollinate. Outdoors, insects sometimes do it for you.
- Early pod: firm, green, often oval with slight ridges.
- Maturing pod: enlarges and turns from green toward yellow/orange-brown over time.
- Ripe pod: yellow-orange to brown, slightly softer, sometimes starting to split or wrinkle.
Patience matters here. In my experience, most seed failures happen because the pod was harvested when it “looked big enough” but wasn’t mature inside.
Real-world scenarios: what seed harvest looks like in different gardens
Scenario 1: Indoor potted gardenia that never sets pods
If your plant drops flowers but never forms pods, it may simply not be getting pollinated. You can hand-pollinate by gently brushing the anthers and then the stigma with a small paintbrush when blooms are freshly open. Keep conditions steady afterward—gardenias hate sudden drying out.
Scenario 2: Outdoor shrub sets pods, but they drop early
Early pod drop usually points to stress: irregular watering, heat spikes, or a nutrient imbalance. In hot weather, letting the root ball go dry even once can trigger drop. Stabilize moisture and avoid heavy nitrogen that pushes soft growth at the expense of fruit development.
Scenario 3: Pods mature, but the seeds mold during processing
This is a common home-gardener issue: pods are opened, seeds are rinsed, then they’re dried too slowly or stored before fully dry. Clean seeds need fast surface-drying and breathable storage, or fungal growth takes over.
Timing: when gardenia seeds are actually ready
Gardenia pods take a long time to mature. Depending on species/cultivar and growing conditions, maturation commonly runs 90–180 days after bloom. If you’re in a cooler climate or growing indoors, it can be closer to the long end.
Harvest when:
- The pod has shifted from green to yellow-orange or tan-brown.
- It feels slightly softer (not mushy), and the skin may look a bit wrinkled.
- If left a bit longer, some pods begin to split—this can be a sign of full maturity, but don’t wait until it’s rotting.
A practical rule: once color change is obvious, give it another 7–14 days unless weather or rot forces your hand.
“Seeds harvested before full maturity often have poor germination and short storage life.” — University of California Agriculture & Natural Resources seed handling guidance (UC ANR, 2020)
Watering: keep pods developing instead of dropping
Seed development is easiest when the plant never experiences big swings. Gardenias are shallow-rooted, and fruiting demands consistent moisture.
- Target moisture: evenly moist, not soggy.
- Simple test: water when the top 1 inch of mix feels dry; don’t let the entire root ball dry out.
- Deep watering: water until you see runoff, then empty saucers so roots don’t sit in water longer than 15–20 minutes.
If you’re growing in a container, a porous mix dries fast in summer. During pod fill, I often end up watering 2–4 times per week in warm weather, less in winter. Outdoors in-ground, a weekly soak of roughly 1 inch of water (rain + irrigation) is a useful starting point, adjusted for heat and soil type.
Soil and pH: seed pods won’t develop well on a struggling plant
Gardenias are acid-lovers. When the pH creeps too high, you get yellowing leaves (chlorosis), weak growth, and poor flowering—none of which supports strong seed.
- Ideal pH range: about 5.0–6.0.
- Container mix: a peat- or bark-based mix with excellent drainage; avoid heavy garden soil in pots.
- In-ground soil: amend with pine bark fines or composted leaf mold to improve structure; avoid over-liming nearby beds.
For pH and nutrient management, university extension resources consistently emphasize soil testing and acid soil requirements for gardenias and related broadleaf evergreens. North Carolina State Extension notes the importance of acidic soil conditions for gardenia performance (NCSU Extension, 2023).
Light and temperature: enough sun for pods, not so much stress they drop
Light affects flowering, and flowering affects seed. Most gardenias do best with bright light and some protection from harsh afternoon sun.
- Outdoors: aim for 4–6 hours of sun, ideally morning sun and afternoon shade in hot climates.
- Indoors: the brightest window you have; a grow light can help. Keep the plant within 12–18 inches of a strong LED grow light for supplemental support.
- Temperature sweet spot: roughly 65–75°F days and 60–65°F nights for steady growth; avoid repeated spikes above 85°F paired with drying soil.
Pods that are forming during a heat wave are more likely to abort if the plant is under-watered even briefly. Shade cloth or shifting a pot to filtered light can save a season’s worth of seed.
Feeding: fuel the plant, but don’t push it into soft growth
Seed production asks a lot of the plant. But heavy fertilizer—especially high nitrogen—can cause leafy growth and fewer flowers (and can increase pest pressure).
What works reliably:
- Use an acid-forming fertilizer labeled for azaleas/camellias/gardenias.
- Feed lightly during active growth: about every 4–6 weeks from spring to mid-summer.
- Stop or reduce feeding by late summer so the plant can harden off and pods can mature without pushing tender growth.
If your leaves yellow between veins while veins stay green, suspect iron chlorosis—often a pH issue rather than a lack of iron in the soil. Fix the pH first, then consider chelated iron as a corrective.
Step-by-step: how to harvest gardenia seed pods
This is the process that keeps seeds clean and viable.
- Watch for ripening color. Wait until pods turn yellow-orange to tan-brown (often 3–6 months after flowering).
- Choose a dry day. Harvest when pods are dry on the outside. Wet pods invite mold during processing.
- Snip, don’t tear. Use clean pruners and cut the pod with a short stem stub.
- Label immediately. Write cultivar (if known) and date. If you’re experimenting, note whether it was hand-pollinated.
- Air-dry briefly. Let pods sit at room temperature (65–75°F) for 3–7 days in a well-ventilated spot, out of direct sun.
If the pod is already splitting, you can skip the short air-dry and move straight to seed extraction.
Seed extraction: clean seeds without inviting fungus
Gardenia pods can be sticky and resinous inside. Cleanliness is the whole game.
- Open the pod. Use a clean knife to slice lengthwise. Work over a plate or paper towel.
- Remove seeds. Scoop seeds and pulp into a small bowl.
- Rinse thoroughly. Add water and gently rub seeds between fingers to separate pulp. Pour off floating debris. Repeat 2–3 times.
- Optional sanitation step. If you’ve had mold trouble, soak seeds for 5 minutes in a 1:10 bleach-to-water solution, then rinse very well. (Don’t exceed time; you’re disinfecting the surface, not pickling the seed.)
- Dry fast on the surface. Spread seeds in a single layer on a coffee filter or paper towel for 24–48 hours in a warm, airy room. They should feel dry to the touch before storage.
For many home gardeners, that bleach step is the difference between usable seed and a fuzzy science experiment—especially in humid climates.
Storage: keep seeds viable until you’re ready to sow
Gardenia seeds don’t store forever with high germination. Your best odds are usually sowing within 3–6 months, though careful storage can extend that.
- Short-term storage: paper envelope inside a jar with a little desiccant packet, kept cool and dark.
- Cool temperature: around 40–50°F (a refrigerator crisper works if seeds are very dry and sealed from moisture).
- Avoid humidity swings: condensation kills seeds quickly.
Comparison: two reliable sowing methods (and what to expect)
Gardenia seed germination is rarely fast. Your goal is warm soil, steady moisture, and zero fungus.
| Method | Setup | Temperature Target | Moisture Management | Typical Germination Window | Best For |
|---|---|---|---|---|---|
| Seed tray in humidity dome | Sow 1/8 inch deep in sterile seed mix; cover with dome | 75–80°F with heat mat | High humidity; vent daily to prevent damping-off | 4–12 weeks (sometimes longer) | Most home gardeners; highest success if you monitor daily |
| Bagged “moist paper towel” pre-sprout | Seeds in barely moist towel inside zip bag; then pot up | 75–80°F (warm shelf or heat mat) | Easy to over-wet; check every 2–3 days | 2–8 weeks to sprout, then transplant | Small batches; checking viability before using pots/trays |
Data-wise, the tray-and-dome method usually gives fewer transplant losses because seedlings aren’t disturbed during the first fragile root stage. The paper-towel method can show you quickly if seeds are viable, but it’s also easier to cause rot if the towel is too wet.
How to sow gardenia seeds (step-by-step)
- Use sterile medium. A fine seed-starting mix reduces fungus problems.
- Sow shallow. About 1/8 inch deep, or just pressed into the surface and lightly covered.
- Warmth matters. Keep medium at 75–80°F. Below 70°F, germination can stall.
- Light after sprouting. Once seedlings emerge, provide bright light 14–16 hours per day under grow lights to prevent stretching.
- Water from below when possible. Bottom watering reduces damping-off risk; don’t leave seedlings sitting in water.
Expect uneven germination. Some seeds pop early; others take their time. I keep trays for at least 12–16 weeks before I give up.
Common problems while pods are developing (and how to fix them)
Problem: buds drop, flowers don’t last, pods never form
- Likely causes: low humidity indoors, temperature swings, underwatering, or no pollination.
- Fix: keep temps steady (avoid cold drafts), water before the pot fully dries, and hand-pollinate fresh blooms. Indoors, aim for 40–60% relative humidity if you can manage it.
Problem: pods form but drop when still green
- Likely causes: drought stress, heat stress, or root issues (waterlogged mix).
- Fix: stabilize watering; ensure the pot drains freely; move plant to bright shade during heat waves above 85°F.
Problem: leaves yellow with green veins (chlorosis)
- Likely causes: pH too high, limiting iron availability.
- Fix: test soil pH; target 5.0–6.0. Use an acid-forming fertilizer and consider chelated iron as a short-term correction. NCSU Extension (2023) emphasizes acidic conditions to prevent nutrient uptake problems in acid-loving ornamentals.
Troubleshooting seed harvest and storage: symptoms and solutions
Symptom: seeds look hollow or papery
- Cause: pod harvested too early or incomplete pollination.
- Solution: leave pods on the plant longer (aim for full color change + 7–14 days). If you’re indoors, hand-pollinate multiple flowers to improve odds.
Symptom: fuzzy mold on seeds during drying
- Cause: pulp residue + slow drying + high humidity.
- Solution: rinse more thoroughly; use the 1:10 disinfecting soak for 5 minutes; dry on a coffee filter with strong airflow for 24–48 hours.
Symptom: seeds don’t germinate after 12–16 weeks
- Cause: old seed, low temperature, waterlogged medium, or non-viable seed.
- Solution: verify your medium is staying in the 75–80°F range; keep it moist but not saturated. Next season, sow fresher seed and consider pre-sprouting a few in a bag to test viability before committing a full tray.
Pests and diseases that interfere with seed production
A seed pod is a resource sink, and stressed plants attract trouble. Watch these closely:
Spider mites (especially indoors)
- Symptoms: stippled, dull leaves; fine webbing; leaf drop.
- What works: rinse foliage (especially undersides) weekly; increase humidity; use horticultural soap or oil according to label directions, testing first on a small area.
Scale insects
- Symptoms: sticky honeydew, sooty mold, bumps on stems and leaf veins.
- What works: physically remove with cotton swab + alcohol; follow with horticultural oil sprays. Repeat every 7–10 days for a few cycles.
Root rot (containers)
- Symptoms: wilting despite wet soil, sour smell, blackened roots, sudden bud/pod drop.
- What works: improve drainage immediately; repot into fresh airy mix; water only when top 1 inch dries.
For disease prevention and general sanitation practices (sterile medium, clean tools, avoiding overly wet conditions), extension-style guidance is consistently clear that hygiene and environmental control are key levers for home propagation success (UC ANR, 2020).
A few hard-won tips that improve success
- Don’t assume seeds come true. Many gardenias are cultivated varieties; seedlings can differ in flower form and fragrance.
- Pick the best mother plant. If the parent struggles every year with chlorosis or mites, the seed project will be harder from the start.
- Track your dates. Write down bloom date and pod harvest date; over a season or two, you’ll learn your plant’s rhythm.
- Start more seeds than you think you need. Germination can be spotty; sowing 20–30 seeds to get a few strong seedlings isn’t unusual.
When it goes well, you’ll notice it early: ripe pods open cleanly, seeds rinse free without much gunk, and the first sprouts appear within a couple of months under warm conditions. When it doesn’t, it’s usually one of three things—pod harvested early, temperature too cool, or moisture kept too wet. Adjust those, and your odds get a lot better.
If you’ve got a ripening pod on your plant right now, treat it like a slow-cooking project: keep the soil evenly moist, keep the light steady, and wait for that full color shift. Harvest on a dry day, clean the seeds like you mean it, and sow warm. That’s the practical path to turning one gardenia into many—one pod at a time.
Sources: University of California Agriculture & Natural Resources seed handling guidance (UC ANR, 2020); North Carolina State University Extension gardenia care guidance emphasizing acidic soils and nutrient uptake (NCSU Extension, 2023).