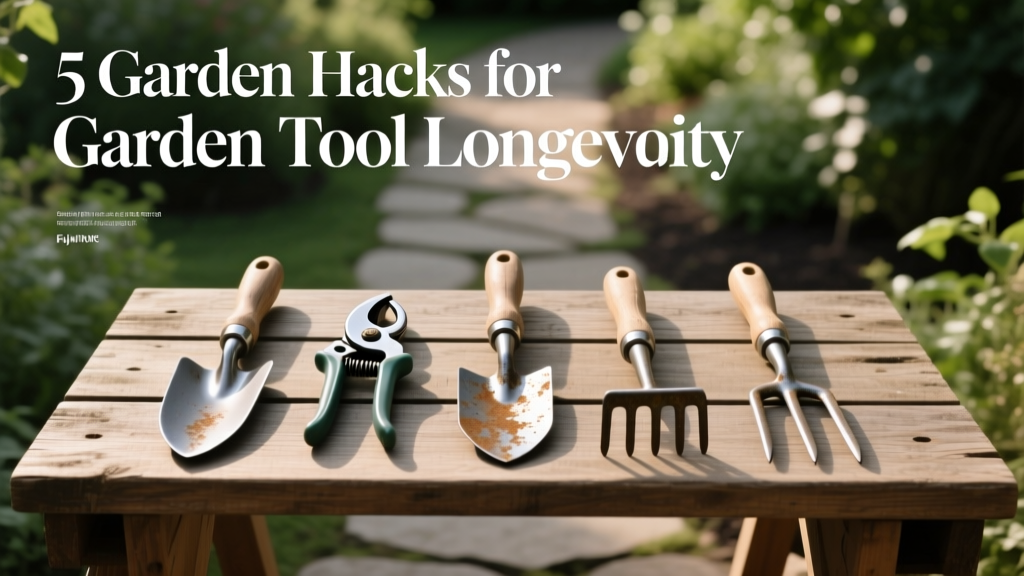
5 Garden Hacks for Garden Tool Longevity
The fastest way to ruin a good shovel isn’t using it hard—it’s putting it away dirty and damp. A thin film of wet soil and plant sap can kick off rust, loosen handles, and gum up moving parts in a matter of days, not seasons. The good news: you don’t need fancy products or a workshop. You just need a few repeatable “tiny habits” that add up to years of extra tool life.
Below are five hacks I’ve watched real gardeners use to keep tools working smoothly for a decade or more. They’re grouped so you can plug them into your routine without adding a bunch of time.
Quick habits that prevent 80% of tool damage
Hack #1: The 60-second “clean + dry” station (right where you drop tools)
Headline: Set up a one-minute cleanup station so tools never go away wet.
Most rust and gunk problems start because cleaning feels like a “later” task. Put a stiff brush, a rag, and a small bucket or spray bottle of water at the spot where tools naturally land—garage threshold, shed door, or patio. Scrub off soil, do a quick rinse only if needed, then wipe dry; aim for 60 seconds per tool before you put it away.
Real-world example: A community garden plot I helped manage cut tool replacements by simply adding a $12 brush and a thrift-store towel at the tool rack. People actually used it because it was right there, not buried under “shed clutter.”
Why this works: soil holds moisture against metal, and moisture plus oxygen equals corrosion. Even “stainless” parts can pit if they’re stored dirty for weeks.
“The most important step in tool care is cleaning after each use; soil and plant residues hold moisture and promote rust and deterioration.” — University of Minnesota Extension (2019)
Hack #2: Use a 10:1 disinfecting dip that won’t destroy your pruners
Headline: Disinfect between plants (or at least between problem plants) with a mix you can measure in seconds.
If you prune roses, tomatoes, fruit trees, or anything with visible disease, tool sanitation matters for both plant health and tool longevity (sticky sap and pathogens create crud that’s harder to remove later). A reliable, easy ratio is 1 part household bleach to 9 parts water (a 10% solution). Dip or wipe blades for 30 seconds, then rinse and dry to reduce corrosion risk.
Real-world example: If you’re cutting out black spot on roses, keep a small jar of the 10% mix near you and dip pruner blades between bushes. You’ll spend an extra minute total, not an extra hour later dealing with gummed-up blades and spreading disease.
DIY alternative: For quick wipes, many gardeners use 70% isopropyl alcohol in a spray bottle (no rinse required, evaporates fast). It’s handy when you’re moving fast and don’t want a bucket.
Source note: Bleach solutions are widely recommended for sanitizing tools; concentrations vary by use case. For example, university extension guidance commonly references diluted bleach for disinfection and emphasizes rinsing/drying to limit corrosion (see University of Florida IFAS Extension, 2018).
Rust-proofing and blade care (without a shop full of gear)
Hack #3: The “sand + oil” bucket—cheap tool spa you’ll actually use
Headline: Stab tools into an oil-charged sand bucket after use to knock off grime and leave a protective film.
This is an old-school trick for a reason: it’s fast and it works. Fill a 5-gallon bucket about 2/3 full with dry play sand, then add roughly 2 cups of mineral oil (or cheap vegetable oil if that’s what you have) and mix. After you wipe off the worst dirt, plunge the metal ends of shovels, hoes, trowels, and cultivators into the sand a few times—abrasion removes fine residue and the oil leaves a rust-resistant coat.
Cost comparison: A bag of play sand (~50 lb) often runs $6–$10, and mineral oil can be $3–$8 depending on size. Compare that to replacing one rusted-out shovel at $25–$60. The bucket pays for itself fast.
| Method | Time per tool | Approx. cost | Best for | Watch-outs |
|---|---|---|---|---|
| Sand + oil bucket | 15–30 seconds | $10–$20 setup | Shovels, hoes, trowels, rakes (metal parts) | Keep sand dry; don’t soak wooden handles |
| Spray lubricant (store-bought) | 30–60 seconds | $6–$12 per can | Pruners, loppers, moving joints | Overspray can attract dust if applied heavy |
| Paste wax (DIY or furniture wax) | 2–5 minutes | $5–$15 | Long-term storage rust prevention | Needs clean/dry surface first |
Real-world example: One suburban gardener I know keeps the bucket beside the shed door. After digging in clay soil, she gives the spade a quick wipe, two stabs into the bucket, and hangs it up. Her spade blade still looks almost new after 7 years—no flaky rust, no pitting.
Hack #4: Sharpen on a schedule (and stop “muscling” dull tools)
Headline: Sharp tools don’t just cut better—they last longer because you stop twisting, prying, and bending them.
Dull edges make you push harder, which loosens handles, bends blades, and chews up joints. For shovels and hoes, a quick file touch-up every 4–6 weeks during heavy season is enough for most home gardens. For pruners and loppers, a light sharpening every 2–3 months (or anytime you notice crushed stems) keeps cuts clean and reduces sticky sap buildup.
Specific technique: Use a mill file on shovels/hoes and follow the existing bevel—typically around 20–30°. Take 5–10 strokes in one direction, then wipe and oil the edge. For pruners, a diamond file works great; sharpen only the beveled cutting blade, not the flat anvil side on bypass pruners.
Case example #1: A gardener in a rental house kept snapping cheap pruners every season. The real issue wasn’t “cheap tools”—it was cutting pencil-thick branches with dull blades. After switching to a monthly 3-minute sharpen and using loppers for anything over 1/2 inch, the same mid-range pruners lasted multiple years.
Source note: Many extension services emphasize that sharp tools make cleaner cuts (better for plants) and reduce strain on the tool and user. For example, Purdue Extension (2020) and similar programs advise routine sharpening and cleaning for pruners and digging tools.
Handles, joints, and storage: the stuff that quietly kills tools
Hack #5: Protect handles and joints with two “micro-maintenance” moves
Headline: One wipe for wood, one drop for pivots—done.
Most gardeners focus on blades and ignore handles and joints, even though that’s where tools “die.” For wooden handles, wipe them down and rub in a thin coat of boiled linseed oil (or tung oil) 2 times per year—once at spring startup and once before winter storage. For pruners, loppers, and shears, add 1–2 drops of light machine oil to the pivot after cleaning; open/close the tool a few times to work it in.
DIY alternative: No linseed oil on hand? In a pinch, a light rub with mineral oil is better than letting wood dry out and splinter. For pivots, even a tiny dab of cooking oil works short-term—just wipe off excess so it doesn’t attract grit.
Real-world scenario #2: If you garden near the coast (salt air), metal corrosion is faster and pivots seize more often. A monthly pivot oiling during humid months can prevent the classic “frozen pruner” problem—especially if tools live in an unheated shed.
Real-world scenario #3: If you share tools with kids or neighbors, handles take extra abuse. A quick spring sanding with 120-grit sandpaper (just 2–3 minutes per handle) plus oiling stops splinters and helps prevent cracks that eventually loosen the head.
Storage hacks that stop rust and warping before they start
Hang tools head-up, not piled blade-down
Headline: Storage position is a tool-life multiplier, not a preference.
Leaning tools in a corner with blades on concrete traps moisture and nicks edges. Hanging them keeps air moving around metal parts and prevents the slow bend that happens when a handle is always under pressure. If you’re on a budget, screw a 1×4 board into studs and add $1–$2 hooks; you’ll store a full set in under 3 feet of wall space.
Example: A small shed can hold 10 long-handled tools on one wall if you stagger hook heights by 6–8 inches. That alone prevents the “tool avalanche” that chips edges and dents handles.
Make a “winter layup” routine for anything with a pivot or spring
Headline: Off-season storage is when tools corrode quietly—so prep them like you mean it.
Before winter (or the rainy season), clean, dry, and apply a protective layer: oil for moving parts, and a thin coat of paste wax for larger metal surfaces if you have it. Then store pruners and shears slightly open (not clamped tight) to reduce spring stress. This takes 20 minutes for a typical home tool set and can prevent the expensive springtime “everything is seized” surprise.
Cost saver: Paste wax is usually $8–$15 and lasts years. If you’d rather not buy wax, the sand+oil bucket plus a wipe-down is still a huge improvement over storing tools bare.
Troubleshooting: quick fixes for common tool problems
Sticky pruners? Clean sap with a two-step wipe (no soaking)
Headline: Sap is glue—treat it like glue, not dirt.
If pruners feel sticky, don’t soak them in water and walk away (that’s rust city). Instead, wipe blades with rubbing alcohol or a citrus-based cleaner, then scrub with a nylon pad and dry immediately. Follow with a light oil on the pivot and a quick wipe on the blades.
Example: After cutting pine, spruce, or anything resinous, do this the same day. Resin hardens fast; after 24 hours, you’ll need more scrubbing and you’re more likely to scratch blade coatings.
Rust spots starting? Use vinegar as a spot treatment—then neutralize and protect
Headline: Stop small rust from becoming pitting with a controlled soak.
For light rust, a short white-vinegar soak works: submerge just the rusty metal for 30–60 minutes, scrub with steel wool or a wire brush, then rinse and dry thoroughly. Because vinegar is acidic, finish with oil or wax right away. Keep the soak short; long soaks can darken metal and may etch some finishes.
DIY alternative: If you don’t want to soak, make a paste of baking soda and water, scrub, then rinse and dry. It’s gentler but may take more elbow grease.
Loose tool heads? Fix it before it “wobbles to death”
Headline: A tiny wobble becomes a snapped handle faster than you think.
If a shovel or hoe head wiggles, don’t keep using it—every swing enlarges the fit and damages the handle end. First, tap the handle end on a solid surface to reseat the head; then tighten or replace the fastener (many use a single screw or rivet). If the wood has shrunk, a simple temporary fix is to remove the head, wrap the handle end with a thin layer of fiberglass tape, then re-seat and fasten—buying time until you can re-handle properly.
Example: This is common in very dry climates or after storing tools near a heater. A twice-yearly handle oiling (Hack #5) dramatically reduces shrink/swell cycles that cause loosening.
Three routines you can steal (pick the one that matches your life)
You don’t need to do everything every time. The trick is choosing a routine you’ll actually repeat.
The “I’m tired” routine (2 minutes total)
Brush off soil, wipe dry, and hang tools. If you used pruners, add 1 drop of oil at the pivot. This alone prevents most rust and seizure problems.
The “Saturday reset” routine (15 minutes weekly)
Run long-handled tools through the sand+oil bucket, touch up one edge with a file, and check for wobbling heads. Spray/wipe pruner blades with alcohol and oil pivots. It’s quick, and it stops small issues from becoming replacements.
The “season change” routine (20–30 minutes twice a year)
Deep clean, sharpen, oil/wax metal, and treat wooden handles. Replace any bent screws, cracked handles, or worn springs now—parts are cheap, and your future self will thank you. This is especially valuable before winter storage or before the spring rush.
If you want the biggest payoff with the least effort, start with two things: a cleanup station at the door and the sand+oil bucket. Those two hacks turn tool care from a project into a reflex—and that’s what keeps your favorite pruners snipping and your shovel slicing cleanly for years.
Sources: University of Minnesota Extension (2019) tool cleaning and maintenance guidance; University of Florida IFAS Extension (2018) recommendations on sanitizing pruning tools and reducing disease spread; Purdue Extension (2020) general pruning tool care and sharpening best practices.