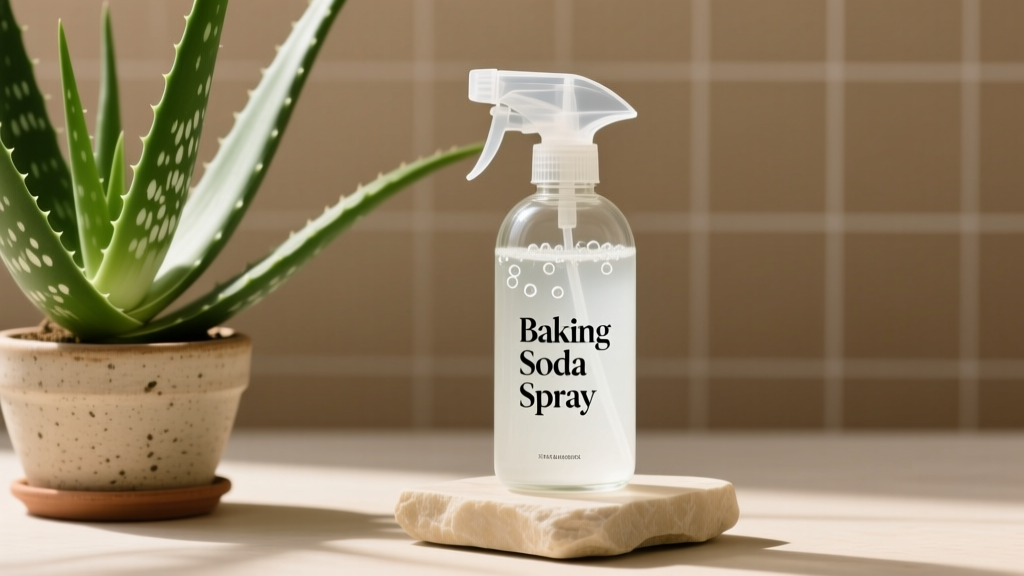
Baking Soda Spray Recipe for Aloe Vera
You notice it on a Tuesday morning: your aloe’s lower leaves look dull and a little blotchy, like someone dusted them with flour. You wipe, it smears. Two days later the spots are back—plus a faint musty smell near the soil line. That’s usually when gardeners reach for the kitchen cabinet and ask the same question: “Can I use baking soda spray on aloe?”
You can—but only if you treat it like a targeted tool, not a weekly tonic. Aloe vera is a succulent with a waxy cuticle and water-storing tissues. It doesn’t appreciate frequent residue, wet crowns, or alkalinity creep. Used correctly, a baking soda spray can help suppress surface fungal issues on leaves; used carelessly, it can burn tissue, clog stomata, and raise pH around the plant.
This guide lays out a practical recipe, exactly how to apply it, and the bigger picture care that prevents the problems that make you reach for sprays in the first place.
When a baking soda spray makes sense for aloe
Baking soda (sodium bicarbonate) is most useful when you’re dealing with early-stage, surface-level fungal pressure—think mild powdery mildew-like residue or sooty film on leaves—especially in stagnant indoor air. It’s not a cure-all for root rot, bacterial soft rot, or insect infestations hiding at the base of leaves.
University of California Agriculture and Natural Resources notes that bicarbonates can be used as protectant sprays for some foliar diseases, but they work best preventively and with good coverage—not as a rescue for advanced infections (UC ANR, 2023). And Penn State Extension emphasizes that powdery mildew management is mostly about environment (airflow/light) and timely, repeated treatments—not one heavy spray (Penn State Extension, 2022).
“Bicarbonate sprays are protectants—best used early and alongside cultural controls like airflow, light, and dry foliage.” — UC ANR guidance on bicarbonate-based disease suppression (UC ANR, 2023)
The baking soda spray recipe (safe for aloe)
Aloe leaves are thicker than many houseplants, but they can still burn if the solution is too strong or applied in hot sun. Keep the concentration modest and apply at the right time.
Basic recipe for aloe leaves
- 1 quart (0.95 L) lukewarm water
- 1/2 teaspoon baking soda (about 2.5 g)
- 1/2 teaspoon mild liquid soap (as a spreader-sticker; unscented castile or a gentle dish soap)
- Optional: 1 teaspoon horticultural oil or neem oil (only if you also suspect mites or want better coverage; skip if your aloe is already stressed)
Why so light? Many online recipes call for 1 tablespoon per gallon. Aloe is less forgiving of repeated salt exposure on its leaf surface, so I prefer a milder concentration you can repeat if needed rather than one strong application that scars leaves.
Mixing steps (don’t skip the order)
- Add 1/2 teaspoon baking soda to 1 cup of warm water and stir until fully dissolved.
- Pour into your sprayer and add the remaining water to reach 1 quart.
- Add 1/2 teaspoon mild soap last. Swirl gently—don’t shake hard (foam makes dosing inconsistent).
- Label the bottle. Use within 24 hours for consistent performance.
Patch test first (especially indoors)
Spray one small section of a lower leaf and wait 24–48 hours. If you see bleaching, bronzing, or a dry “scab” patch, dilute by half and try again—or choose a different approach.
How to apply baking soda spray to aloe (timing matters)
Most aloe spray damage happens because of timing: people spray at midday, leave wet liquid in the crown, or soak the soil. Treat this like a surgical strike.
- Best time: early morning or late afternoon, when temperatures are 60–80°F (16–27°C).
- Avoid: spraying if leaf surfaces will heat above 85°F (29°C) or sit wet overnight in a cold room.
- Frequency: every 7 days for 2–3 rounds, then stop and reassess.
- Coverage: mist to a light sheen on both sides of leaves. Do not drench.
- Keep it off the soil: cover the potting mix with a paper towel or plastic wrap while you spray, then remove it.
After spraying, keep the plant in bright, indirect light with good airflow until leaves are dry—usually 1–2 hours indoors with a small fan on low.
Watering aloe vera so fungal problems don’t come back
If you’re battling recurring spots or film on aloe, your watering routine is usually the real culprit. Aloe likes deep watering followed by a thorough dry-out—no sips, no constant dampness.
A practical watering schedule (adjust to your home)
- Spring/Summer (active growth): water about every 10–21 days, once the mix is dry at least 2–3 inches down.
- Fall/Winter (low growth): water about every 3–6 weeks.
- Indoor tip: if your aloe sits in a cachepot, empty standing water within 10 minutes.
How much water? Water until it runs freely from the drainage holes, then stop. The goal is a full flush and then a dry period—not a constantly moist root zone.
Watering troubleshooting
Symptom: Leaves feel soft, translucent, or “gelly” near the base.
Likely cause: Overwatering and early rot.
Fix: Unpot, inspect roots, cut away mushy tissue with a sterile blade, let the plant air-dry for 24–48 hours, then repot into a drier mix. Do not spray baking soda—this is not a leaf-surface fungus problem.
Symptom: Leaves are thin, curling inward, and dull gray-green.
Likely cause: Underwatering or hydrophobic mix that repels water.
Fix: Bottom-water for 20 minutes once, then drain well. Resume deep-but-infrequent watering.
Soil and pot setup (where most aloe problems start)
Aloe needs air at the roots. A heavy peat mix that stays wet invites fungus gnats, moldy soil surfaces, and rot—issues people often misdiagnose as “leaf fungus” and try to spray away.
My reliable aloe soil blend
- 50% cactus/succulent mix
- 30% pumice or perlite
- 20% coarse orchid bark or crushed lava rock
Use a pot with drainage. For most countertop aloes, a 6–8 inch pot is plenty. Oversized pots dry too slowly indoors.
Soil pH note (important with baking soda)
Aloe generally does well in slightly acidic to neutral soil (roughly pH 6.0–7.0). Baking soda is alkaline; repeated overspray into the pot can push pH upward and lock out nutrients like iron and manganese, leading to pale new growth. That’s why I’m strict about shielding the soil during application.
Light: the difference between sturdy leaves and constant stress
Low light weakens aloe tissue and makes it more prone to spotting and opportunistic fungus. Too much sudden sun, though, causes sunscald that people sometimes mistake for disease.
Indoor light targets
- Bright, indirect light near a south or west window is ideal.
- If moving outdoors, harden off over 7–10 days (start with 1–2 hours of morning sun, increase gradually).
Light troubleshooting
Symptom: Long, leaning growth; wide spacing between leaves; pale green color.
Cause: Not enough light.
Fix: Move closer to a bright window or add a grow light for 10–12 hours/day.
Symptom: Tan or white dry patches on the sun-facing side, especially after moving outdoors.
Cause: Sunburn, not fungus.
Fix: Move to bright shade, don’t spray anything on the damaged tissue, and let new growth replace it.
Feeding aloe vera (and why overfeeding can mimic “disease”)
Aloe is a light feeder. Too much fertilizer creates soft, watery growth that’s more susceptible to rot and spotting.
- Frequency: feed 1–2 times during spring/summer only.
- Strength: use a balanced houseplant fertilizer at 1/4 strength.
- Skip feeding: in winter, or anytime the plant is stressed, recently repotted, or recovering from rot.
Tip: If you suspect salts building up (white crust on soil or pot rim), flush the pot with plain water equal to about 3× the pot’s volume (for example, roughly 1.5 gallons through a 6-inch pot over a few minutes), then let it drain completely.
Common aloe problems baking soda won’t fix (and what will)
Let’s separate leaf-surface issues (where baking soda can help) from structural problems (where it can’t).
Root rot (the big one)
Signs: wobbling plant, sour smell, black/mushy roots, collapsing lower leaves.
What to do: unpot, trim rot, dry 24–48 hours, repot in a gritty mix, then wait 7 days before watering.
Mealybugs
Signs: cottony clusters in leaf axils, sticky residue.
What to do: dab with 70% isopropyl alcohol on a cotton swab, repeat every 7 days for 3 weeks. Improve light and airflow.
Aloe rust / fungal spotting
Signs: small, raised brown spots that may merge; leaves otherwise firm.
What to do: remove the worst leaves, increase airflow, avoid wetting foliage, and consider baking soda spray as a short series (patch test first).
Comparison: baking soda spray vs other options (with real-use numbers)
Here’s how baking soda stacks up against other common home-garden approaches for aloe leaf issues. The “risk” and “best use” columns are where the experience shows up.
| Method | Typical mix rate | Repeat interval | Best for | Risk on aloe |
|---|---|---|---|---|
| Baking soda + mild soap | 1/2 tsp baking soda + 1/2 tsp soap per 1 quart water | Every 7 days × 2–3 | Mild surface fungus/film; early powdery residue | Leaf spotting/burn if too strong or used in heat; pH creep if it hits soil |
| Neem/horticultural oil (spray) | 1–2 tsp oil per 1 quart water (follow label if commercial) | Every 7–14 days | Light pest pressure (mites) and some superficial issues | Leaf burn if applied in bright sun; residue buildup indoors |
| Plain water + microfiber wipe | No additives; damp cloth | As needed | Dust, soot, sticky residue from pests (after treatment) | Low, but avoid pushing water into the crown |
| Cultural controls only (airflow/light/drier soil) | Fan on low; adjust watering; brighter light | Ongoing | Most recurring “fungus” issues caused by damp, stagnant conditions | Lowest risk; slower visible results |
Three real-world scenarios (and what actually worked)
Scenario 1: The bathroom aloe with recurring white film
Aloe kept on a bright bathroom sill looks “humid-happy” at first—but constant steam plus low airflow is prime time for surface fungus and mildew-like films.
- What worked: Move the plant out of the bathroom, run a small fan on low for 2–3 hours/day, and do 2 weekly baking soda sprays (light mist only) after a patch test.
- What didn’t: Daily misting (kept the crown wet and worsened spotting).
Scenario 2: Outdoor aloe with brown patches after “treatment”
This is the classic: aloe goes outside for summer, gets sprayed at noon, and develops tan patches. The gardener assumes the fungus is spreading, so they spray again—making the burn worse.
- What worked: Stop spraying, move to bright shade, and only resume any treatment when temps are below 80°F (27°C). Damaged patches won’t turn green again; judge success by healthy new growth.
- What didn’t: Stronger mixes and more frequent applications.
Scenario 3: “Leaf spots” that were really a watering/soil problem
Aloe in a decorative pot (no drainage) developed dull leaves and scattered discoloration. The surface looked slightly moldy. Sprays made no difference because the roots were suffocating.
- What worked: Repot into a draining pot, gritty mix, and switch to watering every 3–4 weeks in winter. After repotting, leaf appearance improved without any sprays.
- What didn’t: Any foliar treatment while the root zone stayed wet.
Troubleshooting: symptoms and exact next steps
Problem: White, powdery residue on leaves (wipes off)
- First check: Is it just dust or hard-water mineral residue? Wipe with a damp cloth. If it’s gritty, it’s likely minerals.
- If it returns quickly and looks “fuzzy”: Patch test, then apply baking soda spray weekly for 2–3 weeks.
- Prevent: improve airflow and avoid misting.
Problem: Brown speckles that don’t wipe off
- First check: Are you seeing raised, corky spots? That may be edema (water imbalance) or aloe rust.
- Fix: let the mix dry more between waterings; increase light slightly; remove the worst leaf if more than 30% of it is affected.
- Spray? Baking soda can help only if the spotting is fungal and active; it won’t erase corking or scarring.
Problem: Sticky leaves + sooty black film
- Cause: honeydew from pests (often scale or mealybugs) feeding above; the black film is sooty mold growing on the sugar.
- Fix: treat pests first (alcohol swabs for mealybugs; horticultural oil for scale per label). Then wipe leaves with a damp cloth.
- Spray? Baking soda isn’t the main tool here—pest control is.
Problem: Leaf tips browning after spraying
- Cause: solution too strong, applied in heat, or soap/oil sensitivity.
- Fix: rinse leaves with plain water (lightly), dry with airflow, and stop treatments for 2 weeks. Next time, cut the baking soda to 1/4 teaspoon per quart and skip oil.
Safety notes and smart limits (what I tell friends before they spray)
Baking soda is “natural,” but it’s still a salt. On succulents, salt buildup can be the slow burn—literally and figuratively.
- Do not use as a daily or weekly “preventative” forever. Cap it at 2–3 applications, then reassess conditions.
- Never drench the crown. Aloe crowns trap moisture; trapped moisture invites rot.
- Avoid mixing with vinegar. People do this to “make it stronger.” You just neutralize the bicarbonate and create a different solution with unpredictable leaf response.
- Keep treated plants out of harsh sun for 24 hours. Residue + sun is a common scorch recipe.
A steady routine that makes sprays almost unnecessary
If you want an aloe that rarely needs any spray, focus on three habits: gritty soil, strong light, and dry cycles. Wipe dust off leaves every month or two, water deeply only when the pot is truly dry, and keep airflow moving—especially in winter when windows stay shut.
Use the baking soda recipe as a short-term helper when you catch a surface problem early. If the issue keeps returning, treat that as a clue: something in the environment is staying too damp, too dark, or too still. Fix that, and your aloe will do what it’s built to do—coast along looking clean and sturdy with very little fuss.
Sources: University of California Agriculture and Natural Resources (UC ANR), guidance on bicarbonates and disease management (2023). Penn State Extension, powdery mildew management principles and cultural controls (2022).