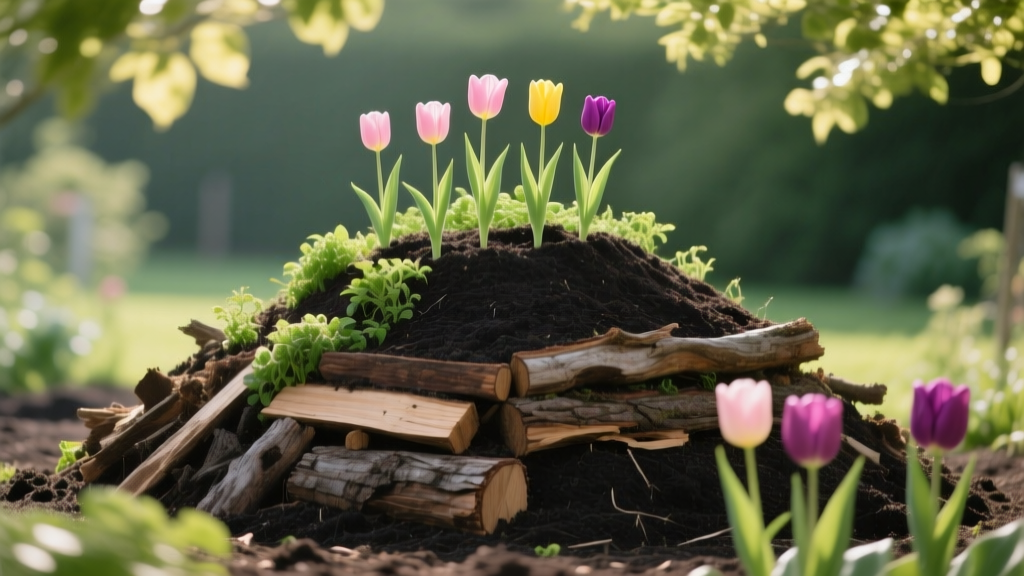
How to Build Hugelkultur Mounds for Tulips
You plant tulip bulbs in fall, baby them through winter, and in spring you get… floppy stems, patchy bloom, and a bed that dries out the moment the wind picks up. Sound familiar? I’ve seen it happen in sandy yards, in raised beds that warm up too fast, and even in heavy clay where bulbs rot if you blink. Here’s the surprising part: a properly built hugelkultur mound can act like a slow-release “moisture and nutrient battery” under tulips—if (and this is the big if) you build it with the right height, the right wood, and the right planting zone for the bulbs.
This isn’t a romantic, “throw logs in a pile and call it permaculture” project. Tulips have specific needs: sharp drainage around the bulb, consistent moisture while rooting, and a relatively lean soil (too rich and you’ll get leaves instead of flowers). A hugelkultur mound can meet all three, but only when you build the mound like a layered system with a dry-ish bulb zone on top and a moisture-holding core underneath.
What Makes Tulips Different on a Hugelkultur Mound
Tulips (Tulipa spp.) want cool rooting in fall, a cold winter rest, then steady moisture and sun in spring. In a standard flat bed, that’s tough to balance: soil can be soggy in winter and bone-dry in spring. On a mound, gravity improves drainage, while the woody core stores moisture for later.
A key caution: fresh wood can temporarily tie up nitrogen as it decomposes. That matters less for tulips than for leafy vegetables, but it still affects the companion plants you might tuck around the mound. The trick is to put the wood deep, keep a solid soil cap, and avoid planting bulbs down in the wood layer.
Research supports the idea that buried wood increases water storage as it breaks down. Oregon State University Extension notes that adding organic matter improves soil’s water-holding capacity and tilth over time (Oregon State University Extension, 2023). And tulip culture guidance from land-grant extensions consistently emphasizes drainage and correct planting depth as the make-or-break factors for bulb health (University of Illinois Extension, 2022).
Planning Your Tulip Hugelkultur: Size, Shape, and Placement
Pick a sunny site with air flow
Tulips bloom best with 6+ hours of direct sun in spring. Morning sun is gold because it dries leaves faster and reduces fungal issues.
- Light: Full sun to light shade (avoid dense shade under trees).
- Wind: Some air flow helps prevent botrytis, but avoid a wind tunnel that snaps tall varieties.
- Spacing from trees: Keep the mound at least 6–10 feet from large tree trunks to reduce root competition and summer drought stress.
Target mound dimensions that work for bulbs
For tulips, you don’t need a giant mound. You need a mound with enough depth to buffer moisture and enough height to shed winter wet.
- Length: As long as you want (a 6–12 ft run is easy to manage).
- Width: 3–4 ft so you can reach the center from either side.
- Finished height: 18–24 inches after settling (build it 24–30 inches initially; it will sink).
If you live where winters are very wet (Pacific Northwest-style rain), aim for the taller end. If you’re in a dry, windy climate, a lower, broader mound reduces drying.
Materials: What to Use (and What to Avoid)
The wood you choose influences drainage, settling, and nitrogen tie-up.
- Best woods: Partially rotted hardwood logs, punky branches, wood chips that are already aging.
- Okay in moderation: Fresh hardwood branches (diameter 1–4 inches) layered with nitrogen-rich material.
- Avoid: Black walnut (juglone), pressure-treated lumber, and large amounts of fresh cedar/redwood (slow to break down and can shed water initially).
For the “green” layer (nitrogen), use grass clippings (thin layers), fresh leaves, manure that’s composted, or finished compost. Keep manure well-aged; tulips don’t want a hot, salty root zone.
Step-by-Step: Building a Hugelkultur Mound for Tulips
This is the build I use when I want tulips to perennialize as well as possible (as much as tulips ever do).
- Mark the footprint (example: 4 ft x 10 ft). Water the area the day before if the ground is hard.
- Remove sod and set it aside (grass side down later).
- Dig a shallow trench 6–10 inches deep. In rainy regions, dig only 4–6 inches to avoid creating a bathtub.
- Lay the largest logs in the trench. Aim for a log layer about 8–12 inches thick.
- Add branches and sticks to fill gaps. Step on them to reduce big air pockets.
- Water the wood layer thoroughly. I’m talking a real soak: about 2–4 gallons per square yard as you build, so the core starts as a sponge, not a wick.
- Add a nitrogen layer: 2–4 inches of compost, chopped leaves, or well-rotted manure/compost blend.
- Flip the sod grass-side down over the nitrogen layer (this helps suppress regrowth and adds organic matter).
- Cap with soil: at least 8–10 inches of good garden soil + compost mix on top. For tulips, I like a leaner top: roughly 80% soil / 20% compost.
- Shape the mound with a rounded top and sloped sides. Avoid a flat plateau that holds puddles.
- Let it settle if you can. Ideally, build the mound 2–4 weeks before planting bulbs. If that’s not possible, build and plant the same day, but expect more settling and plan to top-dress soil later.
One practical note: tulip bulbs should never sit directly in compost-rich “hot” layers. They want mineral soil with a bit of organic matter, not a buffet.
Soil on Top: Getting the Tulip Root Zone Right
The top layer is where tulips live or die. You’re aiming for:
- Texture: Loamy, crumbly, fast-draining.
- pH: Tulips tolerate a range, but many sources note best growth around pH 6.0–7.0 (University of Illinois Extension, 2022).
- Drainage: No standing water after a heavy rain.
If your native soil is clay, don’t “fix” it by dumping sand into clay (that can make a concrete-like mix). Instead, build higher and use a top cap that’s soil + compost + fine pine bark. For extra drainage insurance, mix in 10–20% pine bark fines or expanded shale in the top 8 inches.
“The most common cause of bulb failure is poor drainage—bulbs are storage organs, and they rot quickly in saturated soils.” — University Extension bulb guidance (University of Illinois Extension, 2022)
Planting Tulips in the Mound: Depth, Spacing, and Timing
Plant in fall when soil temperatures cool but before the ground freezes. In many regions that’s 6–8 weeks before your typical hard freeze.
- Ideal soil temperature for planting: about 55°F (13°C) or cooler.
- Planting depth: 6–8 inches deep (measured from the bulb base), or roughly 3x the bulb’s height.
- Spacing: 4–6 inches apart for a full look; 6–8 inches if you want room for companions.
On a hugelkultur mound, plant bulbs slightly below the crown of the mound—not on the steepest side where soil dries fastest, and not in a low pocket where water collects.
Watering: The Part Most Gardeners Get Backwards
Tulips need moisture at specific times, not constant wet soil.
Fall watering (rooting phase)
After planting, water deeply once to settle soil around bulbs. If fall rains are scarce, water when the top 2 inches are dry. A common pattern is 1 inch of water per week (rain + irrigation) until the ground freezes, but on a mound you’ll often need slightly more frequent watering because the top dries faster.
Winter watering (usually none)
In most climates, don’t water in winter. Cold + wet is rot territory. The mound’s job is to shed excess.
Spring watering (growth and bloom)
When shoots emerge, water if you go more than 7–10 days without rain. Water at the base in the morning. If the mound dries quickly, use a slow soak: 30–45 minutes with a soaker hose, then check moisture 6 inches down.
Summer watering (after bloom)
Once foliage yellows and dies back, keep the mound on the dry side. Tulip bulbs prefer a drier summer rest. This is where hugelkultur can be tricky in rainy summer climates—plant tulips toward the top third of the mound where it dries fastest.
Light and Temperature: Using the Mound’s Microclimate
Mounds warm earlier in spring. That can be helpful in cold regions, but it can also push tulips to emerge early, risking frost damage.
- If late frosts are common, plant bulbs on the north or east shoulder of the mound (slightly cooler).
- If your spring is short and you want earlier blooms, plant on the south shoulder for faster warming.
Mulch helps moderate temperature swings. Use 1–2 inches of shredded leaves or straw after the ground cools (not immediately after planting in warm fall weather, or you may invite rodents).
Feeding: Enough for Flowers, Not So Much You Get Leaves
Tulips are not heavy feeders. On a fresh hugelkultur mound, the deeper layers are busy decomposing; the top should stay relatively lean.
- At planting: Skip high-nitrogen fertilizers. If your soil test is low in phosphorus or potassium, use a bulb fertilizer at label rate, scratched into the top 2–3 inches (keep fertilizer away from direct bulb contact).
- Early spring: When shoots are 2–4 inches tall, top-dress with 1/2 inch of finished compost or apply a low-N fertilizer (example: 5-10-10) following the package rate.
If you’re serious about repeat bloom, prioritize sunlight and post-bloom leaf time over fertilizer. Let the foliage photosynthesize until it yellows naturally—usually 6–8 weeks after flowering.
Hugelkultur vs. Standard Raised Bed for Tulips (with Real Tradeoffs)
| Factor | Hugelkultur Mound (18–24 in finished height) | Standard Raised Bed (10–12 in height) |
|---|---|---|
| Water storage in summer | High after wood saturates; can reduce irrigation frequency by 20–40% in dry spells (site-dependent) | Moderate; dries faster unless heavily amended |
| Winter drainage | Excellent if rounded and tall; poor if built like a flat-topped platform | Good, but can stay wet if soil mix is heavy |
| Soil settling | Noticeable; expect 10–30% height loss in year 1 | Minimal settling |
| Nitrogen tie-up risk | Moderate in first 1–2 years (mostly affects companion plants) | Low (unless you bury wood) |
| Tulip re-bloom reliability | Good if bulb zone stays dry in summer and not overly rich | Good if drainage is sharp and summer watering is controlled |
The biggest practical difference: a hugelkultur mound is more forgiving during spring dry spells, while a standard raised bed is more predictable and stable. If your tulips routinely rot in winter, hugelkultur’s height can be a game changer. If your tulips disappear because squirrels dig everything up, the mound shape won’t help—physical protection will.
Common Problems (and Fixes You Can Do This Week)
Problem: Bulbs rot over winter
Symptoms: No spring emergence, or shoots that collapse at soil level; bulbs are mushy or smell sour.
- Likely causes: Bulb zone stayed saturated; mound too flat; heavy soil cap; bulbs planted in a low pocket.
- Fix: Add 3–4 inches of mineral soil to increase crown height; replant future bulbs on the upper third of the mound; keep mulch to 1 inch in wet climates.
Problem: Tall leaves, few flowers
Symptoms: Lots of foliage, short stems, weak or absent bloom.
- Likely causes: Too much nitrogen (fresh manure, heavy compost cap), bulbs planted too shallow, or shade.
- Fix: Stop nitrogen feeding; move bulbs to a sunnier spot; plant at 6–8 inches deep; use a lean top mix (soil-heavy).
Problem: Floppy stems and blown-over blooms
Symptoms: Stems lean hard, flowers face down after rain or wind.
- Likely causes: Too much shade, overly rich soil, or tall varieties on a windy mound crest.
- Fix: Plant tall tulips on the leeward side; add a discreet hoop support; choose sturdier types (Darwin Hybrids often stand better than some doubles).
Problem: Squirrels and voles dig bulbs
Symptoms: Holes in the mound, bulbs missing, chewed bulb scales.
- Fix options:
- Lay hardware cloth (1/2-inch mesh) flat over the planting zone, pin it down, then cover with 1–2 inches of soil.
- Plant bulbs inside wire baskets.
- Top-dress with sharp gravel (1/4–3/8 inch) right after planting—animals dislike digging in it.
Three Real-World Builds (What Worked, What Didn’t)
Scenario 1: Heavy clay yard with winter puddling
A gardener in a clay-heavy suburb kept losing tulips to rot. We built a mound 30 inches tall initially, used mostly partially rotted hardwood, and capped with 10 inches of soil-heavy mix plus pine bark fines. The first spring, bloom was the best they’d had in years. The key detail: bulbs were planted on the upper third, and we avoided thick mulch. Lesson: in wet clay, height and a mineral-rich cap matter more than compost.
Scenario 2: Sandy soil that dries out in April
In a sandy, windy site, tulips emerged well but flowers were small and short-lived. A hugelkultur mound built only 12 inches high dried too fast on the sides. We rebuilt as a broader mound, 24 inches finished height, and mulched with 2 inches of shredded leaves after the ground cooled. Spring watering dropped from every 3–4 days to about once a week in dry spells. Lesson: in sand, wider and mulched beats narrow and tall.
Scenario 3: Small urban garden with a raised bed and limited fall time
An urban gardener wanted tulips plus summer perennials in one feature bed. We built a compact hugelkultur ridge, 3 ft wide and 8 ft long, right on top of cardboard (no trench) because time was short. It settled a lot—nearly 4 inches by spring—so tulips ended up slightly shallow. They still bloomed, but the next fall we topped with soil and replanted deeper. Lesson: no-trench builds work, but expect settling; plan a top-up season.
Seasonal Care Calendar (So You Don’t Guess)
- Early–mid fall: Build mound; water wood layers as you build; let settle 2–4 weeks if possible.
- Mid–late fall: Plant tulips when soil is near 55°F; protect from digging; water once deeply.
- Winter: Avoid watering; check that runoff isn’t eroding the mound sides.
- Early spring: Water during dry spells; feed lightly when shoots are 2–4 inches tall.
- After bloom: Deadhead flowers (leave foliage); keep watering moderate until foliage yellows.
- Early summer: Let the mound dry more; avoid frequent irrigation over dormant bulbs.
Troubleshooting Quick Diagnostic: What the Tulips Are Telling You
If you only remember one thing: tulips complain loudly, but they’re usually complaining about water and placement on the mound.
- Early sprouting in winter warm spells: Mound is warming too fast. Add 1 inch of mulch after the ground cools, and plant on the cooler side next season.
- Cracked soil on the mound crest: Top cap is too thin or too sandy. Top-dress with 2 inches of soil + compost (lean mix) and mulch lightly.
- Green leaves that yellow from the tips early: Often drought stress on a mound. Deep soak and check moisture 6 inches down.
- Brown spots or gray mold on leaves/flowers: Botrytis favored by poor air flow and wet leaves. Water at the base, thin nearby plants, and remove affected material (don’t compost diseased leaves).
Common Problems with the Mound Itself (Not the Tulips)
Settling and exposed wood
What you’ll see: The mound shrinks, and branches poke out.
Fix: Each fall, top-dress with 1–3 inches of soil to keep bulbs covered at proper depth. If wood is exposed near bulbs, add soil immediately—exposed wood can wick moisture away from the bulb zone.
Erosion on the sides
What you’ll see: Soil slides off during hard rain.
Fix: Plant a living “net” on the slopes: low sedums, creeping thyme, or small clumps of perennial groundcovers. Or pin jute netting until plants establish. Keep tulips on the top/shoulder, not the steep face.
Sources Worth Trusting
For gardeners who like to double-check recommendations, these are solid references I use when teaching bulb care and soil building:
- University of Illinois Extension. “Growing Tulips and Other Spring Bulbs” (2022).
- Oregon State University Extension. “Improving Garden Soils with Organic Matter” (2023).
If you build your mound with a tall, rounded shape; keep a mineral-heavy cap; and treat watering as a seasonal tool (not a daily habit), tulips can perform beautifully on hugelkultur. The mound won’t magically make every tulip perennial forever—some modern hybrids are naturally short-lived—but it will give your bulbs the two things most home gardens fail to provide at the same time: drainage in winter and steadier moisture in spring.