How to Divide Mature Daffodils
You know the clump. Ten years ago it was a neat little drift of daffodils by the mailbox, and now it’s a tight, leafy mop that flowers well on the edges and barely at all in the middle. Or maybe you’ve got the opposite problem: plenty of blooms, but the stems are short, the flowers are smaller, and the whole planting looks tired. That’s daffodils telling you—politely, for a few seasons, and then not-so-politely—that it’s time to divide.
Daffodils (Narcissus) are tough bulbs, but they aren’t magic. When bulbs multiply and crowd, they compete for water and nutrients, and the clump slowly turns into a traffic jam. Dividing mature daffodils is the reset button: you restore flowering, spread your plants, and fix drainage or soil issues that may have built up over time.
I’ll walk you through the timing, tools, and step-by-step method I use in real gardens—plus watering, soil prep, feeding, and troubleshooting. I’ll also compare two common approaches (lift-and-store vs. lift-and-replant same day) with actual numbers so you can pick what fits your schedule and climate.
When to divide: timing that actually works
The best time to divide daffodils is after the foliage has finished feeding the bulb. In practical terms, that means waiting until the leaves turn yellow and flop—usually 6–8 weeks after flowering. In many regions, that’s late spring to early summer.
- Most reliable window: When foliage is at least 50% yellow and pulls easily from the bulb without tearing.
- Avoid: Dividing while leaves are still green and upright; you’ll steal stored energy and get fewer flowers next year.
- Also workable: Late summer/early fall (before soil freezes) if you must move them then, but it can be harder to find bulbs after foliage is gone unless you’ve marked the spot.
As a rule of thumb, mature daffodil clumps benefit from division about every 3–5 years, sooner if bloom count drops noticeably. This aligns with guidance from multiple extension programs, including North Carolina State Extension (2020) and the University of Minnesota Extension (2022), both of which note that reduced flowering is a classic sign of overcrowding.
“Allow the foliage to die back naturally after bloom—this is when the bulbs replenish energy for next year’s flowers.” — University of Minnesota Extension (2022)
Real-world scenarios: which approach fits your situation?
Here are three common cases I see in home gardens, and the approach I recommend for each.
Scenario 1: Big leafy clump, few flowers
Likely cause: Overcrowding, shallow planting, or depleted soil. Fix: Divide after foliage yellows, replant at correct depth, and feed lightly in fall.
Scenario 2: You need to move daffodils because of construction or a new bed
Likely cause: Not a plant problem—just life. Fix: If you must lift while still green, dig a wide root ball and replant immediately, keeping as many roots as possible. Expect some bloom reduction next spring.
Scenario 3: Bulbs look healthy, but some rot every year
Likely cause: Poor drainage or summer overwatering. Fix: Divide and replant into improved soil (raised area, grit/compost blend), and adjust watering so bulbs aren’t sitting wet in summer dormancy.
Tools and prep: make the job easier on your back
You don’t need fancy equipment, but you do need the right basics.
- Spade or digging fork (a fork often damages fewer bulbs)
- Bucket or crate for bulbs
- Gloves
- Garden knife or hand pruners (for trimming dead roots/foliage)
- Marker flags (if you’re waiting to replant later)
Before you dig, water the area lightly if the soil is powder-dry. Aim for soil that’s damp but not muddy. If it crumbles like cake, perfect. If it smears like clay, wait a day.
Step-by-step: how to divide mature daffodils without losing blooms
This is the method I use for crowded clumps that have finished flowering and are starting to yellow.
- Cut foliage (optional, timing matters). If leaves are already yellowing, you can trim to 4–6 inches to reduce tangles. If they’re still mostly green, leave them longer so you can see what you’re doing and avoid damaging bulbs.
- Dig wide, not deep. Start 6–8 inches away from the clump edge and push the fork/spade down about 8–10 inches. Daffodil bulbs are often shallower than tulips, but clumps can stack.
- Lift the whole clump. Wiggle up from several sides. Don’t yank by leaves; use the tool as a lever.
- Shake and tease soil off. Let loose soil fall away. If soil is sticky, set the clump on a tarp for 30–60 minutes to dry slightly, then tease apart.
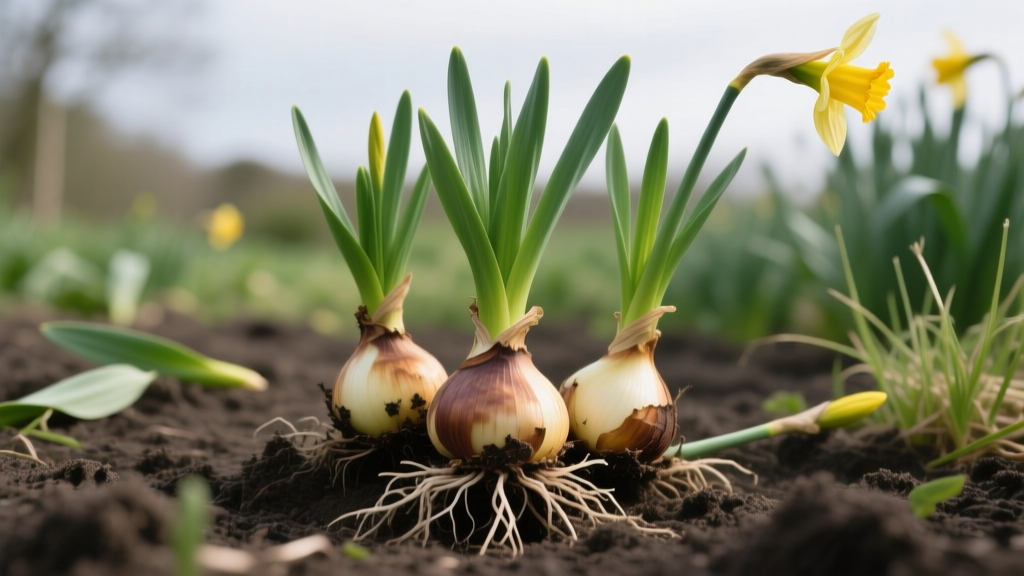
- Separate bulbs by hand. Most daffodils form “mother” bulbs with offsets attached. Gently twist offsets free. If they resist, leave them together rather than tearing the basal plate.
- Sort and cull. Keep bulbs that are firm and heavy for their size. Discard bulbs that are soft, foul-smelling, or clearly rotted.
- Replant promptly or cure briefly. If replanting the same day, keep bulbs shaded and cool while you prep the bed. If storing for later, cure in a dry, airy place out of sun for 3–7 days (more on storage below).
How many bulbs should you plant together? For natural-looking drifts, I like groups of 7–15 bulbs of the same variety spaced evenly. For tight borders, you can plant closer, but crowded bulbs will need dividing sooner.
Spacing and planting depth: the numbers that prevent future crowding
Planting depth and spacing are the difference between a clump that thrives for five years and one that looks tired in two.
- Depth: Plant bulbs with the nose up at 6 inches deep (measured from bulb base to soil surface). In sandy soil, go a bit deeper: 7–8 inches.
- Spacing: 4–6 inches apart for most standard daffodils. Miniatures can be 3–4 inches apart.
- Orientation: Pointed end up; if unsure, plant on its side—daffodils usually correct themselves.
If you’re replanting into a lawn edge, remember that daffodil foliage needs time to yellow after bloom. Either choose a mowing schedule that waits those 6–8 weeks, or plant in a bed where the foliage can finish naturally.
Soil: drainage first, fertility second
Daffodils tolerate a range of soils, but they don’t tolerate sitting wet. If you consistently lose bulbs to rot, fix drainage before you replant.
What “good” soil looks like for daffodils
- Crumbly structure, not sticky
- Water drains through within a few minutes, not hours
- No sour smell
Simple soil improvement recipe
For heavy clay, I work in organic matter and some grit-like material. For each square yard, aim for:
- 2–3 inches of compost worked into the top 8–10 inches
- If drainage is poor: add 1 inch of pine fines or coarse sand (avoid ultra-fine play sand that can worsen compaction)
Extension recommendations consistently emphasize well-drained soil for Narcissus; for example, North Carolina State Extension (2020) notes that daffodils perform best in “fertile, well-drained soil,” and bulb rots are more common in poorly drained sites.
Light: the easiest “fix” people forget
Daffodils bloom best with strong spring sun. They’ll tolerate partial shade, especially under deciduous trees that leaf out late—but too much shade reduces bloom and bulb size over time.
- Best: 6+ hours of direct sun in spring
- Acceptable: 3–5 hours of sun, especially morning sun
- Challenging: Dense evergreen shade or north-side locations that stay cold and dim
If you divide and replant into deeper shade, don’t be surprised if flowering declines even if the bulbs look healthy.
Watering: how to water after dividing (and when to stop)
Watering is one of the most misunderstood parts of bulb care, especially for gardeners used to summer perennials. Daffodils want moisture during active growth, and much less during dormancy.
Right after replanting
- Water in thoroughly to settle soil: about 1 inch of water (roughly 0.6 gallons per square foot).
- If the weather is dry, water weekly for the first 2–3 weeks to encourage root regrowth.
During fall and spring growth
- Aim for about 1 inch of water per week total (rain + irrigation) while roots are active and foliage is growing.
During summer dormancy
- Back off. Once foliage is yellow and dying, watering should be minimal unless you’re in extreme drought and the soil is cracking deeply.
- In irrigated beds, try to keep the daffodil area on the “dry side” in summer to reduce rot risk.
Feeding: what helps, what’s wasted, and what can backfire
Daffodils aren’t heavy feeders, but crowded clumps can exhaust available nutrients. Feeding works best when paired with correct timing and decent soil.
When to fertilize
- Best time: Fall when roots are growing (often when soil is 50–60°F), or very early spring as shoots emerge.
- Avoid: Heavy nitrogen in late spring; it can push leaf growth at the expense of bulb strength.
What to apply (practical options)
- Top-dress with 1 inch of compost in fall.
- Or apply a balanced bulb fertilizer. Follow label rates; a common approach is about 1–2 pounds per 100 square feet depending on formulation.
If you’ve improved soil with compost at planting, you may only need light feeding every other year. More fertilizer doesn’t mean more flowers—especially if the real issue is shade or soggy soil.
Two ways to handle divided bulbs: a comparison with real numbers
Gardeners usually split into two camps: replant immediately, or lift and store for a while. Both can work. Here’s how they compare in practice.
| Method | Best timing | Time out of ground | Risk level (rot/desiccation) | Expected bloom impact next spring | Best for |
|---|---|---|---|---|---|
| Lift & replant same day | Late spring/early summer after foliage yellows | 2–6 hours | Low rot risk; low drying risk if shaded | Usually minimal if foliage had matured; often 0–20% reduction | Most home gardens, quick resets, bed redesigns |
| Lift, cure, then replant in fall | Lift early summer; replant early fall | 8–12 weeks | Higher drying risk if stored too warm; moderate rot risk if stored humid | Can be more variable; often 10–40% reduction if storage is poor | Major bed work, hardscape projects, labeling/sorting varieties |
If you store bulbs, aim for a dry, airy place around 60–70°F and out of sun. Do not seal them in plastic. Use mesh bags, paper bags, or crates with good airflow. Check every couple of weeks and remove anything soft.
Common problems after dividing (and how to fix them)
A well-done division usually looks “worse” for a season simply because you’ve spread bulbs out. But there are a few classic issues that signal something needs correcting.
Symptom: lots of leaves, few or no flowers next spring
- Most likely causes:
- Divided too early (foliage still green)
- Bulbs planted too shallow (temperature swings stress them)
- Too much shade
- High nitrogen feeding
- What to do:
- Mark the area and wait a full year—bulbs often rebound by the second spring.
- Next time, wait until foliage is mostly yellow (6–8 weeks post-bloom).
- Replant at 6–8 inches deep if you suspect shallow planting.
- Switch to compost top-dressing rather than high-N lawn fertilizer drift.
Symptom: bulbs are mushy or smell bad
- Most likely causes: Poor drainage, overwatering during dormancy, or storage too humid.
- What to do:
- Discard rotted bulbs (don’t compost if you suspect disease).
- Replant into improved drainage: raised bed, amended soil, or a spot that doesn’t stay wet.
- Adjust irrigation so the bed isn’t kept evenly moist all summer.
Symptom: chewed bulbs, missing bulbs, or disturbed planting
- Most likely causes: Rodents (squirrels/voles) digging freshly disturbed soil.
- What to do:
- Cover the area with chicken wire pinned down for 2–3 weeks after planting.
- Plant bulbs slightly deeper (within recommended range).
- Avoid adding bone meal if it attracts digging in your area (some gardeners report increased disturbance).
Symptom: foliage is twisted, streaked, or stunted
- Most likely causes: Virus (less common) or environmental stress.
- What to do:
- If symptoms repeat year after year and blooms are distorted, rogue out the affected bulbs to prevent spread.
- Sanitize tools between clumps if you suspect disease issues.
Common pests and diseases to watch for while dividing
Dividing is the perfect time to inspect bulbs. Healthy bulbs are firm, with intact basal plates. Here are the problems I see most often.
Basal rot (often linked to wet soils)
Bulbs may show brown, soft tissue at the base. Prevent it by improving drainage and avoiding summer overwatering.
Daffodil bulb fly (regional, but nasty where present)
Infested bulbs may feel hollowed out. If you find large larvae inside, discard bulbs in the trash (not compost). Replanting healthy bulbs promptly and removing infested ones helps reduce future issues.
Slugs/snails (mostly on foliage)
These rarely kill bulbs outright but can weaken plants if foliage is repeatedly damaged. Hand-pick at dusk, use iron phosphate baits if needed, and keep mulch from staying overly wet in spring.
Aftercare: what to do the first year after dividing
The season after division is about rebuilding bulb strength. Here’s how to set expectations and help them along.
- Mulch lightly: 1–2 inches of shredded leaves or fine bark is plenty. Avoid burying the crowns under thick mulch.
- Let foliage finish: Resist tying or braiding leaves; let them photosynthesize until naturally yellow.
- Deadhead blooms: Snip spent flowers to prevent seed-making, but leave the leaves.
- Water smart: Moist in growth season, drier in dormancy.
If you divided a severely overcrowded clump, don’t be disappointed if the first spring is “okay” rather than spectacular. Daffodils often reward patience—year two after division is when you usually see the real payoff.
Citations and practical references
The following sources align with the timing and aftercare practices described above, particularly the importance of letting foliage die back and dividing when clumps become crowded:
- North Carolina State University Extension. (2020). Daffodils (Narcissus) culture and care. (Guidance on well-drained soil, planting, and maintenance.)
- University of Minnesota Extension. (2022). Bulbs: caring for spring-flowering bulbs. (Emphasis on allowing foliage to die back naturally.)
Dividing daffodils isn’t delicate work, but it does reward good timing and a little restraint with water and fertilizer. When you get those right, you’ll turn that tired clump into multiple plantings that look like you planned them that way all along—and you’ll be handing neighbors a bag of extra bulbs before you know it.