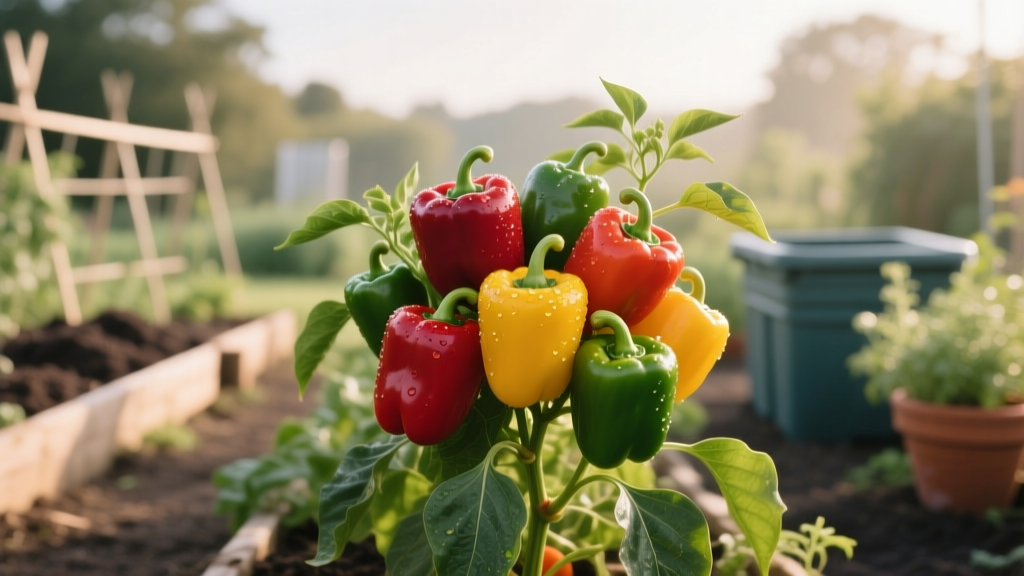
How to Feed Peppers for Bigger Harvests
You did everything “right”: the pepper plants are tall, leafy, and a deep healthy green… and yet the harvest is a trickle. A few blossoms show up, then drop. Or you get fruits, but they’re small, thin-walled, and slow to color. This is one of the most common pepper frustrations I see in home gardens—and nine times out of ten, it comes down to feeding and watering timing more than “not enough fertilizer.” Peppers are picky: they want steady moisture, warm roots, and the right nutrients at the right stage. Feed them like tomatoes early on and you often get a gorgeous plant that’s stingy with fruit.
Below is the practical, stage-by-stage approach I use for bigger, more consistent pepper harvests—whether you grow in raised beds, in-ground rows, or containers on a patio.
Start With the Goal: Flowers and Fruit, Not Just Leaves
Peppers (Capsicum annuum and relatives) need a balanced start, then a shift. Early on, they need enough nitrogen to build a sturdy plant. Once buds form, too much nitrogen keeps them in “leaf mode,” delaying flowering and reducing fruit set. At the same time, peppers are heavy users of potassium (K) and they need consistent calcium (Ca) to avoid blossom-end rot.
One helpful benchmark: most productive pepper plants are not the tallest plants—they’re the ones that keep setting flowers without dropping them, and can support fruit load without stalling.
Watering: The Hidden Partner of Fertilizer
If feeding is the “what,” watering is the “whether it works.” Nutrients move to roots in water. When peppers cycle between bone-dry and soaking wet, you’ll see blossom drop, bitter fruit, split skins, and nutrient lockouts that look like deficiencies even when the soil is fertile.
How much water do peppers need?
For in-ground and raised beds, aim for about 1 to 1.5 inches of water per week (rain + irrigation) during active growth, more during heat waves. The key is deep watering that reaches the main root zone.
- Bed peppers: Water deeply 2–3 times per week in summer rather than a daily sprinkle.
- Container peppers: In hot weather, you may water daily. Containers can dry out in 24 hours when it’s 85–95°F.
A simple “root-zone check”
Before you fertilize, push a finger or trowel down 3–4 inches. If it’s dry at that depth, water first, then feed later the same day or the next morning. Feeding dry roots is a common way people “burn” peppers even with mild fertilizers.
Mulch makes fertilizer work better
Mulch moderates moisture swings and keeps feeder roots near the surface active. Use 2–3 inches of straw, shredded leaves, or untreated grass clippings (thin layers). Keep mulch 1 inch away from the stem to avoid rot.
Soil: Build a Pepper-Friendly Root Zone
Peppers aren’t as forgiving as tomatoes in lousy soil. The best feeding plan fails in compacted ground or potting mix that’s exhausted by midsummer.
Target soil pH and texture
Peppers do best around pH 6.0–6.8. Outside that range, phosphorus and several micronutrients become harder for plants to access. If you haven’t done a soil test in the last 2–3 years, it’s worth it—especially if plants look healthy but under-produce.
University guidance consistently emphasizes soil testing as the foundation for appropriate fertilization. For example, Penn State Extension’s home garden recommendations highlight matching nutrient additions to soil test results rather than guessing (Penn State Extension, 2023).
Compost: the quiet yield booster
Before planting, mix in 1–2 inches of finished compost into the top 6–8 inches of bed soil. In containers, use a high-quality potting mix and blend in up to 20–25% compost by volume (more can make pots hold too much water).
Warm soil = active roots
Peppers sulk in cool soil. Transplant when nighttime lows are reliably above 55°F, and soil is at least 65°F if you can measure it. Cool roots can’t take up nutrients efficiently, which leads gardeners to overfeed.
Light and Temperature: Feeding Won’t Fix Shade
To turn fertilizer into fruit, peppers need strong light. Give them 6–8+ hours of direct sun. Less than 6 hours often means leggy growth and low fruit count, no matter what you feed.
Temperature matters too. Pepper pollen can become less viable when daytime highs climb above about 90–95°F, which leads to flower drop. In those stretches, the best “fertilizer” is steady watering and a bit of afternoon shade cloth (30%) if you have it.
Feeding Peppers: A Stage-by-Stage Plan That Works
Here’s the big mistake: feeding peppers “the same” all season. Peppers want a nutrition shift.
“Excess nitrogen fertilization can delay flowering and fruiting and reduce yields.” — University of Florida IFAS Extension vegetable production guidance (2020)
That quote matches what you see in real gardens: dark green plants, few peppers. So, we’ll use nitrogen early, then prioritize potassium and steady calcium.
Step 1: At transplanting (week 0)
Your goal is root establishment, not a growth spurt.
- Water the transplant hole well.
- Mix in a small amount of balanced organic fertilizer (or compost) rather than a heavy nitrogen dose.
- If using a granular fertilizer, keep it 2–3 inches away from the stem and lightly mix into soil.
Practical rate (common garden products): If you use a balanced granular organic fertilizer (for example, around 4-4-4), apply roughly 1–2 tablespoons per plant at planting, depending on product label and soil richness. In containers (5–10 gallons), use 1 tablespoon mixed through the top layer.
Step 2: Early growth (weeks 2–5): controlled nitrogen
Once you see new growth and the plant has started to branch, you can feed lightly. This is when many gardeners overdo it.
- If plants are pale and slow: use a mild nitrogen-forward feed once.
- If plants are dark green and vigorous: skip nitrogen and wait for buds.
Option A (organic): fish emulsion at label rate every 14 days for two feedings, then stop as buds form.
Option B (synthetic): a water-soluble fertilizer at 1/2 strength once every 10–14 days for two feedings, then pivot to bloom support.
Step 3: Buds, blooms, and fruit set (weeks 5–12): shift toward potassium
When you see buds, you want fewer “leaf pushes” and more fruiting energy. Choose a fertilizer with lower nitrogen and higher potassium (often sold as “tomato/pepper” or “bloom” formulas).
Timing: Start at first visible buds and continue every 2–3 weeks through heavy fruiting.
Calcium note: Calcium problems are usually watering problems first, but in containers (and in very sandy soil) calcium can be genuinely limited. A calcium-containing fertilizer or occasional calcium nitrate (used carefully) can help, but don’t treat calcium like a magic fix if watering is erratic.
Step 4: Heavy harvest (mid to late season): steady, not strong
Once plants are loaded, consistent feeding beats heavy doses. Overfeeding late can cause lush growth that attracts aphids and delays ripening.
- Keep a 14–21 day rhythm with a fruiting-focused fertilizer.
- If growth stalls and leaves lighten, add one mild balanced feeding, then return to bloom/fruit feed.
Comparison: Two Feeding Methods (With Real Numbers)
Most home gardeners fall into one of two camps: granular slow-release or liquid feeding. Both can work; the better choice depends on your watering habits and whether you grow in pots.
| Method | Typical application rate | How often | Best for | Common failure point |
|---|---|---|---|---|
| Granular slow-release (organic or coated) | About 1–2 tbsp per plant at planting; optional 1 tbsp side-dress | Every 6–8 weeks (or per label) | In-ground beds, gardeners who forget liquid feeding | Applied too close to stem; over-applied in rich soil → leafy plants, fewer peppers |
| Liquid feed (fish/seaweed or water-soluble fertilizer) | Mix at label rate; often best at 1/2 strength for peppers | Every 10–21 days depending on stage | Containers, raised beds, quick correction of deficiencies | Feeding dry soil → root stress; too much nitrogen early → blossom drop |
My take: In containers, liquid feeding wins because pots leach nutrients with frequent watering. In rich garden beds, a light granular foundation plus one or two liquid feeds at bud stage often outperforms weekly liquid feeding.
Three Real-World Pepper Feeding Scenarios (And What I’d Do)
Scenario 1: The “beautiful plant, no peppers” problem
What you see: Tall plants, dark green leaves, lots of branching, few flowers, or flowers drop. You’ve been feeding regularly with a balanced or high-nitrogen fertilizer.
What’s happening: Too much nitrogen and/or inconsistent moisture. The plant stays in vegetative mode.
What to do this week:
- Stop nitrogen-heavy feeding for 2–3 weeks.
- Switch to a fertilizer with lower N and higher K starting at first buds.
- Water evenly: target 1–1.5 inches/week and mulch 2–3 inches.
- If temperatures are above 90°F, provide light afternoon shade to improve fruit set.
Scenario 2: Container peppers that look hungry by July
What you see: Decent early growth, then yellowing lower leaves, small new leaves, slow fruiting. You water daily because it’s hot.
What’s happening: Nutrient leaching. Water runs through pots and carries soluble nutrients with it.
What to do:
- Start a “little-and-often” program: liquid feed at 1/2 strength every 7–10 days.
- Use a container that’s at least 5 gallons per plant (10 gallons is even better for big varieties).
- Top-dress with 1 inch compost and re-mulch to reduce evaporation.
Scenario 3: Plenty of peppers, but blossom-end rot shows up
What you see: Fruits form, then the bottom turns brown/black and leathery. Leaves may look fine.
What’s happening: Calcium isn’t reaching the fruit consistently—most often because watering swings interrupt calcium movement. This is widely noted in extension publications; consistent soil moisture is the first-line fix (for example, University of Minnesota Extension, 2022).
What to do:
- Stabilize watering: don’t let plants wilt; avoid flooding after drought.
- Mulch 2–3 inches.
- Avoid heavy ammonium nitrogen (it can compete with calcium uptake).
- If growing in containers, consider a fertilizer that includes calcium, applied at label rates, and keep the mix evenly moist.
Common Pepper Feeding Problems (Symptoms → Fixes)
Symptom: Leaves are very dark green, thick, and curled; few flowers
- Likely cause: Too much nitrogen, especially early.
- Fix: Pause feeding for 2 weeks, then resume with a lower-N, higher-K formula. Keep watering even.
Symptom: Pale leaves starting at the bottom; slow growth
- Likely cause: Nitrogen deficiency or leaching (common in containers); could also be cool soil.
- Fix: Feed once with a balanced fertilizer at 1/2 strength. Verify soil warmth (aim for 65°F+). In pots, move to a more sun-warmed spot and feed weekly.
Symptom: Purple-tinged leaves (especially in cool weather)
- Likely cause: Phosphorus uptake slowed by cold soil; sometimes a true deficiency in low-P soils.
- Fix: Warm the root zone (mulch after soil warms; consider black plastic early). Don’t overcorrect with heavy phosphorus unless a soil test shows low P.
Symptom: Flowers drop without setting fruit
- Likely cause: Heat stress (90–95°F), moisture swings, or excessive nitrogen.
- Fix: Water consistently, mulch, and pause nitrogen. If heat is intense, use 30% shade cloth for afternoon sun and wait for cooler nights.
Symptom: Leaves are green but fruit are small and slow to size up
- Likely cause: Potassium shortage, irregular water, or root restriction (small pot).
- Fix: Shift to a higher-K feed every 14–21 days. Ensure adequate container size (5+ gallons). Deep water instead of frequent sips.
Feeding Steps You Can Follow All Season (No Guesswork)
If you want a simple routine that works in most home gardens, use this as your baseline and adjust based on plant response.
In-ground or raised bed routine
- Pre-plant: Incorporate 1–2 inches compost into top 6–8 inches.
- At planting: Apply a small dose of balanced granular fertilizer (about 1–2 tbsp per plant, per label).
- Weeks 2–5: One light liquid feed if plants are pale; otherwise wait.
- At buds: Start bloom/fruit fertilizer every 2–3 weeks.
- During peak harvest: Keep the rhythm steady; don’t spike nitrogen.
Container routine (5–10 gallon pots)
- Potting mix: Use quality mix; blend in compost up to 20–25% by volume.
- At planting: Light granular slow-release (label rate) or skip and start liquids after 10–14 days.
- From week 2 onward: Liquid feed at 1/2 strength every 7–10 days.
- At buds: Switch to a lower-N, higher-K liquid feed; continue every 7–14 days.
- Watering: Water until a little drains out; don’t let the pot sit in a saucer of water.
Common Problems That Masquerade as “Needing Fertilizer”
Before you add more nutrients, rule these out. I’ve seen gardeners double their fertilizer when the real issue was temperature or pests—then the plants got worse.
Cold nights stall nutrient uptake
If nights drop below 55°F, peppers slow down. Don’t “push” them with more fertilizer. Use row cover or a sheltered spot, and keep soil evenly moist.
Root damage from overwatering
If soil is constantly soggy, roots can’t breathe. Symptoms look like deficiency: yellow leaves, droop, slow growth. Let the soil surface dry slightly between waterings, and improve drainage.
Aphids and mites steal plant energy
Sticky leaves, curled new growth, stippling, or fine webbing can mean pests. High nitrogen makes this worse by producing tender growth pests love. Rinse with water, use insecticidal soap if needed, and avoid high-N feeding until pests are controlled.
Harvest Habits That Encourage More Peppers
Feeding is half the story; harvest timing is the other half. If you let early fruits sit too long, some varieties slow down new flower production.
- Pick peppers when they reach usable size, even if green, to keep plants producing.
- During heavy set, support branches to prevent breakage—broken stems reduce future yield more than most nutrient issues.
- Remove the first few flowers on very small transplants to encourage stronger branching (especially for short-season climates).
If you want bigger harvests, think like the plant: steady water, warm roots, full sun, and nutrition that matches the growth stage. When peppers are fed gently but consistently—and nitrogen is kept on a short leash after the early growth phase—you’ll see the change fast: more flowers that stick, fruits that size up without stalling, and plants that keep producing until the weather finally cools them down.