How to Prevent Root Rot in Pollinator Gardens
The first time I realized my pollinator bed had root rot, it didn’t look dramatic. The coneflowers were still blooming, bees were still working the flowers—and yet whole clumps were “tired” by mid-morning, like they’d run a marathon in the night. A week later, a prized salvia pulled out of the ground with almost no resistance, and the roots smelled sour instead of earthy. That’s the trick with root rot: it often starts quietly, then wipes out plants fast—especially in beds built for continuous bloom and frequent watering.
Pollinator gardens are uniquely prone to root rot because we pack them with nectar plants, mulch them to keep weeds down, and water to keep blooms coming. Add a heavy rain spell, a poorly draining pocket of soil, or an overzealous drip line, and you’ve created the perfect “wet feet” situation where roots suffocate and pathogens move in.
Root rot isn’t one single disease. It’s a failure of oxygen at the root zone plus opportunistic pathogens (often water molds like Pythium and Phytophthora) that thrive in saturated soil. The good news: you can prevent most root rot with a few practical habits—better watering, smarter soil prep, and paying attention to microclimates in your own yard.
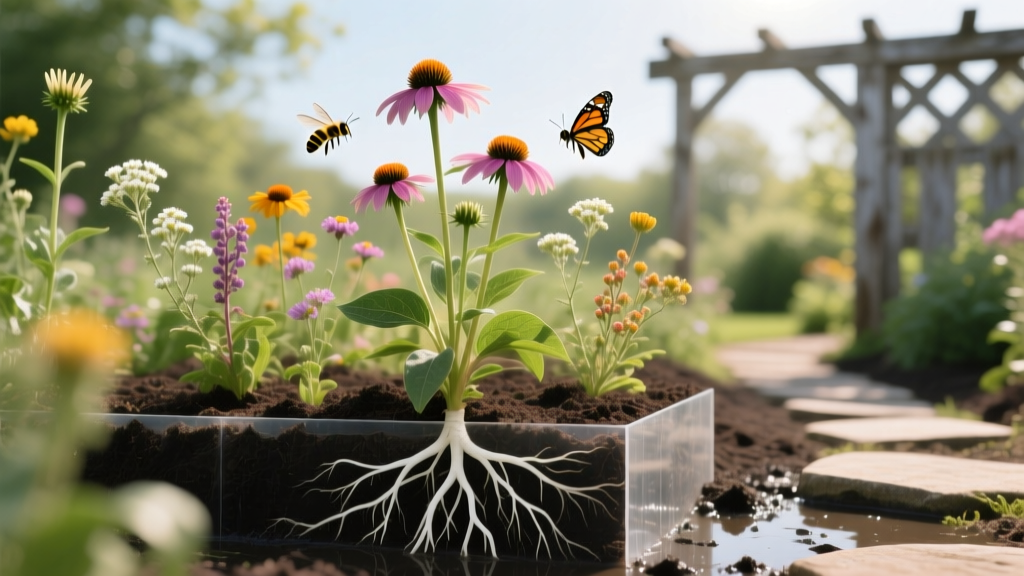
What Root Rot Looks Like in a Pollinator Bed (and Why It’s Different)
In mixed pollinator plantings, root rot rarely shows up as “one plant dies, end of story.” It tends to pop up in patches: a low spot where water sits, the end of a drip line, or a section with heavy clay. Because pollinator beds mix deep-rooted natives with thirstier ornamentals, you can accidentally water everything for the thirstiest plant and drown the rest.
Early warning signs you can spot without digging
- Plants wilting mid-day despite damp soil (a classic “roots can’t function” clue)
- Yellowing lower leaves that don’t perk up after watering
- Slow growth and smaller blooms compared to the rest of the bed
- Stems that darken at the base, especially on salvias, asters, and monarda
- Fungus gnats hovering near constantly moist mulch (more common in shaded beds)
What you’ll find when you do dig
- Roots are brown/black instead of creamy white
- Outer root tissue slips off easily, leaving a “stringy” core
- A sour, swampy odor
“Most root rot problems start with water management—soil stays saturated long enough that roots run out of oxygen, and pathogens take advantage.” — University of Minnesota Extension (2023)
Watering: Keep Roots Moist, Not Marinating
If I could fix only one thing in most pollinator gardens, it would be watering habits. Root rot isn’t usually about “too much water once.” It’s about soil staying wet for too many hours, too many days in a row.
How much to water (real numbers that work)
For most established pollinator perennials, aim for 1 inch of water per week total (rain + irrigation). In hot spells (over 90°F for multiple days), some beds may need 1.5 inches, but only if the soil drains well. If you’re watering more often than every 3–4 days in average summer weather, you should double-check drainage.
New plantings are different. For the first 2–3 weeks after planting, water more frequently to settle soil around roots—but still avoid daily soaking unless your soil is sandy. A good starting rhythm is:
- Days 1–7: water every 2–3 days if no rain, wetting the root zone 6–8 inches deep
- Weeks 2–3: every 3–4 days
- After week 3: shift toward weekly deep watering (or less if plants are drought-tolerant natives)
Timing matters more than people think
Water early. If foliage and mulch stay wet all night, you’re stacking the deck for disease. I like irrigation finishing by 9 a.m. If mornings are impossible, evening watering can work with drip lines (not sprinklers), but the goal stays the same: don’t keep the crown and root zone damp around the clock.
The “finger test” plus a trowel test
Don’t water because the surface looks dry. Mulch lies. Use a two-step check:
- Push your finger down 2 inches under the mulch. If it’s cool and moist, wait.
- Once a week, dig a small trowel hole 6 inches deep. If the soil is shiny, sticky, or smells sour, stop watering and improve drainage.
Comparison: Overhead watering vs drip (root rot risk and real usage)
I’ve run both systems in the same yard. Drip is usually safer for roots, but only if it’s not left on too long. Here’s how they stack up in real-world terms.
| Method | Typical run time to deliver ~0.5 inch (per 10 sq ft) | Where water ends up | Root rot risk | Best use case |
|---|---|---|---|---|
| Overhead sprinkler | 30–60 minutes (depends on output) | Leaves, crowns, soil surface | Medium–High (keeps crowns wet; encourages prolonged dampness) | Large beds with good airflow; morning-only watering |
| Soaker hose | 45–90 minutes | Soil surface under mulch | Medium (can over-saturate if left too long) | Established beds; quick retrofits |
| Drip line (0.5 GPH emitters) | 60–120 minutes (spacing dependent) | Targeted root zone | Low–Medium (low if scheduled correctly; high if daily) | Mixed plantings; water-sensitive crowns |
Comparison analysis with actual data: If you run a drip line with 0.5 GPH emitters for 120 minutes, that’s 1 gallon per emitter. With emitters every 12 inches, a 10-foot run delivers roughly 10 gallons to a narrow strip—great for deep watering, but too much if the soil is clay and you run it daily. Overhead watering for 45 minutes might only deliver 0.3–0.5 inch, but it also wets crowns and foliage, which increases disease pressure in dense pollinator plantings.
Soil and Drainage: The Root Rot Prevention You Only Do Once (If You Do It Right)
Root rot prevention starts before you plant. Pollinator gardens often get built on tough spots—old lawn, compacted construction soil, or low areas that collect runoff. If you skip soil prep, you’ll spend years “managing” problems that could have been solved with a shovel and a wheelbarrow.
Know what you’re working with: quick drainage test
Do this test in at least 3 spots across the bed (high, middle, low). Dig a hole 12 inches deep and wide. Fill it with water and let it drain once. Refill it and time the second drain.
- Good drainage: 1–2 inches per hour
- Borderline: less than 1 inch per hour
- Problem soil: water still standing after 4 hours
These benchmarks align with common extension guidance for infiltration and drainage assessment (North Carolina State Extension publication on soil drainage and site prep, 2022).
Fixes that actually work (and the ones that disappoint)
Works well:
- Raised beds or raised berms: Lift the planting area by 6–12 inches. You don’t need a framed bed; even a gentle mound improves oxygen around roots.
- Compost, used correctly: Mix 2–3 inches of compost into the top 8–10 inches of soil. This improves structure over time. Don’t just top-dress and hope it fixes a bathtub-shaped clay pocket.
- Decompaction: Broadfork or garden fork the bed before planting, especially if it was lawn. You’re creating air channels, not pulverizing soil.
Often disappoints:
- Adding sand to clay: This can create a cement-like mix unless you’re adding a lot (and most gardeners don’t).
- Gravel at the bottom of planting holes: It can create a perched water table effect, keeping roots wetter.
Mulch: friend, not swamp blanket
Mulch is great for pollinator beds—weed suppression, moisture buffering, and cooler soil. But too much mulch plus frequent watering is a root rot recipe. Keep mulch to 2–3 inches deep, and pull it back 2 inches from plant crowns so the base can breathe.
Light and Airflow: The Hidden Root Rot Lever
Root rot is a soil problem, but canopy conditions influence how fast soil dries. A densely planted pollinator garden in part shade can stay wet far longer than a sunny border—even with the same watering.
Sun exposure and drying speed
- Full sun (6+ hours): soil dries faster; overwatering is the main risk
- Part shade (3–5 hours): mulch stays damp; fungal pressure increases
- Bright shade: choose plants that tolerate evenly moist soil, and space them wider
Spacing guidelines that prevent “wet pockets”
If you pack plants too tightly, you create humid, slow-drying zones at soil level. A practical rule: plant so mature clumps barely touch, not overlap. For many pollinator staples, that means:
- Salvia: 18–24 inches apart
- Echinacea: 18–24 inches apart
- Monarda (bee balm): 24–30 inches apart (it gets dense)
- Milkweed (Asclepias tuberosa): 18–24 inches apart (hates wet feet)
Feeding and Fertilizer: Don’t Push Weak Roots
Heavy feeding doesn’t cause root rot directly, but it can make it worse. Lush, fast growth demands more oxygen and creates denser canopies that slow drying. In pollinator gardens, I prefer steady soil-building over high-nitrogen fertilizer.
A practical feeding approach
- Top-dress with 1 inch of compost in spring, around (not on) crowns.
- If plants are pale and truly need a boost, use a slow-release, balanced fertilizer at half the label rate once in late spring.
- Avoid frequent liquid feeds in midsummer unless you’re growing annuals in containers.
Also remember: too much fertilizer can increase soft growth that’s more susceptible to disease and stress. Extension recommendations commonly emphasize soil testing before fertilizing; see University of Minnesota Extension’s guidance on soil testing and fertilizer use (2024).
Common Root Rot Triggers in Pollinator Gardens
Most root rot outbreaks trace back to a handful of repeat offenders. If you identify which one is happening, the fix gets straightforward.
Trigger 1: The “low spot” that looks harmless
This is the classic case: a slight dip where water pools after storms. It may only be 1–2 inches lower than the rest of the bed, but it stays saturated longer.
- Fix: Lift that zone with a 6–12 inch berm, or redirect runoff with a shallow swale.
- Plant choice: Put moisture-tolerant pollinator plants there (see table below).
Trigger 2: Drip irrigation set-and-forget
Drip is efficient, which is exactly why it gets people in trouble. If it runs too often, soil never re-oxygenates.
- Fix: Change from “every day for 20 minutes” to “once every 5–7 days for longer,” then adjust. Roots want a wet-dry cycle.
- Reality check: After a rain of 1 inch, skip irrigation for several days—sometimes a full week in cool weather.
Trigger 3: Heavy mulch + shade + frequent watering
This combo creates chronically moist crowns. It’s common under trees or on the north side of a house.
- Fix: Reduce mulch to 2 inches, increase spacing, and water only when the top 2 inches under mulch are dry.
Plant Selection: Put the Right Pollinator Plants in the Right Moisture Zone
Some pollinator favorites tolerate moisture swings; others resent wet soil and rot quickly. Use that to your advantage by matching plants to microzones.
| Moisture zone | Better choices (more tolerant) | Riskier choices (prone to rot if wet) |
|---|---|---|
| Evenly moist, not soggy | Joe Pye weed (Eutrochium), swamp milkweed (Asclepias incarnata), blue vervain (Verbena hastata) | Lavender, Russian sage, Asclepias tuberosa |
| Average garden moisture | Echinacea, yarrow, coreopsis, asters (well-drained soil preferred but adaptable) | Plants with crowns that dislike wet mulch piled against them (many salvias) |
| Dry to droughty (well-drained) | Blanket flower (Gaillardia), penstemon, oregano, thyme | Moisture-lovers placed here will struggle and tempt you to overwater the whole bed |
Troubleshooting: Symptoms and What to Do This Week
When gardeners suspect root rot, they often respond by watering more. That’s understandable—wilting looks like thirst—but it’s the wrong move if roots are failing. Use symptoms to guide your next step.
Symptom: Wilting during the day, soil is damp
- What’s happening: Roots are oxygen-starved or rotting; plant can’t move water upward.
- Do this:
- Stop watering for 3–5 days (unless it’s extreme heat and sand).
- Pull mulch back from the crown.
- Check drainage with a trowel hole; if it’s saturated, plan a berm or regrade.
Symptom: Yellow leaves from the bottom up, slow growth
- What’s happening: Chronic wetness and nutrient uptake issues; sometimes mistaken for nitrogen deficiency.
- Do this:
- Check soil moisture at 6 inches deep.
- If wet, improve airflow and reduce irrigation frequency.
- If moisture is normal, consider a light compost top-dress rather than quick fertilizer.
Symptom: Stem base is dark, soft, or collapsing
- What’s happening: Crown rot often follows wet mulch against stems.
- Do this:
- Remove mulch from around the crown (leave a bare ring 2 inches wide).
- Trim away collapsed stems.
- Reduce irrigation; water farther from the crown so the base stays drier.
Symptom: Plant pulls up easily; roots are brown and smelly
- What’s happening: Advanced root rot.
- Do this:
- Remove the plant and as much of the decayed root material as practical.
- Do not compost severely rotted roots if you suspect water molds; dispose of them.
- Let the area dry; consider replanting with a moisture-tolerant species or rebuild the site as a berm.
Three Real-World Scenarios (and What Actually Fixed Them)
Here are three situations I see over and over, along with the fixes that stuck—not just for a week, but for seasons.
Scenario 1: A brand-new pollinator bed built on former lawn
What happened: The gardener sheet-mulched grass, planted plugs, and watered daily for “establishment.” The bed looked fine for a month, then salvias and echinacea started wilting. Under the cardboard layer, soil stayed wet like a sponge.
Fix that worked:
- Cut back irrigation to every 3–4 days for two weeks, then weekly.
- Punched aeration holes with a garden fork in the worst spots.
- Kept mulch to 2 inches and away from crowns.
Scenario 2: A low corner that floods after storms
What happened: After every 1–2 inch rain, a corner stayed wet for days. Butterfly weed repeatedly died there, while nearby plants were fine.
Fix that worked:
- Built a 10–12 inch berm with native soil mixed with compost.
- Moved butterfly weed to the berm and planted swamp milkweed in the low area.
- Redirected downspout splash with a stone splash pad and shallow channel.
Scenario 3: Drip irrigation installed for summer convenience
What happened: A timer ran drip lines for 15 minutes daily. The bed never dried, and crown rot showed up in dense monarda clumps.
Fix that worked:
- Reset timer to 60–90 minutes once per week, adjusting for rainfall.
- Checked soil moisture at 6 inches before each run.
- Divided and thinned monarda to improve airflow; replanted with 24–30 inch spacing.
Prevention Checklist: A Routine That Keeps You Out of Trouble
Root rot prevention isn’t complicated—it’s consistent. Here’s the routine I’d follow if I were maintaining your pollinator garden with you.
- Weekly: Check soil moisture 6 inches deep in at least two spots (high and low areas).
- After any heavy rain (1 inch+): Walk the bed and note puddles or soggy mulch; mark those spots for berming or regrading.
- Monthly: Pull mulch back from crowns and refresh to 2–3 inches total depth.
- Each spring: Top-dress with 1 inch compost; avoid piling against stems.
- Each time you add plants: Do a quick drainage check in that spot before you commit.
One last note: don’t be too quick to blame yourself when root rot happens. Sometimes it’s a weather pattern—two weeks of cool rain, nights in the 50–60°F range, and soil that never warms enough to dry. In those stretches, the best gardeners I know don’t “fix” the garden by fussing more. They pause irrigation, open up airflow, and let the soil breathe again.
If you build drainage into the bed, water deeply but less often, and match plants to moisture zones, your pollinator garden can be both lush and long-lived—without the heartbreaking moment of pulling up a plant and finding nothing but mush where roots should be.
Sources: University of Minnesota Extension (2023); University of Minnesota Extension soil testing and fertilizer guidance (2024); North Carolina State Extension soil drainage and site preparation publication (2022).