Air Layering Agave for Guaranteed Roots
You’ve waited months for an agave pup to size up, finally cut it free, set it in gritty mix… and two weeks later it’s soft at the base like a bruised peach. No roots, just rot. I’ve watched tough-as-nails agaves fail like this more times than I care to admit—especially after a wet spell, a heavy-handed watering, or a cut that never truly callused. Air layering is the workaround that feels almost unfair: you coax roots before you separate the plant, so the new piece has a working root system on day one. Done right, it’s as close to “guaranteed roots” as succulent propagation gets.
This method isn’t just for collectors. It’s for any home gardener who wants a safer way to multiply a favorite agave, rescue a leaning plant with a stretched stem, or make a clean new start from a damaged rosette. I’ll walk you through the exact steps, plus the ongoing care (water, soil, light, feeding) and the real-life problems that pop up in backyards.
When air layering beats cutting pups (and when it doesn’t)
Air layering works because you’re keeping the future plant attached to its water-and-sugar pipeline while it builds roots. That’s a big deal with agaves, which store water but still hate being forced to root while dehydrating. This is especially useful for:
- Stemmy or “palm-like” agaves (rosette perched on a trunk) where you want to re-root the top.
- Agaves that rarely pup (many solitary species) where offsets aren’t an option.
- Cold-climate gardeners who need a high success rate during a short warm season.
- Plants with basal rot risk—you can root above questionable tissue.
When it’s not ideal: very small plants (not enough stored energy), plants already severely dehydrated, or situations where you can’t keep the air-layer medium evenly moist. If you can’t check it weekly, postpone.
Tools and materials (keep it simple, keep it clean)
Gather everything first. Once you start, you want clean, fast work.
- Sharp knife or grafting blade
- 70% isopropyl alcohol for sterilizing
- Long-fiber sphagnum moss (or coco fiber as a backup)
- Plastic wrap or a small clear nursery bag
- Twist ties, grafting tape, or zip ties
- Optional: rooting hormone (IBA powder or gel)
- Optional: sulfur or cinnamon (light dusting on exposed tissue)
As a sanitation baseline, I follow the same principle promoted for vegetative propagation: clean tools and clean media prevent a lot of heartbreak. The University of Florida IFAS Extension has repeatedly emphasized sanitation as a core disease-prevention tool in plant propagation work (UF/IFAS Extension publication, 2018).
Air layering agave: step-by-step (the method that actually works)
The goal is to encourage roots at a chosen point on the stem or base, then cut below once roots are established.
Best timing
Start when the plant is actively growing and temperatures are reliably warm. In most home gardens, that’s late spring through summer.
- Ideal temperature range: 70–90°F (21–32°C)
- Avoid: weeks that are consistently under 60°F (16°C) or periods of heavy, cold rain
1) Choose the layering point
Pick a spot on the stem (or just above the base) where you want new roots. On a trunked agave, I often choose a point 3–6 inches below the rosette. On a leaning plant, choose a point that will give you a stable, upright new start.
2) Make the wound (and why it matters)
- Sterilize your blade with alcohol.
- Make a shallow ring cut around the stem or a wide “window” cut (think: removing a strip of outer tissue) about 1/4–1/2 inch tall.
- Scrape lightly to remove the slick, green cambium-like layer so it can’t just “heal over” without rooting.
This is the pivot point: if the wound seals too quickly, you get a scar and no roots. If it’s too deep and wet, you invite rot. Aim for firm, clean tissue with minimal oozing.
3) Apply optional rooting hormone
Lightly dust or dab IBA rooting hormone on the wound. Don’t cake it on. Excess hormone can irritate tissue and encourage rot in a constantly moist wrap.
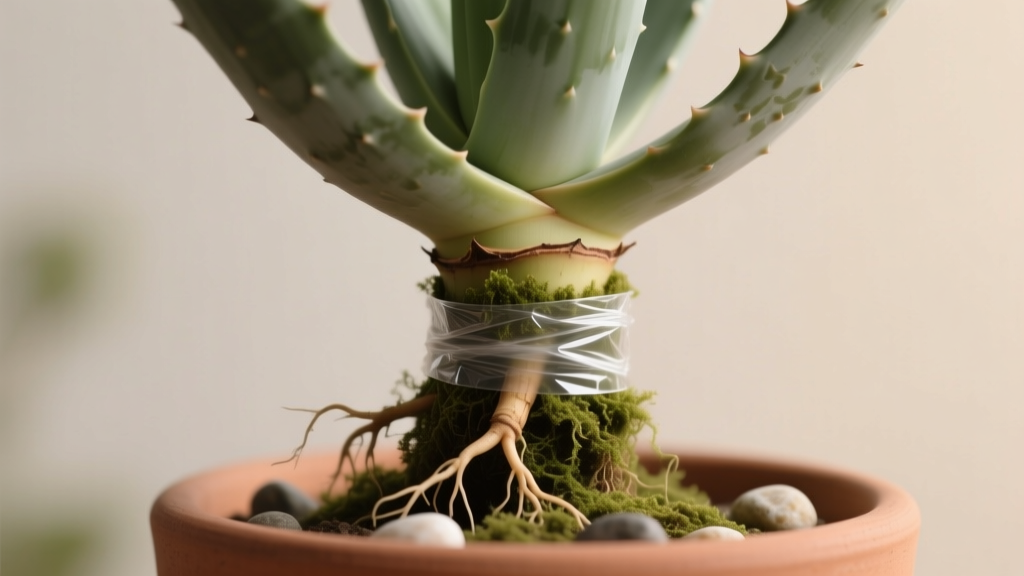
4) Pack moist sphagnum around the wound
Soak sphagnum moss, then wring it out hard. It should feel like a damp sponge, not a dripping rag.
- Amount: a handful is usually enough; you want a 1–2 inch thick layer around the wound.
- Press it snugly so it contacts the wound on all sides.
5) Wrap and seal
- Wrap the moss with plastic wrap or slip on a clear nursery bag.
- Seal the top and bottom with twist ties/zip ties so moisture stays in.
- If the plant is in full sun, add a loose outer layer of aluminum foil or shade cloth to prevent cooking the moss.
What you’re building is a mini greenhouse. It should stay humid, but not swampy.
6) Monitor weekly (this is where “guaranteed” happens)
Check every 7–10 days:
- If the moss is drying, mist it lightly and reseal.
- If it smells sour or looks slimy, open it up, replace moss, and let the wound air for 30–60 minutes before rewrapping.
Rooting time varies by species and conditions, but I commonly see roots in 4–8 weeks in warm weather. Some take 10–12 weeks.
“Most propagation failures come down to moisture management: too wet for too long, or too dry too often.” — Horticulture educator guidance summarized from Cooperative Extension propagation recommendations (e.g., NC State Extension, 2020)
7) Sever and pot up at the right moment
Wait until you can see multiple roots and at least a few are 1–2 inches long. Then:
- Cut the stem 1–2 inches below the rooted zone with a sterilized blade.
- Remove wrap and moss gently (you can leave a little moss if roots are tangled; don’t rip).
- Let the cut base dry and callus in shade with airflow for 2–4 days (longer in humid climates).
- Pot into a fast-draining mix (details below).
Air layering vs pups vs beheading: real data comparison
Here’s how the three common agave propagation approaches shake out in typical home-garden conditions. These are realistic ranges based on observed home propagation outcomes and timing, not lab-perfect results.
| Method | Typical rooting time | Estimated success rate (home garden) | Rot risk | Best use case |
|---|---|---|---|---|
| Air layering | 4–12 weeks (before separation) | 80–95% | Low–Medium (if wrap stays too wet) | Solitary agaves, trunked plants, high-value specimens |
| Removing pups/offsets | 2–8 weeks (after separation) | 60–90% | Medium (fresh cuts + overwatering) | Pupping species, quick multiplication |
| Beheading/top-cutting without air layer | 6–16+ weeks (after separation) | 40–70% | Medium–High | Rescuing a rosette, emergency salvage |
If you’re working in a climate with summer humidity, air layering often outperforms beheading because the plant stays hydrated while it does the slow work of root initiation.
Soil: the mix that keeps new roots alive
Once you sever and pot, the plant has new, tender roots that can rot fast in heavy soil. Use a gritty, fast-draining blend.
My reliable potting recipe
- 50% pumice (or perlite if pumice isn’t available)
- 25% coarse sand or fine gravel
- 25% cactus/succulent potting mix (or screened compost-based mix)
If you’re planting in-ground, mound the soil 3–6 inches above grade and cut native clay with mineral grit. Agaves tolerate lean soil; they don’t tolerate wet feet.
Light: avoid the two classic mistakes
Light is where gardeners swing too hard in either direction—full sun immediately (sunburn) or deep shade (weak rooting and stretch).
- While the air layer is wrapped: bright light is fine, but avoid reflected heat that can cook the wrap. If temps hit 95°F (35°C) regularly, shade the wrap midday.
- After potting: give 7–14 days of bright shade or morning sun only, then step up to full sun over another 2–3 weeks.
New roots function best when the top isn’t losing water faster than the roots can replace it. That’s why gradual reintroduction to sun matters.
Watering: the rule is “less, but not never”
Water management is the difference between a rooted new agave and a mushy disappointment.
During air layering
You’re not watering the plant through the wrap; you’re keeping the moss slightly moist so roots can form.
- Check every 7–10 days.
- If moss is barely damp, mist until evenly moist (not dripping), then reseal.
- If you see condensation constantly pooling, open the top for 1–2 hours to vent, then reseal.
After potting the separated layer
Let the cut end callus first (don’t skip this), then water like this:
- Day 1 (potting day): pot into dry mix.
- Day 3–7: first light watering—just enough to settle dust and slightly moisten the root zone (in a 10-inch pot, that might be 1–2 cups).
- After that: water deeply, then let the mix dry out almost completely. In warm weather this is often every 10–21 days; in cooler weather every 3–5 weeks.
As a reference point, extension guidance for succulents consistently stresses drainage and drying between irrigations to prevent root disease (University of California Agriculture and Natural Resources, 2022).
Feeding: light fertilizer, timed right
Agaves aren’t heavy feeders, and fresh roots are easy to burn.
- Wait 4–6 weeks after potting before fertilizing.
- Use a balanced fertilizer at 1/4 strength (for example, a 10-10-10 or similar).
- Feed only during active growth (warm months). Skip feeding if nighttime temps are consistently below 55°F (13°C).
If you prefer slow-release granules, use a small dose (follow label for container size, then cut it in half). Overfeeding produces soft growth that’s more prone to pests and rot.
Common problems (and how to fix them fast)
Problem: The wrapped moss turns slimy or smells sour
- Symptom: anaerobic stink, blackened moss, mushy tissue around the wound.
- Cause: too wet + too warm + no airflow.
- Fix: unwrap, remove moss, let the wound air-dry 30–60 minutes, dust lightly with sulfur, repack with wrung-out moss, and reseal with a small vent hole.
Problem: No roots after 8–10 weeks
- Symptom: wound has callused smooth; no white root nubs.
- Cause: wound healed over; temps too cool; moss dried repeatedly.
- Fix: reopen the area and gently re-scrape the surface to expose fresh tissue, reapply a tiny amount of rooting hormone, repack. If temps are below 65°F (18°C) most days, wait for warmer weather.
Problem: Leaves wrinkle and soften while still attached
- Symptom: rosette looks thirsty even though it’s still on the mother plant.
- Cause: you girdled too aggressively, restricting flow; or the mother plant is under-watered in extreme heat.
- Fix: If girdle is deep and the plant is collapsing, remove the wrap and consider finishing as a beheading (let callus, then root in dry mix). If mother plant is dehydrated and it’s hot (above 90°F/32°C), water the mother plant deeply and provide temporary shade.
Problem: Sunburn on the rosette after potting
- Symptom: bleached patches, tan scarring on sun-facing leaves.
- Cause: moved from shade/humidity to full sun too quickly.
- Fix: move to bright shade for 10–14 days, then reintroduce morning sun gradually. Sunburn scars won’t heal, but new growth will be normal.
Problem: Fungus gnats in the wrap or pot
- Symptom: tiny black flies around moist moss or soil.
- Cause: media staying wet too long; organic-rich mix.
- Fix: let media dry more between misting/watering; switch to a grittier mix; use yellow sticky traps. In severe cases, a BTi drench can help, but drying is the real cure.
Three real-world scenarios (and how I’d handle each)
Scenario 1: The “leaning blue agave” in a windy yard
You’ve got a large blue agave (often Agave tequilana or a similar landscape type) that’s starting to tip, exposing stem. Staking helps, but the base is unstable.
- Plan: Air layer 4 inches below the rosette where the stem is still firm.
- Timing: Start once nights stay above 60°F (16°C).
- After rooting: Sever, callus 3 days, pot into gritty mix in a wide, heavy container to prevent toppling.
This turns a liability into a reset plant with a centered root system.
Scenario 2: Humid-summer gardener battling rot
If you garden where summer humidity stays high, pups and cuttings can rot before they root.
- Plan: Air layer with extra attention to moisture—wring sphagnum hard, then add a small vent hole near the top of the wrap.
- Check interval: every 5–7 days instead of weekly.
- Potting: use a more mineral mix (up to 70% pumice/grit).
In humid climates, the “guarantee” comes from keeping things barely moist—not lush and wet.
Scenario 3: Cold-climate patio grower with a short season
If you’ve got maybe 3–4 warm months, you can’t afford a slow rooting start after separation.
- Plan: Air layer early—late spring—so roots are ready by mid-summer.
- Temperature target: keep the plant where it stays at least 70°F (21°C) most days (a warm wall helps).
- After potting: hold off on heavy watering as days shorten; aim for dry-ish overwintering with temps above 45°F (7°C) if possible.
This is one of the best uses of air layering: you “bank” roots while the plant is still strong, then separate only when the new plant can actually support itself.
Pest and disease watch: what shows up on stressed agaves
Agave snout weevil (serious in some regions)
In areas where agave snout weevil is present, stressed or wounded plants can be more vulnerable. Symptoms include sudden collapse, oozing at the base, and a foul smell. If you suspect weevil activity:
- Don’t compost infected material.
- Remove and dispose of severely affected plants promptly.
- Minimize unnecessary wounding during peak pest activity.
Local extension offices often track regional pest pressure and recommended controls; it’s worth checking your county guidance.
Root and crown rot
The pattern is predictable: rich soil + frequent watering + cool temps. Keep your mix mineral, let it dry, and don’t water on a schedule—water based on dryness.
Little tricks that boost success
- Mark the date on the wrap with a permanent marker. Memory lies; dates don’t.
- Use clear wrap so you can spot root growth without disturbing the setup.
- Stabilize the plant if it wobbles—movement breaks new roots.
- Don’t rush the cut: wait until you see multiple healthy roots, not just one nub.
- After severing, don’t “test” the roots by tugging. If it’s rooting, let it root.
Air layering agave feels like cheating the first time you do it—roots appear where you used to get nothing but a dried stump. Once you’ve watched a freshly separated rosette settle into gritty soil with a real root system already working, it’s hard to go back to gambling on bare cuttings. Keep the wrap barely moist, keep the temperatures warm, and give the new plant a slow ramp back into sun and water. The payoff is an agave that acts established from the start—because, in the only way that matters, it is.