DIY Drip Irrigation from Recycled Bottles
The most common bottle-drip mistake isn’t the hole size—it’s placement. People poke a few holes, bury the bottle, and assume the plant will “sip” as needed… then wonder why the soil is soggy right by the stem but bone-dry 8 inches away where the feeder roots actually live.
Bottle drip irrigation can be ridiculously effective, but only when you build it like a tiny, targeted delivery system. Below are field-tested tips (the kind you only learn after watching plants sulk) to make recycled bottles water like a pro setup—without buying a full drip kit.
Group 1: Build the Bottle Drip Right (So It Doesn’t Fail in 48 Hours)
Tip: Match bottle size to plant size (don’t overbuild)
A 2-liter bottle is great for tomatoes, peppers, and squash because it holds enough water to matter; a 500 mL bottle is plenty for herbs and small pots. As a quick rule, plan on 1 liter for a medium plant over 1–2 hot days, then adjust after you check moisture 4 inches down. Example: one 2-liter bottle per tomato can carry you through a weekend if it’s set up to drain over 24–48 hours.
Tip: Put the drip zone at the roots, not at the stem
Most vegetable feeder roots sit a few inches out from the main stem, so place the bottle 4–6 inches away for small plants and 6–10 inches away for larger ones like tomatoes. Bury the bottle so the holes sit 3–5 inches below the soil surface—deep enough to avoid evaporation and shallow enough to still wet the root zone. Example: for a 5-gallon tomato, sink the bottle near the pot’s sidewall, not in the center.
Tip: Make the holes tiny—and make more than one
One big hole empties the bottle fast and erodes soil into the opening; several micro-holes release slowly and resist clogging. Start with 2–4 holes made using a hot needle or a 1/16-inch drill bit, placed around the lower third of the bottle. Example: if your bottle drains in under 6 hours, plug one hole with a toothpick and retest; if it’s still full after 36 hours, add one hole.
Tip: Add an air vent up top so the flow doesn’t “glug”
Without a vent, bottles often alternate between no flow and sudden gushes, which makes wet/dry swings worse. Poke one small pinhole in the cap (or leave the cap slightly loosened) to let air in smoothly. Example: for raised beds, a vented cap keeps the drip consistent even when the soil settles after a watering.
Tip: Use a simple filter if you’re using rain barrel water
Algae bits and sediment clog tiny holes faster than you’d think—especially with warm, stored water. Slip a small square of old T-shirt fabric over the bottle opening before screwing on the cap (like a tiny pre-filter), or pour water through a kitchen strainer. Example: if you fill from a rain barrel, filtering can turn “clogs every week” into “clogs once a month.”
Group 2: Dial In the Drip Rate (So You’re Not Guessing)
Tip: Calibrate with a 30-minute test before you bury anything
Fill the bottle, set it on soil, and time the drop in water level for 30 minutes. If it loses about 1/8 of its volume in 30 minutes, you’re roughly on track for a 4-hour drain; if you want a 24-hour drain, you need much smaller flow (think barely moving). Example: a 2-liter bottle dropping 250 mL in 30 minutes is far too fast for most beds—shrink holes or add fewer.
Tip: Use soil type to choose your “speed”
Sandy soil drinks fast and spreads less sideways, so you can use slightly faster drip (more holes) and place bottles a bit closer. Clay holds water and spreads more; it’s better with slower drip and fewer holes to avoid waterlogging. Research from Colorado State University Extension (2020) notes that soil texture strongly influences water infiltration and movement—meaning your drip rate should change with your soil, not just the weather.
Tip: Control speed with a cheap “needle valve” hack (no special parts)
If you want adjustable flow, poke one hole and insert a short cotton wick (like a strip cut from an old T-shirt, about 1/4 inch wide). The wick acts like a metering device: thicker wick = faster flow, thinner wick = slower. Example: in a balcony planter, a wick-fed bottle can keep basil evenly moist without the boom-and-bust cycle of bigger holes.
Tip: Aim to wet 6–8 inches wide, not just a wet spot
After the bottle runs for a day, dig a small test hole 4 inches from the bottle and 4 inches deep. If it’s dry there, your water is staying too localized—add a second bottle on the other side of the plant or switch to a shallow trench + bottle method. Example: for zucchini in a 3x6 bed, two 2-liter bottles spaced 12 inches apart usually beats one bottle trying to do it all.
Tip: Refill timing beats refilling volume
Refilling “whenever you remember” creates stress cycles; plants prefer consistent moisture. Pick a schedule: every morning during heat waves, every 2–3 days in mild weather, or after you verify soil moisture is dry at 2–3 inches down. University of California Agriculture and Natural Resources emphasizes that drip irrigation improves efficiency by applying water to the root zone with minimal evaporation when managed properly (UC ANR, 2017).
Group 3: Setups That Actually Work (Choose One That Fits Your Garden)
| Method | Best for | How long it lasts per fill | Build difficulty | Common failure |
|---|---|---|---|---|
| Buried perforated bottle | In-ground veggies, raised beds | 12–48 hours (typical) | Easy | Clogging from soil/sediment |
| Inverted bottle + wick | Pots, planters, balcony gardens | 24–72 hours | Easy-medium | Wick dries out if not seated well |
| Bottle reservoir + microtube (DIY) | Multiple plants in a row | 1–3 days (depends on bottle size) | Medium | Leaks at tubing connection |
Tip: For raised beds, use the “buried bottle + mulch” combo
Mulch isn’t optional here—bare soil will steal your gains through evaporation. Bury the bottle, then add 2–3 inches of straw, shredded leaves, or wood chips around the plant (keeping mulch 1–2 inches away from the stem). Example: in a 4x8 bed, mulched bottle-drip setups often let you skip a full-bed watering that would otherwise take 10–15 gallons.
Tip: For containers, elevate the bottle and use a wick (it’s cleaner)
Burying bottles in pots steals root space and can make soggy pockets. Instead, hang or stake a 1-liter bottle just above the soil line, poke a tiny hole in the cap, and run a cotton wick from the bottle into the soil 2–3 inches deep. Example: a 12-inch patio pot with a pepper plant can cruise through a hot day on a wick setup without water pouring out the drainage holes.
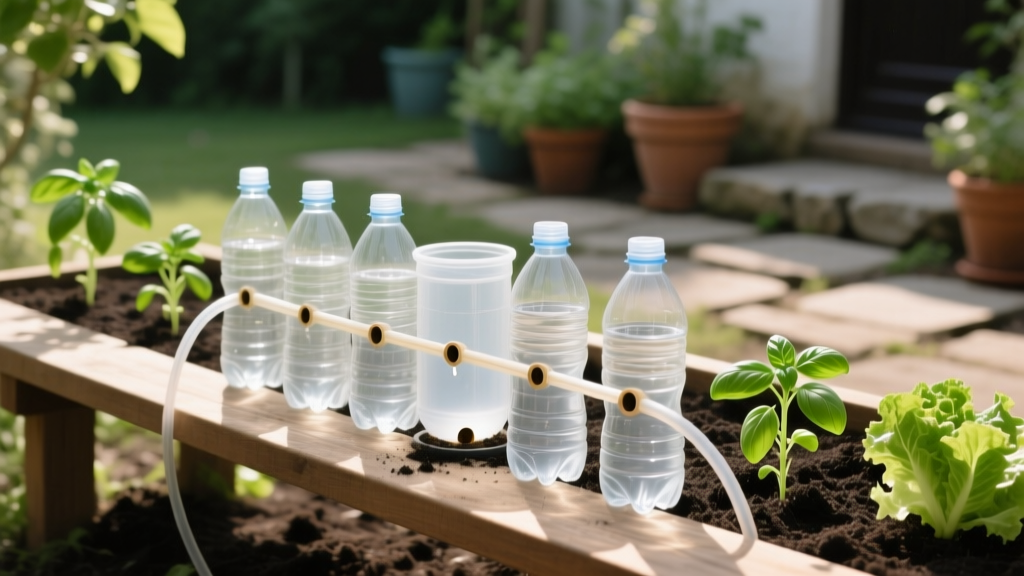
Tip: For rows of plants, make a “bottle header tank” with microtubing
Save a 2-liter bottle for every 2–3 plants, then run 1/8-inch microtubing (often $6–$10 for a small roll) from a hole near the bottle bottom to the base of each plant. Seal around the tubing with silicone or a snug rubber grommet; let it cure 24 hours before filling. Example: for a row of lettuce, a single bottle can feed three plants evenly if the tubing lengths are similar.
Tip: Use the “double bottle sleeve” to prevent soil collapse into holes
If your soil is fluffy or sandy, it can pack into the holes and stop flow. Slide your perforated bottle inside a second bottle with the bottom cut off, leaving a small air gap as a protective sleeve. Example: gardeners in very loose raised-bed mixes find this keeps the drip rate stable for weeks instead of days.
Group 4: Clog-Proofing, Critter-Proofing, and Staying Sane
Tip: Keep holes off the very bottom to avoid sediment jams
When you refill, tiny bits sink. If the holes are at the absolute bottom, they’ll plug first; place them 1–2 inches up instead. Example: this small shift can turn a bottle that needs “daily fiddling” into one that runs hands-off for a week.
Tip: Mark a “refill line” so you can track consumption
Use a permanent marker to draw lines at 250 mL intervals (or simple quarter marks on a 2-liter bottle). This makes it obvious whether your system is draining too fast or not at all. Example: if your tomato bottle only drops to the first line after a full day in 90°F heat, you likely need another hole or a second bottle.
Tip: Cap it against mosquitoes (especially in humid areas)
Open water is a mosquito invitation. Always keep bottles capped, and if you must leave an opening for filling, cover it with fine mesh (like window screen) secured with a rubber band. Example: this is non-negotiable if you’re using bottles near a porch or seating area.
Tip: Anchor bottles so wind and pets don’t pull them out
Half-buried bottles can “walk” out of the soil as you refill and bump them. Push a bamboo stake alongside and zip-tie the bottle loosely, or bury the bottle a bit deeper and mound soil around it. Example: in a community garden, this prevents the dreaded scenario where someone’s foot catches a bottle and your plant loses its water source for days.
Tip: Flush monthly with clean water (it’s faster than troubleshooting)
Once every 3–4 weeks, pull bottles, rinse, and run clean water through the holes from the inside out. If you use fertilizer in bottles (more on that below), do it every 2 weeks. Example: a 10-minute flush routine beats discovering your cucumbers got half the water you thought for the last week.
“Drip irrigation is most efficient when it applies water slowly enough for the soil to absorb it and places water where roots can access it.” — University of California Agriculture and Natural Resources (2017)
Group 5: Real-World Scenarios (So You Can Copy a Setup That’s Already Been Tested)
Scenario: Weekend watering for a tomato patch (2 days away)
Use two 2-liter bottles per large tomato, placed 8 inches from the stem on opposite sides, with 3 micro-holes each (1/16 inch). Bury so holes sit 4 inches deep, then mulch 2–3 inches thick. Cost: basically $0 if you’re reusing bottles; compare that to a $25–$60 starter drip kit if you don’t already have one.
Scenario: Balcony herb planters that dry out by noon
Go with a 500 mL or 1-liter bottle per planter, inverted and wick-fed. Use a 6–8 inch long cotton strip; insert 2 inches into the bottle and 3–4 inches into the soil, then keep the bottle shaded (sun heats water and increases flow). Example: basil and cilantro stop bolting as fast when moisture swings are reduced—especially in shallow planters.
Scenario: New transplants in a heat wave (first 10 days)
Transplants need consistent moisture while roots expand, but too much water at the stem can invite rot. Place a 1-liter bottle 6 inches away, with 2 tiny holes, and refill every morning for the first 3 days; after that, check soil at 3 inches deep and refill every 1–2 days as needed. Example: peppers often stall after transplanting—steady bottle drip helps them keep growing instead of “pausing” for a week.
Scenario: Vacation backup for a mixed raised bed
Don’t try to perfectly water everything with one strategy. Put bottle drip on the thirstiest plants (tomatoes, cucumbers, squash) and let tougher crops (sage, rosemary, established onions) ride it out with deep watering before you leave. Example: a bed with 6 big plants might use 8–10 bottles total, which is still cheaper than setting up a timer-and-hose system if you only need it occasionally.
Group 6: Smart Upgrades (Optional, But They Make Bottle Drip Feel “Legit”)
Tip: Add a mulch basin to spread water sideways
Dig a shallow donut-shaped trench around the plant—about 1 inch deep and 8–12 inches wide—then lay mulch in it. This encourages lateral movement of moisture from the bottle instead of a tight wet column. Example: this trick is especially helpful in sandy beds where water wants to go straight down.
Tip: Use bottle drip to deliver diluted fertilizer safely
If you fertilize through the bottle, go gentle: a common safe starting point is 1/4 strength liquid fertilizer, then observe for leaf burn. Never pour full-strength fertilizer into a bottle dripper—the localized concentration can damage roots. Example: for container tomatoes, a mild feed every 7–10 days through the bottle can keep growth steady without the “feast then crash” pattern.
Tip: Paint bottles or sleeve them to reduce algae growth
Sunlight plus water equals algae, which can clog holes and smell funky. Wrap bottles in an old sock, paint them, or slide them into a cardboard sleeve to block light. Example: a black-sleeved bottle stays clearer longer, especially if it sits above soil in a container setup.
Tip: If you’re scaling up, know when a real drip line is cheaper
Bottles are perfect for small gardens and spot-watering, but if you’re irrigating a 20-foot row, the time spent refilling can outweigh the savings. A basic 50-foot drip line plus fittings can run $20–$40, and once it’s set, you can water the whole row in minutes. Example: many gardeners start with bottles to learn their plants’ water needs, then upgrade to drip line for the long haul.
Group 7: Quick Troubleshooting (Fix It in 2 Minutes)
Tip: If the bottle drains too fast, don’t redo it—plug it
Use toothpicks, hot glue, or a tiny dab of silicone to close one or more holes. Then retest with a 1-hour observation so you’re not guessing. Example: this is faster than making a new bottle when you realize your setup empties before lunchtime.
Tip: If the bottle won’t drain, check for vacuum lock first
A sealed cap with no vent can stop flow completely. Add a pinhole vent at the top or loosen the cap a quarter turn and see if it starts dripping. Example: gardeners often assume “clog,” but the real issue is the bottle can’t breathe.
Tip: If soil stays wet but plants still wilt, you may be watering the wrong place
Wilting with wet soil can happen when water sits near the stem while outer roots stay dry—or when roots are stressed from poor oxygen. Move the bottle 3–4 inches farther out, slow the drip slightly, and check moisture 6 inches from the stem the next day. Example: this fix is common with tomatoes planted deep; their active roots spread outward, not right under the stem.
Bottle drip irrigation is one of those rare garden hacks that scales from “one sad porch pot” to “a whole raised bed,” and the learning curve is mostly about dialing in flow and placement. Start with one plant, test for 24 hours, then copy the setup across the garden once you see a steady wet zone forming where the roots actually are.
If you keep a couple of pre-punched bottles in the shed, you’ll also have an instant rescue tool for heat spikes, new transplants, and the weeks when life gets busy—without dragging hoses around or watching water evaporate off the soil surface.
Sources: Colorado State University Extension (2020), guidance on soil texture and water movement/infiltration; University of California Agriculture and Natural Resources (UC ANR) (2017), drip irrigation efficiency and root-zone watering principles.