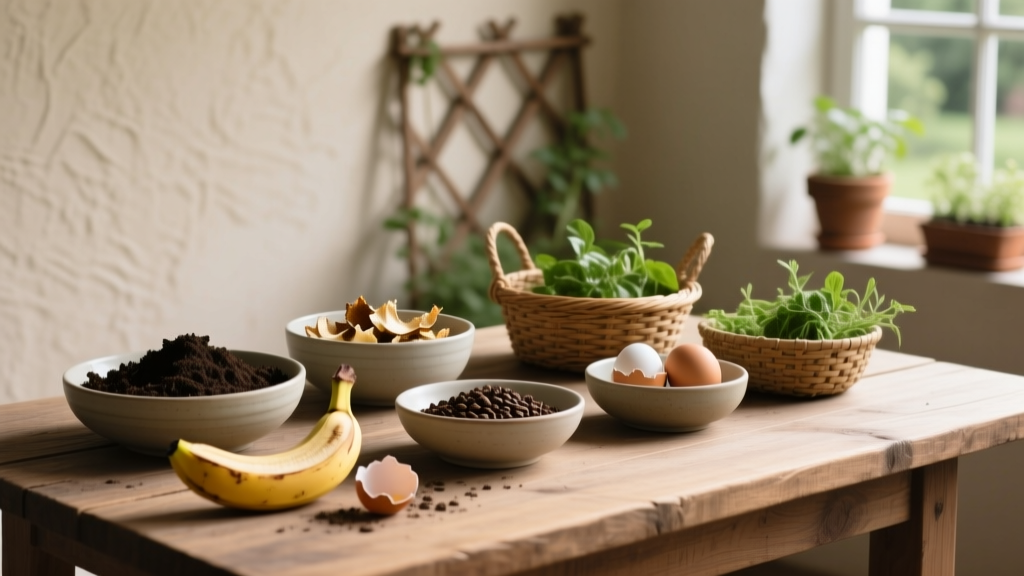
Making Your Own Organic Fertilizer Blends
The most expensive “organic fertilizer” mistake is thinking organic automatically means gentle. Plenty of DIY mixes can burn seedlings, lock up nutrients, or feed your soil microbes while your tomatoes sit there hungry—especially when you dump in “a little extra” of a high-nitrogen ingredient like blood meal or fresh manure.
The shortcut is to blend with a purpose: match the job (leafy growth, flowering/fruiting, transplant recovery, container gardening) and keep the math simple. Below are field-tested tips that make DIY blends predictable, cheap, and easy to repeat.
Start With the Boring Stuff That Saves Your Plants
Tip: Stop guessing—do a basic soil test every 2–3 years
If you only do one “pro” thing, do this. A $15–$30 lab soil test tells you if you’re actually low in phosphorus or potassium, or if you just think you are because plants look slow. Many gardens already have plenty of P, and adding more can be wasted money and contribute to runoff issues.
Example: If a test shows high phosphorus, skip bone meal in your blend and focus on nitrogen plus potassium (like alfalfa meal + kelp meal). The University of Minnesota Extension emphasizes testing to avoid unnecessary fertilization and nutrient loss (University of Minnesota Extension, 2020).
Tip: Know what “N-P-K” really means when you blend ingredients
N-P-K on a bag is percent by weight. A 5-1-2 blend means 5% nitrogen, 1% phosphate, 2% potash. When you mix equal parts of two products, you’re averaging their numbers—so blending is mostly simple math, not mystery.
Example: Mix 2 cups alfalfa meal (about 2.5-0.5-2) with 1 cup blood meal (about 12-0-0) to boost nitrogen without raising phosphorus much.
Tip: Use a “base + boosters” method so you can tweak fast
Instead of reinventing your blend each season, build a neutral base and add small boosters for the crop. A practical base is something like compost + a mild dry fertilizer, then you adjust N or K depending on what you’re growing. This prevents the classic DIY problem: a complicated recipe you’ll never repeat the same way twice.
Example: Keep a 5-gallon bucket of base mix ready, then add 1–2 cups kelp meal when you’re feeding fruiting plants, or 1 cup blood meal when greens need a push.
Build Reliable DIY Blends (Dry Mixes)
Tip: Use this simple all-purpose “garden bed” blend (per 5-gallon bucket)
For a general-purpose dry mix that won’t be too hot, combine: 8 quarts finished compost, 4 cups alfalfa meal, 2 cups kelp meal, and 2 cups rock phosphate or bone meal only if your soil test shows low P. Mix thoroughly and store dry. Apply 1–2 cups per 10 sq ft at planting, scratching it into the top 1–2 inches.
Example: In a 4x8 raised bed (32 sq ft), that’s about 3–6 cups total. If you’re growing leafy greens, stick to the low end so you don’t push excessive soft growth.
Tip: Make a “leafy greens booster” that works in cool weather
Leafy crops often stall in spring because nitrogen mineralization is slower in cool soil. A targeted booster helps: mix 3 parts alfalfa meal with 1 part blood meal. Apply 1 tablespoon per plant for lettuce/brassicas, or 1/4 cup per 10 sq ft for dense plantings, then water in.
Example: A row of kale that looks pale after a cold snap often greens up within 7–10 days after a light nitrogen booster.
Tip: Use a “tomato/pepper fruiting” blend that doesn’t overload phosphorus
Many DIY tomato recipes overdo bone meal, even when soil P is already high. Try a potassium-leaning blend: 4 parts compost, 1 part alfalfa meal, 1 part kelp meal, and 1/2 part gypsum (for calcium without raising pH). Side-dress 1/2 cup per plant at first flowering and again 3–4 weeks later.
Example: For tomatoes in raised beds, this keeps plants productive without the “all leaves, no fruit” vibe you get from over-nitrogenizing.
Tip: Keep a calcium strategy separate from your N-P-K strategy
Calcium problems (like blossom-end rot) are usually watering/uptake issues, but adding calcium without messing with pH is still smart. Use gypsum (calcium sulfate) at 1–2 cups per 100 sq ft if your soil test indicates low calcium or high sodium, or if you’re gardening in very sandy soil. Unlike lime, gypsum won’t raise pH much.
Example: In containers, a light gypsum top-dress (1 teaspoon per gallon of potting mix) can support calcium availability without changing the mix’s acidity dramatically.
Tip: Don’t “freehand” kelp—measure it for containers
Kelp meal is amazing, but in small volumes it’s easy to over-apply and create excess salts. For containers, cap kelp meal at 1–2 teaspoons per gallon of potting mix when blending, or 1 teaspoon as a top-dress monthly. You’re aiming for steady trace minerals, not a one-time dump.
Example: A 10-gallon grow bag gets 10–20 teaspoons (about 3–6 tablespoons) mixed in at planting, then 1–2 tablespoons top-dressed later if needed.
Liquid Fertilizers You Can Make Fast (and When to Use Them)
Tip: Compost tea is fine—compost extract is safer and simpler
If you’re mainly after nutrients, not microbial inoculation, do a quick compost extract: stir 2 cups finished compost into 5 gallons of water, let sit 30–60 minutes, then strain and apply. It’s quicker and avoids the “brew gone wrong” risk. The focus is gentle feeding and micronutrients, not a complicated aeration setup.
Example: Use compost extract to help transplants recover: drench right after planting and again a week later.
Tip: For nitrogen emergencies, use a weed-based ferment (and keep it dilute)
Fast-growing weeds like comfrey, nettle, or even lawn clippings can become a potent liquid feed. Pack a bucket 1/2 full of chopped greens, cover with water, weigh down, and ferment 7–14 days. Dilute to at least 1:10 (1 part ferment to 10 parts water) before applying to soil.
Example: If cucumbers turn pale mid-season, a 1:10 drench around the root zone can perk them up without waiting for slow-release meals to break down.
Tip: Use fish hydrolysate for predictable results when you need speed
DIY liquids are great, but fish hydrolysate is the “I need this to work” shortcut—still organic, still soil-friendly. A common label rate is 1–2 tablespoons per gallon every 7–14 days during active growth. It’s especially useful in containers where biology is limited and nutrients flush out faster.
Example: Basil in pots that stalls after repeated harvests often rebounds after two weekly feedings at 1 tbsp/gal.
“Most nutrient problems in home gardens come from over-application rather than deficiency—soil testing and measured rates prevent both plant injury and nutrient loss.”
—University Extension guidance summarized from home lawn and garden fertilizer recommendations (various extensions)
Rate, Timing, and Placement: The Stuff That Makes DIY Blends Actually Work
Tip: Side-dress instead of “mixing more in” when plants stall
When growth slows, gardeners often scratch in more fertilizer everywhere. A better move is a targeted side-dress: apply your dry blend in a ring 3–6 inches away from the stem, then water. This feeds where roots are actively foraging and reduces stem burn.
Example: For peppers, side-dress 1/4 cup of a mild blend at first buds, then again after the first harvest.
Tip: Time nitrogen early and potassium later for fruiting crops
Tomatoes, peppers, squash, and cucumbers want more nitrogen early for canopy, then more potassium support during flowering/fruit fill. Practically: use a slightly N-forward blend at transplant, then switch to kelp-heavy side-dresses once blooms set. This keeps foliage healthy without turning your plant into a leaf factory.
Example: Weeks 0–3 after transplant: alfalfa + a touch of blood meal. Weeks 4–10: compost + kelp meal side-dress.
Tip: Don’t put “hot” nitrogen directly in the planting hole
Blood meal, fresh manure, and high-N poultry-based products can damage young roots if concentrated. Keep high-N amendments mixed into the top few inches of soil or applied as a side-dress after the plant is established (usually 10–14 days after transplant). This one change prevents a lot of mystery seedling deaths.
Example: If you’re planting lettuce plugs, use compost in the hole and save the nitrogen booster for a light top-dress a week later.
3 Real-World Scenarios (What to Mix, How Much, and What It Costs)
Scenario: Raised bed veggies with “meh” growth and no soil test yet
Use a conservative blend that won’t overload phosphorus: compost + alfalfa meal + kelp meal (skip bone meal for now). Apply 1 cup per 10 sq ft at planting, then reapply the same rate after 4 weeks. This keeps you moving without locking yourself into a phosphorus-heavy approach.
Cost hack: Alfalfa pellets sold as rabbit/horse feed are often cheaper than “garden” alfalfa meal—commonly $18–$25 for 40 lb in many areas, versus smaller garden bags that cost more per pound. Crush pellets before mixing so they break down faster.
Scenario: Container tomatoes that look healthy but drop blossoms
Containers swing between feast and famine. Use a steady liquid schedule: fish hydrolysate at 1 tbsp/gal weekly for 3 weeks, then switch to every other week, plus a monthly top-dress of 1 tablespoon kelp meal per 5-gallon pot. Keep gypsum separate: 1 teaspoon per gallon of potting mix mixed in at planting or as a light top-dress.
Example: A 5-gallon bucket tomato gets 1 tbsp fish in 1 gallon of water weekly—cheap, fast, and less likely to cause salt buildup than overdoing dry meals.
Scenario: Clay soil that stays wet and plants look yellow
In heavy clay, the issue often isn’t “no fertilizer”—it’s low oxygen and slow root function. Go lighter on nitrogen and focus on structure: top-dress 1 inch of compost (about 0.6 cu ft per 10 sq ft) and use a mild dry blend at half rate (1/2 cup per 10 sq ft). If you push high nitrogen in wet clay, you often get weak, disease-prone growth.
Example: For a 100 sq ft clay garden, that’s roughly 6 cu ft compost plus 5 cups of a mild blend—small inputs that improve the soil instead of fighting it.
Smart Substitutions and DIY Alternatives (So You’re Not Hunting Rare Ingredients)
Tip: Swap bone meal with tested, local phosphorus sources
Bone meal is slow and can be unnecessary if soil P is already adequate. If you truly need phosphorus, consider rock phosphate (slower) or a targeted purchased organic P source, but only after a test. Overapplying phosphorus is a classic “I did everything right” frustration—plants still struggle because the imbalance interferes with micronutrient uptake.
Example: If your soil test flags low P, use bone meal at 2–3 cups per 100 sq ft worked into the topsoil, not dumped in holes.
Tip: Use coffee grounds only as a thin add-in, not a main fertilizer
Coffee grounds are not a high-nitrogen fertilizer in the way people hope; they’re more of a soil organic matter add-in. Keep it to no more than 1/2 inch as a surface sprinkle and mix with other materials (leaves, compost) so it doesn’t mat. For real nitrogen, use measured meals or proven liquids.
Example: Sprinkle a handful around blueberries as mulch material, but don’t expect it to replace a proper feeding plan.
Tip: Turn eggshells into a real amendment by grinding—and be patient
Eggshells help mostly as a long-term calcium carbonate source, but only if finely ground. Dry them, then blitz into powder; mix 1–2 tablespoons per planting hole for slow release over months. Don’t expect it to fix blossom-end rot next week.
Example: If you’re starting a new bed this fall, eggshell powder mixed in now can support next year’s crops.
Money-Saving Moves (Without Cutting Corners)
Tip: Buy “feed store” ingredients and re-bag them yourself
Alfalfa pellets, kelp meal (sometimes), and even some mineral amendments can be drastically cheaper outside the garden center. A $20–$30 bag split into sealed buckets can cover multiple seasons. The trick is keeping it dry and labeled so you don’t forget what’s what.
Example: If a 5 lb garden bag of alfalfa meal costs $15, but a 40 lb feed bag costs $22, you’re paying about $3/lb versus $0.55/lb—real savings when you’re feeding beds all season.
Tip: Make small “test batches” before you commit to a big bucket
If you’re experimenting, mix a 1-quart batch first and try it on a small section for 10–14 days. Watch leaf color, growth rate, and any burn at leaf edges. Once it behaves, scale up to a 5-gallon bucket and write the recipe on tape right on the lid.
Example: Test a new greens booster on one row of spinach before you feed the entire bed and regret it.
| Approach | Best for | Typical cost (DIY estimate) | Speed | Common pitfall |
|---|---|---|---|---|
| Dry blend (meals + compost) | Garden beds, steady long-term feeding | $0.10–$0.40 per sq ft per application (varies by ingredients) | Slow to medium (1–4 weeks) | Overdoing phosphorus or “hot” nitrogen |
| Liquid DIY ferment (weeds/greens) | Quick nitrogen bump, mid-season rescue | $0–$0.10 per gallon (mostly free) | Fast (3–10 days noticeable) | Too strong (needs 1:10+ dilution), odor |
| Purchased fish hydrolysate | Containers, predictable fast response | About $0.25–$0.75 per gallon mixed (depends on brand) | Fast (3–7 days) | Overfeeding weekly without flushing containers |
Safety and “Don’t-Regret-This” Rules
Tip: Age manure properly—or skip it in veggie beds
Fresh manure is risky: it can burn plants and can carry pathogens. If you use manure, use well-composted material and avoid applying raw manure close to harvest crops. USDA food safety guidance is commonly summarized as applying raw manure at least 120 days before harvesting crops that touch soil (USDA National Organic Program guidance, commonly referenced; rule applied widely in food safety materials).
Example: If you’re planting carrots for summer harvest, don’t add raw manure in spring—use composted manure or plant-based amendments instead.
Tip: Store meals like you store pet food—sealed, dry, and rodent-proof
Blood meal, fish meal, and alfalfa attract pests and pull moisture from humid air. Use gamma-seal lids or tight buckets, keep them off the ground, and label each container with purchase date. Most meals stay workable for 6–12 months if kept dry, but they get clumpy and less pleasant fast if not sealed.
Example: A $25 bag of alfalfa pellets is only a bargain if it doesn’t become a damp brick in your shed.
Two Proven “Grab-and-Go” Recipes to Keep on Your Shelf
Tip: Mix a mild “Seedling & Transplant” blend (gentle on roots)
Combine 6 parts worm castings with 2 parts compost and 1 part kelp meal. Use 1–2 tablespoons scratched into the top of a 1-gallon pot, or 1/4 cup in the transplant area of a bed (not directly under the stem). This is a low-risk way to feed without burning.
Example: When you up-pot peppers from 4-inch pots to 1-gallon, this blend gives steady nutrition without the “stall” you get from plain potting mix.
Tip: Keep a “Fast Fix” liquid plan for yellowing plants
When something looks hungry and you want a fast response, don’t overthink it: fish hydrolysate at 1 tbsp/gal, drench the soil (not the leaves) in the morning, repeat once in 7 days if needed. If you prefer DIY, use compost extract the same day and follow with a light dry side-dress a week later.
Example: A patch of pale arugula in a crowded bed often responds better to one measured liquid feeding than to a heavy handful of dry nitrogen that may not break down quickly.
If you take anything from DIY fertilizer blending, make it this: measure, write down your recipe, and change only one variable at a time. Your garden will teach you fast—especially when your mixes are consistent enough to repeat, tweak, and trust.
Sources: University of Minnesota Extension (2020) soil testing and fertilizer guidance for home lawns and gardens; Penn State Extension (2019) composting and mature compost use guidance; USDA National Organic Program materials widely summarized in food safety recommendations regarding manure application intervals (rule commonly cited as 120 days for crops contacting soil).