15 Garden Hacks for Native Plant Integration
Most “native plant failures” aren’t because natives are fussy—they’re because we unknowingly pamper them like thirsty ornamentals. A super-common mistake is amending the whole bed with rich compost and then wondering why the native aster flops, the penstemon rots, or the seedlings vanish. Natives usually don’t need luxury soil; they need the right site cues (light, drainage, and competition control) so they can do what they already evolved to do.
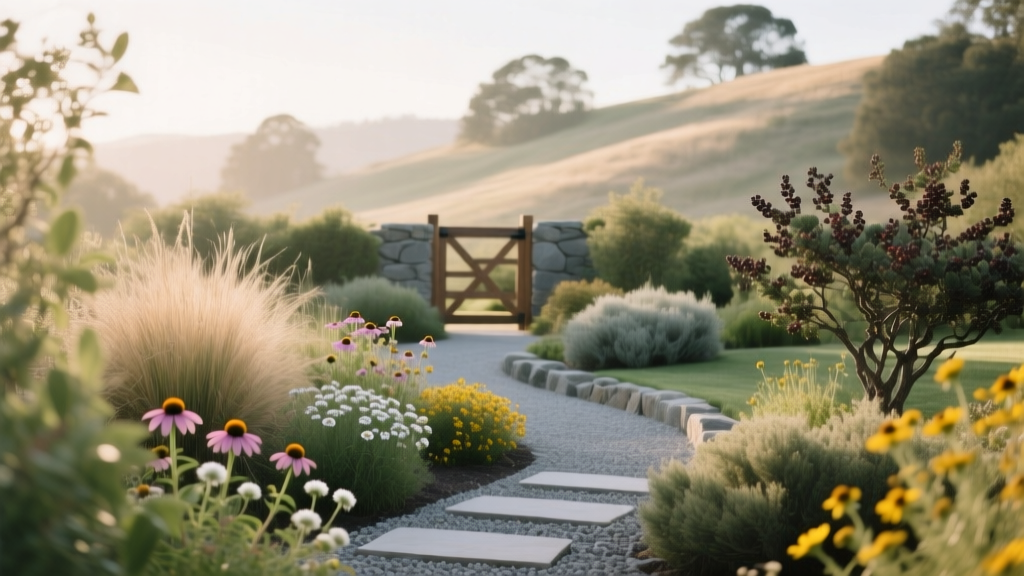
Below are field-tested hacks I use (and see landscapers use) to weave natives into existing gardens without ripping everything out. They’re organized so you can start with planning shortcuts, then installation tricks, then maintenance hacks that save time and money.
Fast Planning Hacks (so you don’t buy the wrong plants)
1) Copy Nature’s “Neighborhoods” with a 3-3-3 Planting Mix
Hack: For any new native pocket, pick 3 grasses/sedges, 3 flowering perennials, and 3 shrubs (or small trees if you have space). This gives you year-round structure, root diversity, and built-in resilience if one species struggles. Keep repeats tight: plant in drifts of 3, 5, or 7 of the same species to make maintenance easier and the design look intentional.
Example: In a sunny front bed: little bluestem + prairie dropseed + sideoats grama; purple coneflower + coreopsis + bee balm; plus New Jersey tea + fragrant sumac + a dwarf native willow.
2) The “Right Plant, Right Place” Shortcut: 2-Minute Drain Test
Hack: Dig a hole 12 inches deep and wide, fill with water, and time the drain. If water is gone in under 2 hours, treat it as fast-draining (good for many prairie natives). If it still holds water after 6 hours, you’re in slow-drain territory—choose moisture lovers or mound the planting area.
Example: If a back corner stays soggy, skip lavender (even if you love it) and use swamp milkweed, cardinal flower, or sedges instead.
3) Skip the “Native vs. Non-Native” Debate—Use the 70/30 Swap Rule
Hack: If a full conversion feels overwhelming, aim for 70% native and keep 30% of your favorite non-invasive ornamentals. This gives you room for experimentation and reduces the urge to over-edit the garden. The ecosystem payoff still shows up when most of the plant biomass is native.
Case example: A homeowner with a foundation bed full of boxwood replaced every third shrub with inkberry holly and added natives in front. It looked “normal” immediately, but pollinators showed up within weeks.
4) Use Keystone Plants First (They Carry the Food Web)
Hack: If you only have budget for a few additions, start with “keystone” native genera that support lots of caterpillars and beneficial insects—think oaks, willows, cherries, goldenrods, asters, and sunflowers. Doug Tallamy’s research popularized the idea that a small set of native plant groups supports a disproportionate amount of insect life, which then feeds birds and other wildlife.
Expert note: Many extension services echo this approach because it stacks the deck for success: more insect life = more visible “garden wins” (birds, butterflies, less pest pressure).
Installation Hacks (where most people lose time and money)
5) Plant Plugs, Not Pots, When You Need Scale on a Budget
Hack: Use 2-inch or 3-inch plugs for perennials and grasses—especially in larger areas. A 1-gallon pot can cost $10–$18, while a plug is often $3–$6; the plug catches up by year two if you control weeds early. Plant plugs 12–18 inches apart for meadow-style, or 8–12 inches for a faster “filled-in” look.
Case example: For a 200 sq ft side-yard strip, a plug-based plan came in around $140 versus $380 in 1-gallon pots—same species list, just a different format.
6) The Cardboard “Weed Reset” (Cheap Sheet Mulch That Actually Works)
Hack: Lay plain cardboard (no glossy print), overlap seams by 6 inches, soak it, then cover with 2–3 inches of mulch. Cut X-slits for planting plugs. This knocks back turf and many annual weeds without herbicide and gives natives a cleaner start.
DIY detail: Grocery-store cardboard is usually free. If you need to buy mulch, budget roughly $35–$55 per cubic yard delivered (varies by region); 1 cubic yard covers about 108 sq ft at 3 inches.
7) Use “Micro-Mounding” to Fix Drainage Without Regrading
Hack: For natives that hate wet feet, build a small mound 6–10 inches high using existing soil mixed with a little sharp sand or fine gravel. Plant the crown slightly above grade, then mulch lightly so the stem base stays dry. This is faster than installing drains and looks natural once plants fill in.
Example: Penstemon and beardtongue that kept rotting in heavy clay can thrive when planted on a subtle mound with gravel mulch around the crown.
8) Make a “Seed Sandwich” for Tiny Native Seeds
Hack: Mix tiny seeds with an inert carrier so you can spread them evenly. A reliable ratio is 1 part seed : 10 parts dry sand (or fine sawdust). Broadcast, then press in with your foot or a roller—don’t bury most prairie seeds deeper than 1/8 inch.
Timing: Many native seeds do best with dormant sowing in late fall or winter so natural cold stratification does the work.
9) Pre-Wet Roots and “Tease Less” with Natives
Hack: Soak plug trays or pots for 10 minutes before planting; it prevents hydrophobic peat from repelling water. Then handle roots gently—many natives resent aggressive root teasing. Plant at the same depth as the plug and firm the soil so there are no air pockets.
Example: Lupines and other deep-rooted natives often sulk if you mess with the root ball; a quick soak and careful planting reduces transplant shock.
10) Use Gravel Mulch Around Crowns (Not Wood Chips Everywhere)
Hack: In hot, humid climates or clay soil, swap wood mulch for a 1-inch layer of pea gravel or crushed stone around plants prone to crown rot (think penstemon, dianthus-like natives, some salvias). Gravel keeps the crown drier, reflects heat, and discourages slugs. Keep gravel pulled back 1–2 inches from the stem base.
Cost tip: A single 0.5 cu ft bag of pea gravel is often $5–$8 and can top-dress several plants; it’s a targeted upgrade, not a whole-yard expense.
Maintenance Hacks (the stuff that keeps natives looking good)
11) The “First-Year Weed Firewall”: 15 Minutes a Week Beats Hours Later
Hack: In year one, set a timer for 15 minutes weekly and pull weeds while they’re tiny. Natives spend their first season building roots, so weeds can easily outcompete them early. After year two, many native plantings become self-defending, and your weeding time drops dramatically.
Real-world scenario: A small native border installed along a driveway took 20–30 minutes of weekly attention the first summer; the second year it needed quick monthly touch-ups.
12) Chop-and-Drop: Free Mulch from Your Own Plants
Hack: Instead of bagging clippings, cut spent stems into 6–10 inch pieces and let them fall as a light mulch (“chop-and-drop”). It shades weed seedlings, returns nutrients slowly, and keeps soil cooler. Do it after plants are established so you’re not smothering tiny crowns.
Example: After spring cutback, leave chopped switchgrass stems between plants—by June it disappears under new growth but still suppressed early weeds.
13) The “One-Third Rule” for Cutting Back (And When Not To)
Hack: If a native perennial flops, don’t stake it—cut it back by 1/3 in late spring (often called the Chelsea Chop). It triggers bushier growth and more flowers on sturdier stems. Avoid chopping plants that bloom only once on old wood; focus on summer and fall bloomers like asters and goldenrods.
Example: Cutting tall garden phlox from 24 inches to 16 inches in late May reduces mildew-prone density and improves airflow.
14) Leave Stems Standing Until It’s Truly Warm
Hack: Delay spring cleanup until daytime temps are consistently around 50°F (10°C). Many beneficial insects overwinter in hollow stems and leaf litter; clearing too early can wipe them out. When you do cut, leave 8–12 inches of stem stubble—native bees will actually use it.
“Many native bees nest in pithy or hollow plant stems, so leaving some standing through spring can provide important habitat.” — Xerces Society guidance on pollinator habitat (e.g., Xerces Society, 2018)
15) Water Like You Mean It—But Only for the Establishment Window
Hack: The secret is deep watering, not frequent sprinkling. For the first 4–6 weeks, water new plugs so moisture reaches 6 inches deep (check with a screwdriver—if it slides in easily, you’re good). After establishment, taper off: many natives perform better with less irrigation, and overwatering can shorten their lifespan.
Data point: University extension recommendations commonly emphasize establishment watering for the first growing season, then reducing supplemental irrigation for drought-adapted natives (see, for example, University of Minnesota Extension, 2020).
Scenario Playbook: Apply the Hacks to Real Gardens
Scenario 1: Converting a Patch of Lawn Without Renting a Sod Cutter
Move: Use the cardboard weed reset (Tip #6), then plant plugs (Tip #5) into X-cuts. Add a simple mix like 60% grasses/sedges and 40% flowering perennials so the grasses do the heavy lifting against weeds. Expect the area to look “sleepy” for the first 8–12 weeks—that’s root-building time.
Scenario 2: A Hot, Dry Hellstrip by the Street
Move: Focus on tough, salt- and heat-tolerant natives and use gravel mulch around crowns (Tip #10). Space plants a bit tighter (10–12 inches) to shade soil faster and reduce weed pressure. If your curb strip gets blasted by reflected heat, micro-mound a few sensitive plants (Tip #7) so they don’t sit in compacted soggy soil after storms.
Scenario 3: Shady Yard Under Mature Trees (Where Nothing “Likes” to Grow)
Move: Stop fighting root competition with heavy compost—tree roots will steal the good stuff anyway. Instead, plant shade-adapted natives as small plugs, water deeply for the first month (Tip #15), and use chop-and-drop leaf litter as mulch (Tip #12). Aim for tough woodland natives like sedges, woodland phlox, and spring ephemerals, then let fallen leaves remain as a natural blanket.
A Quick Comparison: Two Common Ways to Start Natives
| Approach | Best For | Upfront Cost | Time to Look “Full” | Main Risk |
|---|---|---|---|---|
| Plugs (2"–3") | Medium-to-large areas, budget builds | Lower (often $3–$6 each) | 1–2 seasons | Weeds overwhelm in year 1 if ignored |
| 1-gallon pots | Instant impact beds, small spaces | Higher (often $10–$18 each) | Same season to 1 season | Overwatering and rich soil can cause flop/rot |
Extra Money-Savers That Make Natives Stick
Bonus Hack: “Borrow” Seeds from Your Own Garden (Ethically)
Hack: Once your natives are established, collect small amounts of seed from your own plants to expand beds for free. Dry seeds in a paper bag for 7–10 days, label them, and store cool and dry. Avoid collecting from wild populations (it’s often illegal or ecologically harmful), and don’t harvest more than you need.
Bonus Hack: Use Local Native Plant Sales for Better Genetics (and Better Prices)
Hack: Shop spring and fall native plant sales hosted by conservation districts, extension offices, and native plant societies. Plants are often priced 20–40% lower than retail nurseries, and local ecotypes can establish faster because they’re adapted to your region’s rainfall patterns and seasons.
Two Research-Backed Reminders That Prevent Regret Purchases
First, resist the urge to fertilize. Many native plants evolved for lean soils, and extra nitrogen can cause floppy growth and fewer flowers. Second, prioritize habitat structure: leaving stems, leaf litter, and a few grasses turns your planting from “flowers in a bed” into an actual functioning mini-ecosystem.
For deeper reading, the Xerces Society has strong, practical pollinator habitat recommendations (including stem nesting guidance) (Xerces Society, 2018), and multiple university extension resources outline establishment watering and site-based plant selection principles (for example, University of Minnesota Extension, 2020). Those two alone will save you from the most expensive mistakes: buying the wrong species for your drainage and cleaning up too aggressively in spring.
Native plant integration doesn’t have to be a dramatic before-and-after reveal. Start with one “problem spot” (the soggy corner, the roasting curb strip, the dead zone under trees), use the hacks above to set the cues, and let the plants do the heavy lifting. When you realize you spent less time watering, less money replacing plants, and you’ve got more birds and blooms—then you’ll know you nailed it.