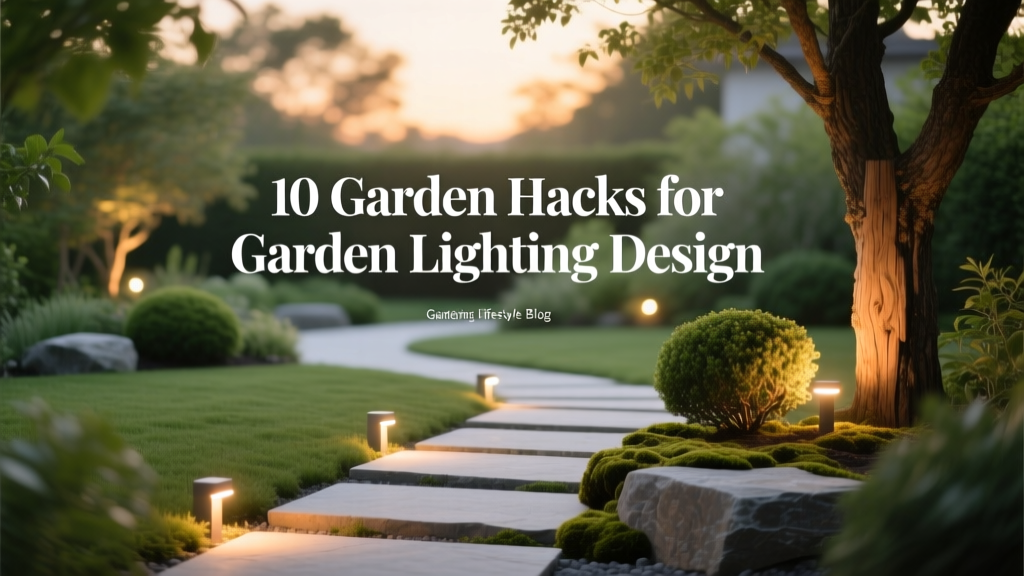
10 Garden Hacks for Garden Lighting Design
Most “bad” garden lighting isn’t too dim—it’s aimed wrong. I can’t tell you how many yards I’ve seen where a $400 lighting kit made the garden look flatter at night than it did in daylight, simply because the fixtures were pointed straight at eye level instead of grazing textures and hiding the light source.
Good lighting design is mostly a handful of repeatable shortcuts: put light where your eye wants to travel, control glare, and keep everything serviceable. Below are 10 garden lighting hacks I use (and steal from other pros) when I want a yard to look intentional without turning it into a runway.
Start with a plan that prevents “glarey spaghetti”
1) Use the “3-layer” lighting recipe: path + accent + ambient
Hack: Don’t buy fixtures first—decide your layers first. A solid baseline is 40% path/safety, 40% accent (trees, sculpture, texture), and 20% ambient (seating glow). This stops the common mistake of over-lighting paths and under-lighting everything people actually want to look at.
Example: In a small front yard, that might mean 4 path lights (safety), 3 uplights on a Japanese maple and boulders (accent), and 1 warm globe light near the porch bench (ambient) instead of ten matching stakes along the walkway.
2) Trace your “night route” with painter’s tape before you install anything
Hack: On a dark evening, walk the route you actually take—driveway to door, door to trash bins, patio to grill—and mark fixture spots with painter’s tape or small flags. Aim for 1–3 foot-candles on walking surfaces (safe without feeling like a parking lot) and put brighter accents off to the side.
Example: One client kept tripping on a single step from patio to lawn. We added a low, shielded step light aimed down; the rest of the patio stayed moody and comfortable.
3) Budget your watts like a cheapskate (because you should)
Hack: LED makes it easy to go overboard because it’s “only a few watts.” But transformers, wire, and time aren’t free. A practical starting point is 60–120W total for most average-sized yards using 12V LED, with 2–5W path lights and 3–9W uplights depending on the beam spread.
Example: A 100W transformer with a photocell typically costs $120–$220. If your plan totals 38W, you’re not “undersizing”—you’re leaving room to add a couple fixtures later without buying a second transformer.
Placement hacks that make cheap fixtures look expensive
4) Put path lights where your feet go, not where your landscaping is “symmetrical”
Hack: Perfectly symmetrical path lights are a daytime design habit that often creates nighttime glare. Place fixtures to light the walking surface from the side, spacing them roughly 6–10 feet apart depending on brightness and beam pattern, and keep them 12–18 inches off the path edge so they don’t become shin-kickers.
Example: On a curved stone walkway, alternating left-right placement (instead of matching pairs) made the curve feel intentional and reduced the “airport runway” effect.
5) Steal this pro move: aim for “grazing” on texture, not spotlighting the whole wall
Hack: For stone, brick, bark, or ornamental grasses, set the light low and close so the beam skims the surface. Try placing the fixture 12–24 inches from the wall/feature and aim upward at a shallow angle; you’ll get dramatic shadows with fewer lumens.
Example: A dry-stack stone retaining wall looked flat with two bright floods. Switching to three small, warm uplights grazing the stone made it look like a magazine photo—same wall, totally different night personality.
6) Light the “back” of planting beds for instant depth
Hack: If you only light what’s closest to you, the yard feels like a stage set with a black curtain behind it. Put one or two fixtures behind a shrub grouping or aimed through branches to create layers; your eyes read that as depth and the garden looks bigger.
Example: In a 25-foot-deep backyard, one uplight behind a hydrangea (aimed through stems) plus one downlight in a tree made the whole bed feel twice as deep from the patio.
Control glare and color so the garden feels welcoming (not harsh)
7) Choose warm color temperature on purpose: 2700K is the sweet spot for most gardens
Hack: If your lighting looks “blue,” it will make plants look lifeless and your patio feel colder. Most landscapes look best at 2700K (warm white) or at most 3000K if you have lots of pale stone or modern hardscaping. Mixing color temperatures randomly is one of the fastest ways to make a professional install look DIY.
Expert note: The International Dark-Sky Association recommends warm lighting (generally ≤3000K) to reduce glare and skyglow impacts (International Dark-Sky Association, 2020).
“Use fully shielded fixtures that direct light downward where it’s needed, and use the lowest light level for the task.” — International Dark-Sky Association guidance on responsible outdoor lighting (IDA, 2020)
8) Add one glare shield before you add another fixture
Hack: If you can see the bulb/LED source from where you sit, it’s glare—your pupils constrict and the garden actually looks darker. Use a simple shield, hood, or louver, and aim lights so the source is hidden by plant stems, rocks, or hardscape edges.
Example: A client wanted “more light” on their patio border. We didn’t add fixtures; we added $8–$15 glare shields to three existing uplights and re-aimed them. Instantly, they could see the planting details again.
Power and installation shortcuts that prevent callbacks (and save weekends)
9) Beat voltage drop with the “T” method and thicker wire where it matters
Hack: Long runs can make far fixtures dimmer. A simple fix is running your main line out and splitting into a T-connection so fixtures aren’t all at the tail end, and using thicker cable for the longest stretches (think 10/2 instead of 12/2 on bigger yards). If you keep most runs under 100 feet, you’ll have fewer brightness surprises.
Example: Scenario: a 70-foot run to a back tree plus five path lights. With a straight line, the tree uplight looked weak. With a T-split—one branch to the tree, one to the path—everything matched without upgrading the transformer.
| Wiring choice | Best for | Typical cost | Common problem it avoids |
|---|---|---|---|
| Daisy-chain (one long run) | Short paths, few fixtures | $ | Far-end dimming on longer runs |
| T-connection (split run) | Yards with a “feature” far away | $$ | Uneven brightness between near and far fixtures |
| Hub method (multiple home runs) | Complex landscapes, zones | $$$ | Troubleshooting nightmares later |
10) Put lighting on a schedule—and make maintenance a 10-minute habit
Hack: Use a transformer with both a photocell and timer so lights come on at dusk and turn off automatically after your prime outdoor hours. A very livable setting is dusk to 11:30 p.m. on weekdays, later on weekends. Then do a quick seasonal reset: in 10 minutes, wipe lenses, re-aim anything bumped by mowing, and trim plants that have grown into the beam.
Example: Scenario: A family with a toddler wanted safety lighting early evening but didn’t want lights blazing all night. A dusk-to-11:30 schedule plus a separate motion light at the side gate solved both—comfort and security—without extra wattage.
DIY upgrades and scenario playbooks (so you can copy what works)
Lighting gets easier when you match the “hack” to the situation. Here are three real-world scenarios I see constantly, plus the shortcuts that make them click.
Scenario 1: Small front yard (tight space, high visibility)
Best hack combo: 3-layer recipe + glare shields + warm 2700K. In a small area, fewer fixtures look better: think 2–4 path lights and 1–2 accents, not a border of identical stakes. Put one accent on a signature plant (like a dwarf conifer) and one on house numbers or a textured wall.
Money saver: Instead of eight path lights at $25–$45 each, buy four better ones and spend the leftover $60–$100 on a solid transformer and thicker cable. The system will last longer and look cleaner.
Scenario 2: Backyard patio (you want glow, not stadium lighting)
Best hack combo: back-of-bed depth + downlighting + scheduling. Add one downlight in a tree (or a mounted eave light with shielding) to create a soft pool over seating, then keep path lights minimal so the patio remains the visual center. The “patio feels cozy” threshold is usually lower than people think—often a couple of warm pools is enough.
DIY alternative: If you can’t mount a tree downlight, use a tall shepherd’s hook or pergola beam to hang a low-voltage downward fixture, and hide the cable along the structure. You’ll get the same overhead effect without trenching across the whole yard.
Scenario 3: Side yard and gate (pure function, but it can still look good)
Best hack combo: painter’s tape night route + shielded downlight. Keep it simple: one downlight aimed at the latch and one low, shielded path light aimed at the ground. You want your keyhole and step edges visible, but you don’t need to light the fence like a billboard.
Safety note: Purdue University Extension emphasizes that outdoor lighting should improve visibility and safety without creating glare that reduces your ability to see (Purdue Extension, 2022). That’s exactly why down-and-shielded beats bright-and-bare.
DIY hack: Make cheap solar lights usable (by treating them like accents, not infrastructure)
Solar lights are unreliable for primary path lighting, especially in shade, but they can be great as “sparkle” accents if you place them where they get 6+ hours of sun. Use them around containers, in a sunny herb bed, or to highlight a single boulder—places where failure isn’t a safety issue.
Real-world example: A renter couldn’t install wired lights, so we clustered six decent solar spikes around two pots and a birdbath in a sunny patch. The effect looked intentional, and when one light died, the whole yard didn’t go dark.
Cost reality check: where to spend and where to save
If you’re trying to keep costs sane, spend on the stuff that’s annoying to redo: transformer, cable, and weatherproof connectors. A box-store kit might look cheaper, but replacing thin wire and corroded connectors after one wet season is a slow burn of frustration.
Typical ballpark: A modest DIY 12V system with 8–12 fixtures often lands around $350–$900 depending on fixture quality and wire length. Swapping just the connectors to gel-filled waterproof types can add $20–$40—and can save you hours of troubleshooting later.
A quick “aiming” ritual that fixes 80% of ugly lighting
After installation, wait until full dark, then adjust each light for 30–60 seconds while sitting in your main viewing spot (usually patio or living room). If you see the source, shield it or rotate it; if the plant looks flat, move the fixture closer and graze. This tiny ritual is the difference between “we have lights” and “wow, the garden looks amazing at night.”
If you try only one thing this week, do the painter’s-tape night walk and aim lights so you never see the LED source from where you sit. That single change makes even budget fixtures look thoughtfully designed—and it makes your garden feel like a place you want to hang out after sunset.
Sources: International Dark-Sky Association (IDA), responsible outdoor lighting guidance, 2020. Purdue University Extension, outdoor lighting and glare/safety recommendations, 2022.