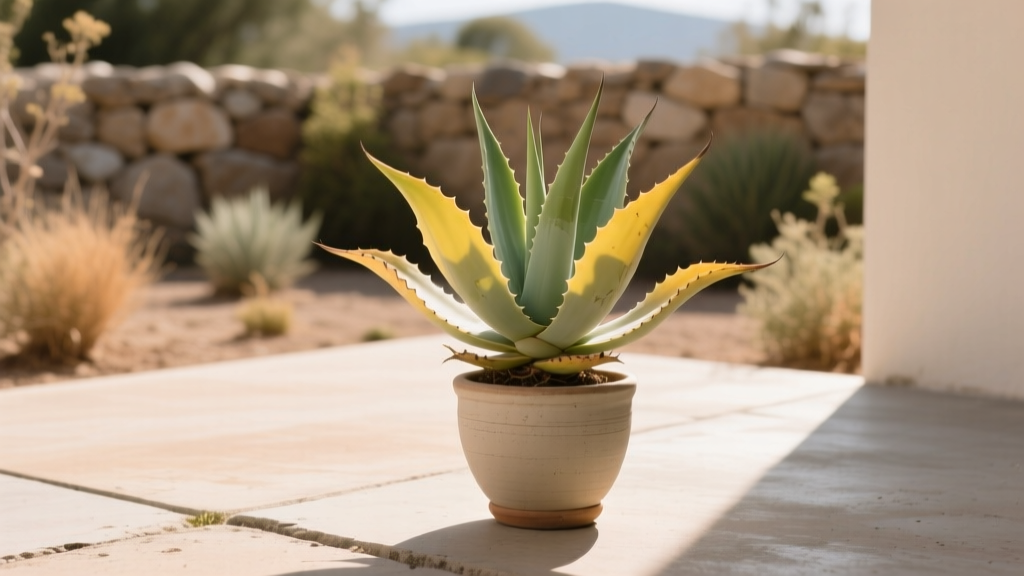
Fixing Yellowing Leaves on Drought-Tolerant Plants
You planted for “low water,” and it worked—until it didn’t. One week your lavender, rosemary, agave, or succulents look tough as nails; the next week you’re staring at yellow leaves and wondering if you somehow overwatered a drought plant during a heat wave. Here’s the surprising part: on drought-tolerant plants, yellowing is often caused by the same thing people try to avoid—mismanaged water—but it can swing both ways. Too much water suffocates roots. Too little water (especially after shallow, frequent sips) can also trigger yellowing as the plant sheds older leaves to survive.
I’ve watched this play out in real gardens: a “set-it-and-forget-it” drip line running 10 minutes daily, a succulent in a pretty pot with no drainage, a native shrub planted into compost-rich soil like a tomato. The good news is that yellow leaves are a fixable message. The trick is reading the pattern, not panicking, and adjusting one variable at a time.
This guide walks you through the practical checks I use as a master-gardener type: watering habits, soil drainage, light and heat, feeding mistakes, and the most common pests and diseases that mimic drought stress. You’ll also get quick troubleshooting by symptom and three real-world scenarios with step-by-step fixes.
First: read the yellow—what pattern are you seeing?
Before you change anything, take 3 minutes to observe. Yellowing is a symptom, not a diagnosis. Use these clues to narrow down the cause.
- Oldest leaves yellowing first (near the base/interior): often normal aging, underwatering, or nitrogen issues.
- New growth yellowing first (tips/top): often iron/manganese deficiency from high pH or waterlogged roots.
- Yellow + mushy stems: classic overwatering/root rot.
- Yellow + crispy edges: drought stress, salt buildup, hot wind burn, or too much fertilizer.
- Yellow + green veins (interveinal chlorosis): usually iron deficiency (often pH-related) or root damage.
Now match your plant to its “normal.” Many drought-tolerant plants keep a lean look—sparse leaves, slower growth, and occasional older-leaf drop. The goal is to stop progressive yellowing and restore steady new growth.
Watering: the #1 cause (and the #1 fix)
Drought-tolerant doesn’t mean “never water.” It means the plant can handle dry spells once established. Yellowing often shows up when watering is either too frequent (oxygen-starved roots) or too shallow (roots stay near the surface and the plant chronically underperforms).
How much water is “right” for drought-tolerant plants?
For most established drought-tolerant shrubs and perennials in the ground, a good baseline is a deep soak every 7–21 days during dry weather, instead of light watering daily. In hot spells above 90°F (32°C), many landscapes need tightening to every 5–10 days, especially in sandy soils.
For container plants (succulents, rosemary in pots, patio lavender), the rule changes: pots dry faster and roots have less room. In summer, many containers need water every 4–10 days depending on pot size, wind, and sun exposure.
A practical way to measure: apply enough water to moisten the root zone to 6–12 inches deep for perennials and up to 18 inches for shrubs. The only way to know is to check with a soil probe, trowel, or even a long screwdriver.
A simple “soak and dry” test you can do today
- Check soil moisture 4–6 inches down. If it’s wet or cool and sticky, do not water.
- If it’s dry at that depth, water slowly so it soaks in instead of running off.
- Re-check 30–60 minutes later to see how deep the moisture actually went.
As a calibration point, many drip emitters put out 0.5–1.0 gallons per hour (GPH). Two 1-GPH emitters running for 60 minutes delivers about 2 gallons—sometimes barely enough for a shrub in summer if the soil is fast-draining. On the other hand, that same daily for weeks can waterlog clay.
“Overwatering is not about the amount at one time—it’s about watering again before the root zone has had time to exchange air.” — Linda Chalker-Scott, Washington State University Extension (2019)
Method A vs Method B: real irrigation comparison
Here’s a common mismatch I see: gardeners run drip for a few minutes every morning because it “feels responsible.” For drought-tolerant plants, that often keeps the surface wet, encourages shallow roots, and promotes rot in heavy soils.
| Method | Example schedule | Total weekly water | Typical result on drought-tolerant plants | Best use case |
|---|---|---|---|---|
| A: Frequent, short drip | 10 min/day with 2 × 1-GPH emitters | ~2.3 gallons/week | Surface stays damp; roots stay shallow; higher rot risk in clay; more fungus/gnats in pots | Seedlings, veggies, very sandy soil (not established xeric plants) |
| B: Deep, infrequent soak | 70 min once/week with 2 × 1-GPH emitters | ~2.3 gallons/week | Deeper wetting; roots chase moisture; better drought performance; lower rot risk if soil drains | Established drought-tolerant shrubs/perennials |
Same weekly gallons, totally different root behavior. If your plant is yellowing and you’re watering “a little all the time,” shifting to deep/infrequent is often the turning point.
Three watering mistakes that trigger yellow leaves
- “Just a splash” watering: wets the top inch only. The plant is thirsty below, and older leaves yellow and drop.
- Watering on a schedule, not by soil: a cool week or a shady bed may stay wet for 10+ days, especially in clay.
- Watering near the crown: for plants like lavender and many succulents, chronic moisture at the base encourages crown rot.
Soil and drainage: drought plants hate “wet feet”
If your drought-tolerant plant is yellowing and you’re confident you didn’t overwater, check the soil structure. Many drought-tolerant species evolved for mineral soils with fast drainage and lots of air pockets. Put them in dense clay or rich compost and they can yellow from root stress even with “normal” watering.
Drainage test (10 minutes of work, big payoff)
- Dig a hole 12 inches deep and about 8 inches wide near the plant (not through major roots if you can avoid it).
- Fill it with water and let it drain once (pre-wets the soil).
- Fill it again and time the drop.
Rule of thumb: if water is still sitting in the hole after 4 hours, drainage is poor for most drought-tolerant plants. If it drains in 30–90 minutes, you’re usually in a safe range.
These practical drainage guidelines align with extension recommendations emphasizing oxygen availability in root zones and avoiding chronic saturation (University of Minnesota Extension, 2023).
Fixes for poor drainage (without ripping the whole yard apart)
- Raise the planting area: build a berm or mound 6–12 inches high using mineral topsoil blended with coarse sand or small gravel (avoid adding pure sand to clay—aim for a mixed, crumbly texture).
- Stop “improving” with too much compost: compost is great, but in heavy soils it can hold water. For true xeric beds, keep amendments modest and focus on structure.
- Switch mulch type: use gravel mulch (1–2 inch layer) around lavender, thyme, and many succulents instead of thick bark that stays damp at the crown.
- Choose the right potting mix for containers: a cactus/succulent mix or a blend that drains fast. A common target is 30–50% mineral material (pumice, perlite, grit) for succulents.
Light and heat: yellow can be a sun problem, not a water problem
Drought-tolerant plants often love sun, but there’s a catch: nursery-grown plants are frequently raised under shade cloth. Put them straight into harsh afternoon sun and you can get yellowing from sunscald or heat stress—especially the first 2–3 weeks after planting.
Symptoms that point to light/heat stress
- Yellow or bleached patches on the sun-facing side only
- Leaf edges crisping during hot, windy afternoons
- Plant wilts midday but perks up at night (especially in the first week after transplanting)
Practical fixes
- Give temporary shade for 7–14 days (shade cloth, patio umbrella, or lattice) for new transplants during extreme heat.
- Water deeply the morning of a heat wave (not every day—just before peak stress). Moist soil buffers heat better.
- Check reflected heat: south/west walls and gravel can push temperatures higher. If leaves closest to a wall yellow first, consider relocating or providing afternoon shade.
Heat stress can look like underwatering, but the fix isn’t always more water—it’s often smarter timing and temporary protection.
Feeding: when fertilizer causes yellow leaves
Drought-tolerant plants are generally light feeders. Over-fertilizing is a classic cause of yellowing because it creates salt buildup, pushes weak growth, and interferes with nutrient uptake. Under-fertilizing can also cause pale foliage, but it’s less common in established landscape plants unless soil is extremely poor or pH is off.
Common feeding mistakes
- High-nitrogen lawn fertilizer drifting into beds: causes fast, soft growth in rosemary/lavender and can lead to yellowing and dieback.
- “A little every watering” in pots: salts accumulate, leaf tips burn, leaves yellow.
- Ignoring pH: iron becomes unavailable in alkaline soils, leading to yellow leaves with green veins.
What to do instead (specific, workable targets)
- Landscape plants: if growth is slow but otherwise healthy, top-dress with 1 inch of compost in spring, keeping it 2–3 inches away from stems.
- Container plants: flush salts every 6–8 weeks by watering until at least 20% of water drains out the bottom (this only works if the pot has drainage holes).
- Chlorosis (yellow leaves with green veins): test soil pH. If pH is above 7.5, consider an iron chelate labeled for alkaline soils and correct the root cause (waterlogging, high pH irrigation water, compacted soil).
Many extension resources emphasize that diagnosing nutrient problems without a soil test leads to wasted effort and sometimes worse yellowing (Texas A&M AgriLife Extension, 2022).
Common problems that turn drought-tolerant leaves yellow
Once water, soil, and light are roughly right, look at the “usual suspects.” These show up in home landscapes constantly, and they often overlap with watering issues.
1) Root rot (Phytophthora and friends)
Symptoms: yellowing spreads quickly, leaves may droop, stems near the base look dark, roots smell sour or look brown and sloughy. Often worse after a rainy period or after switching to frequent irrigation.
Fix:
- Stop watering until the soil dries to at least 4–6 inches down.
- Improve drainage (raise the bed, reduce mulch at crown, fix runoff).
- In pots: remove plant, trim black/mushy roots, repot in fast-draining mix, and use a pot with drainage. If more than 50% of roots are rotten, replacement is often more realistic than rehab.
2) Spider mites (especially in hot, dusty spots)
Symptoms: fine stippling that turns into bronzing/yellowing, tiny webbing, leaves look “dirty” or speckled. Often hits rosemary, juniper, and some succulents in reflected heat.
Fix:
- Blast foliage with water early morning 2–3 times per week for 2 weeks (works best early in infestation).
- If needed, use insecticidal soap or horticultural oil, following label directions and avoiding application above 85°F (29°C) to prevent leaf burn.
3) Scale insects and mealybugs
Symptoms: sticky honeydew, sooty mold, yellow leaves, bumps on stems, cottony clusters in leaf joints (common on succulents).
Fix:
- Spot-treat with 70% isopropyl alcohol on a cotton swab for small infestations (test a small area first).
- Prune heavily infested stems; isolate house/patio plants to prevent spread.
4) Cold shock (yes, even “tough” plants)
Symptoms: yellowing after a sudden cold night, then blackened tips. Common when a warm spell is followed by a dip below 28–32°F (-2 to 0°C), especially on tender succulents and newly planted rosemary.
Fix:
- Wait until weather stabilizes, then prune dead tissue back to green.
- Use frost cloth on nights forecast below 32°F (0°C), especially for first-year plants.
Troubleshooting by symptom: quick diagnoses that actually work
Use this section like a field checklist. Pick the closest match and do the specific action steps in order.
Symptom: yellow leaves + soft/mushy base
- Most likely: overwatering, poor drainage, root/crown rot.
- Do this today: stop irrigation; pull mulch back 3 inches from crown; check soil moisture at 6 inches.
- Do this this week: adjust drip to deeper, less frequent cycles; consider raising the plant on a mound if water pools.
Symptom: yellow older leaves + dry, crispy edges
- Most likely: chronic underwatering from shallow watering, salt buildup, or hot wind.
- Do this today: deep soak until soil is moist 8–12 inches down; if in a pot, water until 20% drains out.
- Do this this week: add a windbreak or temporary shade during extreme heat; flush pot salts if using fertilizer.
Symptom: new leaves yellow, veins stay green
- Most likely: iron chlorosis from high pH, cold/wet roots, or compacted soil.
- Do this today: check drainage and irrigation frequency; don’t add nitrogen.
- Do this this month: test soil pH; if pH > 7.5, use chelated iron per label and improve soil aeration/drainage.
Symptom: yellow speckling + fine webbing
- Most likely: spider mites.
- Do this today: hose off foliage; repeat every 3–4 days.
- Do this this week: treat with soap/oil if needed; reduce dust and heat stress.
Real-world scenarios (and how to fix them without guesswork)
Scenario 1: Lavender turns yellow after you “improve the soil”
You planted lavender in a bed amended like a vegetable garden—several inches of compost worked into clay. It looked fine for a month, then yellowed from the bottom up, and the crown started thinning.
What’s happening: compost + clay can hold moisture around lavender’s crown and roots, starving them of oxygen. Lavender prefers lean, fast-draining soil and hates staying damp.
Fix plan:
- Pull mulch back and keep the crown dry.
- Reduce irrigation to a deep soak every 10–14 days (adjust for weather).
- If drainage is poor, lift and replant on a 8–12 inch mound with mineral soil and gravel mulch.
- Prune lightly (don’t cut into old wood) to improve airflow.
Scenario 2: Succulent in a decorative pot yellows fast indoors or on a patio
Your echeveria or aloe was fine, then leaves turned translucent-yellow and started dropping. The pot is cute, but you can’t remember if it has holes.
What’s happening: no drainage + moisture-retentive mix equals root rot. Indoors, low light slows water use, making the problem worse.
Fix plan:
- Confirm drainage. If there’s no hole, repot within 48 hours.
- Use a fast-draining mix (aim for 30–50% pumice/perlite/grit).
- After repotting, wait 3–5 days before watering to let damaged roots callus.
- Move to brighter light gradually over 7–10 days to avoid sunburn.
Scenario 3: Rosemary hedge yellows in patches despite “not much water”
Rosemary is supposed to be tough, but sections are yellowing while others look fine. You water with drip, and the schedule hasn’t changed.
What’s happening: uneven emitter output, clogged emitters, or a low spot where water collects. I’ve also seen rosemary yellow from spider mites in hot reflected heat near driveways.
Fix plan:
- Run the system and physically check each emitter for 60 seconds—look for weak flow or none.
- Probe soil moisture at 6 inches in both healthy and yellow patches. If yellow areas are wetter, fix grading/drainage; if drier, fix coverage.
- Inspect for mites: tap a stem over white paper; if tiny moving dots appear, treat and reduce dust.
When to remove yellow leaves (and when to leave them alone)
Yellow leaves don’t turn green again. Removing them can tidy the plant and reduce disease pressure, but don’t strip foliage aggressively—plants need leaves to recover.
- Remove leaves that are fully yellow, mushy, spotted, or moldy.
- Keep slightly pale leaves if the plant is stressed and leaf drop would expose stems to sunburn.
- Rule of thumb: don’t remove more than 25–30% of total foliage in one session.
A steady recovery plan (what I’d do over the next 2–3 weeks)
If you want a practical roadmap, this sequence solves most yellowing problems without causing new ones:
- Week 1: Verify drainage and correct watering frequency. Probe soil at 6 inches before every watering.
- Week 1–2: Adjust light exposure for new transplants (temporary shade if needed). Check for mites/scale.
- Week 2: Flush container salts if applicable; avoid fertilizing until you see healthy new growth.
- Week 3: If yellowing persists, do a soil pH test and consider targeted correction (iron chelate for chlorosis, not random fertilizer).
Most drought-tolerant plants respond quickly once roots can breathe and watering matches the soil. Look for the first sign of recovery in the newest growth: firmer leaves, better color, and new tips that aren’t stalling out. If you get that, you’re back on track—even if a few older yellow leaves still need time to drop.
And if there’s one hard-won lesson I can pass along, it’s this: drought-tolerant plants thrive on rhythm—deep water, then real drying—more than they thrive on constant attention. Adjust the rhythm, and the yellow usually fades into the background where it belongs.
Sources: Washington State University Extension horticulture resources (2019); Texas A&M AgriLife Extension, nutrient deficiency guidance (2022); University of Minnesota Extension, soil drainage and root health materials (2023).