Reviving Succulents After a Drought
You come home from a trip, or you’ve been busy and the pots on the patio simply didn’t make the cut. Your succulents look… bad. Leaves are wrinkled like raisins, a rosette is half-collapsed, and one plant has dropped a ring of crispy “bottom leaves” that crunch when you touch them. The surprising part? The fastest way to finish them off is usually a big drink.
Drought-stressed succulents can absolutely recover, but you’ll get the best results by rehydrating in stages, checking roots before you water heavily, and matching light and soil to the plant’s current strength. Think of it like bringing someone in from the desert: you don’t hand them a gallon of ice water and send them for a run.
First: confirm it’s drought stress (not rot or pests)
Before you change anything, do a 2-minute assessment. Drought symptoms and rot symptoms can look similar from a distance, but they respond to opposite care.
Quick symptom check
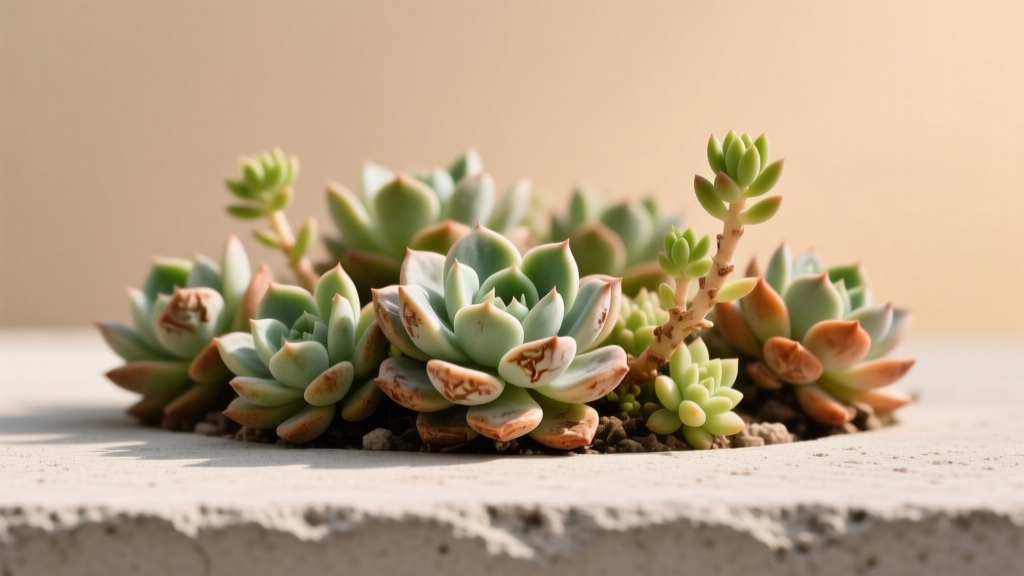
- Drought stress: leaves thin, wrinkled, dull; plant feels light in the pot; stems firm (not mushy); older leaves may dry and drop.
- Overwatering/rot: leaves translucent or yellow, mushy base, blackened stem, sour smell; plant may collapse suddenly even if soil is damp.
- Sunburn (often after drought): bleached patches (tan/white), corky scars; tissue feels dry but not wrinkled overall.
- Spider mites/mealybugs: stippling, webbing, cottony clusters in leaf axils; plant may look “tired” even with correct watering.
If the plant is mushy anywhere near the crown or base, skip ahead to the troubleshooting section on rot. If it’s wrinkled but firm, drought recovery is a good bet.
Scenario-based triage: three common drought situations
Not all droughts are equal. The right move depends on how long the plant has been dry and what’s happening underground.
Scenario 1: “Forgot to water for 3–6 weeks” (still potted, leaves wrinkled)
This is the most salvageable case. Roots are usually alive but dormant, and the plant needs a steady rehydration cycle—not a flood followed by more neglect.
Scenario 2: “Bone-dry for 2–3 months” (pot feels feather-light, lower leaves crisp)
In longer droughts, fine feeder roots can die back. If you water heavily right away, the soil may stay wet while the plant can’t drink efficiently—setting the stage for rot. Plan on checking the root ball and possibly refreshing soil.
Scenario 3: “Outdoor heatwave + drought” (sunburn plus dehydration)
Here, the plant is fighting on two fronts: water deficit and heat/light damage. Rehydration helps, but you’ll also need temporary shade and a gentler ramp back to full sun.
Watering: how to rehydrate without splitting or rotting
Succulents store water in leaves and stems, so drought recovery is about restoring root function and refilling tissues gradually. Over-correcting is where people lose plants.
The two-step rehydration method (works for most droughted succulents)
- First drink (controlled): Moisten the soil evenly, but don’t fully saturate if the plant is severely dehydrated. For a 4-inch pot, start with about 60–90 mL (¼–⅓ cup) poured slowly around the edge.
- Wait: Give it 48 hours in bright shade or morning sun only. This pause lets roots “wake up” and begin absorbing again.
- Second drink (full soak): Water thoroughly until you see drainage for at least 10–20 seconds. Then let it drain completely—no saucers holding water.
For many home gardeners, that pause is the difference between a rebound and a mushy mess.
Bottom-watering vs top-watering (with real tradeoffs)
If the potting mix has become hydrophobic (water runs down the sides and out the bottom), bottom-watering can re-wet it more evenly. If the crown is tight (Echeveria, Sempervivum), avoid splashing into the rosette where water can sit.
| Method | Best for | Typical time | Risk | What “done” looks like |
|---|---|---|---|---|
| Top-watering (slow pour) | Most succulents in gritty mix; quick resets after mild drought | 30–90 seconds | Water trapped in rosettes; channeling in hydrophobic soil | Water drains freely; pot feels evenly heavier |
| Bottom-watering (soak tray) | Hydrophobic soil; very dry mixes that repel water | 10–20 minutes | Over-soaking; salts move upward if done repeatedly | Top surface becomes slightly damp; pot noticeably heavier |
| “Sip” rehydration (measured small watering) | Severely droughted plants with possible root dieback | 2–3 days total (two steps) | Too little water if repeated endlessly | Leaves begin to plump within 3–7 days |
Water quality and temperature matter more than you’d think
Use room-temperature water, roughly 18–24°C (65–75°F). Ice-cold water on a hot, drought-stressed root zone can shock tissues. If your tap water is very hard, occasional flushing helps prevent salt buildup—especially after fertilizer. Extension guidance commonly recommends leaching container soils periodically to reduce soluble salts (North Carolina State Extension Publication, 2020).
“Allowing the potting medium to dry between thorough waterings is essential for most succulents; constant moisture around roots is a primary cause of decline.” — University of Minnesota Extension, Houseplant Watering Guidance (2022)
How long until you see improvement?
- 2–4 days: slight plumping in thin-leaved succulents (Crassula, Sedum).
- 5–10 days: noticeable change in Echeveria-type rosettes if roots are functional.
- 2–3 weeks: if the plant had root dieback and needs time to regrow fine roots.
If nothing changes after 10 days (and you’ve watered correctly), inspect roots.
Soil and potting: drought often exposes a hidden problem
A droughted succulent in the right mix usually bounces back. A droughted succulent in peat-heavy soil often becomes a “rehydrate-and-rot” situation because the mix re-wets unevenly and stays wet too long.
When to unpot and check roots
Unpot if any of these are true:
- The plant is severely shriveled after 7–10 days and two correct waterings.
- Water runs straight through or down the pot sides (hydrophobic mix).
- You smell sour/earthy rot, or the base looks dark.
- The plant wobbles, suggesting root loss.
Root triage: what you want to see
- Healthy roots: light tan/white, firm, branching.
- Drought-killed fine roots: brittle, papery, snapping easily.
- Rotten roots: brown/black, slimy, outer sheath slips off.
Trim dead or rotten roots with clean scissors. If you remove more than about 30% of the roots, let the plant sit out of soil in bright shade for 24 hours so cut surfaces callus.
A practical soil recipe for recovery
Aim for a mix that drains fast but still holds a little moisture for root regrowth. For most common succulents:
- 50% quality cactus/succulent mix
- 50% mineral grit (pumice, perlite, crushed granite, or coarse horticultural sand)
If you live in humid areas or keep plants indoors with lower evaporation, push it to 60–70% mineral grit.
Pot choice: size and material affect recovery speed
- Choose a pot only 1–2 inches wider than the root mass. Oversized pots hold moisture too long after rehydration.
- Unglazed terracotta dries faster and can be forgiving during recovery.
- Always use a drainage hole. No exceptions for drought recovery.
Light: drought recovery is not the time for “full blast” sun
When a succulent is dehydrated, it can’t cool itself or maintain normal cell pressure. Put it straight into harsh sun and you’ll often get sunburn or stalled recovery.
Use a 7–14 day light ramp
- Days 1–3: bright shade or filtered light; no hot afternoon sun.
- Days 4–7: morning sun for 1–3 hours, then shade.
- Days 8–14: increase exposure by 30–60 minutes every couple of days until back to your normal spot.
Indoors, place the plant near the brightest window you have (often south or west), but start a few inches back from the glass if it’s been stressed. If you use grow lights, begin at 12–18 inches above the plant and shorten the distance gradually.
Temperature guidelines
Most common succulents recover best in a stable range of 18–27°C (65–80°F). Avoid rehydrating right before a cold night below 10°C (50°F) outdoors; cold, wet soil is a classic rot trigger.
Feeding: when fertilizer helps—and when it backfires
A droughted plant is not a hungry plant; it’s a stressed plant. Fertilizing too soon can burn damaged roots and increase salt stress.
When to fertilize
- Wait until you see signs of recovery: new growth, firmer leaves, or improved color.
- As a rule of thumb, wait 2–4 weeks after the first successful rehydration cycle.
How to fertilize safely
- Use a balanced liquid fertilizer at ¼ strength (for example, if the label says 1 teaspoon per gallon, use ¼ teaspoon per gallon).
- Apply only to already-moist soil—water first, then fertilize.
- Feed during active growth periods (often spring/summer; winter growers like many Aloes and Haworthias may prefer cooler seasons).
Salt buildup is a real issue in containers. Periodically flushing the pot with plain water until it drains freely helps reduce soluble salts (Royal Horticultural Society guidance on container composts and feeding, 2021).
Common problems after drought (and exactly what to do)
Drought doesn’t just dehydrate a plant; it changes how it responds to water and light afterward. Here are the problems I see most often in home collections.
Problem: Leaves stay wrinkled after watering
Likely causes: hydrophobic soil, dead fine roots, or the plant is using stored water to regrow roots.
What to do:
- Check if water is actually soaking in. If it runs through, bottom-water for 15 minutes once, then return to normal watering.
- If no change after 10 days, unpot and inspect roots. Trim dead roots and repot into a grittier mix.
- Keep light bright but gentle for 7 days while roots recover.
Problem: Leaves plump up, then turn mushy at the base
Likely causes: overwatering after drought, poor drainage, or watering in cool conditions.
What to do (act fast):
- Stop watering immediately.
- Unpot, remove wet soil, and inspect the stem base.
- Cut away any black/mushy tissue back to firm, healthy tissue.
- Let the plant callus for 48–72 hours in dry shade.
- Repot dry in fresh gritty mix; wait 5–7 days before watering lightly.
Problem: Brown, bleached patches after moving back to sun
Likely causes: sunburn on dehydrated tissue.
What to do:
- Move to bright shade immediately.
- Do not remove burned leaves unless they’re fully dead; partially damaged leaves still feed the plant.
- Restart the light ramp (add sun back over 10–14 days).
Problem: Plant drops a lot of lower leaves
Likely causes: normal drought response, plus the plant reallocating resources. Some leaf loss is expected.
What to do:
- Remove only leaves that detach with a gentle tug; don’t tear living tissue.
- Check for pests hiding under dropped leaves (mealybugs love that shelter).
- Stabilize watering: water thoroughly, then wait until the mix is dry at least 2 inches down.
Problem: Soil is hard, shrunken, and pulls away from the pot
Likely causes: peat-heavy mix became hydrophobic during drought.
What to do:
- Bottom-water once for 10–20 minutes to re-wet, then let drain.
- If it keeps happening, repot into a mix with 50–70% mineral grit.
Step-by-step revival plan (use this if you’re unsure)
If you want one practical routine you can follow without overthinking, this is it.
- Move out of harsh sun for 3 days (bright shade is perfect).
- Check the pot weight and the soil surface. If bone-dry, do the controlled first drink: 60–90 mL for a 4-inch pot.
- Wait 48 hours. Don’t “test water” again during this window.
- Water thoroughly until it drains for 10–20 seconds. Empty the saucer.
- Do not fertilize for 2–4 weeks.
- Ramp light back up over 7–14 days.
- Reassess at day 10. If it’s not improving, unpot and check roots.
Extra notes for popular succulent types
Different succulents show drought stress differently. Here are a few quick, real-world cues.
Echeveria and tight rosettes
Wrinkling often starts on lower leaves. Avoid water sitting in the crown; water around the pot edge. If leaves are very thin and papery, expect some loss while new roots form.
Aloe and Haworthia
Leaves may curl inward during drought. After rehydration, they can take 1–2 weeks to relax fully. These often appreciate bright light but not scorching afternoon sun while recovering.
Jade plant (Crassula ovata)
Jades can look fine, then drop leaves after rewatering if roots were compromised. Use the two-step rehydration method and make sure the mix drains sharply. Don’t fertilize until you see new leaf pairs forming.
Case notes from the patio: what actually works
Case 1: The “vacation shrivel” Echeveria
A 5-inch pot left dry for about 4 weeks came back best with a 48-hour pause between a small drink and a full soak. The plant lost three bottom leaves, but the center stayed firm and new growth resumed within 8 days. The key was shading it for the first week; the same variety in full afternoon sun scorched.
Case 2: The hydrophobic soil trap
A Sedum in a peat-heavy mix looked thirsty even after watering because the water ran down the pot sides. Bottom-watering for 15 minutes fixed the immediate problem, but it relapsed the next dry cycle. Repotting into a 50/50 mix stopped the “false drought” pattern.
Case 3: Heatwave damage with mixed symptoms
An Aloe outdoors during a 35°C (95°F) stretch had both curling (dehydration) and pale scald patches (sunburn). Moving it to morning sun only, rehydrating in two steps, and waiting 3 weeks before feeding produced new clean growth. The old scars never disappeared, but the plant’s vigor returned.
When a succulent can’t be “revived” as-is (but can be saved)
Sometimes the top is too far gone, but the plant can still live on through cuttings.
Signs you should switch to propagation mode
- The crown or stem base is soft or blackening.
- Leaves detach with a wet, mushy break.
- The plant smells rotten even after drying.
Simple salvage method
- Cut above any damaged tissue into firm, healthy stem.
- Let the cutting callus for 3–7 days (longer for thicker stems).
- Place on dry gritty mix; wait 5 days, then mist lightly or water sparingly around the edge.
- Once you feel resistance (new roots), return to normal watering.
Drought recovery is mostly about restraint: controlled water, honest root checks, and a patient return to light. When you get that rhythm right, a “dead-looking” succulent often surprises you—plumping back up leaf by leaf, as if nothing happened, except now you know exactly how close the edge really was.
Sources: University of Minnesota Extension, Houseplant watering and moisture management guidance (2022); North Carolina State Extension, container media and soluble salts/leaching guidance (2020); Royal Horticultural Society (RHS), container compost and feeding recommendations (2021).