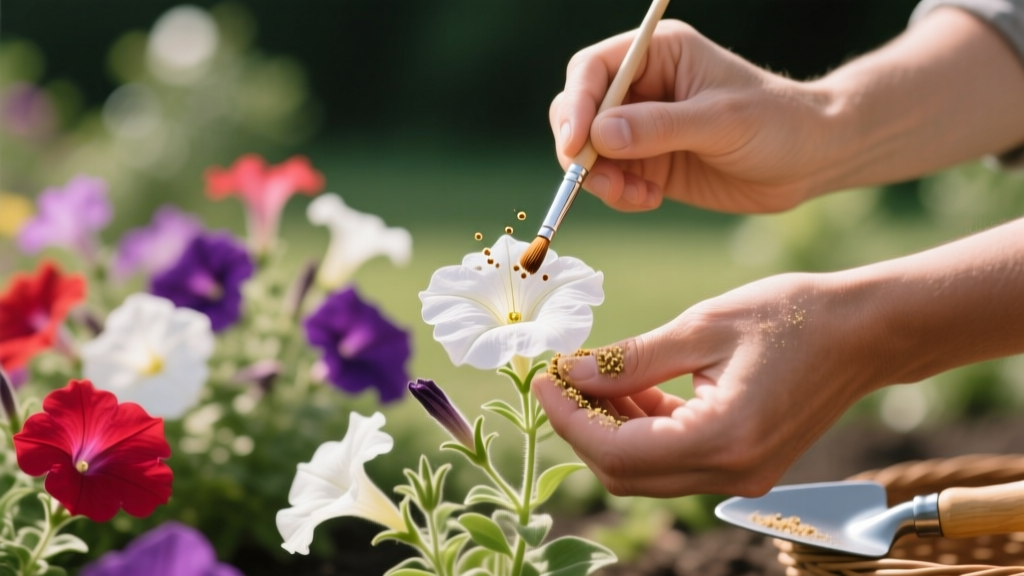
Hand-Pollinating Petunias for Better Fruit Set
You’ve got petunias overflowing from baskets and beds, flowers popping daily… yet the seed pods (the “fruit” of a petunia) are scarce, small, or never mature. Or maybe you’re saving seed for next year and keep finding empty pods that crumble when you squeeze them. I’ve seen this happen most often in two situations: hot spells where pollen gets lazy, and patio/container setups where pollinators simply don’t visit. The surprising part is how easy it is to tip the odds back in your favor with a 30-second routine done at the right time of day.
Petunias are generally good at setting seed when conditions are right, but “generally” doesn’t help when you’re trying to collect seed from a specific color, make a cross, or get consistent fruit set on a covered porch. Hand-pollination isn’t fussy, but it rewards attention to timing, flower stage, and plant care (water, light, and feeding) that keeps pollen viable and the developing pod from aborting.
What “fruit set” means for petunias (and why it fails)
In petunias, the “fruit” is a seed capsule that forms behind the flower once pollen grains reach the stigma, germinate, and fertilize ovules. That capsule has to keep growing for a few weeks before it browns and splits to release seed.
Fruit set fails for a handful of practical reasons:
- Pollen isn’t viable (often from heat stress or overly wet flowers).
- The stigma isn’t receptive (wrong flower age or time of day).
- No pollen transfer (low pollinator activity, no wind movement in sheltered spots).
- The plant aborts the pod because it’s stressed (drying out, low light, low nutrition, or root issues).
University-based breeding and extension resources consistently note that temperature and humidity affect pollen performance and fertilization success. In practice, that’s why your petunias may set pods in June but struggle during a sticky July heat wave. For background on petunia reproductive biology and breeding, the University of Minnesota Extension’s petunia overview and cultural guidance are a useful baseline (University of Minnesota Extension, 2023), and controlled pollination methods are standard in ornamental breeding programs (Royal Horticultural Society, 2022).
“Successful pollination is as much about plant condition as it is about pollen transfer—stressed plants commonly abort developing seed capsules even after fertilization.” — adapted from common extension greenhouse production guidance on bedding plants (University of Florida IFAS Extension, 2020)
Three real-world situations where hand-pollinating pays off
Scenario 1: Covered porch or sunroom planters. You’ve got bright light but little insect traffic. Flowers look perfect, but seed pods are rare. Hand-pollination replaces the missing pollinators.
Scenario 2: Heat-wave garden. Daytime highs push 90–95°F (32–35°C) for a week. You still see blooms, but pollen clumps, and pods abort. Hand-pollinating early in the day and keeping moisture consistent improves success.
Scenario 3: Saving seed from a specific plant. You want seed from that one “perfect purple” petunia. Hand-pollinating lets you target the exact flowers and (if you want) control the pollen source to reduce accidental crosses.
Know your flower parts (quick and practical)
You don’t need a botany degree—just the basics:
- Anthers: pollen-bearing tips (often dusted with pale yellow pollen).
- Stigma: sticky surface where pollen lands (inside the flower throat).
- Ovary: behind the flower base; becomes the seed capsule if fertilization happens.
Petunia flowers are usually “perfect” (male and female parts in the same bloom), so self-pollination is possible. For intentional crosses, you’ll remove anthers from the flower you want to be the seed parent before they shed pollen.
Best timing: the simple schedule that works
If you only remember one thing: pollinate when the flower is fresh and the plant is not stressed.
- Time of day: Aim for 8–11 a.m. once dew has dried but before midday heat.
- Flower age: Use blooms that opened within the last 24 hours. Older blooms often have less receptive stigmas and less viable pollen.
- Weather: Avoid pollinating when flowers are wet from rain/overhead watering. Let them dry for 2–3 hours.
Hand-pollination methods (with steps you can actually follow)
Method A: “Brush transfer” (fast, great for general seed set)
This is my go-to when a gardener simply wants more seed capsules on patio plants.
- Pick the right tools: a small, dry artist’s brush (size 0–2), a cotton swab, or even a clean fingertip.
- Collect pollen: touch the brush to the anthers of a fresh flower. You should see a faint dusting.
- Deliver pollen: gently brush the stigma inside another fresh flower’s throat.
- Repeat: do 5–10 flowers per plant every 2–3 days for two weeks if you want a good batch of pods.
- Tag if saving seed: tie a small string or label so you know which flowers were pollinated.
Tip from experience: If pollen isn’t transferring, the plant may be too hot or too wet. Move to earlier in the morning and avoid overhead watering for a day.
Method B: “Controlled cross” (for intentional hybridizing)
Use this when you want to cross Plant A (seed parent) with Plant B (pollen parent).
- Select a bud on the seed parent that will open within 12–24 hours (plump, color showing).
- Emasculate: carefully open the bud and remove the anthers with tweezers before pollen sheds.
- Bag it (optional but helpful): cover with a small mesh bag to prevent stray pollen.
- Collect pollen from the pollen parent from a fresh, open flower.
- Pollinate: dab pollen onto the seed parent’s stigma.
- Label clearly: include date and cross (e.g., “Purple A × White B, 6/11”).
Comparison: brush transfer vs controlled cross (with real-world numbers)
| Pollination approach | Typical time per flower | Best use | Expected capsule set (home conditions) | Control over parentage |
|---|---|---|---|---|
| Method A: Brush transfer | ~10–20 seconds | Boosting seed pod formation quickly | 40–70% of treated flowers (varies with heat/water) | Low (open pollination likely) |
| Method B: Controlled cross | ~2–4 minutes | Hybridizing, saving seed true to a planned cross | 20–60% of treated flowers (more steps, more handling) | High (especially with bagging/labeling) |
Those percentage ranges reflect what I regularly see in home gardens: brush transfer wins on speed and volume, while controlled crosses sacrifice convenience for genetic control. When temperatures stay near 70–85°F (21–29°C) and moisture is steady, both methods improve.
Watering: keep pods from aborting
Most petunia “failed fruit set” I troubleshoot isn’t a pollination failure—it’s a pod abortion triggered by uneven watering. Developing seed capsules are a resource sink, and petunias are quick to drop them if they swing between drought and flood.
How much water is “enough”?
- In containers: water until you see 10–20% runoff from the drainage holes, then stop. In hot weather, that might be daily for small pots.
- In beds: aim for about 1 inch of water per week (rain + irrigation), adjusting for heat and sandy soil.
Timing tip: Water early morning. If you water late evening, flowers may stay damp into the next day, making pollen clump and reducing stigma receptivity.
Signs watering is hurting fruit set
- Flowers look fine, but tiny pods yellow and drop within 3–7 days.
- Leaves curl on hot afternoons even when the pot is “sort of” moist.
- Soil pulls away from the pot edge (severe dry-down).
Soil and potting mix: root health drives reproduction
If you’re growing petunias in containers (where many people try seed saving), soil structure matters as much as fertility. You want moisture retention without sogginess.
- Container mix: use a quality peat/coir-based potting mix with perlite. Avoid heavy garden soil in pots—it compacts and suffocates roots.
- Target pH: petunias perform best around pH 5.5–6.2 in soilless mixes; iron uptake problems show up sooner at higher pH.
- Pot size: for vigorous trailing petunias, a 10–12 inch pot (or a basket with similar volume) is far easier to keep evenly moist than a cramped 6-inch pot.
If you suspect root problems, slide the plant out of its pot. Healthy roots are white to tan and fill the mix without circling into a tight knot. Brown, sour-smelling roots point to overwatering or poor drainage—both enemies of seed capsule retention.
Light and temperature: the hidden factors behind “empty pods”
Petunias flower best in strong light, and seed set follows. Low light makes weaker flowers with less energy to mature pods.
- Sun target: 6–8 hours of direct sun is a solid baseline outdoors.
- Heat management: if highs hit 90°F (32°C) or more, pollinate in the morning and give containers a little afternoon shade to reduce stress.
- Indoor/greenhouse: bright south-facing light is often not enough for heavy seed set unless supplemented. If plants are stretching, seed production will be spotty.
One practical trick: in hot weeks, I’ll shift baskets so they get sun until about 1–2 p.m. and bright shade after. You still get bloom, but the plant holds onto pods better.
Feeding: enough to support pods, not so much you get only leaves
To mature seed capsules, petunias need steady nutrition—especially in containers where frequent watering leaches nutrients. But overdoing nitrogen can push lush growth at the expense of pod retention.
A feeding routine that supports flowering and seed capsules
- Container petunias: apply a balanced or bloom-leaning fertilizer (something like 10-10-10 or 15-30-15) at 1/2 strength every 7–10 days, or use a controlled-release fertilizer at label rates.
- In-ground: incorporate compost and use a light feeding every 3–4 weeks if growth is pale or slow.
Watch for iron deficiency: yellow leaves with green veins (especially on new growth) can show up when pH is high or roots are stressed. Correcting pH and using chelated iron can restore vigor—and vigorous plants set seed more reliably.
Common problems that block successful hand-pollination
Problem: You’re deadheading everything
If you remove every spent flower, you also remove the developing ovary behind it. For seed pods, you must leave some pollinated flowers in place. I usually tell gardeners to “assign” part of the plant for seed production:
- Leave 5–15 pollinated flowers per plant to mature pods.
- Keep deadheading the rest to maintain bloom and reduce disease pressure.
Problem: Rain and overhead watering wash away pollen
Wet flowers don’t pollinate well. If you rely on sprinklers, switch to drip or hand-water the soil line for a week while you pollinate. If rain is unavoidable, pollinate on the next dry morning and aim for multiple attempts every 2–3 days.
Problem: Heat makes pollen clump
During hot spells, pollen can get sticky and less viable. Pollinate early, keep plants evenly moist, and avoid pushing high nitrogen. If you can, provide light shade in the hottest part of the day.
Troubleshooting: symptoms and specific fixes
Symptom: Pods start, then turn yellow and drop
- Most likely causes: drought/overwatering swings; low light; root stress.
- Fix:
- Stabilize watering—no extreme dry-down. In containers, check moisture daily during 85°F+ weather.
- Move plant to stronger light (aim for 6+ hours sun).
- Inspect roots; repot to a larger container if rootbound.
Symptom: Flowers pollinated, but pods are hollow or very low seed count
- Most likely causes: pollination happened when stigma wasn’t receptive; pollen not viable (heat/wetness); incomplete pollen transfer.
- Fix:
- Pollinate flowers opened within 24 hours.
- Try again on a different morning; make 2–3 pollination passes on the same flower over 48 hours if needed.
- Avoid pollinating wet blooms; wait until dry.
Symptom: Lots of lush green growth, few pods
- Most likely causes: too much nitrogen; too much shade; heavy pruning/deadheading of potential pods.
- Fix:
- Switch to a bloom-leaning feed and reduce overall nitrogen.
- Increase light exposure.
- Designate specific stems for seed and stop deadheading those.
Symptom: Sticky residue, distorted growth, and buds that fail
- Most likely causes: aphids or thrips feeding on buds/flowers.
- Fix:
- Blast aphids off with water early in the day (avoid soaking flowers you plan to pollinate that morning).
- Use insecticidal soap in the evening, repeating every 5–7 days for 2–3 rounds as needed.
- Remove badly damaged blooms and pollinate fresh ones after the population is controlled.
Seed pod care: from pollinated flower to harvestable capsule
Once pollination “takes,” the flower will fade and drop, but the base should swell slightly. After that, your job is to keep the plant steady.
- Don’t drown it: soggy roots lead to aborted pods and fungal issues.
- Don’t let it crisp: a single severe dry-out can trigger pod drop.
- Support if needed: heavy pod-laden stems can flop in baskets; a soft tie prevents breakage.
Most petunia seed capsules mature in roughly 3–5 weeks, depending on temperature. Harvest when capsules turn tan/brown and begin to dry—before they split and scatter. I snip pods into a paper envelope and let them finish drying indoors for 7–10 days in a warm, dry spot (around 65–75°F / 18–24°C). Then crumble gently and separate seed from chaff.
How plant care ties directly to hand-pollination success
Hand-pollination is the “spark,” but plant care is the “fuel.” If your petunia is living on the edge—too dry by noon, too shaded, underfed, or rootbound—fertilization may still happen, but the plant often won’t commit to finishing the job. When gardeners tell me, “I tried brushing pollen and nothing happened,” a quick look usually reveals one of three things: inconsistent watering in a small pot, too little sun on a porch that looks bright to humans, or constant deadheading that removed every developing capsule.
If you want a simple weekly rhythm that works:
- Mon/Wed/Fri mornings: hand-pollinate 5–10 fresh flowers per plant.
- Once a week: feed at 1/2 strength (containers) and flush with plain water once a month to reduce salt buildup.
- Daily in hot spells: check container moisture; keep it even.
- All season: deadhead most blooms, but leave your tagged seed flowers alone.
For further reading on petunia culture and performance needs, including sunlight and general care practices, see University of Minnesota Extension guidance (University of Minnesota Extension, 2023). For pollination technique fundamentals used broadly in garden plants and breeding work, the Royal Horticultural Society’s resources on plant propagation and controlled pollination are a dependable reference point (Royal Horticultural Society, 2022).
Once you get the hang of the timing—dry morning, fresh flowers, steady moisture—you’ll find petunias are cooperative. Some weeks you’ll still lose a few pods (that’s normal), but you’ll also start seeing those little capsules swelling behind the blooms you tagged. And when you finally crack open a dry pod and see a pile of viable seed, it feels like you’ve been let in on a piece of the plant’s private life—one you can use to save favorites, share with friends, or start your own small breeding experiment right on the patio.