How to Clone Bulbs from Existing Plants
You know that feeling: you planted 10 tulips, and one of them turns out to be a stunner—bigger bloom, richer color, stronger stem. Next spring you want more of that exact plant, not a “similar one” from a new bag of bulbs. Here’s the surprise most home gardeners learn the hard way: bulbs don’t reliably “come true” from seed, and many named varieties only stay identical when you clone them by division. The good news is that bulbs are naturally designed to multiply. Your job is mostly timing, gentle handling, and giving the new offsets (baby bulbs) the conditions to size up.
This guide walks you through practical, field-tested ways to clone bulbs from existing plants—what to do, when to do it, what can go wrong, and how to fix it. I’ll lean on both extension guidance and the kind of little details you only notice after lifting a lot of bulbs.
What “cloning a bulb” really means (and what it doesn’t)
When gardeners say “clone bulbs,” we’re talking about vegetative propagation: making new plants from parts of the original plant so the new plants are genetically identical. With bulbous plants, this usually means:
- Offsets/bulblets (baby bulbs) formed alongside the mother bulb
- Division of clumps (common with daffodils, alliums, many lilies)
- Scaling (separating lily bulb scales to grow new bulblets)
- Bulb chipping or basal plate scoring (more advanced; used for some bulbs like hyacinths and daffodils)
What it doesn’t mean: saving seed. Seeds are great for breeding and producing quantity, but if your goal is “more of that bulb,” division and offsets are your friends.
For timing and handling basics, extension recommendations consistently emphasize lifting and dividing after foliage has matured and died back, because that’s when the bulb has finished replenishing stored energy. That’s also why braiding or cutting leaves early tends to reduce bloom and offset formation the following year. (University of Minnesota Extension, 2023; Royal Horticultural Society, 2024)
Quick comparison: the main bulb-cloning methods
| Method | Best for | When to do it | How many new bulbs (typical) | Time to flowering-size | Difficulty |
|---|---|---|---|---|---|
| Lift & divide offsets | Daffodils, tulips, alliums, crocus, many others | After foliage yellows; often late spring to mid-summer | 2–10+ per clump (species-dependent) | 1–3 years | Easy |
| Leave in place, separate later | Naturalizing bulbs (daffodils, species tulips) | Every 3–5 years or when bloom declines | Moderate; depends on crowding | Same as above | Easy |
| Lily scaling | Lilies (true lilies, Lilium spp.) | Late summer to fall (or when lifting) | 10–30+ bulblets per bulb | 2–4 years | Moderate |
| Basal plate scoring/chipping | Daffodils, hyacinths (advanced hobby propagation) | After lifting, during dormancy | 10–50+ bulblets | 2–5 years | Advanced |
Scenario #1: “My daffodils used to bloom well—now I get leaves and no flowers”
This is the classic “too crowded” clump. Daffodils are generous multipliers; after a few years, the bulbs compete for space and nutrition. Cloning here is simply lifting and dividing offsets.
Step-by-step: lifting and dividing offsets (the reliable method)
- Wait for the right moment. Don’t lift while leaves are still green. Wait until foliage is mostly yellow and flops easily—often 6–8 weeks after bloom for many spring bulbs.
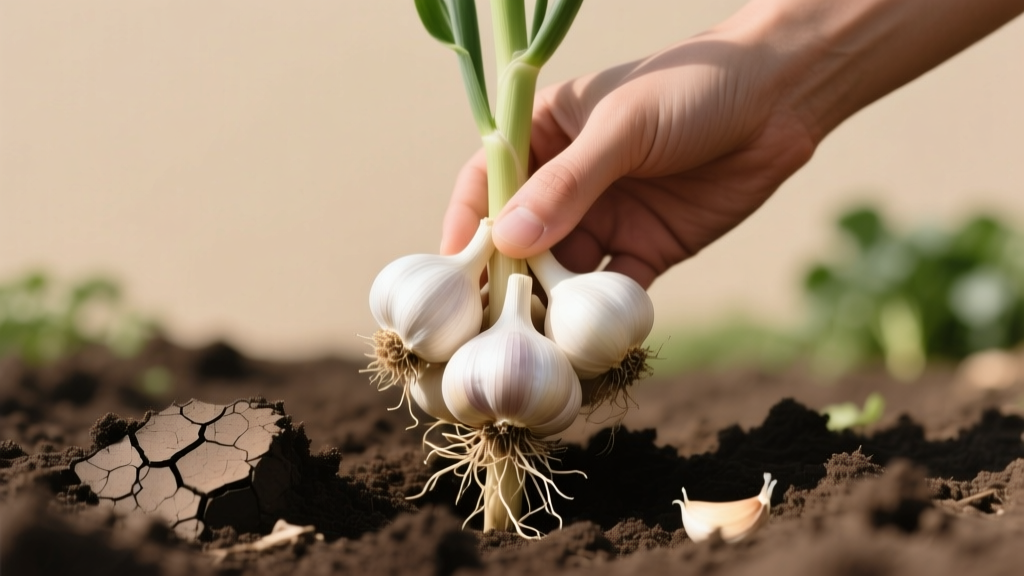
- Loosen soil wide. Use a garden fork and start 6–8 inches away from the clump so you don’t spear bulbs. Lift the whole cluster.
- Shake off loose soil. You want to see where the offsets attach.
- Separate by hand first. Many offsets pop apart with gentle twisting. If you need a knife, disinfect it (70% isopropyl alcohol works) and cut cleanly.
- Sort by size. Large offsets can go back in the garden immediately. Small “rice-grain” bulblets should be planted in a nursery area to grow on.
- Replant promptly or cure briefly. If you’re replanting the same day, plant right away. If you must store, keep bulbs in a dry, airy place at about 60–70°F (16–21°C) for a short cure (typically 1–2 weeks), out of sun.
Planting depth and spacing: A good rule is 2–3 times the bulb’s height. For many daffodils that’s about 6 inches deep with 6 inches between bulbs. Tulips often do best at 6–8 inches deep in well-drained soil.
“Allow bulb foliage to die back naturally after flowering so the plant can replenish energy reserves for next year’s bloom.” — Royal Horticultural Society advice on spring bulbs (RHS, 2024)
Scenario #2: “I bought one special lily and want ten without spending a fortune”
If you’ve never scaled a lily, it feels like wizardry the first time it works. Lilies are one of the easiest bulbs to clone in quantity because each scale can produce a new bulblet.
Lily scaling: a practical home method
Best timing: late summer into fall, when you’re lifting or dividing anyway. Scaling can be done without sacrificing the whole bulb if you only remove a portion of scales.
- Lift the lily bulb carefully and rinse off soil so you can see clean scale bases.
- Remove outer scales by snapping them off at the base. Aim for 8–12 scales from a healthy bulb, leaving enough that the mother bulb can be replanted.
- Disinfect lightly to prevent rot. A simple home approach: dust the scale bases with powdered sulfur or dip briefly in a fungicide labeled for bulbs (follow label).
- Bag them with barely moist medium. Put scales in a sealable bag with slightly damp vermiculite or perlite (think “wrung-out sponge,” not wet).
- Warm phase: keep at 68–77°F (20–25°C) for 6–8 weeks. Bulblets typically form at the base.
- Cool phase: after bulblets form, move to a cooler spot around 40–50°F (4–10°C) for 8–12 weeks to mimic dormancy.
- Pot up bulblets in small pots or a nursery bed. They’ll need time—usually 2–4 years to reach flowering size depending on lily type and growing conditions.
Don’t rush the moisture. Most failed scaling attempts come from a medium that’s too wet, which invites fungal rot.
Scenario #3: “My tulips are shrinking and coming back weak—can I clone the good ones?”
Tulips are a mixed bag. Some varieties perennialize, many don’t—especially in warm winters or poorly drained soils. You can absolutely clone tulips by saving and replanting offsets, but you’ll also need to fix the underlying growing conditions or the offsets won’t size up.
What I do with tulips I want to keep: after the leaves yellow, I lift, separate offsets, and replant the biggest offsets right away in a better spot (or chill and replant if I’m in a warm zone). Small offsets go to a “bulb nursery” where they can grow for a year or two without being disturbed.
Watering: what bulbs need to multiply (and what causes rot)
Bulbs like a clear cycle: moisture during active growth, then drier conditions as they go dormant. Here’s a working baseline you can adjust to your climate and soil.
In-ground watering targets
- During active growth (leafing and flowering): about 1 inch of water per week total (rain + irrigation). Sandy soils may need that split into two waterings.
- After bloom while leaves are still green: keep moderate moisture—this is when next year’s flower is being built inside the bulb.
- When foliage yellows and dies back: taper off. Many bulbs want relatively dry soil during dormancy.
Container watering targets
In pots, bulbs dry out faster and also rot faster if the pot stays soggy. Use the finger test: water when the top 1–2 inches of mix are dry during growth; once dormant, keep just barely moist (or dry for true summer-dormant types).
Watering red flags (and what to do)
- Symptom: mushy bulbs, sour smell, gray/white mold
Fix: stop watering, improve drainage, discard badly rotted bulbs, dust salvageable bulbs with sulfur, replant in a grittier mix. - Symptom: lots of leaves, few flowers
Fix: reduce summer irrigation, ensure full sun, avoid high-nitrogen feeding, and lift/divide overcrowded clumps.
Soil: the make-or-break factor for cloning success
If you want offsets to become flowering-size bulbs, drainage is everything. A bulb that sits wet is a bulb that rots, and a bulb that struggles with rot doesn’t multiply well.
Soil texture and drainage
- Ideal: loose, well-drained loam with organic matter
- Challenging: heavy clay that stays wet, especially in summer dormancy
In clay, I either:
- Plant bulbs in raised beds, or
- Amend planting strips with grit: mix in coarse sand or fine gravel (not play sand) plus compost, or
- Grow the “keepers” in deep pots where drainage is under my control.
Soil pH (keep it reasonable)
Most bulbs are fine around slightly acidic to neutral soil. If your soil is extremely acidic or alkaline, nutrient lockout can reduce bulb size over time. If you haven’t tested soil in a while, a basic test every 2–3 years is worth it.
Extension sources commonly recommend soil testing rather than guessing at amendments, especially phosphorus—too much can be as unhelpful as too little. (University of Minnesota Extension, 2023)
Light: cloning needs energy, and energy comes from sun
If you want offsets to fatten up, they need enough light to photosynthesize after bloom. For most spring-flowering bulbs:
- Full sun: 6+ hours is ideal
- Part sun: workable for some daffodils and species bulbs, but offsets may size up more slowly
One practical trick: plant spring bulbs where they get sun in spring, even if summer shade arrives later (under deciduous trees is a classic example). That supports both flowering and offset formation.
Feeding: fertilize for bulb size, not leafy hype
Bulbs don’t need constant feeding, but they do benefit from the right nutrients at the right time—especially if you’re trying to grow small offsets into bloom-size bulbs.
When to fertilize
- Spring: when shoots emerge and again right after flowering (while leaves are still green)
- Fall (for spring bulbs): optional in fertile soil; more useful in sandy or nutrient-poor beds
What to apply (practical options)
- Compost: a 1-inch top-dressing in fall or early spring
- Bulb fertilizer: follow label rates; many gardeners use a low-nitrogen blend (too much nitrogen pushes leaves at the expense of bulb storage)
Keep fertilizer off the bulb itself when planting—mix into surrounding soil. And water it in during active growth so nutrients move into the root zone.
Timing: when to divide for the highest success rate
If you only remember one timing rule, make it this: divide after the plant has finished storing energy.
- Spring-flowering bulbs (tulips, daffodils, crocus): lift/divide when foliage is yellowing, typically late spring to early summer
- Summer-flowering bulbs (some alliums, lilies): often divided in fall or after foliage dies back, depending on species
And don’t divide every year. Many bulbs perform best when lifted every 3–5 years, or when you see clear signs of crowding: smaller blooms, more leaves than flowers, or a tight mound of shoots.
Common problems when cloning bulbs (with fixes that actually work)
Problem: offsets form but never reach flowering size
Symptoms: plenty of small bulbs; lots of foliage; few or no blooms for years.
- Likely causes: too much shade, early leaf removal, drought during post-bloom, nutrient-poor soil, or overcrowding in the nursery area.
- Fix: give offsets 6+ hours sun, water consistently during growth (1 inch/week), avoid cutting leaves early, and space nursery bulbs at least 3 inches apart so they can expand.
Problem: bulbs rot in storage after lifting
Symptoms: soft spots, mold, foul odor, bulbs collapsing.
- Likely causes: bulbs stored wet, stored without airflow, or stored too warm.
- Fix: cure in a single layer with airflow for 7–14 days at 60–70°F (16–21°C). Store in paper bags or mesh, not sealed plastic. Discard any bulb with spreading rot.
Problem: lots of flowers the first year after division, then a slump
Symptoms: strong bloom right after replanting; weak bloom next season.
- Likely causes: drought during the “recharge” period after flowering, or foliage tied/cut early.
- Fix: water during active growth and after bloom, and let foliage yellow naturally. If aesthetics are the issue, underplant with later-emerging perennials to hide the fading leaves.
Problem: pests eating bulbs and offsets
Symptoms: missing bulbs, chewed basal plates, tunnels, disturbed soil.
- Likely culprits: squirrels, voles, mice.
- Fix: plant in bulb cages or line holes with hardware cloth. In high-pressure areas, choose less-palatable bulbs (daffodils are famously avoided due to alkaloids) and avoid bone meal if it attracts digging in your yard.
Advanced cloning: when you want higher multiplication (and accept more risk)
If you’re the kind of gardener who labels trays and doesn’t mind a longer timeline, techniques like basal plate scoring (making shallow cuts in the basal plate) or chipping (cutting the bulb into sections) can multiply certain bulbs fast. They also increase the chance of rot if sanitation and humidity aren’t right.
If you try it, treat it like kitchen hygiene:
- Use a clean blade disinfected with 70% alcohol
- Work with firm, healthy bulbs only
- Use sterile, barely moist medium
- Label everything with date and variety
For many home gardeners, offsets and lily scaling give plenty of payoff with less heartbreak.
A few habits that make your cloned bulbs perform like “store-bought”
Here’s what separates “I multiplied bulbs” from “I multiplied bulbs and they look amazing.”
- Mark your best clumps. Put a small stake in during bloom so you know which ones to lift later.
- Handle bulbs by the body, not the basal plate. Damaging the basal plate (where roots emerge) slows recovery.
- Keep a nursery bed. A dedicated strip where small offsets can grow undisturbed for 1–2 seasons is a game-changer.
- Don’t over-tidy. Let foliage finish naturally. If you must cut, wait until it pulls away with a gentle tug.
Real-world cloning timelines (so your expectations match reality)
One reason gardeners get discouraged is expecting offsets to bloom the very next spring. Sometimes they do, often they don’t. Here’s what’s typical in a home garden with decent sun and drainage:
- Daffodil offsets: often 1–2 years to bloom, depending on size
- Tulip offsets: often 2–3 years, and may never perennialize well in warm-winter areas
- Lily bulblets from scaling: commonly 2–4 years
If you’re consistent with sunlight, post-bloom watering, and not disturbing the nursery bulbs, you’ll be surprised how quickly “tiny” becomes “garden-worthy.”
For additional region-specific timing and care details, extension resources are worth a quick check because local climate changes the calendar. University-based guidance strongly emphasizes post-bloom leaf retention and proper planting depth for perennial performance (University of Minnesota Extension, 2023), and the RHS reiterates letting foliage die back to refill the bulb for next season (RHS, 2024).
Clone the bulbs you truly love, give the offsets a sunny nursery and a season or two of patience, and you’ll eventually have the kind of repeat display that looks expensive—but is really just good propagation and good follow-through.
Sources: University of Minnesota Extension (2023); Royal Horticultural Society (RHS) spring bulb guidance (2024).