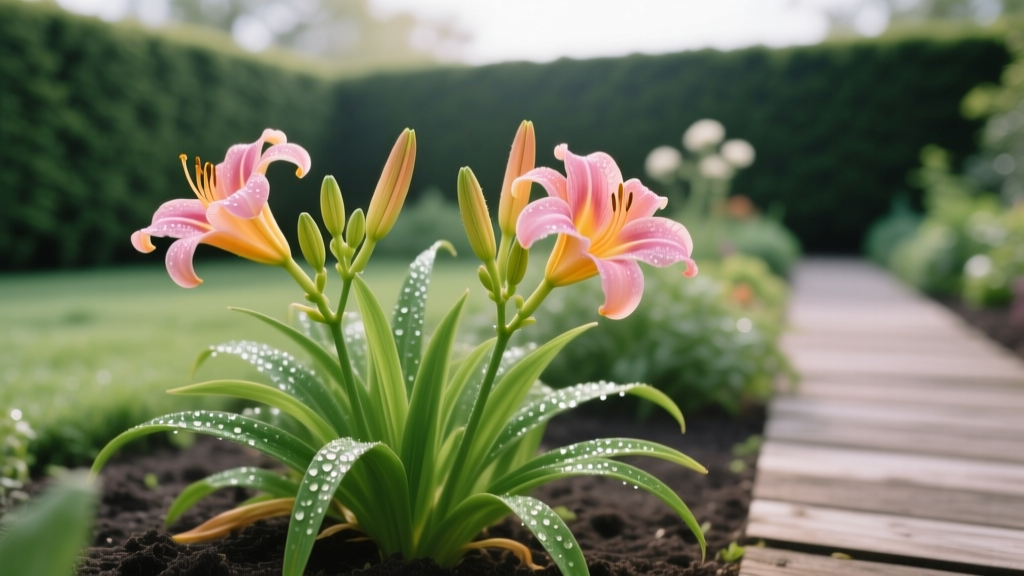
Spring Care Routine for Daylilies
You walk the garden in early spring and your daylily clumps look… fine. Not dead, not thriving—just a messy fountain of last year’s leaves with a few pale green tips poking through. Then six weeks later you’re staring at floppy scapes, fewer blooms than you remember, and a weedy moat creeping into the crown. The surprising part: most daylily “problems” in summer are set up in spring—by what you clean up (or don’t), how you water during the first growth spurt, and whether you feed at the right time instead of the convenient time.
Daylilies (Hemerocallis) are tough, but spring is when you can steer them toward a season of sturdy stems and reliable flowering. This routine is the one I use in home gardens where daylilies have been in place for years—sometimes thriving, sometimes barely hanging on. You’ll find specific numbers, timing, and practical troubleshooting for real situations like late frosts, heavy clay, and clumps that have turned into a dense “donut.”
First Spring Walk-Through: Clean-Up and a 10-Minute Inspection
Before you touch fertilizer or the hose, do a quick assessment. It saves you from treating the wrong problem.
What to do on your first mild day (usually when soil is workable)
- Cut back old foliage to 2–3 inches above the crown if it’s still standing. Use clean shears. Rake away loose debris that can shelter slugs and disease.
- Check the crown: healthy crowns are firm. If you can pull fans out easily with a rotten base, suspect crown rot or winter damage.
- Look for heaving in freeze-thaw climates: if roots are exposed, gently firm soil back and top-dress with 1 inch of compost.
- Mark weak spots with a small flag: you’ll come back after a couple of weeks to see if they rebound.
Don’t be too precious about old leaves—spring cleanup is not cosmetic. Removing last year’s material improves airflow and reduces hiding spots for pests. Many university extension recommendations for perennial cleanup emphasize sanitation to reduce disease carryover; for daylilies that can mean fewer early-season leaf issues. The University of Minnesota Extension notes that sanitation (removing infected foliage and debris) is a key tactic for foliar disease management in ornamentals (University of Minnesota Extension, 2020).
Watering: Spring Moisture Without Creating Mush
Daylilies are drought-tolerant once established, but spring watering affects how many fans grow strongly enough to produce bloom scapes. The trick is deep, spaced-out watering—not frequent sips.
How much water do daylilies need in spring?
- Established clumps: Aim for about 1 inch of water per week from rain + irrigation once active growth is underway.
- New divisions/transplants: Keep the root zone evenly moist for the first 2–3 weeks, then transition to deeper watering.
If you want a simple method: place a straight-sided tuna can or rain gauge nearby. When the can reaches 1 inch for the week, you’re done.
Timing matters: water when the plant can use it
- Morning watering is best. Leaves dry faster, and you’re not feeding slugs with a damp buffet all night.
- In cool springs (highs under 55°F), daylilies grow slowly; back off supplemental water unless the top few inches are dry.
Method A vs Method B: sprinkler vs drip (with real numbers)
I’ve tested this in multiple home gardens. The results are consistent: drip reduces disease pressure and puts water where you need it.
| Watering method | Typical run time to deliver ~1 inch/week (example setup) | Where the water goes | Common spring downside |
|---|---|---|---|
| Overhead sprinkler | 60–90 minutes once weekly (varies by output) | Leaves + soil surface | Wet foliage encourages leaf streak/spotting; more evaporation on windy days |
| Soaker hose / drip line | 45–75 minutes once weekly (typical soaker hose at moderate pressure) | Root zone | Clogs or uneven output if not flushed; needs mulch to prevent surface crusting |
Comparison analysis (practical takeaway): If your daylilies struggle with leaf issues or you’re watering on a schedule, drip/soaker is usually better. Overhead watering is fine if you do it early and infrequently, but in a cool, wet spring it can tip you into disease trouble.
Real-world scenario: “It’s been raining for 2 weeks—should I still water?”
No. In fact, this is when you should focus on drainage and air movement. If you can press a finger down 2–3 inches and it feels wet and sticky, hold off. Daylilies tolerate wet spells, but prolonged soggy soil invites crown and root problems—especially in heavy clay or low spots.
Soil: Spring Fixes That Actually Help (Without Rebuilding the Bed)
Daylilies aren’t picky, but they perform best in soil that drains well and has decent organic matter. Spring is ideal for light improvements because the roots are waking up and ready to grow into better conditions.
Quick soil targets that make a difference
- Drainage: water should soak in, not puddle for hours.
- pH: daylilies generally do well around 6.0–7.0. If you haven’t tested soil in a few years, spring is a good reminder.
- Organic matter: top-dress with compost rather than digging aggressively around crowns.
What to add (and how much)
- Compost: apply a 1–2 inch layer around clumps, keeping it pulled back 1 inch from the crown to avoid rot.
- Mulch: after the soil warms, add 2–3 inches of shredded bark or leaf mold. Keep mulch off the crown.
A soil test beats guessing. Many extension services recommend periodic soil testing for targeted fertilization rather than blanket feeding (Penn State Extension, 2023). If your daylilies look lush but bloom poorly, excess nitrogen is a common culprit—and a soil test helps you stop overcorrecting.
Real-world scenario: Heavy clay bed that stays wet
If your bed is clay and your daylilies sit in a low area, spring is when you see it. Solutions that work without tearing everything out:
- Raise the crown zone by top-dressing around the clump (not on it) with compost and a little expanded shale or pine fines, building gradually over a season.
- Create a shallow swale to move water away from the bed.
- Divide and replant a few fans onto a slight mound (even 3–4 inches higher can change drainage).
Light: Spring Adjustments for Better Bloom Later
Daylilies flower best in full sun, but “full sun” is not one-size-fits-all. Spring sunlight is gentler; summer heat is the real test.
Best light levels for daylilies
- 6+ hours of sun typically gives best flowering.
- 4–6 hours can still bloom well, especially with bright afternoon light, but expect fewer scapes.
- In hot climates, afternoon shade can reduce stress and leaf scorch while still allowing strong bloom.
Real-world scenario: “My daylilies used to bloom, but now they don’t”
This is often a light creep problem. Trees leaf out more each year, and what was full sun becomes dappled shade. In spring, watch how shadows move once trees begin to leaf out. If the bed is sliding under 4 hours of sun, you have three options:
- Prune up nearby shrubs/trees to reclaim light.
- Divide and relocate some clumps to a sunnier spot.
- Accept fewer blooms and grow them more for foliage (which can still look great in part shade).
Feeding: Fertilizer Timing That Produces Stems, Not Just Leaves
Daylilies don’t need heavy feeding, but spring nutrition can help them build strong fans and set up bloom. The common mistake is feeding too much nitrogen, too early, or too often—especially if you already mulch with compost.
When to fertilize in spring
- Fertilize when you see 4–6 inches of new growth and the soil has warmed (not when it’s still cold and saturated).
- If you divide and replant, wait about 2 weeks after planting before applying fertilizer, and water well.
What to use (practical options)
- Balanced granular fertilizer (example: 10-10-10 or similar): apply at label rates. As a general homeowner guideline, many products land around 1 pound per 100 square feet, but follow the specific label for your formulation.
- Compost only: if your soil is already reasonably fertile, a 1–2 inch compost top-dress often supplies enough for steady growth.
- Slow-release fertilizer: helpful if spring rains are heavy and you don’t want nutrients washing away.
“Over-fertilization—especially with high nitrogen—often produces beautiful foliage at the expense of flowers.” — North Carolina Cooperative Extension publication on daylily culture (NCCES, 2019)
Method comparison: Compost vs granular fertilizer (what I see in real gardens)
Here’s the honest tradeoff: compost improves soil structure and steady growth; granular fertilizers give a faster push but can overdo it.
- If your clumps are old and the soil is tired: compost + a light, balanced fertilizer application at spring green-up is a strong combo.
- If your plants are lush but shy to bloom: skip extra nitrogen. Use compost lightly, and consider a fertilizer with lower nitrogen relative to phosphorus and potassium if a soil test supports it.
Spring Dividing and Replanting: The “Donut Clump” Fix
If your daylily clump is blooming less each year, spring is a good time to diagnose crowding. Many mature clumps develop a dead center with active growth on the outer ring—classic “donut clump.” You’ll get more blooms by resetting spacing.
When spring dividing makes sense
- Clumps are 4–6 years old and flowering has declined.
- The center of the clump is bare or weak.
- Fans are thin and crowded, with lots of foliage but fewer scapes.
Step-by-step: dividing daylilies in spring
- Water the day before if soil is dry. Moist soil lifts easier.
- Dig a wide circle around the clump, about 8–12 inches out from the crown mass, and lift.
- Split into fans using your hands or a clean knife/spade. Aim for divisions with 2–3 fans each for fast re-establishment.
- Trim leaves to 6–8 inches if they’re long and floppy to reduce wind rock.
- Replant so the crown sits at soil level (don’t bury it). Space divisions about 18–24 inches apart.
- Water in thoroughly and keep evenly moist for the next 2–3 weeks.
Real-world scenario: late frost after division
If a late freeze is forecast (down to 28°F or colder) right after you’ve divided or you see tender new growth, cover clumps overnight with frost cloth or an old sheet (not plastic directly on leaves). Remove coverings in the morning. A light mulch around (not over) the crown can moderate soil temperature swings.
Common Spring Problems (and What to Do Before They Snowball)
Most daylily issues are manageable if you catch them early. Spring is when you set the baseline: clean foliage, good spacing, and controlled moisture.
Troubleshooting: symptoms and fixes you can apply this week
1) Yellowing leaves early in spring
- Likely causes: waterlogged soil, nitrogen deficiency, or natural winter-to-spring transition stress.
- What to do:
- Check moisture at 2–3 inches deep; if wet, stop watering and improve drainage.
- Top-dress with 1 inch compost; if growth is weak and pale, apply a light balanced fertilizer when temps stabilize.
- Remove the worst leaves to improve airflow and appearance.
2) Soft, smelly crown or fans pull out easily
- Likely causes: crown rot due to saturated soil, poor drainage, or mulch piled on the crown.
- What to do:
- Pull mulch back so the crown is exposed to air.
- Remove rotted tissue with a clean knife; discard (don’t compost if disease is suspected).
- Improve drainage immediately: shallow trench, raised mound, or relocate divisions to better-drained soil.
3) Ragged leaf edges and missing tips
- Likely causes: slugs/snails (common in cool, wet springs), sometimes rabbits.
- What to do:
- Go out at dusk with a flashlight; confirm pests.
- Set iron phosphate bait according to label directions, especially around dense clumps.
- Reduce hiding spots: remove debris, keep mulch pulled back, and avoid constant dampness.
4) Leaves with brown streaks or spots that expand in wet weather
- Likely causes: foliar disease favored by wet foliage and poor airflow.
- What to do:
- Switch to morning watering or drip/soaker irrigation.
- Thin overcrowded clumps; improve spacing to 18–24 inches.
- Remove heavily affected leaves and dispose of them.
5) Lots of leaves, few or no blooms later
- Likely causes: too little sun, too much nitrogen, or clumps that need dividing.
- What to do now (spring actions):
- Track sun hours; aim for 6+.
- Skip high-nitrogen feeding; compost lightly instead.
- Plan division if clumps are older than 4–6 years or have a dead center.
Putting It All Together: A Simple Spring Schedule You Can Follow
If you like a checklist, here’s a realistic spring routine that works in most home gardens. Adjust by a week or two depending on your climate.
Early spring (first workable soil, before rapid growth)
- Cut back old foliage to 2–3 inches.
- Remove debris; check crowns for firmness.
- Top-dress with 1 inch compost.
Mid-spring (new growth at 4–6 inches)
- Water deeply if rainfall is short of 1 inch/week.
- Apply fertilizer if needed (based on plant vigor and, ideally, a soil test).
- Add 2–3 inches mulch once soil starts warming, keeping it off crowns.
Late spring (buds and scapes forming)
- Watch for slugs and leaf streaking after rainy spells.
- Weed carefully—daylilies hate competition right at the crown.
- Stake nothing unless you must; strong spring growth usually eliminates the need.
Three Case Studies from Real Gardens (So You Can Recognize Your Own Situation)
Case 1: The overwatered foundation bed
A homeowner had a sprinkler system that ran 20 minutes every day in spring. Daylilies were lush, but midsummer brought spotted foliage and weak flowering. Fix: changed to 60 minutes once per week (adjusted for rainfall), moved to morning-only watering, and pulled mulch back off crowns. Results: less leaf spotting and noticeably sturdier scapes by early summer.
Case 2: The shaded clump that “just stopped blooming”
A mature maple canopy turned a previously sunny border into bright shade. The daylilies still grew, but scapes dropped to almost nothing. Fix: divided the clump in spring, relocated half to a spot with 6–7 hours sun, and kept the shaded half as foliage filler. The moved divisions bloomed the same season (not as heavily as established clumps, but enough to prove the point).
Case 3: The heavy clay “donut clump”
In a low clay area, clumps developed dead centers and rotted fans after wet springs. Fix: lifted clumps, kept the healthiest outer fans, replanted on a gentle mound about 4 inches higher, amended with compost, and spaced divisions to 24 inches. That improved drainage and airflow—two things daylilies quietly demand if you want them to look good into late summer.
A Few Hard-Won Tips That Save Effort All Season
- Keep the crown visible. Mulch and compost should never smother it. A buried crown is a slow-motion problem.
- Don’t fertilize on autopilot. If foliage is already deep green and vigorous, you may be feeding weeds and buying fewer blooms.
- Water deeply, then walk away. Daylilies reward that rhythm with stronger roots and sturdier scapes.
- Divide before the clump declines for years. If bloom count is slipping and the center is sparse, spring division is a reset button.
Once you’ve done this spring routine a couple of times, you’ll start to spot the early cues: the clump that needs air, the bed that holds water too long, the fertilizer habit that’s making foliage at the expense of flowers. Daylilies don’t ask for much, but they respond quickly when spring care lines up with how they actually grow—strong roots first, then fans, then flowers.
Sources: University of Minnesota Extension (2020); Penn State Extension (2023); North Carolina Cooperative Extension (2019).