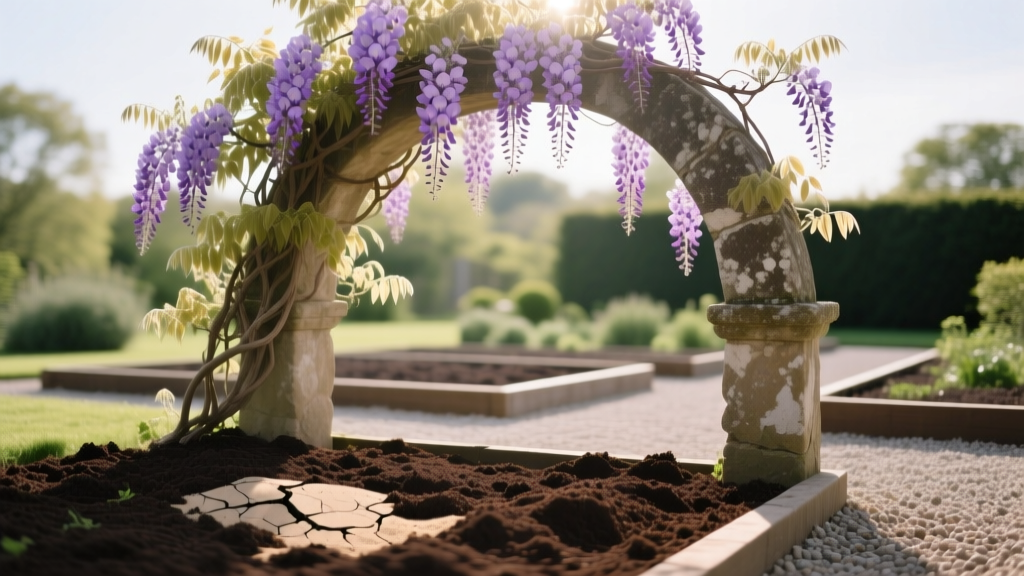
Improving Clay Soil for Wisteria
The first time I planted a wisteria into heavy clay, it looked fine for three weeks—then the leaves dulled, new growth stalled, and the whole vine started acting like it regretted moving in. When I finally dug around the root zone, the hole was holding water like a soup bowl. That’s the clay soil trap: it can look rich and “moist,” but it can also suffocate roots, stunt growth, and set you up for a long wait for blooms.
Wisteria is tough, but it’s not magic. If you want a vine that climbs, flowers, and doesn’t sulk for years, you need to change how clay behaves around its roots—without turning your planting area into a swampy bathtub or a fluffy potting-mix pocket that dries out wrong.
This is the practical, field-tested approach: improve drainage and structure, plant correctly, water with intention, and feed lightly. Do those things and clay stops being the enemy—sometimes it even becomes an advantage during summer heat.
First, understand what clay is doing to your wisteria
Clay particles are tiny and pack tightly. That means:
- Slow drainage: water can sit around roots for days after rain or irrigation.
- Low oxygen: roots need air; soggy clay pushes oxygen out.
- Compaction: foot traffic and digging can turn it into brick.
- Nutrient holding power: clay holds nutrients well (this part is good), but plants can’t use what roots can’t access.
Wisteria prefers a fertile, well-drained soil. Many extension sources emphasize that drainage matters more than “richness.” For example, Clemson Cooperative Extension notes wisteria performs best in well-drained soil and that excessive fertility can reduce bloom (Clemson Cooperative Extension, 2020). Meanwhile, University of Minnesota Extension warns that poor drainage is a common cause of root stress for many woody plants (University of Minnesota Extension, 2022).
“Poorly drained soils limit oxygen in the root zone, reducing root function and increasing the likelihood of decline.” — University Extension horticulture guidance on soil drainage and root health (University of Minnesota Extension, 2022)
Real-world cases: what clay looks like in different yards
Case 1: New construction clay (the “subsoil special”). You’ve got scraped topsoil, compacted clay, and maybe some rubble. Water puddles after a 1 inch rain and the ground cracks in July. Wisteria planted in a single amended hole often fails because roots hit the hard pan and stop.
Case 2: Mature yard with heavy clay but decent organic matter. You can dig, but it’s sticky when wet and rock-hard when dry. This is salvageable with broad improvement (not just the planting hole) and smart watering.
Case 3: Slope or raised area with clay that drains “okay.” Clay on a slope can drain better than clay in a flat low spot. Here, the risk shifts: it’s easier to keep oxygen in the root zone, but runoff and uneven moisture can cause leaf scorch in heat.
Soil improvement strategy: fix drainage and structure without creating a bathtub
Step 1: Run a simple drainage test (10 minutes + wait time)
- Dig a hole 12 inches wide and 12 inches deep where the wisteria will go.
- Fill it with water and let it drain completely (pre-soaks the surrounding clay).
- Fill it again and time how long it takes to drain.
Rule of thumb: If water is still standing after 4 hours, drainage is poor for a woody vine. If it takes 12–24 hours, you must improve drainage or change the planting approach (raised planting/mounding or relocation).
Step 2: Improve a wide area, not just the hole
The most common mistake in clay is digging a nice hole, adding compost, planting, and calling it done. In heavy clay, that amended hole can act like a sump: water moves easily into the softer mix and then can’t move out into the surrounding dense clay.
Better: improve a 3–5 foot diameter area (or a strip along a fence/trellis line). Your goal is to create a gradually improving soil texture so roots travel outward.
Step 3: Add the right amendments (and skip the wrong ones)
Use amendments that improve aggregation (crumb structure) and keep pore space open.
- Compost: Work in 2–3 inches over the area and mix into the top 8–10 inches of soil.
- Shredded leaf mold: Excellent for clay; similar rate to compost.
- Fine pine bark (partially composted): Helps long-term structure; add up to 20–30% by volume in the top layer if available.
Avoid:
- Sand additions to clay unless you can add huge volumes and mix perfectly. Small amounts can create a concrete-like texture.
- Gypsum “miracle fixes” unless a soil test shows you specifically need calcium without raising pH, and your clay chemistry supports it. Gypsum can help certain sodic soils, but it’s not a universal answer.
For soil testing and amendment decisions, extension services consistently recommend basing fertility and pH adjustments on a test rather than guesswork (University of Georgia Extension soil testing guidance, 2021).
Method comparison: broad amendment vs. planting hole only
| Method | Improved area | Amendment amount | Risk in heavy clay | Expected establishment (typical) |
|---|---|---|---|---|
| Planting hole only | ~2–3 ft wide hole | 1–2 bags compost mixed in hole | High “bathtub effect”; roots may circle | Slow; decline risk after heavy rains |
| Broad area improvement | 3–5 ft diameter (or 3–8 ft strip) | 2–3 in compost over area mixed into top 8–10 in | Low to moderate; gradual transition helps drainage | Faster; more resilient in wet/dry swings |
| Mounded / raised planting | 3–5 ft footprint mound | Imported topsoil/compost blend plus native soil | Lowest for waterlogging; needs more summer watering | Fast in wet sites; strong root aeration |
Planting wisteria in clay: the technique that prevents long-term problems
Wisteria is a long-lived woody vine. Take the extra hour now; it saves you years of limp growth.
Best timing
Plant in early spring after soil is workable or early fall when heat breaks. Avoid planting when clay is sticky-wet; working wet clay destroys structure. If you can roll a handful into a rope that shines and smears, wait.
Step-by-step planting (clay-safe)
- Dig wide, not deep: dig a hole 2–3× the root ball width, and only as deep as the root ball height.
- Rough up the sides: score the hole walls with a spade so roots can penetrate.
- Set the crown slightly high: place the plant so the top of the root ball sits 1–2 inches above surrounding grade (clay settles).
- Backfill mostly native soil: use the soil you dug out, lightly mixed with compost if you’ve improved the broader area.
- Water in: soak slowly to settle soil, then mulch.
Mulch like you mean it
Mulch moderates moisture swings—clay’s biggest headache.
- Apply 2–3 inches of wood chips or shredded bark.
- Keep mulch 3–4 inches away from the stem to prevent rot and rodent damage.
Watering in clay: less often, more intentionally
In clay, watering “a little every day” is a reliable way to keep the root zone chronically wet and low on oxygen. The right pattern is deeper, slower, and spaced out.
Newly planted (first 8–12 weeks)
- Water 1–2 times per week depending on rain and temperatures.
- Each time, deliver roughly 2–5 gallons slowly at the root zone (more for larger vines and sandy top layers; less if the soil stays wet).
- If daytime highs are consistently above 90°F, check moisture midweek. Clay can crack on top while staying wet underneath—use your finger or a trowel to check 4 inches down.
Established wisteria (after first season)
Once established, wisteria is fairly drought tolerant, but steady moisture supports growth and flowering.
- During dry spells: water every 10–14 days with a deep soak.
- Aim to moisten soil to about 8–12 inches deep.
Symptoms you’re watering wrong
- Overwatering in clay: yellowing leaves, limp growth, musty smell near soil, algae on soil surface.
- Underwatering (often on mounds/raised areas): leaf scorch on edges, droopy leaves in afternoon that don’t recover by morning, crispy new growth.
Light and placement: set up bloom, not just vines
If your wisteria is green and vigorous but stingy with flowers, the issue is often light or nitrogen—not “the clay.”
- Provide at least 6 hours of direct sun for reliable flowering.
- Morning sun with some afternoon shade can work in hot climates, but too much shade delays blooms.
Also plan for the plant’s adult behavior. Wisteria is powerful. Give it a sturdy support and keep it away from gutters and flimsy arbors.
Feeding: clay holds nutrients, so don’t overdo it
Clay already hangs onto nutrients well. Over-fertilizing—especially with high nitrogen—pushes leafy growth at the expense of blooms and can create soft growth that attracts pests.
What to do instead
- Year 1: Skip heavy fertilizer. Focus on soil structure (compost + mulch). If growth is weak, use a light application of a balanced slow-release fertilizer at label rate in spring.
- Bloom support: If soil test shows low phosphorus or potassium, correct based on recommendations. Avoid guessing—phosphorus is easy to overapply and doesn’t move much in soil.
- pH target: Many garden soils do well around pH 6.0–7.0. If your clay is strongly acidic, lime can help—but only apply based on a soil test.
Clemson Cooperative Extension specifically cautions that wisteria can become vegetative with too much fertilizer and that bloom is best with full sun and moderate fertility (Clemson Cooperative Extension, 2020).
Common clay-related problems (and what actually fixes them)
Problem: Vine grows but won’t flower
Likely causes: too much shade, too much nitrogen, or pruning at the wrong time. Clay can contribute if it keeps the plant too lush from abundant nutrients and moisture.
Fix:
- Confirm 6+ hours of sun.
- Stop nitrogen-heavy lawn fertilizer drift near the root zone (keep lawn feeding at least 3 feet away).
- Prune correctly:
- Summer: cut long whips back to about 6 leaves.
- Late winter: shorten those to 2–3 buds.
Problem: Yellow leaves, slow growth, and soggy soil smell
Likely cause: waterlogged clay leading to root stress and potential rot.
Fix now:
- Stop watering until the top 2–3 inches dry out.
- Pull mulch back temporarily to speed surface drying (put it back once soil normalizes).
- Open “breathing holes”: use a soil auger or a sturdy stake to create several holes 8–10 inches deep around (not through) the root zone, then top-dress with compost to encourage aggregation.
Fix long-term: convert to a raised planting or mound if the site stays wet after storms. If downspouts dump nearby, redirect them.
Problem: Leaves scorch and drop during hot spells even though clay “holds water”
Likely cause: uneven moisture—clay can go from saturated to hard and dry at the surface; roots may be shallow due to earlier waterlogging.
Fix:
- Water deeply and slowly (drip line or trickle hose) so moisture penetrates 8–12 inches.
- Maintain 2–3 inches mulch year-round.
- In extreme heat (above 95°F for several days), provide a deep soak every 7–10 days rather than frequent light watering.
Problem: New plant “disappears” (dies back) after heavy rain
Likely cause: the planting hole filled and stayed full, suffocating roots—classic bathtub effect.
Fix:
- Replant higher (root crown 1–2 inches above grade).
- Improve a wide area, not just the hole.
- If the site collects water, build a mound 6–12 inches high and plant into that, blending edges into existing grade.
Three smart ways to improve clay for wisteria (pick the one that fits your yard)
Scenario A: Flat yard with slow drainage
This is the toughest setup. You need elevation and oxygen.
- Build a mound 6–12 inches tall and 3–5 feet wide.
- Use a blend of native soil + composted bark/compost (don’t use straight bagged topsoil alone—it collapses).
- Install the trellis before planting so you’re not pounding posts into roots later.
Scenario B: Clay that’s workable but compacted from foot traffic
Here, structure is the win.
- Top-dress compost 1 inch in spring and 1 inch in fall for 2 years.
- Keep mulch replenished to 2–3 inches.
- Keep people/pets off the root zone; use stepping stones if needed.
Scenario C: Wisteria already planted and struggling
You can’t “dig in” amendments without tearing roots, but you can still make meaningful gains.
- Stop the extremes: correct watering first (deep and spaced out).
- Top-dress: add 1–2 inches compost over the root zone (don’t pile against the stem).
- Mulch: restore 2–3 inches of wood chips.
- Relieve compaction gently: create several narrow holes 8–10 inches deep around the drip line and fill with compost.
Common pests and diseases you’ll actually see (and what to do)
Aphids on tender shoots
Symptom: curled new growth, sticky honeydew, ants.
Fix: strong water spray in the morning; encourage beneficial insects; avoid excess nitrogen that creates soft growth.
Powdery mildew in humid shade
Symptom: white powdery coating on leaves, usually late season.
Fix: improve sun and airflow, avoid overhead watering late day, and don’t force lush growth with fertilizer.
Root stress/rot in persistently wet clay
Symptom: yellowing, dieback, lack of vigor despite watering, sour soil smell.
Fix: drainage improvements, raised planting, and watering discipline. If the site stays wet for days, relocating to a better-drained spot is sometimes the kindest choice.
Troubleshooting quick-reference: symptom to solution
- Standing water near vine after rain: redirect downspouts, raise planting area 6–12 inches, broaden soil improvement zone.
- Cracks in soil + wilting: deep soak every 7–14 days, refresh mulch to 2–3 inches, check moisture 4 inches down.
- Lots of leaves, no blooms: increase sun, reduce nitrogen, prune (summer to 6 leaves, winter to 2–3 buds).
- Weak growth in year one: confirm drainage test results, check planting height, and avoid smothering with mulch against the stem.
Clay soil isn’t a reason to give up on wisteria. It’s a reason to plant smarter: widen the improved area, plant slightly high, water slowly and less often, and keep fertilizer modest. Once the roots have oxygen and a path outward, wisteria tends to stop sulking and start doing what it does best—growing with purpose and putting on a spring show that makes you forget the messy work that got it there.
Sources: Clemson Cooperative Extension (2020); University of Minnesota Extension (2022); University of Georgia Extension soil testing guidance (2021).