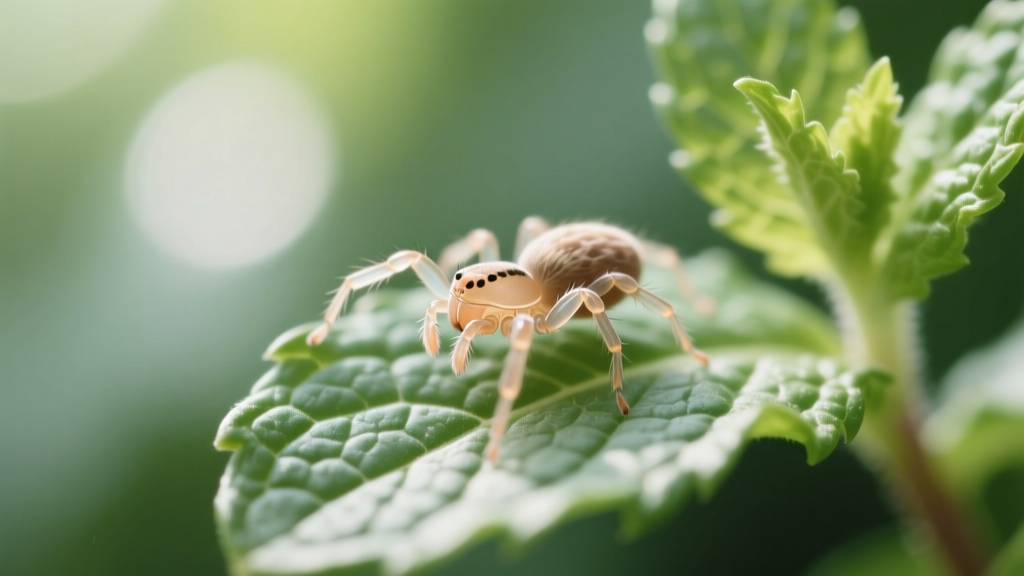
Predatory Mites for Mint Pest Management
You step outside to snip a handful of mint for iced tea and the plant looks… dusty. Not soil-dusty—speckled, stippled, and tired. Flip a leaf over and there it is: a fine webbing along the midrib and tiny moving dots that look like pepper. Two hot days later, your once-lush pot of mint is fading fast. This is the moment most gardeners reach for spray. But mint is an herb you eat, and the pests that love it (spider mites, broad mites, thrips) often laugh at casual spraying—especially in hot, dry patios and greenhouses. Predatory mites are one of the cleanest, most targeted ways I know to get mint back to “pick-and-eat” status without dousing your kitchen herb in residues.
This guide focuses on how to use predatory mites as part of a whole mint-care routine—because biological control works best when the plant is growing steadily and the environment isn’t stacked in the pest’s favor. We’ll cover watering, soil, light, feeding, common problems, and multiple real-life scenarios so you can match the right predator to the right situation.
Know your enemy: the mint pests predatory mites actually handle
Predatory mites don’t fix every problem on mint, but they’re excellent for the pests that hide on leaf undersides and reproduce quickly.
- Two-spotted spider mites (Tetranychus urticae): Fine webbing, pale stippling, leaf bronzing. Outbreaks accelerate when temperatures run 75–90°F and humidity is low.
- Broad mites (Polyphagotarsonemus latus): Distorted new growth, curled tips, “burnt” edges even when watered. Hard to see without magnification.
- Thrips (various species): Silvery streaks, black specks (frass), deformed growth. Some predatory mites feed on thrips larvae.
If your mint has holes, ragged chewing, or slime trails, that’s a different crew (caterpillars, beetles, slugs). Predatory mites won’t help there.
Predatory mites: which ones to use on mint (and when)
The trick is choosing a predator that matches your pest and your growing conditions. Here’s a practical comparison you can use at the potting bench.
| Predatory mite | Best target pests on mint | Works best at | When I reach for it |
|---|---|---|---|
| Phytoseiulus persimilis | Spider mites (especially heavy infestations) | 68–86°F, moderate humidity | When webbing is visible and leaves are already stippled |
| Neoseiulus (Amblyseius) californicus | Spider mites (preventative to moderate) | 60–95°F, tolerates drier air better | Hot patios, greenhouses, or recurring summer flare-ups |
| Neoseiulus (Amblyseius) cucumeris | Thrips larvae; sometimes helps with broad mites early | 68–86°F, likes higher humidity | When you see silvery scarring and black specks, especially indoors |
| Amblyseius swirskii | Thrips larvae, whitefly eggs/larvae (more common in protected culture) | 72–90°F, performs well in warmth | Greenhouse mint with mixed pest pressure (thrips + whitefly) |
These predators are widely used in biocontrol programs. For practical identification and management guidelines on mites and other mint-adjacent pests, see the University of California Statewide IPM Program resources (University of California Agriculture and Natural Resources IPM, 2023) and extension biocontrol guidance such as Cornell University’s greenhouse biological control materials (Cornell Cooperative Extension, 2022).
“Biological control agents work best when introduced early, before pest populations explode, and when disruptive pesticides are avoided.” — Cornell Cooperative Extension greenhouse biocontrol guidance (2022)
Real-world scenarios: what I do in three common mint setups
Scenario 1: Patio pot mint in a heatwave (spider mites)
This is the classic. Your mint is in a black pot on concrete, reflecting heat. The plant is slightly drought-stressed, and spider mites move in fast.
- What you see: Fine webbing, stippled leaves, dull color.
- What works: Neoseiulus californicus for heat tolerance, or Phytoseiulus persimilis if webbing is already heavy.
- What you change: Move the pot so it gets morning sun and afternoon shade; keep soil evenly moist.
Scenario 2: Indoor windowsill mint (thrips + stress)
Indoors, the plant often grows softer and pests arrive on houseplants nearby. Thrips damage can look like nutrient issues until you notice the silvery streaks.
- What you see: Silvery scarring, distorted new leaves, tiny dark specks.
- What works: Neoseiulus cucumeris (thrips larvae predator) plus a sticky card to monitor adults.
- What you change: Increase humidity slightly and improve airflow; avoid overfeeding nitrogen.
Scenario 3: Raised bed mint patch (recurring spider mites every summer)
Mint in the ground is tougher, but if you’re in a hot-summer area, spider mites can still flare up—especially along dusty paths and fence lines.
- What you see: Localized bronzing on edges, worse near reflective heat or dusty zones.
- What works: Early-season preventative releases of N. californicus and good irrigation consistency.
- What you change: Hose off dust occasionally; mulch to reduce soil splash and drought stress.
Watering: keep mint steady so predators can keep up
Mint isn’t fussy, but it’s dramatic about drying out—especially in containers. Spider mites love drought-stressed plants. Predatory mites also perform better when the plant canopy isn’t crisping.
Practical watering targets
- Containers: Water when the top 1 inch of soil is dry. In summer, that can mean every 1–2 days for small pots.
- Raised beds: Aim for about 1 inch of water per week from rain/irrigation, adjusted for heat and wind.
- Best time: Morning watering keeps the plant hydrated through the hottest hours without leaving foliage wet overnight.
Important: Don’t “mist for mites” as your main strategy. Light misting rarely reaches the pests under leaves and can encourage mildew in stagnant indoor air. Instead, keep the root zone consistent and use predatory mites for the actual pest control.
Soil: the right mix prevents stress (and stress invites pests)
Mint grows fast and responds to stable moisture and oxygen at the roots. Soggy soil is just as stressful as drought, and stress is when pests get momentum.
Container soil mix that behaves
- Base: Quality potting mix (not garden soil) for drainage.
- Boost: Add 20–30% compost for resilience and steady nutrition.
- If your mix stays wet: Add extra perlite (about 10–15% by volume) and ensure drainage holes are clear.
Mint tolerates a broad pH, but it’s happiest roughly in the 6.0–7.0 range. If your mint is chronically weak, a basic soil test can reveal if you’re battling extremes.
Light: enough sun for flavor, not so much stress that mites throw a party
Mint will grow in part shade and full sun, but pest pressure changes with exposure.
- Best all-around: 4–6 hours of sun with afternoon shade in hot climates.
- Full sun (6–8+ hours): Great flavor, but watch watering closely; heat stress can trigger spider mite booms.
- Indoors: Bright window light; rotate the pot weekly so growth stays even and less stressed.
If you’re planning predatory mite releases, avoid placing the plant where leaves regularly bake against hot glass or a reflective wall. Predators are living tools; they do best in a stable canopy.
Feeding: don’t overdo nitrogen (it can backfire on pests)
Mint doesn’t need heavy feeding. Over-fertilized mint grows soft and lush—exactly the kind of tissue many pests prefer.
Simple feeding plan
- Mix compost into the potting soil at planting time (the 20–30% mentioned above).
- During active growth, use a gentle fertilizer (fish/seaweed or balanced organic) at 1/2 strength every 3–4 weeks for containers.
- Stop or reduce feeding if you’re seeing pest pressure plus very soft growth.
If mint is in the ground and reasonably mulched, you may not need any fertilizer beyond compost once a season.
How to release predatory mites on mint (step-by-step)
Predatory mites are perishable. The number one reason they “don’t work” is that they’re mishandled, released too late, or used alongside residues that knock them out.
Before you release
- Confirm the pest: Use a 10x hand lens. If you see webbing and stippling, think spider mites. If new growth is twisted with no webbing, consider broad mites.
- Stop disruptive sprays: Avoid broad-spectrum insecticides and sulfur products before and after release. UC IPM emphasizes the importance of choosing compatible controls when using beneficials (University of California ANR IPM, 2023).
- Rinse heavy dust: A gentle shower of the plant (especially leaf undersides) can remove dust and knock back some pests—then release predators after leaves dry.
Release timing and method
- Release in the evening or early morning, not in full midday sun. Heat and UV stress can reduce survival.
- Distribute across the canopy: Tap mites from the carrier (bran/vermiculite) onto multiple stems and leaf clusters. Don’t dump in one spot.
- Focus on hotspots: Put extra near the most damaged leaves, but still spread them around.
- Repeat releases: For active outbreaks, plan on 2–3 releases spaced 7–10 days apart rather than a single “hail Mary.”
How many to use? Product labels vary by supplier and formulation, and you should follow that label. As a practical home-garden reference, for a single dense herb pot (roughly 10–12 inches wide), many gardeners have success starting with a small “sachet” or a light sprinkle release and repeating weekly if pests persist. The repeat is often more important than the initial dump.
Compatibility: what not to mix with predatory mites
- Avoid: Pyrethroids, carbamates, organophosphates, many residual oils if applied heavy, and sulfur close to release windows.
- Usually safer options (still test and time carefully): Insecticidal soap used as a spot treatment before releasing predators, then rinsed off after a day; or simply a strong water rinse to knock populations back.
Common problems on mint (and how predatory mites fit in)
Spider mites: stippling, webbing, bronzing
Symptoms: Pale dots on leaves, dull gray-green color, webbing between nodes, leaves drying from the edges.
What to do:
- Immediate reset: Rinse the plant thoroughly, aiming water at leaf undersides. Repeat every 2–3 days for a week if needed.
- Release predators:
- Heavy webbing: Phytoseiulus persimilis
- Hot/dry conditions or recurring problems: Neoseiulus californicus
- Fix the stress trigger: Increase watering consistency; move out of scorching afternoon exposure.
Broad mites: twisted growth with no obvious pest
Symptoms: New leaves crinkle, curl, or stay small; tips look burned; the plant stops looking “minty.”
What to do:
- Prune hard: Remove the worst distorted tips and discard (don’t compost if you suspect mites).
- Improve conditions: Broad mites thrive when plants are stressed and crowded; open the canopy for airflow.
- Choose the right predator: Talk to your supplier about predators labeled for broad mites in your setting; Neoseiulus cucumeris is sometimes used early, but broad mite control can be trickier than spider mites and may require a multi-pronged approach.
Thrips: silver streaks and black specks
Symptoms: Silvery scarring on leaves, distorted new growth, tiny black dots (frass), adults may fly when disturbed.
What to do:
- Monitor: Hang a blue or yellow sticky card near the mint and check weekly.
- Release predators: Neoseiulus cucumeris or Amblyseius swirskii (especially in warmer indoor/grow-tent conditions).
- Sanitation: Remove heavily scarred leaves; thrips love to hide in old foliage and debris.
Troubleshooting: symptoms you’ll actually see, with fixes that work
“I released predatory mites and nothing happened.”
Likely causes:
- Pest population was already extreme (webbing everywhere) and predators couldn’t catch up.
- It was too hot/dry at release (common on patios above 90°F).
- Residual sprays killed them (even some “organic” products can be rough on beneficials).
- You bought the wrong predator for the pest (thrips predator won’t fix spider mites).
Fix:
- Rinse the plant to knock pest numbers down first.
- Switch to a better-matched predator (e.g., P. persimilis for heavy spider mite pressure; N. californicus for hot/dry conditions).
- Plan 2–3 releases 7–10 days apart.
“My mint looks worse after I started watering more.”
Likely causes: Overwatering in a pot with poor drainage, leading to root stress (yellowing, droop that doesn’t perk up).
Fix:
- Check that water drains freely within 30–60 seconds of watering.
- If the pot stays heavy and wet for days, repot into a mix with perlite and ensure drainage holes are open.
- Water by feel: top 1 inch dry = water; still damp = wait.
“Leaves are curling, but I don’t see webbing.”
Likely causes: Broad mites, thrips, heat stress, or herbicide drift (outdoor beds).
Fix:
- Inspect newest growth with a hand lens and tap leaves over white paper to spot tiny movers.
- Prune and discard distorted tips.
- If outdoors, consider drift: curling plus odd twisting across multiple plants near a lawn can point to herbicides rather than mites.
Comparison analysis: predatory mites vs spraying on edible mint (with numbers)
Here’s the grounded trade-off I see most home gardeners weighing: “Should I spray, or should I release beneficials?” Both can work, but they behave differently on an herb you harvest often.
| Approach | Typical application frequency | Harvest impact | Best use case |
|---|---|---|---|
| Predatory mites | 2–3 releases spaced 7–10 days apart | Usually minimal; no leaf residues when done right | Ongoing management, edible herbs, prevention + moderate outbreaks |
| Water rinse (“blast”) | Every 2–3 days during outbreak | None, but can spread soil and stress leaves if too rough | Fast knockdown, pairs well before predator release |
| Insecticidal soap / horticultural oil | Often weekly for 2–4 weeks | May require washing leaves; risk of flavor taint or leaf burn in heat | Spot treatments when predators aren’t available; careful timing required |
Notice the pattern: sprays often require repeated coverage and can interfere with beneficials, while predatory mites are a living control that needs a supportive environment. For edible mint that you clip frequently, I lean toward rinse + predators, then fix the underlying stress (too hot, too dry, too root-bound).
Prevent pest flare-ups: what I do once mint is “clean”
After predators do their job, your goal is to keep mint growing steadily so pests don’t rebound.
- Harvest/prune weekly: Snip stems back by 1/3 to encourage fresh growth and reduce old leaf habitat.
- Rinse occasionally: A gentle underside rinse every 7–14 days in dusty weather makes spider mites less comfortable.
- Quarantine new plants: Keep new houseplants or nursery herbs separate for 10–14 days and inspect before placing near mint.
- Don’t crowd the pot: Good airflow reduces hotspots where pests build unnoticed.
Safe harvesting tips while using beneficial mites
Home gardeners often ask if they can still eat the mint. In practice, yes—predatory mites are tiny, and you’ll wash herbs anyway.
- Harvest with clean scissors; avoid taking the most heavily infested leaves during an active outbreak.
- Rinse harvested mint in cool water and spin or pat dry.
- If you need mint immediately and the infestation is heavy, harvest the cleanest top growth, rinse well, and then prune the plant back to regrow while predators work.
Most of the success with predatory mites comes down to timing: release early, repeat as needed, and stop doing the things that make mint miserable (letting it bake dry, overfeeding, and spraying residues that wipe out your allies). Once you’ve seen a mint pot go from webby and washed-out to lush again without “chemical whack-a-mole,” you’ll start treating predatory mites like any other garden tool—right alongside pruners and a watering can.
Sources: University of California Agriculture and Natural Resources, Statewide IPM Program (UC IPM) pest management guidance (2023); Cornell Cooperative Extension greenhouse biological control guidance (2022).