Propagating Wisteria from Leaf Cuttings
The first time I tried to root wisteria from a “leaf cutting,” I did what a lot of determined gardeners do: I snipped a handful of leaves, stuck them in potting mix, kept them moist, and waited. And waited. A month later I had a tray of limp, compostable foliage and exactly zero new plants. Here’s the surprising fact that changes everything: a wisteria leaf by itself can’t reliably make a new vine because it usually lacks a node (the growth point that produces roots and shoots). What most people call a “leaf cutting” only works when it includes a sliver of stem tissue with a node or “heel.”
This guide will show you what actually works at home—how to take the right kind of leaf-and-node cutting, what conditions matter most (humidity, warmth, and timing), and how to troubleshoot the common failures that make wisteria feel “impossible.” I’ll also compare leaf-and-node cuttings with the methods that root more easily, so you can choose the approach that fits your patience and setup.
First, let’s be clear on the cutting: leaf-only vs leaf-and-node
When gardeners say “propagating wisteria from leaf cuttings,” they’re usually referring to one of these:
- Leaf-only cutting: A leaf blade + petiole (leaf stem) with no node. This almost always fails for wisteria.
- Leaf-and-node cutting (recommended): A single leaf attached to a short piece of stem that includes at least one node. This can root.
- Heel cutting (also recommended): A side shoot pulled away with a small “heel” of older wood. Often roots more readily than a clean cut.
If you take just a leaf, you’re asking a piece of tissue with limited meristematic potential to create a whole vine. For wisteria, don’t count on it. Make it a leaf-and-node cutting and you’re back in realistic territory.
“Adventitious roots most commonly form at nodes or the base of a cutting where meristematic tissues and carbohydrate reserves are concentrated.” — North Carolina State Extension (2023)
Best timing: when wisteria is most cooperative
Timing is half the battle. You’ll get your best results with softwood to semi-hardwood material:
- Softwood cuttings: Late spring to early summer, when stems still flex but aren’t mushy.
- Semi-hardwood cuttings: Mid to late summer, when the new growth is starting to firm up.
In practical terms, I aim for a window when daytime temperatures are around 70–85°F (21–29°C) and nights stay above 60°F (16°C). If your nights are still cold, rooting slows down and rot becomes more likely.
Wisteria also has a reputation for being vigorous above ground and stubborn below ground—so don’t be discouraged if rooting takes 6–10 weeks. Some cuttings can sit “green and idle” for longer before they finally push roots.
Step-by-step: propagating wisteria using a leaf-and-node cutting
This is the method I use for home setups (no mist bench required), and it’s the closest thing to “leaf cuttings” that actually performs.
What you’ll need
- Clean pruners or a sharp knife (sanitized)
- Small pots or a cell tray with drainage
- Rooting hormone (IBA) at 0.3%–0.8% for woody cuttings (powder or gel)
- Propagation mix (details below)
- Clear humidity dome or a clear plastic bag + stakes
- Heat mat (optional but helpful): target 75–80°F (24–27°C) at the rooting zone
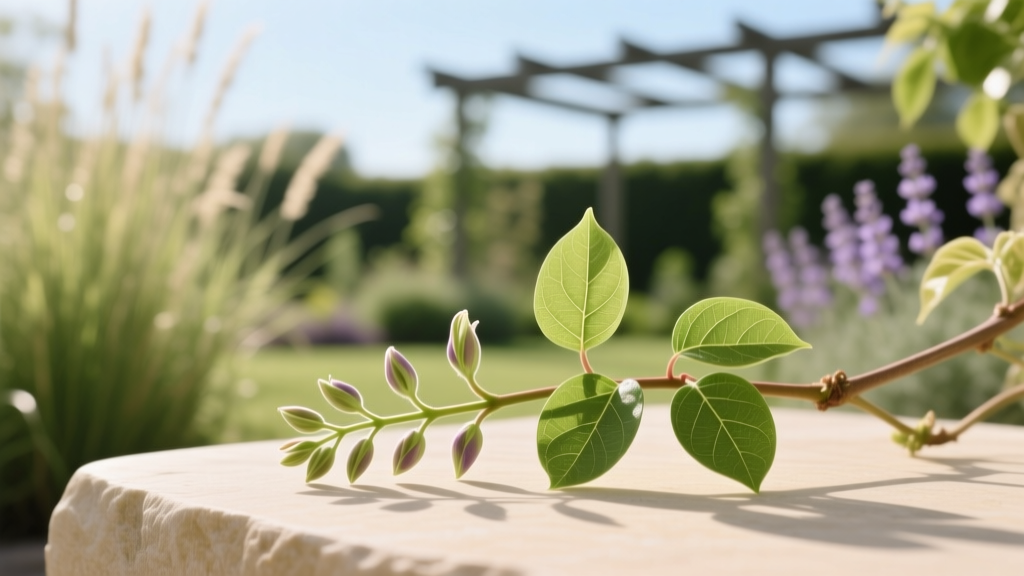
1) Take the right cutting (the “leaf cutting” that works)
- Select a healthy, non-flowering shoot. Flowering wood is often slower to root.
- Cut a section with one leaf and one node, leaving about 1.5–3 inches (4–8 cm) of stem total.
- If the leaf is large, trim it by 1/2 to reduce moisture loss (especially in warm weather).
- Make your lower cut just below a node. That node is your rooting engine.
2) Apply hormone (don’t skip this with wisteria)
Dip the lower end in water, then in rooting hormone. Tap off excess. Wisteria is one of those plants where hormone makes a noticeable difference in consistency—especially in a home environment without automated mist.
3) Stick and firm
- Pre-moisten your propagation mix so it’s evenly damp (not dripping).
- Insert the cutting so the node is buried and the leaf sits above the surface.
- Firm the mix around the stem so there are no air gaps.
4) Humidity + warmth + bright shade
- Cover with a dome or bag to keep humidity high.
- Place in bright, indirect light (no direct midday sun under plastic).
- Ideal air temps: 72–82°F (22–28°C).
If you only change one thing from your past attempts, make it this: steady humidity without soggy soil. Wisteria cuttings rot when wet and shrivel when dry.
5) Check weekly (hands off, mostly)
Once a week:
- Open the cover for 10–15 minutes to exchange air.
- Feel the mix. If the top 1/2 inch (1 cm) is dry, water lightly.
- Remove any cutting that turns black or mushy (rot spreads fast).
After 6–10 weeks, test for rooting by gently tugging. Resistance usually means roots. Don’t pot up until you see new growth and the cutting holds firmly in the mix.
Watering: keeping cuttings alive without inviting rot
Watering is where most wisteria propagation attempts go sideways. Your goal is “evenly damp,” not “wet.” Under a humidity cover, the soil dries much more slowly than you think.
Practical watering targets
- Pre-moisten the mix before sticking cuttings; it should feel like a wrung-out sponge.
- During rooting, water in small amounts (1–3 tablespoons) per small pot as needed—not on a schedule.
- If condensation is heavy and the mix stays dark and wet, crack the dome or add ventilation holes.
Symptom-based adjustments
- Leaves wilt midday, perk up at night: humidity is too low or light is too strong; increase shade or tighten the cover.
- Leaves yellow and drop quickly: mix may be waterlogged or too cold; reduce water, add bottom heat.
- Stem turns black at the soil line: classic rot; improve airflow, use a sharper drainage mix, start fresh cuttings.
University guidance consistently emphasizes sanitation, moisture control, and proper media for cuttings. For example, University of Minnesota Extension (2020) notes that overly wet media and poor aeration are common causes of cutting failure.
Soil (propagation mix): airy beats rich every time
Do not use garden soil or heavy potting soil for rooting wisteria cuttings. You want oxygen around the stem base. Rich mixes encourage rot and fungus gnats.
Reliable propagation mix recipes
- Mix A (simple): 50% perlite + 50% peat moss or coco coir
- Mix B (extra airy): 60% perlite + 40% coco coir
- Mix C (gritty): 1/3 perlite + 1/3 coco coir + 1/3 fine pine bark
Target pH isn’t something to lose sleep over at this stage, but wisteria generally prefers slightly acidic to neutral conditions (roughly pH 6.0–7.0) once established. For rooting, structure matters more than chemistry.
Light: bright shade, not sunbaked plastic
Wisteria vines love sun when mature, but cuttings are a different story. Under a humidity dome, direct sun can cook them in an hour.
Light guidelines that work on patios and windows
- Give bright indirect light or morning sun only.
- If using grow lights, keep them about 12–18 inches (30–45 cm) above the dome for 14–16 hours/day.
- Aim for warm, steady light rather than intense bursts.
Feeding: when (and when not) to fertilize
Don’t fertilize fresh cuttings. Fertilizer salts can burn stem tissue and encourage soft, weak growth before roots exist.
When to start feeding
Once you have clear signs of rooting—new growth plus a rooted “hold” in the pot—begin feeding at:
- 1/4 strength balanced liquid fertilizer (for example, 10-10-10 or 20-20-20)
- Every 2 weeks for the first month after potting up
After the plant is actively growing in a larger pot, you can move to a standard schedule. Avoid heavy nitrogen if your goal is flowering later; too much nitrogen pushes leaves and vines at the expense of blooms. This aligns with general wisteria culture guidance emphasizing balanced fertility and patience with flowering, especially on juvenile plants.
Method comparison: leaf-and-node cuttings vs other ways to propagate wisteria
If you’re doing this for fun, leaf-and-node cuttings are satisfying. If you’re doing it because you want a sure thing, it’s worth comparing methods. Here’s how they stack up in a home garden setting.
| Propagation method | Best season | Typical time to roots | Success rate (home setup) | Notes |
|---|---|---|---|---|
| Leaf-and-node cutting (softwood) | Late spring–early summer | 6–10 weeks | 30–60% | Needs high humidity; hormone strongly recommended. |
| Semi-hardwood cutting | Mid–late summer | 8–12 weeks | 25–50% | More resistant to wilt, but slower to root. |
| Layering (simple or mound) | Spring | 8–16 weeks | 70–90% | Most reliable for homeowners; cutting stays attached to mother plant. |
| Seed | Fall sowing / spring stratification | Weeks to germinate | Variable | Flowering may take 7–15 years; not true-to-type for cultivars. |
Those success ranges reflect what I typically see across home gardeners: layering is the “boring but dependable” option; cuttings are faster when they work, but fussier. Many university propagation resources emphasize that layering often outperforms cuttings for difficult-to-root woody vines in non-commercial conditions (NC State Extension, 2023).
Three real-world scenarios (and how I’d handle each)
Scenario 1: “I only have a few leaves from a friend’s plant”
If all you were given are loose leaves with no stem node, set expectations: you probably can’t make a vine. The fix is to ask for a piece that includes at least one node. If your friend is hesitant to prune, request a small lateral side shoot and take a heel cutting—it’s tiny, and it roots better.
If you must try with what you have, you can still practice moisture control and sanitation, but treat it as an experiment, not a plan.
Scenario 2: “My cuttings stay green for 2 months but never root”
This is common. Green isn’t the same as rooted. Usually one of these is happening:
- Too cool at the rooting zone (add a heat mat to reach 75–80°F).
- Cuttings taken too woody/too old (try softwood earlier in the season).
- No node buried (double-check your cutting structure).
- Not enough light (bright shade is still bright).
I’ll often restart with fresher softwood, use hormone, and switch to a more aerated mix (increase perlite). Patience matters, but so does knowing when to refresh the batch.
Scenario 3: “They root, then collapse after potting up”
This is transplant shock plus humidity shock. Newly rooted cuttings have delicate roots and have been living in a high-humidity bubble.
Fix it like this:
- Harden off slowly: open the dome a little more each day for 7–10 days.
- Pot up gently: move to a small pot (don’t jump to a huge container) with a well-draining mix.
- Keep in bright shade for another 7 days after potting.
- Water thoroughly once, then allow the top 1 inch (2–3 cm) to dry slightly before watering again.
Common problems and troubleshooting (symptoms you can actually use)
Problem: Leaves turn black or stem rots at the base
- Likely cause: mix too wet, poor airflow, contaminated tools/media
- What to do:
- Start over with sterile pots and fresh mix.
- Increase perlite content (aim for 50–60%).
- Vent the dome daily for 10–15 minutes.
- Keep the medium warm, not cold and wet.
Problem: Leaves shrivel, curl, or crisp at edges
- Likely cause: humidity too low, too much sun/heat under plastic
- What to do:
- Move to brighter shade (no direct midday sun).
- Seal the humidity cover better or mist the inside of the dome (not the soil) lightly.
- Trim large leaves by 1/2 to reduce transpiration.
Problem: Mold on soil surface
- Likely cause: stagnant air + constantly wet surface
- What to do:
- Scrape off the top 1/4 inch (0.5 cm) and replace with dry perlite.
- Vent more often; add 2–4 small holes in the dome.
- Water less frequently and from the bottom if possible.
Problem: Cuttings push a little growth, then stall
- Likely cause: using stored energy without establishing roots; low light or low warmth
- What to do:
- Check temperature at the pot level; aim for 75–80°F.
- Increase light intensity slightly (still indirect).
- Don’t fertilize until rooting is confirmed.
After rooting: potting up and the first season of care
Once rooted, your job shifts from propagation to steady growth. Potting up too early is a classic mistake; wait until the cutting resists a gentle tug and shows new growth.
Potting up steps
- Move rooted cuttings into a pot only 1–2 inches (2–5 cm) wider than the root ball.
- Use a free-draining mix (quality potting soil cut with 20–30% perlite works well).
- Water thoroughly, then let excess drain completely.
- Keep in bright shade for 7 days, then gradually introduce morning sun.
Don’t rush them into a permanent spot. I like to grow young wisteria in pots for a full season so I can control watering and training. A young vine that dries out once can lose weeks of progress.
Common questions I hear at the potting bench (answered plainly)
Will a cutting bloom sooner than seed? Usually, yes. Seed-grown wisteria can take 7–15 years to flower, and seedlings won’t reliably match the parent plant. Cuttings are clones of the parent, so you keep the cultivar traits.
Can I root wisteria in water? You can sometimes coax callus in water, but it’s not my first choice. Water-rooted tissues often struggle when moved to soil. An airy propagation mix is more consistent for woody vines.
Is it legal/okay to take cuttings? Only from your own plant or with permission. Also note that some named cultivars may be patented; propagation for sale can be restricted.
Two source-backed guardrails that keep you out of trouble
When in doubt, I default to guidance that’s boring for a reason: it works.
- Use nodes and manage humidity: University and extension references consistently emphasize that successful cuttings depend on selecting material with viable buds/nodes and maintaining humidity while avoiding saturated media (NC State Extension, 2023).
- Media aeration matters: Overly wet, poorly aerated media is a leading cause of cutting loss (University of Minnesota Extension, 2020).
Citations: North Carolina State Extension (2023); University of Minnesota Extension (2020).
If you take one hard-won lesson from all of this, let it be this: wisteria propagation isn’t about luck—it’s about making the cutting biologically capable (node included) and then keeping it in the narrow comfort zone between wilt and rot. Do that, and even a vine with a reputation for stubbornness starts acting like a plant that wants to live.