How to Take Softwood Cuttings of Cacti
The first time you try to “just take a cutting” from a cactus, it’s usually because something happened: a pad snapped off while you were moving a pot, a tall column cactus started leaning, or a favorite plant got a sunburned scar and you’d rather restart it clean. Here’s the surprising part—many cacti root more reliably from a fresh, soft (actively growing) piece than from an old, corky section, as long as you manage two things: letting the cut end seal properly and keeping the rooting mix barely moist, not wet.
I’ve watched home gardeners lose cuttings in two opposite ways: they pot them up immediately and water like a houseplant (rot), or they set them on a shelf for weeks and forget them entirely (desiccation). Softwood cactus cuttings are a sweet spot—fast to root, quick to establish—but they demand a bit of timing and restraint. Let’s do it the way nurseries do when they want high success rates.
What “softwood” means for cacti (and which cacti it fits)
In cactus terms, “softwood” isn’t literal wood. It means fresh, current-season growth that’s still firm but not hardened and corky. Think new pads on prickly pear (Opuntia), fresh segments on holiday cactus (Schlumbergera), or newer top growth on many branching columnar types.
Softwood cuttings are especially practical for:
- Segmented/jointed cacti: Schlumbergera, Hatiora, Epiphyllum (often treated as cactus-like epiphytes).
- Pad-forming cacti: Opuntia and relatives.
- Branching columns: Cereus, Trichocereus/Echinopsis types, where side arms can be removed.
They’re less appropriate for very slow, solitary globes (some Mammillaria, Ariocarpus) where offsetting or grafting is more common—though even then, offsets can be treated similarly.
Real-world scenarios (so you can pick the right approach)
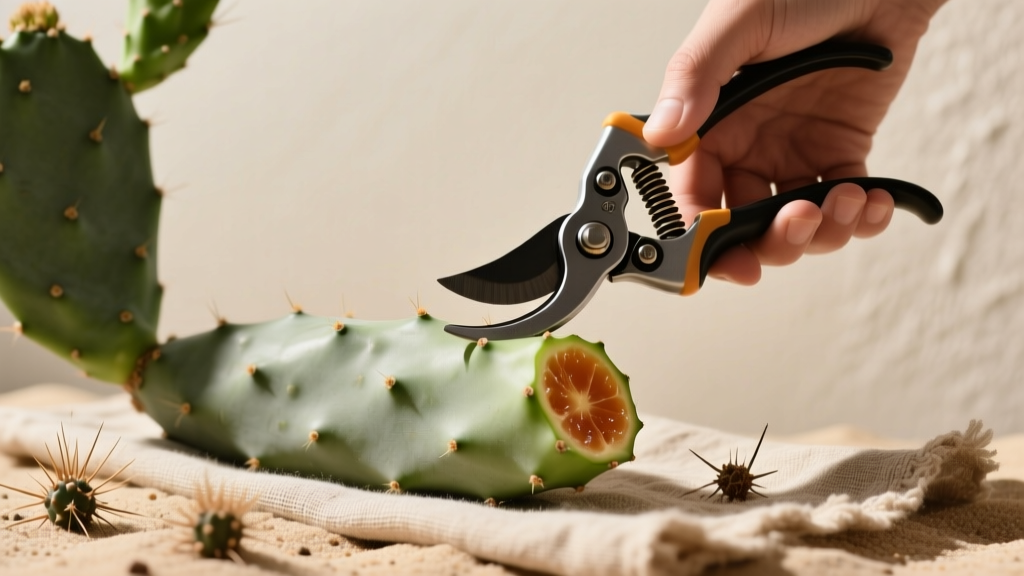
Scenario 1: A pad snapped off your Opuntia. Good news: that’s basically the plant volunteering a cutting. You just need to dry the wound and plant it shallowly.
Scenario 2: Your column cactus is top-heavy and leaning. You can “head” it: cut the top 6–12 inches (15–30 cm), root that section, and the base often pups out below the cut.
Scenario 3: A holiday cactus got leggy and sparse. Taking 2–4 segment cuttings and re-rooting them is the fastest way to fill a pot again—much faster than waiting for old stems to branch.
All three are the same skill, with slight tweaks in drying time, potting depth, and aftercare.
Timing: when to take softwood cactus cuttings
Take softwood cactus cuttings when the plant is in active growth and can heal quickly. Indoors, that’s usually late spring through mid-summer. Outdoors in warm climates, you can stretch the season, but avoid the cold edge of the year when healing slows.
Practical timing targets:
- Air temperature: aim for 70–85°F (21–29°C) during the first 2–3 weeks.
- Night lows: keep above 60°F (16°C) if possible for faster rooting.
- Day length/light: bright light without harsh midday scorch.
University guidance aligns with this: the University of Arizona Cooperative Extension notes cacti and succulents root best in warm conditions with careful moisture control (University of Arizona Cooperative Extension publication, 2018).
Tools and prep (don’t skip the boring parts)
Clean cuts heal cleaner. Ragged tears invite rot.
- Cutting tool: a sharp knife, pruning saw (for columns), or clean pruners.
- Disinfectant: 70% isopropyl alcohol for blade wipe-down between plants.
- Gloves & tongs: especially for Opuntia (glochids are miserable).
- Optional: sulfur powder or a copper-based fungicide dusting for humid climates.
- Pots: small and snug—3–4 inch (7.5–10 cm) pots root more safely than oversized containers.
As the Royal Horticultural Society advises, keeping cutting material and tools clean reduces disease and failure rates in propagation (Royal Horticultural Society guidance on propagation hygiene, 2023).
Step-by-step: taking the cutting (softwood, but sturdy)
Here’s the process I use when I want repeatable results.
1) Choose the right piece
- Pick a healthy, unblemished segment/pad/arm with no mushy spots or pest damage.
- For columns, choose a section at least 6 inches (15 cm) long; 8–12 inches (20–30 cm) is easier to stabilize in a pot.
- For holiday cactus, take 2–4 segments per cutting (single segments work, but are slower and more finicky).
2) Make a clean cut
- Disinfect your blade with 70% alcohol.
- Cut straight across (columns) or at the joint (segmented cacti).
- For pad cacti, detach at the natural pad connection—don’t carve the base.
3) Label orientation (especially for columns)
Sounds silly until you accidentally plant a column cutting upside down. Mark the “top” with a piece of tape or a felt pen line.
Callusing: the make-or-break stage
Softwood cactus cuttings need time to seal the cut end (callus) so it doesn’t wick moisture and rot. But they don’t need to sit for ages.
General callus times I’ve found reliable:
- Holiday cactus (Schlumbergera): 12–24 hours (they’re more tropical and can shrivel if left too long).
- Opuntia pads: 3–7 days in dry, airy shade.
- Column sections (6–12 in / 15–30 cm): 5–10 days; longer if the cut surface is large.
Set cuttings upright in a dry tray in bright shade with good airflow. Avoid direct sun while they’re freshly cut—sun + open wound is a recipe for dehydration and scarring.
“The most common cause of cutting loss in cacti is planting before the wound has sealed, followed closely by overwatering during the first weeks.” — Propagation notes summarized from extension-style succulent guidance (University of Arizona Cooperative Extension, 2018)
Soil for rooting: fast-draining, low-organic, lightly moist
Rooting mix is where many home gardeners unintentionally sabotage themselves. Regular potting soil holds too much water around a rootless cutting.
A dependable DIY rooting mix:
- 50% pumice or perlite
- 25% coarse sand or fine gravel
- 25% cactus/succulent potting mix (or sifted potting mix)
Aim for a slightly acidic to neutral range, roughly pH 6.0–7.0. More important than pH is that the mix dries quickly while still holding a whisper of moisture.
Potting depth and stability
- Holiday cactus: bury the bottom segment about 1/2 inch (1–1.5 cm).
- Opuntia pads: insert the pad 1 inch (2–3 cm) deep, or just enough to stand.
- Column cuttings: set 2–3 inches (5–7.5 cm) deep, then brace with stones if needed.
Use a pot only slightly wider than the cutting. A big pot stays wet in the corners long after the root zone should be drying.
Light: bright, protected, and gradually increased
Fresh cuttings aren’t ready for harsh sun. They have no roots to replace moisture lost through the skin, and soft growth can sunburn faster.
Light targets that work well:
- Week 1–2: bright shade or filtered light (east window, shade cloth, or dappled outdoor shade).
- After signs of rooting: increase to brighter light over 7–10 days.
- Long-term: match the species—Opuntia and many columns want strong sun; holiday cactus prefers bright indirect light.
Watering: the part everyone overdoes
Watering a rootless cutting is different from watering a potted cactus. Your goal is to keep the mix barely moist in the immediate rooting zone, while the rest stays airy. That’s a narrow target.
After planting: when to water first
- Holiday cactus: lightly moisten the mix at planting, then wait until the top 1 inch (2.5 cm) dries.
- Opuntia and desert columns: after callusing and planting, wait 3–7 days before the first light watering (especially in humid weather).
How much water is “light”?
For a 4-inch (10 cm) pot, I use roughly 2–4 tablespoons (30–60 mL) around the edge of the pot, not directly on the cut end. You’re not trying to soak the pot—just to cue roots to form.
Watering rhythm while rooting
- Check every 4–7 days.
- Water only when the mix is dry at least halfway down.
- If temperatures are below 65°F (18°C), water less often—cool + damp is rot territory.
Feeding: when (and when not) to fertilize
Don’t fertilize a fresh cutting. Fertilizer salts can burn tissues and encourage soft, weak growth before roots exist.
Feeding schedule that keeps things sturdy:
- Wait until you see new growth or feel resistance when you gently tug—usually 3–8 weeks, depending on species and temperature.
- Then feed at 1/4 strength with a balanced fertilizer (for example, 10-10-10 or similar) once every 4 weeks during active growth.
- For desert cacti, stop feeding in fall and winter indoors unless growth is clearly active under strong light.
Method comparison: dry-rooting vs lightly moist rooting
You’ll hear two schools of thought: “don’t water at all until roots form” versus “keep it slightly moist.” Both can work, but they behave differently in real homes.
| Method | Best for | Typical first watering | Rooting speed (common range) | Failure risk |
|---|---|---|---|---|
| Dry-rooting (no water at first) | Humid climates, thick desert cacti, large column cuttings | After 7–14 days in the pot | 4–10 weeks | Lower rot risk; higher shrivel risk if very warm/dry |
| Lightly moist (small sips) | Indoor propagation, smaller cuttings, holiday cactus | At planting (holiday cactus) or after 3–7 days (desert types) | 3–8 weeks | Faster rooting; higher rot risk if mix stays wet |
If you tend to overwater, choose dry-rooting. If your home is very dry (forced-air heat, desert climate) and you can measure small amounts, lightly moist is often faster and prevents excessive wrinkling.
Common problems (with symptoms and fixes)
Most failures announce themselves early. Don’t guess—look, feel, and smell.
Problem: Cutting turns black or mushy at the base
- Symptoms: soft tissue, dark discoloration, foul smell, base collapses.
- Cause: planted before fully callused; mix too wet; cool temperatures.
- Fix:
- Remove the cutting immediately.
- Cut back to firm, healthy tissue with a sterile blade.
- Dust with sulfur (optional) and re-callus for 3–7 days (or 12–24 hours for holiday cactus).
- Repot into fresh, drier mix; reduce watering frequency and keep above 70°F (21°C) if possible.
Problem: Cutting shrivels and wrinkles deeply
- Symptoms: deflated pads, wrinkled segments, limp growth.
- Cause: too much sun while rootless; zero moisture too long; very low humidity with heat.
- Fix:
- Move to bright shade (no hot midday sun).
- Give a measured drink: 30–60 mL in a 4-inch pot, then wait until half-dry again.
- Check that the cutting is stable and has good contact with the mix (wobbling delays rooting).
Problem: Cutting won’t root (stays alive but does nothing)
- Symptoms: no new growth, no resistance when tugged after 8–10 weeks.
- Cause: too cool, too dark, mix too dry, or the cutting is overly mature/hardened.
- Fix:
- Increase warmth to 75–85°F (24–29°C).
- Increase light gradually (brighter shade, not scorching sun).
- Switch to lightly moist watering rhythm (small sips).
- If the base is corky or scarred, recut a thin slice to expose fresh tissue, then re-callus.
Problem: Fungus gnats hovering around the pot
- Symptoms: tiny flies, larvae in wet mix, slow rooting.
- Cause: mix staying too wet or too organic.
- Fix: let the mix dry more between sips; top-dress with coarse sand; use yellow sticky traps; consider BTI dunks if gnats persist.
Pests and disease watch (especially indoors)
Cuttings are vulnerable because they’re stressed. The big three:
- Mealybugs: cottony clumps in joints—dab with 70% alcohol on a cotton swab, repeat weekly for 3 weeks.
- Scale: brown bumps on stems—scrape gently and treat with horticultural oil (avoid heavy oiling in hot sun).
- Soft rot: usually bacterial/fungal following excess moisture—your best tool is sanitation and drying time.
Aftercare: when to pot up and treat it like a normal cactus
Once roots form, your job is to transition from “propagation mode” to normal care without shocking the plant.
- How to confirm rooting: gentle tug test—if it resists, roots are likely present. For holiday cactus, look for new segment growth.
- When to repot: when you see clear new growth and roots have had at least 6–10 weeks to develop, or when roots peek from the drainage holes.
- New pot size: go up only 1–2 inches (2.5–5 cm) wider than the root ball.
For desert types, gradually increase sun exposure over 10–14 days to avoid sunburn. For holiday cactus, keep it in bright indirect light and use a slightly more organic mix than you’d give an Opuntia.
Three quick case fixes from real gardens
Case A: Opuntia pad planted in potting soil turned to mush in 5 days. I had the gardener recut to clean tissue, callus for 6 days, and replant in a 50% pumice mix. We waited 7 days before the first light watering. The pad rooted in about 6 weeks.
Case B: Holiday cactus segments shriveled on a shelf while “callusing.” They were left for a week in a warm room—too long. New cuttings were dried only overnight (18 hours), then set into lightly moistened mix and kept in bright shade. They firmed up within 10 days and showed new growth at 5 weeks.
Case C: Column cactus top cutting rooted slowly and kept tipping. The pot was too big and the cutting wobbled. We moved it into a snug 6-inch (15 cm) pot, set it 3 inches (7.5 cm) deep, braced with rocks, and held off watering for 10 days. Once stable, it rooted without further rot issues.
A few final habits that boost success
If you want your success rate to feel boringly reliable, do these every time:
- Keep notes (date cut, date potted, first watering). Rooting often takes longer than you think.
- Use small pots and gritty mix; most cactus propagation failures are moisture failures.
- Err on the dry side until you’re sure roots exist.
- Acclimate to sun slowly—sunburned cuttings can scar permanently.
The payoff is big: one healthy cactus can become a whole batch of plants for your own pots, gifts, or a backup copy of something you’d hate to lose. Once you’ve rooted a few cuttings successfully, you’ll start seeing “broken pieces” not as accidents—but as free plants waiting for a pot.
Sources: University of Arizona Cooperative Extension succulent/cactus propagation guidance (2018); Royal Horticultural Society propagation hygiene and cutting guidance (2023).