Fall Garden: Harvesting and Curing Winter Squash
The clock matters now: a single cold night can collapse vines, stain rinds, and cut storage life in half. If your winter squash is still in the patch, your best move this week is to match harvest timing to your first frost date and the next 10–14 day forecast. The payoff is huge—properly harvested and cured squash can keep for months in a cool pantry, while rushed or bruised fruit often fails by Thanksgiving.
This is the moment to prioritize three things: (1) harvest at the right maturity, (2) cure correctly for your squash type and your climate, and (3) protect both fruit and vines from cold snaps and fall disease pressure. Use the sections below as a triage list—do the top items first.
Priority 1: Harvest at peak maturity (before cold damage)
Know your frost and temperature thresholds
Winter squash can tolerate cool days, but mature fruit is easily damaged by cold. Use these concrete thresholds to decide what to do today:
- Harvest before a hard freeze (28°F / -2°C). Fruit exposed to 28°F even briefly can develop invisible chilling injury that shows up later as sunken spots and rot.
- Start “harvest mode” when nights regularly hit 40°F–45°F (4°C–7°C), especially in damp climates where rot pressure climbs fast.
- Plan to harvest 7–10 days before your average first fall frost date if fruit is mature; that buffer reduces risk from surprise cold fronts.
- After a light frost (32°F / 0°C) that only nips leaves, you can still harvest sound fruit; just don’t let squash sit through repeated frosts.
- Curing is fastest at 80°F–85°F (27°C–29°C) with good ventilation; below 70°F (21°C), curing slows and surface wounds stay vulnerable longer.
Timing examples: In many Zone 5 locations, average first frost lands around October 5–15. In Zone 7, it’s often November 1–15. Mountain valleys can be earlier by 2–4 weeks than nearby lowlands. Your local forecast overrides averages—if a 29°F night is predicted next week, harvest what’s ready now.
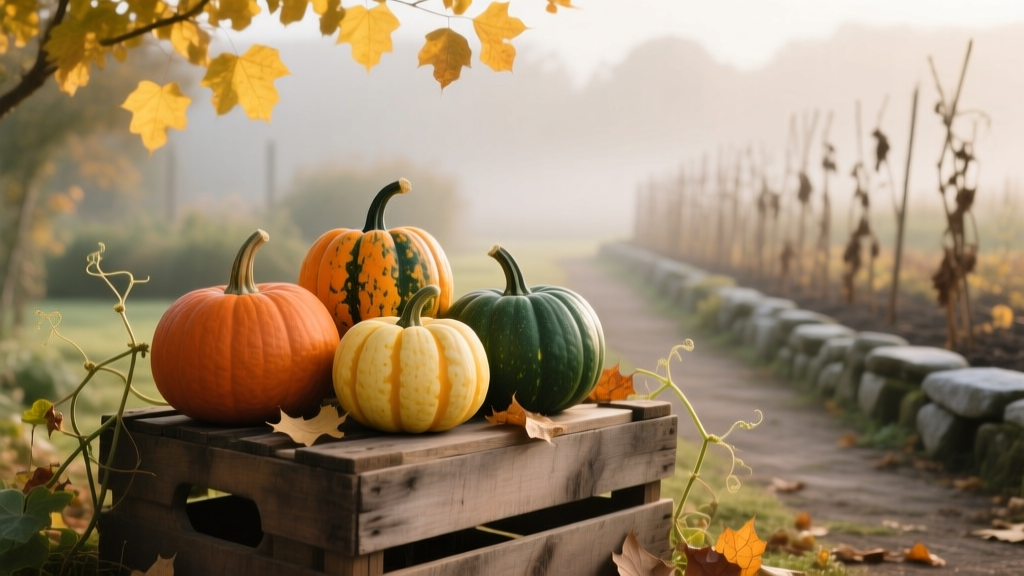
Field maturity checklist (use this before you cut)
Use these indicators together. One sign alone isn’t enough.
- Rind hardness: Press a thumbnail into the rind. If it resists and doesn’t puncture easily, it’s close.
- Stem condition: The stem (peduncle) should be corky, dry, and firm—not green and juicy.
- Color shift: Butternut turns from pale tan to deeper beige; acorn deepens; many kabocha types develop a duller, matte finish.
- Days to maturity: Compare to the seed packet. If your variety lists 95 days and you’re at day 80, focus on protection and selective harvest, not stripping the vine.
- Soundness: Skip fruit with soft spots, cracking, or active ooze. Use those first; don’t store them.
How to harvest without shortening storage life
Storage life is won or lost at harvest. Do it deliberately:
- Cut, don’t twist. Use pruners or a sharp knife to avoid tearing the stem end.
- Leave a stem stub: Aim for 1–2 inches of stem on most squash. A clean, intact stem reduces entry points for rot.
- Handle like eggs: Don’t carry by the stem; stems snap and create a wound you can’t “undo.”
- Keep fruit dry: Harvest after morning dew dries if you can. Wet fruit = higher rot risk.
- Sort in the field: Separate “store” fruit from “use first” fruit (minor scuffs, small stems, surface blemishes).
Extension guidance consistently emphasizes maturity and careful handling. Purdue University Extension notes that winter squash should be harvested when the rind is hard and the stem is dry, and that curing helps heal minor injuries and improve keeping quality (Purdue Extension, 2020).
Priority 2: Cure correctly (the difference between 6 weeks and 6 months)
Curing targets by type (and what “cure” actually does)
Curing is controlled warm storage that toughens rinds and heals small cuts. It also reduces surface moisture and can improve eating quality in some types (notably Hubbard and some kabocha).
| Squash type | Cure? | Best curing conditions | Typical cure time | Ideal storage after curing |
|---|---|---|---|---|
| Butternut (C. moschata) | Yes (highly recommended) | 80–85°F, 70–80% RH, airflow | 10–14 days | 55–60°F, dry, 50–70% RH |
| Hubbard / Blue Hubbard | Yes | 80–85°F, ventilated | 10–14 days | 50–55°F, dry |
| Acorn (C. pepo) | Optional/short cure | 75–80°F, airflow | 5–7 days | 50–55°F; use earlier (shorter keeping) |
| Kabocha / buttercup types | Often yes | 80–85°F, airflow | 10–14 days | 50–55°F; sweetness often improves after a few weeks |
| Spaghetti squash | Short cure helps | 75–80°F | 7–10 days | 55–60°F |
For storage, many extension recommendations cluster around cool (but not refrigerator-cold) temperatures. University of Minnesota Extension advises storing winter squash in a cool, dry place—generally around 50–55°F for many types—and emphasizes that some kinds (like acorn) have shorter storage lives (University of Minnesota Extension, 2019).
“Curing at warm temperatures with good air circulation helps heal minor cuts and strengthens the rind, improving storage life.”
—Extension storage guidance synthesized from university postharvest recommendations (Purdue Extension, 2020; University of Minnesota Extension, 2019)
Fast curing setups you can do this week
You don’t need a greenhouse—just warmth, airflow, and dry surfaces.
- Warm room method: A spare room held near 80°F with a box fan on low. Lay squash in a single layer on cardboard or slatted racks, not bare concrete.
- Garage/daytime heat method: If days still hit 75–85°F, cure in a garage with doors cracked for ventilation; bring indoors if nights drop below 55°F.
- Sun-safe porch method: Bright shade only—direct sun can overheat and sunscald rinds. Aim for warm air, not hot sun.
Spacing rule: Leave 1–2 inches between fruits so air can move. Rotate once halfway through curing to prevent soft spots.
When not to cure (or how to adjust)
If you’re in a humid coastal fall with persistent dampness, “warm + humid + still air” is a rot factory. In that case:
- Prioritize airflow (fan, racks) over heat.
- Cure at 70–75°F rather than 85°F if humidity is high and you can’t ventilate well.
- Shorten cure to 7–10 days for butternut if rinds are already very hard and stems are dry—then move to cooler storage.
Priority 3: Protect fruit still on the vine (buy time without risking rot)
When fruit is close but not ready
If your squash looks nearly mature but stems are still a bit green—and you’re 2–3 weeks from average frost—your goal is to keep vines functioning while preventing cold injury.
- Row cover on cold nights: Use frost cloth when forecasts call for 32–36°F. Remove during the day so foliage dries.
- Get fruit off wet ground: Slide a shingle, straw mat, or piece of cardboard under each fruit to reduce contact rot.
- Stop watering: If rains are light and soils are irrigated, taper off irrigation to reduce excessive vine growth and disease. Don’t stress plants to the point of collapse, but avoid soggy soil.
- Clip new flowers and tiny fruits: After about 3–4 weeks before frost, they won’t mature; redirect plant energy to existing fruit.
Three regional “right now” scenarios (choose yours)
Scenario A: USDA Zone 3–4 (short season, early frost risk)
If your first frost commonly arrives in late September and a 28°F night is plausible any week, harvest mature fruit immediately and cure indoors. Use row cover only as a brief bridge—don’t gamble on long vine time. In these zones, prioritize varieties with shorter maturity next year (90 days or less) and consider black plastic or low tunnels to speed ripening.
Scenario B: USDA Zone 5–6 (classic fall swings)
In much of the Midwest and Northeast, September can be warm but nights cool fast. Treat the first predicted 30–32°F night as a decision point: harvest anything with hard rinds and corking stems, protect the rest with frost cloth, and be ready to harvest everything within 7–10 days if the pattern turns cold. This is also peak time for powdery mildew—manage it so vines keep photosynthesizing long enough to finish fruit.
Scenario C: USDA Zone 8–10 (warm falls, disease pressure, longer hang time)
You may have weeks of growth left, but humidity and insects can reduce storage quality. Focus on keeping fruit clean, dry, and uninjured. You can often let squash stay on the vine longer for deeper color—just harvest before extended rains, and cure with aggressive airflow to prevent surface molds. In very warm nights (above 70°F), watch for increased pest activity and sunscald—use leaf cover and avoid stripping foliage.
Priority 4: Prepare your storage plan (before the first crate comes inside)
Set up a storage zone with the right numbers
After curing, move fruit to storage conditions that slow respiration without chilling injury:
- Temperature: Aim for 50–60°F (10–16°C). Many squash suffer if stored near refrigerator temps (below ~45°F).
- Humidity: Moderate—generally 50–70% RH. Too dry shrivels; too damp molds.
- Air movement: Gentle airflow prevents condensation and mold growth.
- Darkness: Not mandatory, but helps stabilize temperature and reduces sprouting in some produce stored nearby.
Great locations: a cool spare room, insulated porch, or basement area that stays above 50°F. Avoid: a damp cellar corner, uninsulated shed that dips below freezing, or a warm kitchen shelf for long-term storage.
Storage checklist (do this the same day you bring squash in)
- Wipe off dry soil; don’t wash unless you must. If you wash, dry completely.
- Label variety and harvest date (masking tape works) so you can “eat by shelf-life.”
- Store in a single layer on shelves or slatted racks; avoid stacking early on.
- Keep fruit from touching: a small gap reduces rot spread.
- Inspect weekly: remove any fruit with soft spots immediately.
Monthly schedule: what to do from now through early winter
| Time window | Garden actions | Indoor actions | Decision triggers (numbers) |
|---|---|---|---|
| Early–mid September | Lift fruit off soil; clip new flowers; scout mildew | Stage curing area; gather racks/fans | If nights fall to 45°F repeatedly, plan harvest order |
| Late September–early October (Zone 4–6 typical) | Harvest mature fruit; cover vines on cold nights | Begin curing (80–85°F if possible) | Harvest before predicted 28–30°F; cure 10–14 days |
| Mid October–November | Remove vines after harvest; clean patch to reduce disease carryover | Move to 50–60°F storage; weekly inspections | Storage space must stay above 50°F; discard soft fruit fast |
| December–January | Plan next year’s varieties; rotate cucurbit beds | Use shortest-keeping types first (often acorn) | If storage dips below 45°F, relocate to avoid chilling injury |
What to plant right now (while you’re handling squash)
Even in a squash-focused week, fall planting keeps your garden productive and reduces spring workload. Choose based on your frost window and USDA zone.
Fast fall crops (Zones 3–8, adjusted by frost date)
- Garlic: Plant 2–4 weeks before the ground freezes. In many Zone 5 gardens, that’s mid-October. Mulch after the first hard frosts.
- Spinach and arugula: Sow now if you have 4–6 weeks before hard freezes; protect with row cover.
- Cover crops: Where winter comes hard (Zones 3–6), sow cereal rye before about 2–4 weeks prior to consistent freezes; in warmer zones, crimson clover or mixes may work longer into fall.
Practical pairing: once your squash vines come out, that open space is perfect for a quick cover crop sowing—less mud, fewer weeds, and improved soil structure by spring.
What to prune (and what not to prune) in squash season
Do: remove disease-heavy foliage to extend vine function
Powdery mildew often surges in late summer into fall, especially with warm days and cool nights. You can slow it down enough to finish fruit:
- Remove the worst infected leaves (don’t strip the plant bare; keep canopy to prevent sunscald).
- Water at the soil line only; avoid evening overhead watering.
- Improve airflow by gently training vines so leaves dry faster after dew.
Don’t: prune vines hard to “force ripening”
Severe pruning reduces photosynthesis and can stop fruits from finishing. If frost is imminent, harvest instead of trying to manipulate ripening with aggressive cuts.
What to protect: fruit, vines, and next year’s garden
Fall pest and disease prevention (specific, seasonal moves)
Late-season problems often show up during curing and storage. Prevention starts now.
- Squash bugs: Adults may linger into fall. Remove egg clusters from leaf undersides and clear plant debris promptly after final harvest to reduce overwintering sites.
- Vine borer residue: In regions where squash vine borers are common, remove and destroy infested vines after harvest; don’t compost heavily infested material if your compost doesn’t heat up.
- Powdery mildew: Don’t store fruit with heavy mildew residue on the rind; keep curing airflow strong. Sanitize harvest tools.
- Black rot / gummy stem blight risk: Avoid wounding fruit. Many storage rots enter through scratches and stem injuries—another reason to cut with pruners and cure properly.
Patch cleanup matters. After harvest, remove old vines and rotting fruit. If disease was heavy, consider bagging and trashing rather than composting. Rotate cucurbits (squash, cucumbers, melons) to a different bed next year—aim for a 2–3 year rotation when possible.
Frost-protection checklist for the next 7 days
- Check the 10-day forecast daily; note any nights below 36°F.
- Stage frost cloth/row cover and clips before sundown on cold nights.
- Harvest mature fruit ahead of a predicted 30°F night; don’t wait for “after work tomorrow.”
- Pull fruit off soil with shingles/cardboard if heavy dew or rain is expected.
- Prepare indoor curing space so harvested fruit isn’t stuck in a cold garage overnight.
What to prepare: a harvest-to-storage timeline you can follow
10–14 day curing timeline (printable workflow)
Day 0 (Harvest day): Cut fruit with 1–2 inch stems, sort “store” vs “use first,” bring under cover before evening damp. Keep dry.
Day 1–3: Arrange in single layer with airflow. Start fan. Hold near 80–85°F if possible. Check for oozing stems or soft spots—remove any questionable fruit.
Day 4–7: Rotate fruit once. Continue airflow. If curing space is humid, crack windows/doors during warmest part of the day.
Day 8–14: Finish cure; rinds should feel firm and dry. Move to storage at 50–60°F. Label and record.
Eating order plan (so nothing goes to waste)
- Use first: acorn types, fruit with short stems, lightly scuffed fruit, any that cured in less-than-ideal humidity.
- Mid-season: spaghetti squash, delicata (often shorter storage), smaller butternuts.
- Longest keepers: butternut, Hubbard, many kabocha types—if properly cured and stored cool and dry.
One last practical habit: schedule a weekly 5-minute inspection. Storage losses usually start as one soft spot that spreads. Catching it early can save the rest of the shelf.
If you do only three things this week, make them these: harvest mature squash before the next 28–30°F event, cure with warmth and airflow for 10–14 days, and store at 50–60°F with weekly checks. That’s the fall window where small choices determine whether your winter squash becomes reliable pantry food—or compost.