Spring Garden: Prepping New Garden Beds from Scratch
Spring doesn’t wait. The window between “soil finally workable” and “we’re behind on planting” can be as short as two weekends—especially if you’re building new beds from bare lawn, compacted soil, or a weedy patch. The payoff is huge: get the bed structure, soil, and planting plan right now and you’ll spend the rest of the season maintaining—not repairing.
This guide is organized by what matters most first: what to prepare, what to plant, what to prune, and what to protect. Use the checklists and the schedule table to match your frost dates and your USDA hardiness zone, then execute in priority order.
Priority #1: What to Prepare (Beds, Soil, Layout) — Start as soon as soil is workable
The single best “timing” indicator for new bed work is soil condition, not the calendar. As a rule: work soil when it’s moist like a wrung-out sponge—never when it forms a slick ribbon in your hand. If you can squeeze a handful into a ball and it crumbles when poked, you’re good to dig. If it stays in a hard clod, wait 3–7 days and test again.
Pick your method: Smother, dig, or build up
Choose the method based on your starting point and how fast you need to plant.
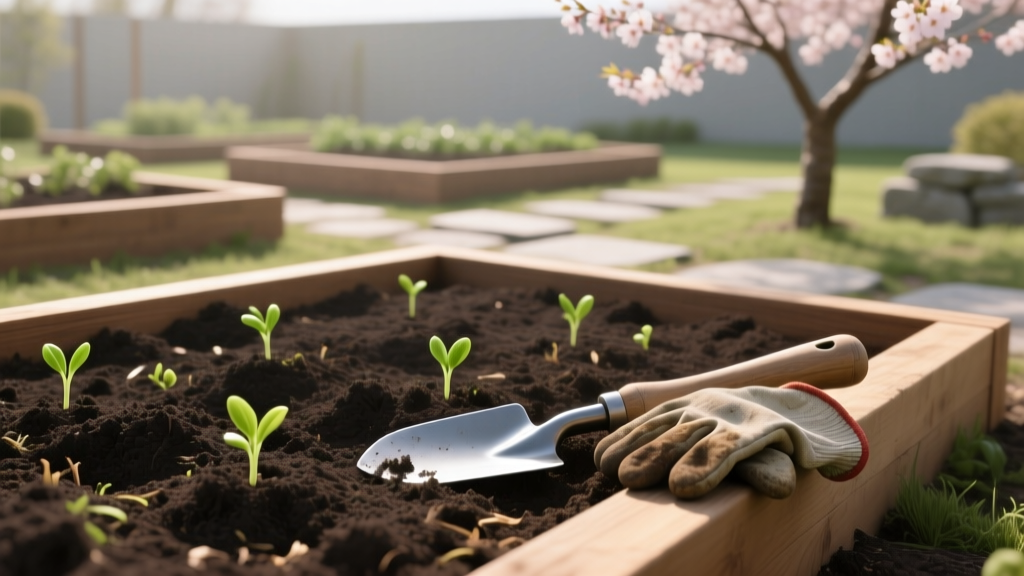
- Fastest (plant in 1–2 weeks): Raised bed on top of lawn using cardboard + soil/compost mix (no digging).
- Moderate (plant in 2–4 weeks): Sheet mulch in place (cardboard + compost + mulch) and plant through gaps.
- Slow but thorough (plant in 4–8 weeks): Sod removal + soil amendment + settling time, especially if drainage is poor.
If your soil is heavy clay or stays wet after rain, a raised bed (6–12 inches high) often outperforms “digging it better” in the short term. If you’re in a dry-summer region, in-ground beds with deep organic matter can hold moisture better than tall raised beds.
Lay out beds with access first (before you touch soil)
Most spring bed failures aren’t soil issues—they’re access issues that lead to compaction. Set dimensions so you never step in the bed.
- Bed width: 3–4 feet max if accessed from both sides; 2–2.5 feet if against a fence.
- Path width: 18–24 inches for foot traffic; 30–36 inches if you’ll wheelbarrow or mow near paths.
- Sun check: Track sun for a day if possible. Vegetable beds need 6+ hours direct sun; fruiting crops prefer 8+.
New bed checklist (do this before adding amendments)
- Mark bed edges and paths with stakes/string or hose
- Confirm water access (hose reach, drip line plan)
- Identify low spots where water pools after rain (fix with grading or raised beds)
- Pull out large perennial weeds (bindweed, quackgrass, Bermuda grass runners) by roots
- Plan crop placement: tall crops north side; trellises won’t shade shorter crops
Soil testing and amendment targets (numbers that matter)
If you can run one test this spring, make it a soil test. Many state extension services recommend soil testing every 3–5 years, and especially before establishing a new bed so you don’t over-apply phosphorus or lime. The University of Minnesota Extension notes that excess phosphorus is common in gardens that receive repeated compost/manure applications (University of Minnesota Extension, 2019).
Targets to aim for:
- Soil pH: 6.0–7.0 for most vegetables; blueberries prefer ~4.5–5.5
- Organic matter: aim for 3–5% for many garden soils; sandy soils benefit from more
- Soil temperature for planting cool-season crops: 45–50°F minimum in many cases
- Soil temperature for warm-season crops (tomatoes/peppers): 60°F+
When amending, prioritize compost quality over quantity. A common spring approach is adding 1–2 inches of finished compost over the bed and incorporating it into the top 6–8 inches (or leave it on top as mulch in no-dig systems). Avoid “hot” manure in spring beds you plan to plant immediately—it can burn seedlings and can introduce food safety issues for edibles if not properly composted.
“Adding organic matter improves soil aggregation and water infiltration, which helps reduce runoff and compaction—two common problems in new garden beds.” — USDA NRCS Soil Health principles summary (USDA NRCS, 2020)
Bed-building options compared
| Method | When to choose it | Time to plant | Best for | Watch-outs |
|---|---|---|---|---|
| Cardboard + raised bed fill (no-dig) | You need a new bed fast; starting over lawn | 7–14 days | Vegetables, cut flowers | Use plain cardboard (no glossy print); water thoroughly so it stays in place |
| Sheet mulching (in-ground) | Moderate timeline; want to build soil life | 2–4 weeks (plant through) | Perennial beds, mixed plantings | Weeds can punch through thin mulch; keep 3–4 inches mulch depth |
| Sod removal + amend | You need clean soil surface and good seedbed | 4–8 weeks | Direct-seeded crops, formal rows | High disturbance can bring up weed seed; mulch immediately after planting |
Timeline: the first 21 days of a new bed
- Days 1–2: Layout, remove big weeds/roots, decide bed method
- Days 3–7: Build edges/paths, add cardboard if using, add compost/soil, water deeply
- Days 7–14: Install drip irrigation or soaker hoses, add 2–3 inches mulch on unplanted areas
- Days 10–21: Plant cool-season crops or early perennials; start succession planting plan
Priority #2: What to Plant (Right Now, Based on Temperatures and Frost Dates)
Use your average last spring frost date as the anchor, then adjust by soil temperature and microclimate. In many locations, early spring planting starts 4–6 weeks before last frost for cool-season crops and 1–2 weeks after last frost for warm-season crops—later if nights stay cold.
Concrete timing numbers to work from (adjust to your area):
- Start peas, spinach, radish: 4–6 weeks before last frost
- Transplant broccoli/cabbage: 2–4 weeks before last frost if hardened off
- Plant potatoes: around when soil is 45–50°F and workable (often 2–4 weeks before last frost)
- Set out tomatoes/peppers: when soil is 60°F+ and nights stay above 50°F
- Protect blossoms/seedlings if frost predicted below 32°F; sensitive transplants can be damaged below 36°F
Cool-season planting list (best payoff for a brand-new bed)
Cool-season crops forgive imperfect soil and let you test irrigation and spacing before summer heat.
- Direct sow: peas, spinach, arugula, lettuce, radish, turnips, carrots (if soil is well-prepped), beets
- Transplant: kale, cabbage, broccoli, Swiss chard, onions, leeks
- Plant sets: onion sets; seed potatoes
If your bed is still settling (raised bed fill can sink), prioritize transplants over tiny seeded crops for the first two weeks. Lettuce transplants, onion sets, and brassica starts handle uneven moisture better than carrot seed.
Warm-season planning (do the prep now, plant later)
Even if you can’t plant tomatoes yet, you can prepare the bed for them now:
- Install cages/trellises early (easier before plants are in the way)
- Lay drip lines and test for leaks
- Pre-warm soil with clear plastic for 7–10 days if you’re trying to plant early (remove before planting or switch to mulch)
For timing guidance backed by research-based recommendations, many extension services emphasize soil temperature as the go/no-go metric for warm-season crops (e.g., Iowa State University Extension and Outreach, 2021, vegetable planting guidance based on temperature and frost risk).
Priority #3: What to Prune (Only the Right Things, at the Right Time)
New beds often go hand-in-hand with “cleaning up” the yard. Spring pruning is useful, but it can also remove this year’s flowers or invite disease if timed wrong. Keep pruning targeted.
Do now (late winter into early spring, before budbreak)
- Fruit trees (apple/pear): structural pruning while dormant; remove crossing limbs and water sprouts
- Summer-flowering shrubs: prune if they bloom on new wood (e.g., many hydrangea paniculata types)
- Roses (many types): remove dead canes, open the center for airflow
Wait (common spring pruning mistakes)
- Spring-flowering shrubs: lilac, forsythia, many azaleas—prune after bloom, or you’ll cut off flowers
- Stone fruits: prune cautiously; in wet climates, pruning timing can affect disease pressure
If you’re building beds near existing shrubs or trees, prune for access and airflow, then mulch appropriately. Keep mulch 2–3 inches deep, but pull it back 3–6 inches from trunks and crowns to reduce rot.
Priority #4: What to Protect (Frost, Wind, Pests, and Spring Diseases)
Spring protection is what keeps your early work from getting reset by weather or pests. Your goal is steady growth: consistent moisture, protected seedlings, and fewer disease entry points.
Frost protection that actually works
Keep row cover, old sheets, or frost cloth ready. Use them when a late frost threatens, especially in low spots where cold air settles.
- Cover timing: put covers on in late afternoon before temperatures drop; remove mid-morning when it warms
- Thresholds: protect tender transplants if forecast is 36°F or lower; most frost damage happens at or below 32°F
- Watering trick: water soil earlier in the day before a cold night—moist soil holds more heat than dry soil
Cutworm, slugs, and flea beetles: the early-season trio
Brand-new beds attract pests because seedlings are concentrated and tender. Start prevention immediately rather than reacting after damage.
- Cutworms: place cardboard collars (1–2 inches into soil, 2–3 inches above) around transplants for the first 2–3 weeks
- Slugs/snails: reduce hiding places (boards, thick debris), water in the morning, use iron phosphate bait if needed, and avoid piling mulch right against seedlings
- Flea beetles (brassicas): use lightweight row cover from planting day; keep plants growing steadily with consistent moisture
Spring disease prevention: focus on airflow and splash control
Most spring disease pressure comes from cool, wet conditions and soil splash. Your best tools are spacing, mulch, and watering at the base.
- Mulch: apply 2–3 inches around established seedlings to reduce soil splash (key for early blight and leaf spot pathways later)
- Watering: drip/soaker hoses over overhead watering; if overhead is your only option, water early so foliage dries quickly
- Sanitation: remove last year’s diseased plant debris; don’t compost visibly diseased foliage unless your compost reaches high, sustained heat
University of California Agriculture and Natural Resources notes that keeping foliage dry and limiting leaf wetness duration reduces many foliar diseases (UC ANR Integrated Pest Management guidance, 2022).
Monthly schedule (adjust by USDA zone and your frost date)
Use this as a working plan. Substitute “Month” with your local conditions if your spring runs early (Zone 8–10) or late (Zone 3–5). If you don’t know your zone, look it up by ZIP code and pair it with your local last frost date.
| Time window | Bed prep priorities | Planting priorities | Protection priorities |
|---|---|---|---|
| Weeks 6–4 before last frost | Layout beds/paths; remove perennial weeds; start sheet mulching | Direct sow peas/spinach/radish if soil workable; transplant hardened brassicas under cover | Row cover ready; slug monitoring begins |
| Weeks 4–2 before last frost | Add 1–2 inches compost; install drip lines; build trellises | Succession sow lettuce; plant onion sets; seed potatoes when soil ~45–50°F | Cutworm collars on transplants; cover if nights dip below 36°F |
| Last frost week | Top up mulch in paths; adjust irrigation; check settling in raised beds | Sow beans only if soil warming; keep cool-season successions going | Frost watch (32°F); vent covers on warm days |
| Weeks 1–3 after last frost | Switch from “build” to “maintain”; keep beds evenly moist | Transplant tomatoes/peppers when nights stay above 50°F and soil ~60°F+ | Mulch around warm-season transplants; scout aphids weekly |
Three real-world spring scenarios (and how to adjust)
“Spring” behaves differently depending on your region, soil, and weather patterns. Use the scenario that fits your conditions best.
Scenario 1: Cold spring, short season (USDA Zones 3–5; late frosts)
If your last frost commonly falls in mid-May to early June (for example, May 15 to June 5 in many cold regions), don’t rush warm-season crops. Your best move is to build a bed that heats and drains quickly.
- Prefer raised beds (6–12 inches) or at least crown the rows to shed excess water
- Start with cool-season crops and plan quick successions every 10–14 days
- Use low tunnels/row cover to gain a few degrees and block wind
- Wait for soil 60°F before tomatoes/peppers; cold soil stalls roots and invites stress
Practical trick: plant cold-hardy greens along the bed edges first. They’ll anchor your watering routine and give you early harvests while you wait for heat.
Scenario 2: Wet spring with heavy clay (common in parts of the Midwest, Northeast, Pacific Northwest)
If your site stays soggy and you can’t walk on soil without leaving deep footprints, the priority is drainage and compaction avoidance.
- Do not till wet clay—it smears into bricks. Wait until it passes the crumble test.
- Build up: raised beds or imported topsoil/compost blend over cardboard is often the fastest fix.
- Mulch paths heavily to prevent mud and keep you out of the beds.
- Choose transplants over direct-seeding tiny seeds until surface structure improves.
Disease prevention matters more in wet springs: space plants a little wider, keep leaves dry, and use mulch to reduce soil splash.
Scenario 3: Warm spring that turns hot fast (USDA Zones 7–10; early heat spikes)
In regions where last frost may be as early as March 1 to April 1, your challenge is not cold—it’s keeping new beds evenly moist before summer heat arrives.
- Prioritize irrigation installation early (drip/soaker), then mulch immediately after seedlings establish
- Plant potatoes and cool-season greens early, but plan to shade or replace them as temperatures rise
- Use light-colored organic mulches (straw, shredded leaves) to reduce soil temperature swings
- Consider afternoon shade for lettuce and cilantro; bolt risk rises as temps climb above 75–80°F
Warm zones can build soil quickly with biology—compost, mulch, and minimal disturbance—because microbes stay active longer. The tradeoff is weeds also grow fast; don’t leave soil bare.
“Do this this weekend” checklist (new bed sprint)
If you only have one weekend, focus on actions that prevent rework later.
- Mark bed and paths; commit to bed width you can reach across
- Smother lawn/weeds with plain cardboard (overlap seams 6 inches)
- Add 6–10 inches of bed mix for raised beds (or 1–2 inches compost for in-ground no-dig)
- Water deeply to settle materials
- Install drip/soaker hoses before planting, then test run for 15–30 minutes
- Plant cool-season transplants (kale, lettuce) and direct-sow peas/radish where appropriate
- Set row cover in place if nights may dip below 36°F
Early-season maintenance: keep the new bed improving (not reverting)
New beds need short, consistent attention. The goal is to keep soil covered, moisture consistent, and weeds from getting established.
Weekly (10–20 minutes per bed)
- Walk the bed edges and pull small weeds before they root deeply
- Check moisture 2 inches down; water deeply when dry rather than sprinkling daily
- Inspect undersides of leaves for aphids; blast off with water early before colonies build
- Look for slug trails and cutworm damage; respond immediately
Every 2–3 weeks
- Succession sow fast crops (radish, lettuce, cilantro) to keep harvests steady
- Add a thin compost top-dressing (¼–½ inch) around heavy feeders if growth is pale
- Refresh mulch where soil is exposed, especially after heavy rains
Mulch and fertilizer: avoid the common spring overdo
Two spring mistakes cause more problems than they solve: burying seedlings in mulch and over-fertilizing. Keep mulch pulled back from stems, and don’t add high-nitrogen fertilizer “just because.” Let plant color and growth rate guide you. If a soil test recommends phosphorus or lime, follow the rate—don’t guess. Over-application can create nutrient imbalances that are harder to fix than low fertility.
Spring bed prep is a sequence, not a single event: build access, build soil, plant for the temperatures you have, and protect young plants from the week-to-week swings. Once the bed is planted and mulched, your job shifts from construction to observation—and that’s when gardening gets easier and harvests get predictable.
Sources: University of Minnesota Extension (2019), guidance on garden soil testing and phosphorus considerations; USDA Natural Resources Conservation Service (2020), soil health principles emphasizing organic matter and soil structure; UC Agriculture and Natural Resources IPM (2022), disease prevention principles emphasizing reduced leaf wetness and sanitation; Iowa State University Extension and Outreach (2021), planting guidance based on frost risk and soil temperature.