Spring Mulching Best Practices
Spring mulch can either jump-start your garden or slow it down. Apply too early and you trap cold, wet soil that delays growth and invites rot. Apply too late and weeds get a head start, moisture swings stress new plantings, and you’ll spend May pulling seedlings you didn’t want. The window is short: aim to mulch after the soil starts warming and drying, but before weed pressure peaks and summer heat arrives.
Use this guide like a working almanac—prioritized tasks you can act on this week, with timing cues (soil temperatures, frost dates, and calendar windows) plus regional adjustments for different USDA zones.
Priority 1: What to prepare (so mulching actually works)
1) Time it by soil temperature, not the first sunny weekend
Mulch is an insulator. In early spring, that means it can keep soil colder longer. A reliable rule: wait until your garden soil is consistently 50–55°F at 2–4 inches deep before applying most organic mulches around warm-season crops and perennials. For cool-season beds (peas, brassicas, lettuce), you can mulch earlier—but keep it thin until the soil warms.
- Soil temp target: 50°F for cool-season planting support; 55–60°F for warm-season bed mulching.
- Moisture cue: soil should crumble in your hand, not smear into a ribbon.
- Calendar cue: in many areas, that’s roughly 2–4 weeks before your average last frost date for cool-season beds, and 1–2 weeks after last frost for warm-season beds.
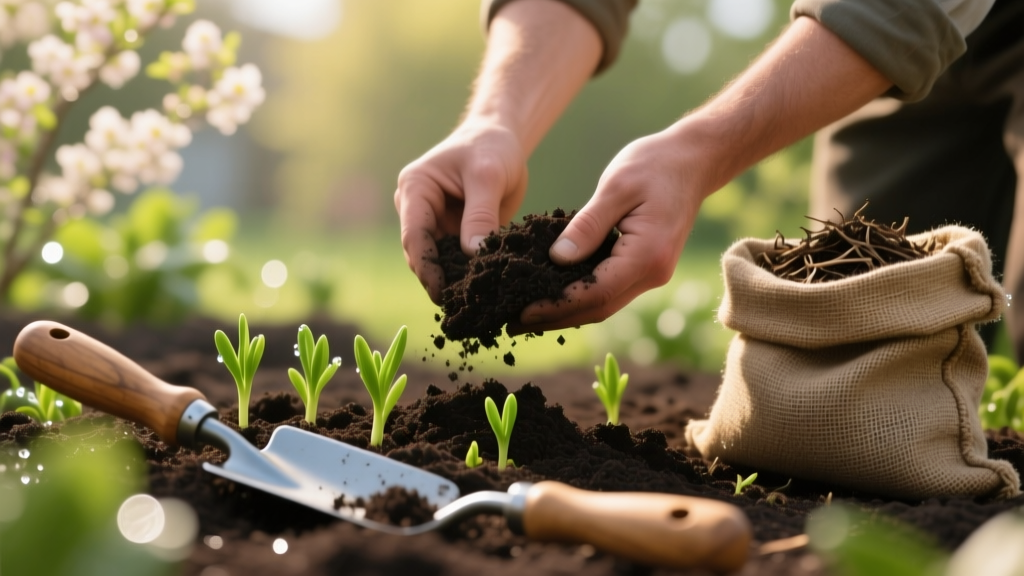
2) Clean up first—mulch goes on soil, not on problems
Mulching over last year’s diseased leaves and stems can preserve spores and insect habitat right where new growth emerges. Before you spread anything, do a fast sanitation pass:
- Remove matted leaves from crowns of perennials (especially hosta, daylily, peony).
- Cut and dispose of diseased debris (do not compost if you had blight, mildews, or canker issues).
- Pull winter annual weeds now (chickweed, henbit) before they set seed.
- Rake mulch back from bulb shoots and emerging perennials to let soil warm.
Pest/disease prevention note: Slugs love cool, damp cover. If you’ve had slug damage before, delay thick mulch until nights are consistently above 50°F and plants are growing vigorously, or use a thinner layer plus targeted controls (iron phosphate baits, boards/traps).
3) Decide your mulch goal: warming vs weed control vs moisture buffering
Not every bed needs the same strategy in April. Choose one main goal and match the material and thickness to it:
- Warm soil faster: use black plastic or landscape fabric temporarily (anchored well), or a very thin compost layer (1/2 inch) early, then add organic mulch later.
- Stop weeds: use 2–4 inches of coarse organic mulch (wood chips, shredded bark), or sheet mulch with cardboard + chips for new beds.
- Buffer moisture: use leaf mold, compost, straw, or fine wood mulch at 2–3 inches, kept away from stems.
“Mulches moderate soil temperature and conserve moisture, but they can also delay soil warming in spring if applied too early or too thick.” — Extension guidance summarized from university horticulture recommendations (e.g., University of Minnesota Extension, 2020)
4) Use the right thickness (most spring problems are “too much”)
For established beds, the sweet spot is usually 2–3 inches of organic mulch after soils warm. Less than 2 inches often won’t suppress weeds; more than 4 inches can reduce oxygen to roots and encourage crown rot.
- Compost: 1/2–1 inch as a soil top-dress (not a deep weed barrier).
- Straw (clean, seed-free): 2–3 inches for veggie paths and around potatoes/strawberries.
- Wood chips: 2–4 inches for trees/shrubs and perennial beds (keep off crowns).
Spring mulch material comparison (quick pick table)
| Mulch material | Best spring use | Apply when | Typical depth | Watch-outs |
|---|---|---|---|---|
| Shredded bark / wood chips | Shrubs, trees, perennial beds, pathways | After soil is ~55°F and drying | 2–4 inches | Keep 3–6 inches away from trunks/crowns; don’t “volcano” mulch |
| Compost | Top-dress beds; feed soil biology | As soon as soil is workable | 1/2–1 inch | Not a strong weed barrier; can crust if applied thick and allowed to dry hard |
| Straw (weed-free) | Veggie rows, strawberries, potato hilling support | After seedlings are established; after rains settle soil | 2–3 inches | Weedy bales cause headaches; can shelter slugs in cool springs |
| Leaf mold | Moisture buffering; woodland gardens | Once beds are cleaned and soil warming | 2–3 inches | Can mat if applied thick; fluff it after heavy rains |
| Cardboard + chips (sheet mulch) | New bed creation; lawn-to-bed conversions | Early spring while soil is moist | Cardboard + 3–4 inches chips | Leave gaps around desired plants; may harbor slugs initially |
Priority 2: What to protect (spring weather whiplash)
1) Protect crowns and trunks: keep mulch off the base
Spring is prime time for crown rot and rodent damage. The fix is simple: pull mulch back from stems and trunks.
- Perennials: keep a “donut hole” around crowns—1–2 inches of bare space.
- Trees/shrubs: keep mulch 3–6 inches away from the trunk; maintain a broad ring out to the dripline if possible.
- Depth cap: keep total depth near trunks at 2–3 inches max.
2) Frost swings: mulch helps after plants are up, not before soil wakes up
Late frosts are common even when days feel mild. Use mulch tactically:
- After planting cool-season crops: a light mulch reduces soil splash (and disease) during spring rains.
- Before an overnight frost: mulch won’t protect blossoms like a cover will. Use row cover or sheets when forecasts dip below 32°F, especially for strawberries and early fruit bloom.
- After thaw/freeze cycles: mulch can reduce frost heaving around shallow-rooted perennials once the soil is warming.
3) Disease prevention: stop soil splash early
Spring rain + bare soil = spores splashing onto new leaves. Mulch is a simple barrier that reduces splash dispersal for problems like early blight on tomatoes and some leaf spot diseases. Extension guidance commonly recommends mulching to reduce soil splash and stabilize moisture; for example, Cornell University’s vegetable disease resources note mulch as a cultural tool to reduce soil-to-leaf movement of pathogens (Cornell Cooperative Extension, 2019).
Actionable steps:
- Mulch immediately after transplanting tomatoes/peppers once soil is warm and plants are hardened off.
- Stake/cage plants first, then mulch, so you’re not disturbing mulch later.
- Water at soil level (drip/soaker), not overhead, to keep foliage dry.
Priority 3: What to prune (so mulch doesn’t hide structural problems)
1) Prune before mulching when possible
Mulch hides the base of plants—exactly where you need to see damage, cankers, and girdling roots. Do your pruning pass first, then clean up, then mulch.
- Shrubs that bloom on old wood (lilac, forsythia, many hydrangeas): prune right after flowering, not in early spring, to avoid removing buds.
- Shrubs that bloom on new wood (panicle hydrangea, many spireas): prune in early spring as buds swell.
- Ornamental grasses: cut back before new green blades reach 2–4 inches tall.
- Roses: prune when buds begin swelling; then mulch after soil warms to reduce blackspot splash.
2) Remove overwintered pest habitat
Many pests overwinter in plant debris. A clean bed plus correctly timed mulch reduces hiding spots.
- Dispose of iris leaves with borer history; don’t mulch over them.
- Rake out thick leaf layers in strawberry beds to reduce fungal pressure, then re-mulch lightly after plants leaf out.
- For fruit trees, remove mummified fruit and fallen leaves (apple scab/rot pressure) before refreshing mulch.
Priority 4: What to plant (and how mulch changes planting success)
1) Direct sowing: keep mulch out of the seed row
Mulch can prevent germination if it blocks light and warmth. For carrots, lettuce, beets, and other small-seeded crops, keep a clean seed trench.
- Sow, water, and let seedlings emerge.
- Once seedlings are 2–3 inches tall, tuck a thin mulch between rows (not on top of seedlings).
- In windy gardens, lightly pin straw with water or cover it with netting until it settles.
2) Transplants: mulch after the first deep watering
For broccoli, cabbage, onions, and early herbs, get roots established first.
- Plant on a calm day; water deeply.
- Wait 24–72 hours, then mulch to lock in moisture.
- Keep mulch back from stems to reduce damping-off and stem rot.
3) New trees and shrubs: build a wide mulch ring (not a volcano)
Spring planting is prime time for woody plants in many regions. A wide mulch ring reduces mower damage and stabilizes moisture as roots expand.
- Create a ring 3–6 feet wide where possible.
- Depth: 2–3 inches.
- Keep mulch 3–6 inches away from the trunk.
Research-backed note: A common extension recommendation is to use organic mulch to conserve moisture and reduce weeds, while avoiding trunk contact to prevent decay and pest issues. For example, Washington State University Extension discusses mulch benefits and cautions around trunk contact and excessive depth (WSU Extension, 2021).
Timing you can follow: a spring mulch schedule by month
Adjust by USDA zone and your local frost date, but use this as a realistic workflow. Concrete targets below assume a typical last frost window sometime between mid-April and late May, depending on region.
| When | What to do | Depth/threshold | Best beds to focus on |
|---|---|---|---|
| Late March–Early April (~4–6 weeks before last frost) |
Clean beds; pull winter annual weeds; top-dress compost; rake mulch off crowns to warm soil | Compost 1/2–1 inch; avoid thick mulch if soil <50°F | Perennials, garlic, early greens, berry beds |
| Mid-April (~2–4 weeks before last frost) |
Mulch cool-season beds lightly; set up drip/soakers before mulching | Soil ~50°F; mulch 1–2 inches | Peas, brassicas, onions, lettuce rows (between rows) |
| Last frost window (watch forecasts for 32°F nights) |
Use covers for frost-sensitive blossoms; delay heavy mulch if soil is cold and wet | Cover when <32°F expected | Strawberries in bloom, early fruit trees, tender perennials |
| 1–2 weeks after last frost | Apply main-season mulch; mulch after planting/transplanting and deep watering | Soil 55–60°F; mulch 2–3 inches | Perennial borders, shrubs, tomatoes/peppers (after hardening off) |
| Late May–Early June | Spot-mulch thin areas; refresh paths; scout for slugs/earwigs; adjust irrigation under mulch | Maintain 2–3 inches; avoid >4 inches | High-weed zones, edges, sunny beds heading into heat |
Regional scenarios: how spring mulching changes across the map
Scenario 1: Cold, slow springs (USDA Zones 3–5; Upper Midwest/Northeast)
If your snow melts late and soils stay saturated, early mulching is a common mistake. Your priority is warming and drying.
- Pull last year’s mulch back from perennials as soon as shoots appear.
- Wait for soil to reach 50°F before applying more than a dusting around cool-season crops.
- Plan your main mulch application for roughly 7–14 days after your average last frost date (often May 10–30 depending on location).
- If spring winds dry beds fast once they finally warm, mulch immediately after a soaking rain to lock moisture in.
Scenario 2: Mild winter, early warm-up (USDA Zones 6–7; Mid-Atlantic/Ohio Valley)
In these zones, weeds can explode early, and warm spells can push perennials up—only to get hit by a late freeze.
- Use a staged mulch: 1 inch early (weed suppression + splash control), then top up to 2–3 inches once soil is consistently 55°F.
- Watch for April cold snaps after early heat. Mulch won’t save blossoms—have row cover ready.
- Scout for aphids on tender growth and manage early with strong water sprays and beneficial-friendly practices (avoid broad-spectrum insecticides that disrupt spring predators).
Scenario 3: Warm climates with early heat (USDA Zones 8–10; South/Gulf/parts of West Coast)
Your spring window can jump from cool to hot quickly. Mulch is a heat and moisture management tool here, and earlier application is often beneficial—provided you avoid stem rot.
- Mulch earlier to prevent rapid evaporation as temps climb above 80°F.
- Keep mulch airy (coarser chips, pine straw) to reduce fungal issues in humid regions.
- In areas with heavy spring rains, avoid piling mulch against foundations and plant crowns to prevent soggy conditions and fungal outbreaks.
- Fire-wise note (dry regions): choose composted mulch and keep it maintained; avoid letting fine, dry mulch accumulate against structures.
Scenario 4: Rainy coastal springs vs. dry inland springs (Pacific Northwest vs. Intermountain West)
Same month, different reality. Match mulch to moisture patterns.
- Rainy coastal: prioritize drainage and airflow; use 2 inches, not 4. Watch slugs under boards, rocks, and thick mulch.
- Dry inland: mulch sooner after irrigation is in place; use 3 inches to reduce evaporation and temperature spikes, especially for new plantings.
Mulch checklists you can use this weekend
Pre-mulch checklist (30–60 minutes per bed)
- Soil is crumbly, not muddy
- Soil temperature is at least 50°F (or you’re applying only a thin layer)
- Winter weeds removed before they seed
- Old diseased debris removed (not buried)
- Drip lines/soaker hoses laid out and tested
- Plant crowns and trunks exposed (no mulch touching)
Mulching checklist (the “do it right once” list)
- Spread evenly to 2–3 inches (up to 4 inches only for coarse chips in non-crown areas)
- Keep mulch 3–6 inches off tree trunks and 1–2 inches off perennial crowns
- Mulch after deep watering or a soaking rain
- Leave seed rows unmulched until seedlings are established
- Mark irrigation emitters so they don’t get buried and lost
Spring pest and disease prevention tied to mulching
Slugs and sowbugs: manage habitat intentionally
Thick mulch during cool, wet weather can increase slug activity. If you’ve had hosta, lettuce, or strawberry damage:
- Use a thinner spring layer (1–2 inches) and increase later.
- Water in the morning so the surface dries by night.
- Place slug traps/boards and check at dawn for a week.
- Use iron phosphate bait as needed, especially after rain.
Fungal leaf spots and blights: reduce splash + stabilize moisture
Mulch helps most when paired with smart watering and spacing.
- Mulch beneath susceptible crops (tomatoes, squash) once soil is warm.
- Avoid overhead watering; use drip under the mulch.
- Prune lower tomato leaves once plants are tall enough to keep foliage off the soil.
Rodents and voles: don’t give them a spring runway
In regions with vole pressure (often Zones 4–7), thick mulch tight to trunks is an invitation.
- Keep trunk clearance and avoid piling mulch against woody stems.
- Maintain a tidy mulch edge and avoid tall grass nearby.
- Check young trees for girdling and install guards if needed.
A simple spring timeline (printable logic, not guesswork)
Use your average last frost date as the anchor, then follow these steps:
- 6 weeks before last frost: clean beds; remove diseased debris; top-dress compost (1/2–1 inch)
- 4 weeks before last frost: start light mulching in cool-season beds if soil is near 50°F
- 2 weeks before last frost: keep mulch thin; prep irrigation; watch for 32°F nights and protect blooms with covers
- 1–2 weeks after last frost: main mulch application (2–3 inches) once soil is 55–60°F
- Late May/early June: inspect depth, refill low spots, and adjust watering schedules for mulched soil
Mulch is one of the few spring chores that affects everything—watering frequency, weed pressure, soil temperature, disease risk, and even how quickly perennials wake up. Get the timing right, keep it off crowns and trunks, and treat thickness as a precision setting, not a pile-it-high habit. When summer arrives, you’ll feel the payoff every time you skip a weeding session and your soil stays evenly damp under a stable, living surface layer.