Summer Composting: Speeding Up with Heat
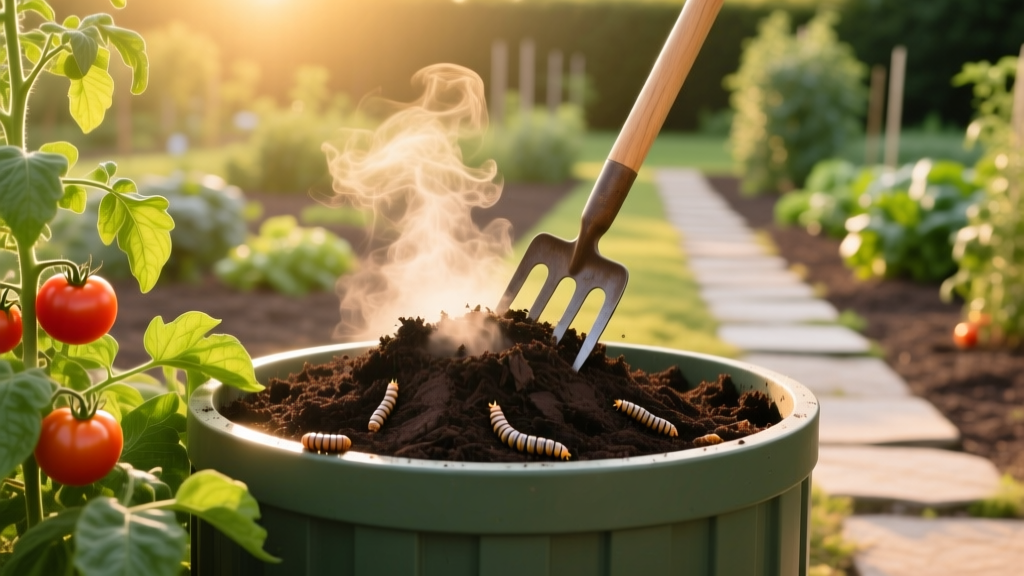
When daytime highs settle into the 80–95°F range and the garden is producing more clippings, trimmings, and kitchen scraps than you can comfortably handle, you’ve got a narrow, valuable window: summer heat can turn “compost someday” into finished compost fast. The catch is that hot weather can also dry a pile into dormancy or invite odors and flies if you feed it wrong. The goal right now is to ride the season’s warmth while controlling moisture, airflow, and ingredients so your pile stays in the active “hot composting” zone.
This guide is organized by what matters most in mid-summer: what to plant (using compost and compostables wisely), what to prune (and what not to compost), what to protect (moisture, nitrogen, beneficials, and your own time), and what to prepare (systems that keep compost moving through the hottest weeks). Timing notes include concrete temperature and calendar targets so you can act this week, not later.
Priority 1: What to Prepare (so the heat works for you)
Build or reset a pile sized for hot composting
Heat is easiest to hold in a pile that’s big enough to insulate itself. Aim for a working pile that’s roughly 3 ft × 3 ft × 3 ft minimum. Smaller piles can compost, but they cool quickly and stall—especially when summer breezes and dry air pull moisture out. If you’re restarting mid-season, consolidate half-finished material into one “core” pile and start a second “new inputs” pile beside it.
Temperature targets: Monitor the center of the pile with a long compost thermometer. Most home composters do best when the core runs around 131–150°F for active decomposition. Turning becomes most productive when the pile peaks and starts to fall (for many piles, that’s within 3–7 days of a turn or build, depending on ingredients and moisture).
“Compost piles work best when the moisture content is similar to a wrung-out sponge and the pile has enough bulk to conserve heat.”
— Principles commonly recommended in extension composting guidance, including University of California Agriculture and Natural Resources (UC ANR, 2019)
Set your summer “speed controls”: carbon, nitrogen, water, air
Summer composting is a balancing act between rapid microbial activity and rapid drying. Use this four-point check before you add anything:
- Carbon (“browns”): dry leaves, shredded paper/cardboard, straw, wood shavings (thin layers), dried plant material.
- Nitrogen (“greens”): grass clippings (thin layers), garden trimmings, kitchen scraps, coffee grounds, fresh weeds before they seed.
- Water: add water as you build and at each turn until the handful squeeze test yields a few drops. If it crumbles and won’t clump, it’s too dry.
- Air: avoid thick, wet mats (common with grass). Mix and fluff; consider a perforated PVC aeration pipe if turning is hard.
Fast fix for a smelly pile: Smell usually means too wet/too much nitrogen and not enough air. Mix in shredded cardboard and dry leaves, then turn. Fast fix for a cold, dry pile in a heatwave: Water thoroughly during a turn (not just surface sprinkling), then cap with 2–4 inches of browns as mulch.
Use a summer cap to stop evaporation and flies
A cap is a deliberate top layer that protects the active core. In summer, a cap does three jobs: reduces moisture loss, discourages flies, and filters odors. After each feeding, cover with 2–3 inches of shredded leaves, straw, or finished compost. If you’re fighting drying winds or full sun, increase to 4 inches.
Monthly schedule: what to do when heat is highest
| Month | Primary goal | Turning rhythm | Moisture action | Inputs to prioritize |
|---|---|---|---|---|
| June | Build volume; start hot | Turn every 7–10 days if pile hits 131–150°F | Water during turns; cap with browns | Early weed pulls (pre-seed), garden thinnings, small grass layers |
| July | Prevent drying; keep heat steady | Turn every 5–7 days if temps peak fast | Deep soak during turns; shade pile if needed | Kitchen scraps + shredded cardboard; avoid thick grass mats |
| August | Finish batches; bank compost for fall planting | Turn every 10–14 days as pile cools | Maintain “wrung sponge”; don’t overwater in humid regions | Crop residues (disease-free), dried browns to balance late-summer greens |
Timing note: If your pile holds 131°F or higher for 3 days and you turn it so outer material moves to the center, you accelerate breakdown and improve sanitation. Many home piles won’t perfectly meet industrial standards, but this is a practical benchmark for summer speed.
Priority 2: What to Protect (heat, moisture, and sanitation)
Protect the pile from drying out (especially zones 8–10)
In USDA Zones 8–10, consistent 90°F+ days can turn a pile into a dry “mulch stack” in a week. Use these tactics immediately:
- Site selection: Morning sun, afternoon shade is ideal. Full shade slows heating; full sun accelerates drying.
- Shade cloth or a simple cover: A breathable tarp or shade cloth reduces evaporation; avoid sealing the pile airtight.
- Water strategy: Water during turning so moisture reaches the core. A surface sprinkle evaporates before it helps.
Concrete threshold: If your compost thermometer shows the pile failing to rise above 110°F after a fresh turn/build in hot weather, assume moisture or nitrogen is limiting. Correct those before you add more material.
Protect against pests: flies, rodents, and raccoons
Summer is peak pest season, and compost odors travel farther in warm air. Prevention is mostly about how you add food scraps:
- Bury scraps 8–12 inches deep in the active core, then cap with browns.
- Avoid meat, dairy, oils in open piles (they reliably attract rodents).
- Use a bin with a lid if you have raccoons (common in suburban and coastal regions).
- Freeze and batch scraps during heatwaves: add them during a turn so they’re immediately mixed and buffered.
Protect your garden from compost-borne disease mistakes
Summer pruning and crop cleanup can provide lots of biomass—but not all of it should go into a fast pile. Keep these guardrails:
- Do not compost plants with obvious fungal disease (powdery mildew, blight) unless you reliably achieve and maintain hot temperatures and turn thoroughly.
- Do not compost weeds that have set seed unless you have a consistently hot system and a disciplined turning schedule.
- Do compost healthy crop residues, spent annuals, and disease-free trimmings—shredded to speed breakdown.
Extension guidance consistently emphasizes balancing greens and browns and maintaining proper moisture and aeration to reduce odors and pests and support efficient decomposition (UC ANR, 2019). Similarly, Cornell Cooperative Extension notes that hot composting depends on oxygen, moisture, and a good mix of materials, with temperature monitoring as a practical management tool (Cornell Cooperative Extension, 2020).
Priority 3: What to Prune (and how to feed the pile safely)
Prune for plant health—and compost the right fractions
Mid-summer pruning produces the perfect compost feedstock: soft green growth, thinnings, and trimmings. Use a two-bucket approach as you work:
- Bucket A (compost now): soft tips, green leaves, spent flowers, healthy annuals, non-woody weeds (pre-seed).
- Bucket B (chip, dry, or discard): thick stems, thorny canes, diseased foliage, seed heads, and anything you suspect is infested.
Make it smaller: If you want speed, chop material to 1–2 inch pieces where practical. Smaller particles increase surface area and heat production—but don’t overdo shredding into a fine paste that restricts airflow.
Grass clippings: the summer accelerator (and the summer hazard)
Grass clippings are nitrogen-rich and can spike temperatures quickly, especially when daytime highs are above 85°F. They also mat into slimy layers that go anaerobic. The rule that prevents most summer compost failures:
- Add grass in layers no thicker than 1–2 inches.
- Immediately cover each grass layer with 2–3 inches of browns (shredded leaves, shredded cardboard, straw).
- If clippings are wet from irrigation or rain, let them dry for 24 hours before adding.
Pruning timelines that pair well with composting
Use these time windows as a practical rhythm (adjust for your region and heat):
- Every 7 days: quick garden walk—remove yellowing leaves, harvest, pull small weeds before they seed; feed the pile lightly and cap.
- Every 10–14 days: turn the active pile if temperatures have peaked and started dropping.
- Every 3–4 weeks: do a bigger prune/cleanup day, stockpile browns, and rebuild the pile for another hot run.
Priority 4: What to Plant (and where compost fits right now)
Plant heat-tolerant crops—and use compost as soil armor, not a salt shock
In mid-summer, compost use should be strategic. Fresh compost is still biologically active and can tie up nitrogen or introduce salts if it’s immature. Right now, your safest moves are:
- Top-dress with finished compost: 1/2 to 1 inch around established vegetables and flowers, then water in.
- Use compost as mulch base: a thin compost layer under straw or leaf mulch helps retain moisture and feeds soil life.
- Avoid planting into unfinished compost: if it still heats, smells sour, or shows recognizable food scraps, keep it composting.
Summer planting timing (useful numbers): Many gardeners aim to start fall crops 6–10 weeks before the first expected frost date. In Zones 3–5, that often means sowing brassicas and carrots in late July through August. In Zones 6–7, sowing can extend into late August. In Zones 8–10, fall planting may shift to September once nights cool and soil temperatures drop.
Three real-world regional scenarios (adjust your compost strategy)
Scenario 1: Hot and dry inland summer (USDA Zones 7–10, low humidity)
Your compost pile will dry out faster than it decomposes. Prioritize moisture retention and shade.
- Place the pile where it avoids afternoon sun.
- Expect to water at least once per week during stretches above 95°F, especially after turning.
- Use a thicker cap (up to 4 inches) and stockpile browns so you never add kitchen scraps without coverage.
Scenario 2: Hot and humid summer with frequent thunderstorms (USDA Zones 6–9, high humidity)
Your compost pile can go anaerobic quickly if rain saturates it. Prioritize drainage and structure.
- Keep the pile under a breathable cover that sheds heavy rain.
- Add extra bulking agents (straw, small twigs, wood chips used sparingly) to maintain pore space.
- If the pile smells like rotten eggs or vinegar, turn immediately and add browns.
Scenario 3: Short summer window (USDA Zones 3–5, cool nights)
Daytime heat helps, but nights can cool the pile. Prioritize pile size and insulation.
- Build bigger (at least 3×3×3 ft), and consider a bin to reduce heat loss.
- Turn less frequently than hot climates if your pile struggles to reheat; try every 10–14 days instead of weekly.
- Use high-nitrogen inputs (grass, coffee grounds) in balanced layers to help the pile climb above 131°F.
Fast timeline: a 21-day summer hot-compost push
If you want compost ready for late-summer top-dressing or early fall bed prep, run a focused three-week cycle. Results depend on ingredients and diligence, but summer gives you the best odds.
Day 0 (build day)
- Assemble at least 1 cubic yard of mixed material (or the 3×3×3 ft equivalent).
- Layer browns and greens, watering as you go.
- Finish with a 2–4 inch brown cap.
- Insert thermometer into the center.
Days 3–5 (first peak)
- If core temperature reaches 131–150°F, let it ride until it starts to dip.
- If it smells or stays below 110°F, correct moisture and mix in nitrogen (greens) or carbon (browns) as needed.
Days 7–10 (first turn)
- Turn so outer material moves to the center.
- Water dry pockets during turning; break up mats.
- Re-cap with browns.
Days 14–17 (second turn)
- Repeat turning if temperatures peaked again and are falling.
- Stop adding new scraps to this batch—start a second “feeding pile” if needed.
Days 21+ (assess readiness)
- Compost is ready when it’s dark, crumbly, earthy-smelling, and no longer heats after turning.
- If it still warms above 100°F, let it cure another 2–4 weeks before using around seedlings.
Summer pest and disease prevention in and around the compost area
Fruit flies and gnats
They explode in summer when you add melon rinds, tomatoes, and other soft scraps. Prevent them with a strict cap and deep burial of scraps. If they’re already established, stop adding food scraps for 7 days, turn the pile once, and cap heavily with browns.
Ants
Ants usually indicate the pile is too dry. Water during a turn until the material holds together when squeezed. In arid regions, keep the pile off bare, hot concrete; contact with cooler soil can help stabilize moisture.
Rodents
Rodents are drawn to calorie-dense scraps and sheltered piles. Use enclosed bins in problem areas, bury scraps deeply, and never add greasy food waste. Keep surrounding vegetation trimmed so rodents don’t have cover right up to the compost site.
Plant pathogens
If you’re dealing with common summer diseases (powdery mildew on squash, blights on tomatoes), be conservative. Unless your system reliably reaches hot temperatures and you turn thoroughly, dispose of heavily infected material rather than risking reintroducing pathogens to beds later. For guidance on safe home composting practices and the role of temperature and management, see UC ANR (2019) and Cornell Cooperative Extension (2020).
Quick checklists you can use this week
“Is my pile set up to go fast?” checklist
- Thermometer on hand and used at least 2–3 times per week
- Pile is at least 3×3×3 ft or contained in an insulating bin
- Materials are mixed (no thick grass mats)
- Moisture passes the wrung-sponge test
- Top cap is 2–4 inches of browns
- Turning plan: every 5–10 days during active heat
“What can I compost right now?” checklist
- Healthy garden trimmings, chopped
- Grass clippings in thin layers
- Kitchen scraps buried in the core
- Shredded cardboard/paper as browns
- Dried leaves or straw for caps and balancing
“What should not go in the summer pile?” checklist
- Weeds with mature seeds
- Plants with heavy disease symptoms (unless you consistently hot-compost and turn)
- Meat, dairy, oils (pest magnets)
- Pet waste (pathogen risk for home compost used on food gardens)
Practical compost math: browns bank, greens flow
The most common mid-summer compost problem is running out of browns right when greens surge. Fix it by creating a “browns bank” now: stash 2–3 large bags of shredded leaves, shredded cardboard, or straw near the compost area. Every time you add a bucket of kitchen scraps or grass, add an equal or larger volume of browns. You’ll get fewer odors, fewer flies, better airflow, and higher sustained heat.
If you’re harvesting heavily right now—tomatoes, cucumbers, squash—expect a surge in wet scraps. Compensate immediately with dry browns and a cap. In heatwaves, do your turning early in the day and water as needed so the pile doesn’t lose all its moisture by afternoon.
By late summer, your best composting payoff is having finished or nearly finished compost ready for the next big garden move: lawn repair, fall vegetable beds, garlic planting, and perennial bed top-dressing. Put the heat to work while it’s free, but keep the pile fed, covered, and correctly moist so microbes—not flies—get the benefits.
Sources: University of California Agriculture and Natural Resources (UC ANR). Composting Is Good for Your Garden and the Environment (2019). Cornell Cooperative Extension. Composting Basics (2020).