Winter Garden: Building a DIY Grow Light Setup
The shortest days of the year are also your best chance to get ahead. While outdoor beds rest, a well-built DIY grow light setup lets you start onions, slow-grow herbs, and raise sturdy seedlings weeks before your last frost—without the leggy, pale plants that come from windowsill light. If you act now (before your seed-starting rush hits 6–10 weeks before last frost), you can dial in light, heat, airflow, and sanitation so your indoor “winter garden” produces compact transplants and clean starts.
This guide prioritizes what to do first, then what to plant, prune, protect, and prepare—timed to winter realities like 32°F freezes, indoor humidity swings, and low sun angles. Use it like an almanac: choose your scenario, hit the checklist, and set your system up once so it runs reliably all season.
Priority #1 (This Week): Build the Grow Light System That Prevents Leggy Seedlings
Pick your footprint and crop goals (30 minutes)
Decide what you’re growing indoors this winter. Your crop list determines light intensity and shelf height. Examples:
- Seed-starting for spring (tomatoes, peppers, brassicas): high light intensity, adjustable height, good airflow.
- Winter herbs and greens (basil, lettuce, kale, microgreens): moderate intensity, consistent photoperiod, frequent harvest.
- Houseplant maintenance/rehab: moderate intensity, longer hours, careful watering to avoid fungus gnats.
Choose your light type (LED shop lights vs LED grow bars vs panels)
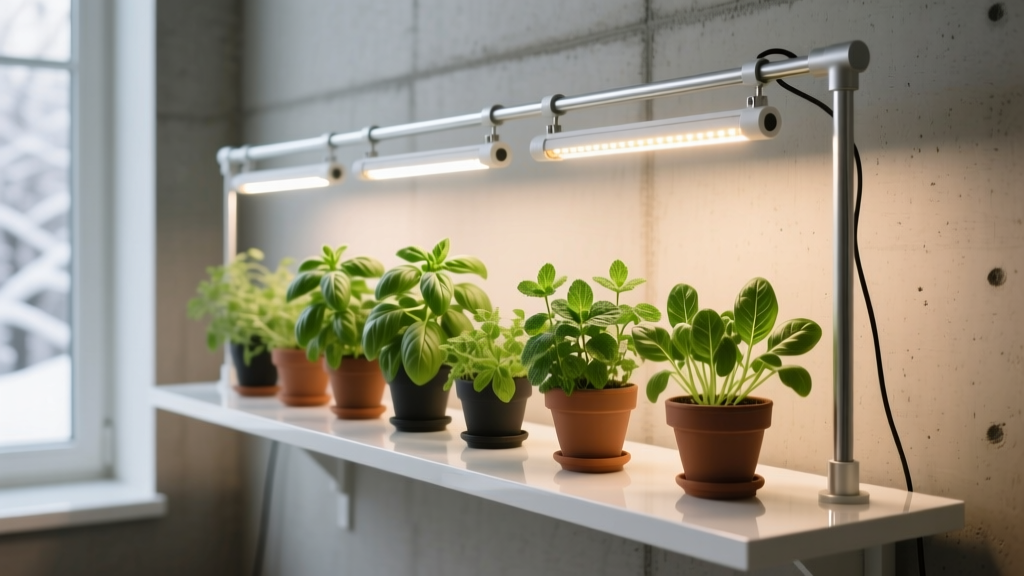
For most gardeners, LED shop lights or LED grow bars over a wire shelf are the best DIY balance of cost, coverage, and safety. Aim for 4000–5000K “daylight” LEDs for seedlings and greens. If you use dedicated “grow” LEDs, look for reputable output specs (PPFD maps), not just watt-equivalent marketing.
| Light option | Best for | Typical mounting height | Notes |
|---|---|---|---|
| LED shop lights (4000–5000K) | Seedlings, greens, herbs | 2–4 inches above seedlings (raise as they grow) | Affordable, broad coverage; use multiple fixtures for even light |
| LED grow bars (full spectrum) | Seedlings + fruiting starts (pepper/tomato starts) | 6–12 inches depending on intensity | Often higher output per bar; easier on shelves |
| LED panels (high intensity) | Dense trays, larger indoor plants | 12–24 inches (follow manufacturer PPFD chart) | Can be overkill for seedlings; watch heat and dry-down |
Set the photoperiod now (today): 14–16 hours for seedlings
Winter daylight is short; your timer is the season’s secret weapon. Set:
- Seedlings: 14–16 hours ON, 8–10 hours OFF daily.
- Greens/herbs: 12–16 hours depending on growth rate and temperature.
Use a simple outlet timer. Consistency matters more than perfection.
Target light distance and temperature thresholds (do this during setup)
Legginess is usually low light intensity (too far away), too much warmth, or both. Use these winter thresholds:
- Keep LEDs close: start at 2–4 inches above seedlings for shop lights (raise to maintain distance).
- Germination heat: many seeds prefer 70–80°F media temperature; remove from heat mats after sprouting unless crop requires warmth.
- Seedling grow-on: aim for 60–70°F air temperature for sturdy growth (cooler nights help).
- Hard stop: if a shelf area stays above 80°F with lights on, increase ventilation or raise lights.
- Freeze awareness outdoors: assume tender seedlings die at 32°F; don’t rush them outside.
“A common cause of weak, spindly seedlings is insufficient light—keeping fluorescent or LED lights just a few inches above the plants helps produce stocky transplants.” — University of Minnesota Extension (2020)
Build it: a reliable DIY shelf setup (1–2 hours)
Simple bill of materials for one standard 4-foot shelf level:
- 1 wire shelving rack (or a sturdy table) with adjustable shelf height
- 2x 4-foot LED shop lights or grow bars (more for higher intensity coverage)
- Chain + S-hooks (for fast height adjustment)
- Outlet timer
- Small oscillating fan
- Waterproof tray liners (boot trays or mixing mortar trays)
- Power strip with surge protection (mounted above water line)
Assembly rules that prevent winter headaches:
- Mount lights on chains so you can raise them weekly.
- Put water-holding trays at the bottom of each shelf level; keep cords and power strips higher than trays.
- Run a small fan on low for at least 8–12 hours/day to reduce damping-off risk and strengthen stems.
- Label one shelf “clean zone” for seed-starting; keep houseplants elsewhere to avoid pest crossover.
Sanitation and disease prevention (today, before sowing)
Indoor seed-starting failures in winter often come from pathogens and algae thriving in warm, wet conditions.
- Wash trays and domes with soap and water, then sanitize (follow label directions for any disinfectant you use).
- Use fresh seed-starting mix, not reused potting soil.
- Bottom-water when possible; avoid keeping the surface constantly wet.
- Provide airflow; stagnant air + wet media = damping-off.
For damping-off prevention, multiple extensions emphasize cleanliness, avoiding overwatering, and using a sterile medium. Penn State Extension notes sanitation and careful watering as key steps to reduce damping-off in seedlings (2019).
Priority #2 (Weeks 10–6 Before Last Frost): What to Plant Under Lights Right Now
Your sowing window depends on your local last frost date and USDA zone. Use these concrete planning anchors:
- 10–12 weeks before last frost: onions from seed, leeks, slow perennials.
- 8–10 weeks before last frost: peppers (often slow), eggplant.
- 6–8 weeks before last frost: tomatoes, broccoli, cabbage, cauliflower.
- 4–6 weeks before last frost: lettuce transplants (or direct-sow later outdoors), many annual flowers.
If your area’s average last frost is April 15, count backward: peppers around Feb 1–15, tomatoes around Feb 15–Mar 1. If your last frost is May 15, shift everything about a month later.
Quick-win winter crops that do well under basic LEDs
- Microgreens: harvest in 7–21 days; keep lights close and water lightly to prevent mold.
- Lettuce and baby greens: sow every 2 weeks for steady harvest; cooler rooms (60–65°F) improve quality.
- Chives, parsley, cilantro: slower, but steady under 12–14 hours of light.
Seed-starting checklist (printable-style)
- Timer set to 14–16 hours ON
- Lights hung on adjustable chains
- Fan running gentle airflow
- Trays sanitized; fresh seed-starting mix ready
- Heat mat + thermostat available (optional but helpful)
- Labels and dates ready (don’t trust memory)
- Notebook: record sow date, germination date, and problems
Priority #3 (Midwinter Maintenance): What to Prune (and What to Leave Alone)
Winter pruning is about timing and temperature. Pruning at the wrong moment can invite dieback or disease. Use these region-aware rules.
Prune on a mild day above 20–25°F
When wood is deeply frozen, it can be brittle. If possible, prune when temperatures are above 25°F and rising.
Scenario 1: Cold-winter zones (USDA Zones 3–5)
Do now (Jan–Feb):
- Apple and pear: dormant pruning for structure (before bud swell).
- Grape vines: late winter pruning to manage vigor.
Hold off: avoid pruning tender landscape plants until you see winter survival; wait until closer to spring when buds reveal dieback.
Scenario 2: Milder-winter zones (USDA Zones 6–7)
Do now (late Jan–Feb):
- Roses: remove dead/crossing canes, but save major shaping for closer to bud break.
- Fruit trees: dormant pruning; sanitize tools between trees if you suspect disease.
Scenario 3: Warm-winter/coastal zones (USDA Zones 8–10)
Growth may not fully stop, so time pruning around your coolest period and plant bloom cycles.
- Prune after bloom for spring-flowering shrubs (azalea, lilac-type shrubs in suitable climates) so you don’t remove flower buds.
- Citrus: prune lightly after risk of cold snaps passes; protect first if temps threaten 28–32°F.
Priority #4 (Every Cold Night): What to Protect Outdoors While Your Indoor Setup Runs
Even if your main action is indoors, winter outdoor protection prevents spring setbacks.
Freeze thresholds to act on
- 32°F: protect cool-season seedlings, uncovered tender annuals, and some citrus blossoms.
- 28°F: serious risk for many tender plants; cover and add thermal mass (water jugs) where possible.
- 20°F and below: protect young fruit trees from sunscald and rodents; mulch roots of borderline-hardy perennials.
Mulch, wrap, and water wisely
- Mulch: keep 2–4 inches over root zones, but pull mulch back from trunks to prevent rot and vole damage.
- Tree wraps/guards: install for young trees to reduce sunscald and rodent girdling.
- Water during thaws: if soil is dry and unfrozen, water deeply before a cold snap; drought-stressed evergreens burn more in winter wind.
Indoor pest prevention (winter-specific)
Grow lights don’t cause pests, but warm, bright shelves can accelerate infestations you already have.
- Fungus gnats: let the top 1/2 inch of mix dry between waterings; use yellow sticky cards; avoid algae growth by improving airflow and reducing surface wetness.
- Aphids: inspect undersides weekly; isolate new plants for 7–10 days before placing near seedlings.
- Powdery mildew risk: increase spacing and airflow; avoid wetting foliage late in the light cycle.
Priority #5 (Set It and Improve It): What to Prepare for the Next 8–12 Weeks
Monthly schedule you can follow (adjust by frost date)
| Month | Indoor under lights | Outdoor (when weather allows) | System checks |
|---|---|---|---|
| December | Microgreens; herbs; inventory seeds; test timers | Mulch checks; protect trunks; clean tools | Measure shelf temps; set fan; organize cords safely |
| January | Onions/leeks (10–12 weeks pre-frost in many areas); succession greens | Dormant pruning on mild days; rodent patrol | Sanitize trays; calibrate heat mat thermostat (70–80°F media) |
| February | Peppers/eggplant (8–10 weeks pre-frost); more greens | Late-winter pruning; prep beds during thaws | Raise lights weekly; start gentle fertilizer once true leaves appear |
| March | Tomatoes/brassicas (6–8 weeks pre-frost for many zones) | Cold-hardy sowing where workable; row cover readiness | Pot up crowded starts; add airflow to prevent damping-off |
Timing anchors by region (real-world variations)
Use these as planning examples—confirm your local average last frost.
- Upper Midwest / Northern New England (Zones 3–5): last frost often May 10–25. Start peppers in late Feb to early March; tomatoes mid-to-late March. Expect indoor starts to live under lights longer—plan shelf height.
- Mid-Atlantic / Lower Midwest (Zones 6–7): last frost often April 10–30. Start peppers early to mid-Feb; tomatoes late Feb to mid-March. Watch indoor humidity—forced air heat dries seedlings fast.
- Pacific Northwest (Zones 7–9, marine influence): last frost can range March 15–April 15 depending on elevation. Light levels are low and skies are gray; prioritize brighter fixtures and tight light distance to prevent stretch.
- South / Coastal (Zones 8–10): last frost may be Feb 1–Mar 15 or occasional late surprises. You may be hardening off sooner; keep frost cloth ready for surprise 28–32°F nights.
Upgrade path: add precision without overcomplicating
- Thermometer/hygrometer: aim for 40–60% indoor humidity if possible; too high invites fungus, too low stresses tender starts.
- Heat mat thermostat: prevents overheating and weak growth.
- Reflective sides: simple white foam board around shelves boosts usable light without extra fixtures.
What to Plant Outdoors (Only When Conditions Allow)
Winter sowing outdoors depends on soil workability and temperatures, but there are a few timely moves.
If soil is workable and not frozen (common in Zones 7–10)
- Direct sow peas when soil is consistently above 40°F.
- Plant bare-root fruit trees and shrubs during dormancy on days above 32°F.
If snow cover is persistent (common in Zones 3–5)
- Focus outdoors on protection: mulch, tree guards, and checking for vole tunnels.
- Do your “planting” indoors: onions/leeks and early herbs under lights.
Winter Grow Light Timeline: A Practical 4-Week Kickoff
Week 1 (now): build shelf, hang lights, set timer to 14–16 hours, add fan, sanitize trays.
Week 2: sow first round (microgreens/greens or onions/leeks depending on frost date). Record germination times; adjust watering.
Week 3: thin crowded seedlings; keep lights close (2–4 inches for shop lights). Start gentle airflow daily.
Week 4: pot up if roots fill cells; begin light feeding only after true leaves appear. Inspect weekly for fungus gnats and algae.
Winter-Specific Troubleshooting (Fix It Fast)
Leggy seedlings
- Lower lights to the target distance (often 2–4 inches for shop LEDs).
- Reduce heat after germination (aim 60–70°F air for many crops).
- Add a fan for stem strength.
Damping-off (seedlings collapsing at soil line)
- Increase airflow immediately; stop misting constantly.
- Let surface dry slightly between waterings.
- Start over with sanitized trays and fresh mix if losses continue.
Slow growth despite long light hours
- Check temperature: many seedlings stall below 55–60°F.
- Check nutrition: after true leaves, a dilute fertilizer can help.
- Check light intensity: add a second fixture per shelf level if growth is weak and plants lean.
Ohio State University Extension emphasizes that successful indoor seed-starting relies on providing enough light, managing temperature, and avoiding excess moisture that encourages disease (OSU Extension, 2021). Use that triad as your diagnostic shortcut in winter.
Right-Now Checklist (Fast Pass)
- Install lights on chains; set timer to 14–16 hours
- Place fan for gentle, постоян airflow (no sandblasting seedlings)
- Sanitize trays; use fresh seed-starting mix
- Decide your first sowing based on your last frost date (count back 6–12 weeks)
- Keep lights close (shop LEDs typically 2–4 inches)
- Scout weekly for fungus gnats/aphids; isolate houseplants
- On mild days above 25°F, handle dormant pruning as appropriate for your zone
- Watch forecasts: protect outdoor plants at 32°F and especially 28°F
Once your grow light shelf is running, winter stops feeling like a waiting season. You’ll be producing compact, dark-green starts while the outdoor garden sleeps—and when your local last frost window arrives (April 15, May 15, or whenever your zip code dictates), you’ll have transplants that are ready for real sun, real wind, and real soil instead of a last-minute scramble under a dim kitchen bulb.