5 Garden Hacks for Garden Row Cover Use
Most gardeners who “tried row cover and it didn’t work” made the same mistake: they treated it like a blanket, not a system. They tossed fabric over plants, pinned the edges with whatever was handy, and hoped for the best—then the cover flapped loose, cooked seedlings on a warm afternoon, or became a slug motel. Row cover is incredibly forgiving, but it still needs a little strategy to pay you back.
Used well, a row cover can buy you 2–4 weeks of earlier planting, block pests without sprays, and even reduce irrigation—without building a high tunnel. The hacks below are the “I wish someone told me sooner” kind: simple tweaks that make row cover stay put, ventilate better, and actually protect crops instead of stressing them.
Set Yourself Up: Fit, Tension, and Anchoring (the stuff that makes or breaks row cover)
Hack #1: Build a “wind-proof seal” with a trench edge (not rocks)
Headline: Bury the edges 2–4 inches deep so wind can’t get under the fabric.
Rocks and bricks feel secure, but wind only needs a small gap to turn your cover into a sail. The fastest, cheapest upgrade is a shallow trench: pull the cover tight, tuck the edge into a 2–4 inch deep slit, and backfill with soil. This creates a continuous seal that resists gusts and also blocks crawling pests from sneaking in at the edges.
Real-world example: If you’ve ever watched a 10-foot section of cover peel back during a spring front, this fixes it. A gardener in a windy suburban lot can trench the windward side first, then “lock” the leeward side with soil clods—no extra hardware needed.
DIY alternative: No shovel handy? Use a stirrup hoe to open the slit. It takes about 3 minutes per 10 feet once you get the rhythm.
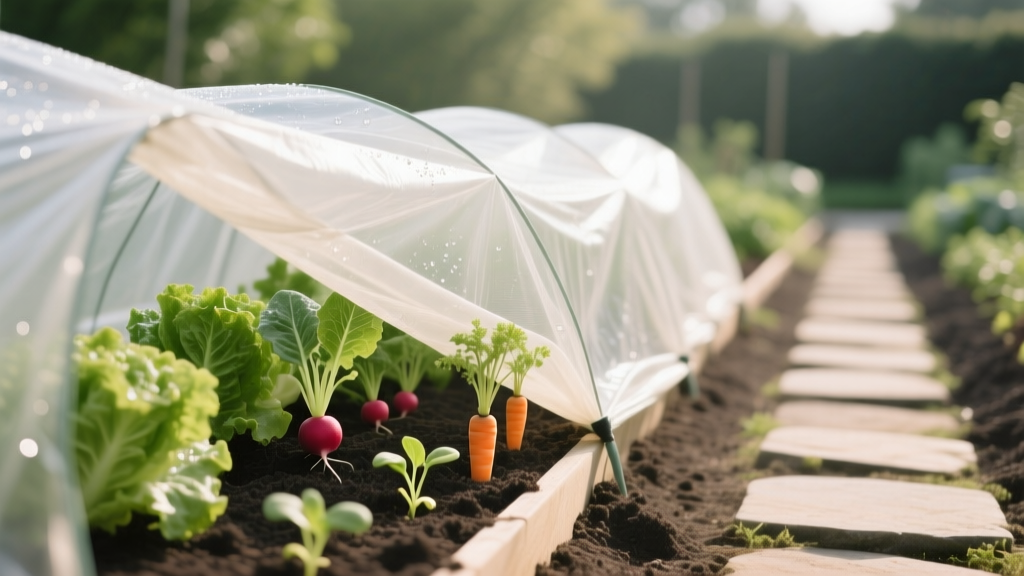
Hack #2: Use low hoops and tension—aim for 12–18 inches of headroom
Headline: Keep fabric off leaves by giving it a simple skeleton.
Row cover works best when it isn’t rubbing seedlings or resting on tender transplants. Add low hoops (wire, PVC, or fiberglass) set about 3–4 feet apart, with a target peak height of 12–18 inches for most greens and brassicas. That small air gap reduces abrasion, improves airflow, and keeps the cover from collapsing under dew or light snow.
Real-world example: For a 25-foot bed of kale and cabbage, eight hoops at ~3-foot spacing prevents the fabric from snagging on leaf edges (the tiny tears that become big rips by July).
Money-saving note: New 9-gauge wire hoops can run $1–$3 each depending on source and length, but you can DIY with 10-foot lengths of EMT conduit bent into hoops or reuse heavy-gauge electric fence wire. Even trimmed saplings (straight, flexible whips) can work in a pinch for short spans.
Hack #3: Clip-and-strap instead of pin-and-pray (especially for frequent access)
Headline: Make row cover quick to open and close so you actually use it every day.
If you’re lifting the whole cover to harvest or weed, you’ll stop using it. Set up a “hinge” side: bury one long edge in a trench, then secure the opposite edge with clips and straps you can release in seconds. Try 2-inch spring clamps every 3–4 feet, clipped to the fabric and a lightweight batten (a lath strip or a 1x2), then weigh that batten with a sandbag or two.
Real-world example: This is perfect for salad beds you cut twice a week. You can flip the cover open like a book, harvest, then close it back down tight—no re-burying edges each time.
DIY alternative: Cut old bicycle inner tubes into 1-inch rubber bands to loop fabric to stakes. It’s shockingly durable and doesn’t tear the material like some clips can.
Choose the Right Cover for the Job (and stop overheating plants)
Hack #4: Match fabric weight to your goal—use a two-cover “swap” schedule
Headline: Don’t run one fabric all season; switch weights as conditions change.
Row cover isn’t one-size-fits-all. Lighter covers are better for insect exclusion and heat management; heavier ones are better for frost protection. A smart shortcut is keeping two rolls: a light insect barrier for most of the growing season, and a heavier frost cloth for shoulder-season cold snaps.
| Row cover type | Typical weight | Best use | Temperature boost (approx.) | Tradeoffs |
|---|---|---|---|---|
| Lightweight spunbond | ~0.5 oz/yd² | Insect exclusion, gentle microclimate | ~2–4°F | Less frost protection; can tear easier |
| Medium-weight spunbond | ~0.9–1.0 oz/yd² | Spring/fall season extension | ~4–6°F | Warms faster; needs venting on sunny days |
| Heavy frost cloth | ~1.25–1.5 oz/yd² | Cold nights, hardening off | ~6–10°F | Overheats easily; not ideal for summer pests |
| Insect netting (mesh) | N/A (mesh) | Summer pest barrier with max airflow | Minimal | No frost protection; edges must seal perfectly |
Many extension resources note that floating row covers can raise temperatures a few degrees and provide meaningful frost protection when used correctly. For example, University of Minnesota Extension discusses row covers as a season extension tool and highlights their temperature-moderating effect (University of Minnesota Extension, 2019).
Real-world example: In early April, use medium-weight over direct-seeded carrots to warm soil and speed germination. By late May, swap to insect netting or lightweight cover to prevent overheating and to block pests like cabbage moths.
Cost check: A 6-foot x 50-foot roll of lightweight cover often lands around $15–$35 depending on brand and UV resistance; insect netting tends to cost more per foot but lasts longer if stored out of sun.
“Row covers are most effective when they’re installed before pests arrive and sealed along the edges—small gaps are enough to defeat the barrier.” — General guidance echoed across integrated pest management materials, including extension recommendations (e.g., University of California IPM, 2021).
Use Row Cover Like a Pro Pest Barrier (without accidentally locking pests inside)
Hack #5: Time the install to the pest, not the planting—and “reset” the bed first
Headline: Cover immediately after planting (or transplanting) and remove any pest source before sealing.
The biggest row-cover fail with pests is covering a bed that already has eggs or larvae present. Before sealing, do a quick reset: remove crop debris, check undersides of leaves, and water at the base so you’re not tempted to open it again that day. Then install the cover the same day you plant—not “after I notice holes.”
Case example #1 (brassicas): For broccoli and cabbage, cover right after transplanting to block cabbage white butterflies. If you wait until you see the first white butterflies fluttering, they’ve often already laid eggs. University of California’s IPM guidance emphasizes exclusion and timing as core tactics for managing many insects (UC IPM, 2021).
Case example #2 (cucurbits): For cucumbers or squash, row cover can dramatically reduce early beetle pressure if installed immediately after seeding. But you must remove or vent it at flowering for pollination—set a calendar reminder for about 35–45 days after seeding (variety and heat dependent), or when you see the first female flowers.
DIY alternative: If you don’t want to remove the entire cover for pollination, switch to a “day-open, night-closed” routine during bloom, or hand-pollinate early mornings and keep it closed the rest of the time.
Real-World Mini Playbooks (three situations where small tweaks pay off fast)
Scenario A: Late frost threatens your tomatoes after transplanting
Tomatoes aren’t classic row-cover crops, but a quick hoop-and-cover setup can save you on surprise cold nights. Use a heavier frost cloth and make sure the cover doesn’t touch the foliage (tomato leaves that press against cold fabric can still get damaged). If the forecast dips to 30–32°F, add a second layer just for the night, or slide 1-gallon jugs of water under the cover to add thermal mass.
Practical detail: Put the cover on by late afternoon to trap ground warmth, then vent or remove by mid-morning if sun pops out—tomatoes can overheat fast under heavy cloth even when it’s chilly outside.
Scenario B: You’re losing arugula and bok choy to flea beetles
Flea beetles are tiny, persistent, and they can destroy a planting in a weekend. Lightweight row cover or insect mesh installed immediately after seeding is your best no-spray shortcut, but only if edges are sealed completely (trench method shines here). For quick access, use the “hinge side” setup so you can harvest without leaving gaps.
Practical detail: When seedlings are at cotyledon stage, keep the cover closed 24/7 for at least 14 days to get them past the most vulnerable phase. After that, you can vent on hot days and still maintain protection.
Scenario C: You want earlier carrots in a cool spring without building a tunnel
Carrots germinate slowly in cold soil, and row cover can shift the odds in your favor. After sowing, water deeply, then cover with medium-weight fabric on hoops so it doesn’t crust the soil. Check moisture every few days; the cover reduces evaporation, so you may water less often, but you still want evenly moist topsoil for germination.
Practical detail: If nights are still cold, leaving cover on can improve emergence speed by keeping the top inch of soil from swinging wildly. University of Minnesota Extension notes row covers as a practical method for warming and protecting crops in early season conditions (University of Minnesota Extension, 2019).
Extra micro-hacks that make row cover last longer (and cost less per season)
Label your covers with a paint marker. Write the weight (like “0.5 oz” or “1.0 oz”) and purchase year on the hem. When you’ve got two white rolls in the shed, you’ll save time and avoid using the heavy one on a warm day.
Patch tears immediately with greenhouse repair tape. A 2-inch strip on both sides stops a small rip from becoming a long run. If you don’t have tape, fold the torn edge over itself twice and clip it—ugly, but it works until you can patch properly.
Store out of sun and off the ground. UV exposure is what shortens life the fastest. Roll covers onto a piece of scrap PVC and store in a garage or shed; even moving it out of direct sunlight can add an extra season.
Use sandbags, not random stones. Sandbags conform to the ground, seal better, and don’t poke holes. DIY them with old jeans legs or feed bags; fill each with about 10–15 lb of sand or gravel and tie off.
Keep a cheap soil thermometer with your row cover supplies. When soil temps under cover hit the mid-70s°F for cool-season greens, it’s time to vent more aggressively or swap to mesh. This prevents the “my lettuce bolted overnight” surprise.
Row cover is one of those tools that rewards tiny improvements: a better edge seal, a quicker access system, the right fabric weight at the right time. Once you set up a couple beds with trenches and hoops, it stops feeling like extra work and starts feeling like a shortcut—because it is.
If you want one simple next step: trench one bed, add hoops at 3–4 foot spacing, and keep a few clamps in your pocket. Do that once, and row cover goes from “fussy fabric” to your easiest insurance policy in the garden.