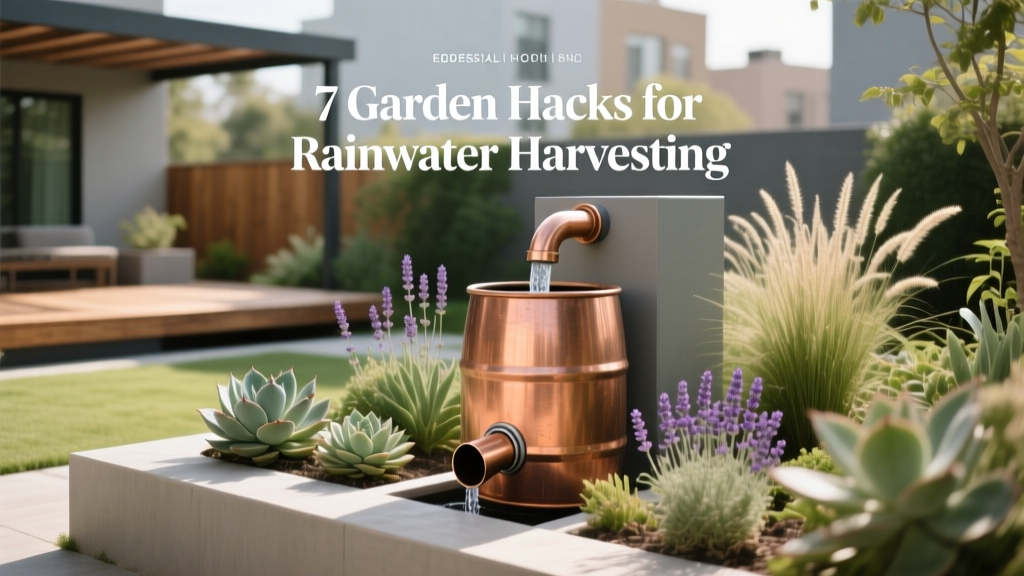
7 Garden Hacks for Rainwater Harvesting
A 1,000 sq ft roof can shed over 600 gallons of water from just 1 inch of rain—yet most gardeners let it race down the downspout and away. The common mistake isn’t “not having a rain barrel.” It’s collecting water without filtering, managing overflow, or matching storage to what your plants actually need, so the system becomes a mosquito factory or an algae soup you avoid using.
Let’s fix that with seven proven hacks that make rainwater harvesting cleaner, easier, and more useful—without turning your yard into a plumbing project.
Start Smart: Capture More, Cleaner Water (Without More Work)
1) Size your storage using a simple roof-to-gallons shortcut
Hack headline: Stop guessing—calculate what a “good rain” really gives you.
Use this rule of thumb: 1 inch of rain on 1,000 sq ft of roof ≈ 623 gallons. That’s based on the standard rainfall conversion used by extension services and water agencies, and it’s close enough for garden planning. If your roof section feeding a downspout is 250 sq ft, then 1 inch of rain yields about 156 gallons—meaning a single 55-gallon barrel will overflow fast unless you plan for it.
Real-world example: A townhouse gardener with one 200 sq ft roof section tied to a downspout gets about 125 gallons per inch. Installing two 50-gallon barrels in series (100 gallons total) captures most rains under an inch and cuts overflow “waste” dramatically.
2) Add a first-flush diverter (even a DIY version) to keep barrels from turning gross
Hack headline: Dump the dirty first few gallons—your barrel will smell better and stay clearer.
The first runoff from a roof often carries dust, pollen, bird droppings, and shingle grit. A first-flush diverter sends that initial dirty water away before the cleaner flow enters your tank. For small systems, a practical target is diverting about 5–10 gallons per downspout for a typical rain event; if your roof is under heavy tree cover, lean toward the higher end.
DIY alternative: Use a 3–4 inch PVC pipe (length depends on desired volume) capped at the bottom with a clean-out. Add a simple ball valve slow-release so it empties between storms. Parts often land around $25–$60 versus $80–$200 for branded diverters.
“A first-flush device can improve water quality by reducing the debris and contaminants washed from the roof at the start of a rain event.” — North Carolina Cooperative Extension, Rainwater Harvesting (2019)
3) Put a real screen where it matters: at the downspout inlet, not just inside the barrel
Hack headline: One good screen beats five “fine-mesh” inserts that clog.
The fastest way to hate your rain setup is a barrel that fills slowly because your filter clogs every storm. Instead, intercept leaves and roof grit before they enter the downspout: use a downspout filter or a small section of gutter guard plus a removable debris basket. Aim for a screen around 1/16 inch (about 1–2 mm) openings: fine enough to stop mosquito entry and leaf fragments, but not so fine it mats over with pollen.
Case example: A Pacific Northwest gardener under fir trees switched from a barrel-top mesh sock (clogged weekly) to a downspout debris catcher (cleaned every 3–4 weeks). Result: faster filling and far less sludge in the barrel by mid-summer.
Storage That Works: Keep Water Usable, Mosquito-Free, and Easy to Access
4) Elevate your barrel the “right” amount for real pressure (and easier filling cans)
Hack headline: Two concrete blocks isn’t just neat—it’s functional water pressure.
Rain barrels rely on gravity, and a little height makes a big difference in usability. Elevate the barrel 12–24 inches on a stable base (pavers + compacted gravel, or a cinder-block stand) so you can slide a watering can under the spigot and get a stronger flow. If you want to run a short soaker hose from a barrel, more height helps; even then, keep hose runs short (think 10–25 feet) and avoid steep uphill routes.
Safety note: A full 55-gallon barrel weighs roughly 450+ lb (water is ~8.34 lb/gal). Build the base like you’re supporting a heavy appliance—flat, level, and not sitting on soft soil.
5) Connect barrels with a bottom-balance line to actually use the full capacity
Hack headline: Don’t “daisy-chain” from spigot to spigot—equalize from the bottom.
Many gardeners connect the overflow of one barrel into the top of the next, but that often leaves you with one full barrel and one half-full barrel. A better hack is a 3/4 inch to 1 inch hose or PVC line connecting the lower outlets so the water levels equalize automatically (communicating vessels). Use bulkhead fittings and keep the barrels on the same level base so balancing works properly.
Real-world example: In a hot-summer climate, two linked 55-gallon barrels (110 gallons) balanced from the bottom gave a vegetable gardener nearly a full extra week of watering during a dry spell—without buying a bigger tank.
6) Build overflow like you mean it: send excess water to a thirsty spot, not your foundation
Hack headline: Your overflow is free irrigation—aim it on purpose.
Overflow is not a failure; it’s a design feature. Attach a 1.25–1.5 inch overflow hose and route it to a rain garden, a mulch basin under a fruit tree, or a gravel-filled infiltration trench at least 5–10 feet away from your house foundation. Secure the hose end so it doesn’t whip around during heavy rain and erode soil.
Scenario example: A gardener with clay soil and basement seepage redirected barrel overflow into a 10-foot long gravel trench topped with wood chips. During downpours, the trench slowed the flow, reduced puddling near the house, and kept a nearby hydrangea happier through July.
Make the Water Go Further: Distribution Hacks That Cut Work (and Tap-Water Bills)
7) Pair rainwater with the right delivery method: drip/soaker beats hand-watering from a barrel
Hack headline: Use rainwater where it shines: slow, targeted watering that avoids waste.
Rain barrels don’t deliver high pressure, so skip sprinklers and choose low-pressure options: short soaker hoses, gravity-fed drip kits, or a watering can for container plants. If you irrigate beds, run soakers for 30–60 minutes in the early morning so moisture soaks in before heat spikes; adjust after checking soil depth (aim for moisture at 4–6 inches down for many vegetables). This is also where rainwater’s “softness” can help—many gardeners notice less salt buildup in containers compared with some municipal water supplies.
Cost saver: A basic gravity drip kit often costs $30–$70. Compared to hand-watering for 15 minutes a day, it saves time immediately—and if your summer water rate is high, it can shave meaningful dollars off your bill.
Quick Comparison: Two Ways to Set Up a Backyard Harvesting System
If you’re deciding between a simple barrel and a larger storage tank, here’s the practical tradeoff most gardeners feel day-to-day.
| Setup | Typical capacity | Approx. cost range | Best for | Watch-outs |
|---|---|---|---|---|
| Single rain barrel + screen + overflow hose | 40–80 gallons | $60–$200 | Containers, small beds, quick wins | Overflows quickly in big storms; limited pressure |
| Two barrels linked with bottom-balance + first flush | 80–160 gallons | $150–$450 | Veg beds, weekly watering buffer | Needs level base; more fittings to install |
| Slim wall tank (space-saving) + filter + planned overflow | 200–500 gallons | $300–$1,200 | Serious gardeners, drought-prone summers | Must secure against tipping; check local codes/placement |
Real-World Setups: Three Scenarios You Can Copy
These aren’t fantasy builds—these are the kinds of systems that actually get used all season.
Scenario A: Small urban yard with one downspout
A compact setup that works: one 50–65 gallon barrel on a 16-inch stand, a downspout debris basket, and a 10-gallon first-flush diverter. Overflow goes via a 1.25-inch hose into a mulched shrub bed. This is a “set it and forget it” system that keeps watering cans filled for patio tomatoes and herbs.
Scenario B: Suburban vegetable garden (4 raised beds)
Two 55-gallon barrels linked at the bottom with 1-inch tubing, plus a short gravity drip line feeding each bed. The gardener runs soakers for 45 minutes every 2–3 days in warm weather, topping up with tap water only during long dry spells. The biggest win here is consistency: plants get steady moisture without daily hand-watering.
Scenario C: Tree-heavy lot with frequent clogs
The “hack” is focusing on pre-filtration: gutter guard on the problem section, a downspout filter that’s easy to pop open, and a first-flush cleanout checked every 2 weeks during peak pollen/leaf drop. This setup prioritizes keeping debris out of the barrel so the water stays usable for longer—and maintenance stays quick (no scooping sludge in August).
A Few Evidence-Based Notes (So You Don’t Accidentally Create Problems)
If you plan to use harvested rainwater on edible gardens, it’s worth knowing what the research and extension folks keep repeating: roof runoff isn’t sterile. Most home gardeners use it safely for soil-level watering (drip/soaker or watering can aimed at the base of plants), and avoid spraying directly onto leafy greens right before harvest.
The U.S. Environmental Protection Agency notes that rainwater harvesting can reduce stormwater runoff and support water conservation, but collection systems should be designed and maintained to protect water quality and prevent mosquito breeding (EPA guidance, 2013). And multiple extension publications emphasize using screens, sealed lids, and routine cleaning as core practices for safe, functional systems (for example, North Carolina Cooperative Extension, 2019).
One more practical point: if your roof is old, treated with certain products, or you have overhanging branches where birds roost heavily, you’ll get better results by being extra strict about first flush and filtration. For most garden uses, “clean enough for soil irrigation” is the realistic goal—not drinking-water purity.
Small Add-Ons That Feel Like Cheating (In a Good Way)
Once you have the core hacks in place, these mini-upgrades give you a big convenience bump for little money.
Label your barrels with storm math
Write a note right on the barrel with a paint marker: “0.5 in rain ≈ ___ gallons from this downspout.” It sounds silly, but it changes how you think—suddenly you can decide if you should water today or wait for tomorrow’s forecasted 0.4 inches. This is especially handy in summer when you’re trying to stretch stored water between storms.
Use a dark barrel or wrap it to slow algae
Algae loves light. If your barrel is translucent, wrap it with a dark tarp or paint it (make sure the paint is compatible with plastic). You’ll notice less green slime and less clogging at the spigot screen, especially when barrels sit in full sun for weeks.
Keep a $3 valve on your overflow line for winterizing
A simple shutoff valve lets you drain and disconnect hoses quickly before freezing weather. In cold climates, drain barrels before the first hard freeze (many gardeners do this when nights start dipping below 32°F) to prevent cracking. It’s a tiny part that saves a barrel.
Rainwater harvesting doesn’t have to be a big infrastructure project. If you size the storage with real numbers, keep the first flush out, screen debris before it clogs your system, and route overflow to something living, you’ll end up with the kind of setup that’s actually pleasant to use—one that quietly turns every storm into easier watering for the rest of the week.