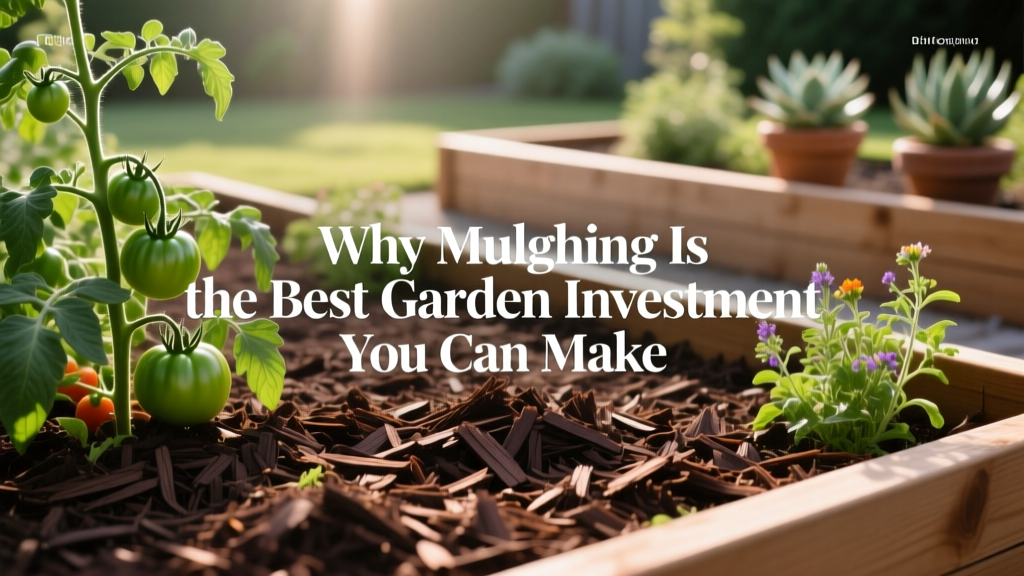
Why Mulching Is the Best Garden Investment You Can Make
The most expensive gardening mistake I see isn’t buying the “wrong” fertilizer or planting at the “wrong” moon phase—it’s leaving soil naked. Bare soil is basically a welcome mat for weeds, evaporation, and temperature swings. Mulch looks like a cosmetic finishing touch, but it’s actually a lever: one habit that quietly cuts your workload, boosts plant performance, and protects the money you’ve already sunk into soil, compost, plants, and irrigation.
Here’s the insider part: mulching isn’t one thing. The payoff comes from matching the right mulch to the job, putting it down at the right depth, and handling the details (edges, watering, timing) that most people skip. Let’s make mulch do real work for you.
Get the foundation right (so mulch actually saves you time)
Tip: Hit the “sweet spot” depth—2–3 inches for most beds
Most mulching failures come from going too thin (weeds pop right through) or too thick (soil stays soggy, stems rot, slugs throw a party). For shredded bark, wood chips, or leaf mold, aim for 2–3 inches across garden beds; for coarser chips, 3–4 inches is fine. In a veggie garden where you seed directly, keep mulch thinner near rows and build depth as seedlings mature.
Example: In a tomato bed, mulch 3 inches deep everywhere, but leave a 2–3 inch “donut gap” around each stem so the base stays dry and airy.
Tip: Always leave a mulch-free ring around stems and trunks
Mulch piled against trunks (“mulch volcanoes”) invites rot, rodents, and boring insects. Keep mulch 3–6 inches away from the base of shrubs and trees, and don’t bury plant crowns (especially perennials like lavender and echinacea). This tiny detail prevents the kind of slow decline that looks like “mystery disease.”
Example: For a young fruit tree, make a mulch circle 3 feet wide but keep a clean gap at the trunk; you’ll see fewer suckers, less mower damage, and easier watering.
Tip: Use a “mulch edge” to stop chips from wandering
Mulch migrates—into lawns, onto paths, and against house foundations. Create a simple edge: a 2–4 inch trench, a line of bricks, or a metal edging strip. A clean edge also gives you a clear “refill line,” so topping up takes minutes instead of a full reset.
Example: One weekend trenching around a 10x12 bed can save you a half-hour every time you rake stray mulch out of the grass.
Mulch for moisture: fewer watering headaches, healthier roots
Tip: Water deeply first, then mulch—don’t mulch dry soil
Mulch helps soil hold moisture, but it won’t magically hydrate dry ground. Do one thorough soak (think 1 inch of water, or until the top 6 inches of soil is moist), then apply mulch. After that, you’ll water less often but more effectively.
Example: If you’re installing drip irrigation, run it for a long cycle before mulching, then check moisture with a trowel the next day—you’ll be surprised how long the soil stays damp under a 3-inch layer.
Tip: Pair drip irrigation + mulch for a “set-and-forget” combo
Drip under mulch is one of the cleanest shortcuts in gardening: less evaporation, fewer weeds, and you can water without wetting foliage (which helps reduce disease in many crops). A practical starting schedule is 30–60 minutes per zone, 2–3 times per week, then adjust based on plant stress and soil type. Under mulch, you’ll often reduce runtime after the first couple weeks of summer heat.
Case example: A front-yard pollinator bed on drip used to need hand-watering every other day in July. After adding 3 inches of shredded bark and placing drip lines under it, the same bed held up on 2 watering cycles/week—and the weeds dropped dramatically.
Tip: In heat waves, use lighter-colored mulch to reduce soil temperature spikes
Dark mulches can warm faster in full sun, which may stress cool-season crops and shallow-rooted annuals. Straw or light wood chips reflect a bit more heat and keep the soil surface gentler. This matters most in beds that bake against south-facing walls or on reflected-heat patios.
Example: Basil bolting early in a hot courtyard? Swap dark bark for straw around herbs, and you’ll often buy yourself an extra 2–3 weeks of leafy growth.
Mulch for weed control: win the season before weeds start
Tip: Smother weeds with cardboard + mulch (the “lazy bed reset”)
When a bed is already weedy, don’t hand-weed for hours—smother. Lay overlapping cardboard (no glossy print), soak it, then cover with 3–4 inches of mulch. The cardboard blocks light long enough to knock back most annual weeds while the mulch makes it look finished immediately.
Example: Turning a scruffy side-yard strip into a shrub bed: one layer of cardboard plus 4 inches of chips often beats a weekend of digging—and you can plant through it by cutting X-slits.
“Organic mulches… help control weeds by excluding light and can reduce the number of annual weeds that germinate.” — Washington State University Extension, 2020
Tip: Time your mulch refresh right after a weeding or cultivation pass
If you mulch over a jungle, you’re basically tucking weeds into bed. The best timing is: weed first (or hoe lightly on a dry day), water, then mulch the same day. This sequence reduces the “weed rebound” that happens when disturbed soil gets sun and moisture.
Example: In a raised bed, a quick 10-minute stirrup-hoe pass plus a 2-inch mulch top-up can keep you nearly weed-free for a month.
Tip: Use the right mulch texture to block the weeds you actually have
Fine mulches (leaf mold, compost) can let some weeds sneak through; chunky mulches (wood chips) tend to block better. If your problem is tiny-seeded annual weeds, go chunkier and deeper. If your problem is perennial weeds with runners (bindweed, Bermuda grass), use cardboard underneath and stay vigilant at the edges.
Case example: A gardener fighting crabgrass around blueberries had mediocre results with leaf compost alone. Adding cardboard under 3 inches of chips dramatically reduced breakthrough, but the real win was trenching the edge to stop runners creeping in.
Mulch for soil health: feed the soil, not just the plants
Tip: Use wood chips in perennial beds—let fungi do the heavy lifting
Perennials, shrubs, and trees benefit from woody mulches because they encourage a fungal-rich soil food web. Chips slowly break down, improving structure and moisture-holding over time without you constantly “rebuilding” the bed. Think long game: the bed gets easier every year.
Example: Under roses and hydrangeas, 2–3 inches of arborist chips can reduce crusting and keep the surface soil crumbly instead of compacted.
Tip: Keep high-nitrogen materials close to heavy feeders (and away from trunks)
Grass clippings (untreated) and compost are “hotter” than chips and can mat if applied too thick. Use clippings in thin layers—½ inch at a time—letting them dry between applications. Compost works beautifully as a 1-inch spring topdress, then add a coarser mulch on top to protect it.
Example: For corn or squash: lay down 1 inch of compost around plants, then cap with straw so the compost doesn’t crust and the soil stays evenly moist.
Tip: Don’t panic about nitrogen “tie-up”—just avoid mixing chips into the soil
Fresh wood chips can temporarily tie up nitrogen at the soil surface where decomposition happens, but it’s mainly a problem when chips are tilled in. Keep chips as a surface layer and your plant roots below will be fine. If you’re still worried in a veggie bed, add a light nitrogen boost (like diluted fish emulsion at 1–2 tablespoons per gallon) during peak growth.
Expert source: University of California Agriculture and Natural Resources notes that nitrogen immobilization is primarily an issue when woody materials are incorporated into soil rather than used as surface mulch (UC ANR, 2019).
Pick the best mulch for the job (and your budget)
Tip: Use this simple comparison to match mulch to your garden
| Mulch type | Best for | Typical depth | Approx. cost (DIY/retail) | Watch-outs |
|---|---|---|---|---|
| Arborist wood chips | Shrubs, trees, perennial beds, pathways | 3–4 inches | Often free ($0) via chip drop; $20–$50/yd³ delivered varies | Can include leaves/twigs; keep 3–6 inches from trunks |
| Shredded bark | Front-yard beds where appearance matters | 2–3 inches | $5–$8 per 2 cu ft bag (often $40–$70 per yd³ equivalent) | Can float in heavy rain on slopes; may need edging |
| Straw (not hay) | Vegetables, strawberries, seedling rows | 2–4 inches | $8–$15 per bale | May contain weed seeds; can blow—wet it down |
| Leaf mold / shredded leaves | Woodland gardens, soil building, gentle mulch | 2–3 inches | Free if you shred your own leaves | Compacts if applied too thick; top with chips if needed |
| Compost | Soil improvement + light weed suppression | 1 inch (as topdress) | $30–$60/yd³ bulk; bagged costs more | Not a long-lasting weed block; cap with coarser mulch |
Tip: If looks matter, “double mulch” for both beauty and function
Want the soil-building power of compost but the tidy look of bark? Use a two-layer system: 1 inch compost as a topdress, then 2 inches shredded bark on top. You get better moisture retention, better soil over time, and a bed that still looks intentional.
Example: This is my go-to for front entry foundation plantings—less crusting, fewer weeds, and the bark stays darker longer because the soil beneath holds moisture.
Tip: For slopes, go heavier and interlock your mulch
On a slope, mulch that’s too fine (or too slick) can wash downhill in hard rain. Use chunkier wood chips at 3–4 inches, and consider laying jute netting over the top for the first season until roots knit in. Water with drip or a soaker line to avoid blasting mulch with a hose.
Case example: A sloped side yard kept losing shredded bark in storms. Switching to arborist chips plus a 2-inch trench edge stopped the “mulch avalanche,” and the bed stayed put through spring downpours.
DIY and money-saving mulch moves (the real “investment” angle)
Tip: Price mulch by the cubic yard, not by the bag
Bagged mulch is convenient, but it’s usually the most expensive way to cover a large area. One cubic yard is 27 cubic feet; that’s roughly 13–14 of the common 2 cu ft bags. If bags are $6 each, you’re paying about $78–$84 per cubic yard—often double (or more) than bulk delivery.
Example: Covering a 200 sq ft bed at 3 inches needs about 1.85 yd³ of mulch. That’s ~26 bags (often $150+), versus bulk that might land closer to $60–$120 depending on your area.
Tip: Get free mulch without getting burned (arborist chips done right)
Free chip drops can be a goldmine, but ask two questions: “What tree species?” and “How fresh?” Fresh chips are fine as mulch, but avoid chips from known diseased trees if your area is dealing with something specific. Plan a spot for a big pile—often 5–15 cubic yards arrives at once, which is a lot more than most people picture.
Example: If you only need 2 yards, coordinate with a neighbor and split the pile. You both get free mulch and nobody ends up with a driveway mountain for three months.
Tip: Turn fall leaves into premium mulch with one tool
Shredded leaves stay put better than whole leaves and break down into leaf mold faster. Run a mower over dry leaves and collect them; you’ll reduce volume and create a fluffy mulch that’s fantastic around perennials and in veggie paths. If you stockpile shredded leaves, they can become leaf mold in about 6–12 months depending on moisture and turning.
Example: Instead of paying for 10 bags of mulch, a typical suburban yard’s fall leaves can cover multiple beds at 2 inches deep—especially if you shred them first.
Real-world mulching playbooks (steal these setups)
Scenario: The low-maintenance front bed that still looks sharp
Use the “double mulch” method: 1 inch compost in early spring, then 2 inches shredded bark for a clean finish. Install a hard edge (brick or metal) so bark doesn’t creep onto sidewalks. Top up bark at 1 inch each year instead of ripping everything out and starting over.
Why it works: You get soil improvement without sacrificing curb appeal, and the yearly refresh becomes a quick touch-up instead of a full weekend project.
Scenario: The vegetable garden that stays weed-light all summer
After planting, lay straw at 2–4 inches, but keep it pulled back until seedlings are 4–6 inches tall so you don’t smother them. For transplants (tomatoes, peppers), mulch right away and add a little extra around cages where you hate weeding. If you direct-seed carrots or beets, mulch the paths heavily and keep the seed rows mostly bare until germination, then “feather” straw in.
Why it works: Straw is easy to move aside for planting, keeps mud down, and makes harvesting cleaner—especially for zucchini, cucumbers, and strawberries.
Scenario: The drought-stressed yard where irrigation costs are climbing
Create wider mulch rings around trees and shrubs—at least 3 feet across for young plants, wider if you can. Use coarse wood chips at 3–4 inches and run drip under the mulch so water goes into the soil instead of evaporating off the surface. Keep chips 3–6 inches off trunks to avoid rot and pest issues.
Why it works: You’re protecting the roots and making each gallon of water count, which is exactly what you want when summer water bills start getting spicy.
Small details that prevent the common mulch mess-ups
Tip: Refresh mulch on a schedule—don’t wait until you see bare soil
Most organic mulches settle and break down; that’s good for soil, but it means depth disappears quietly. Check depth twice a year: mid-spring and early fall. If you’re under 2 inches in beds, add enough to get back to your target depth.
Example: A quick “mulch audit” after spring cleanup—trowel in, eyeball depth, top up thin spots—keeps weeds from getting a foothold in June.
Tip: Keep mulch off house siding and away from foundations
Mulch piled against a house can trap moisture and attract pests. Maintain a 6–12 inch bare strip (or use gravel) next to foundations, depending on local building guidance. It also stops mulch from splashing soil onto siding during storms.
Example: If you’re mulching a foundation bed, use a stone border near the house and keep your organic mulch out where plants actually are.
Tip: Don’t use landscape fabric as your “permanent weed fix” under mulch
Fabric can seem like a shortcut, but in real gardens it often turns into a maintenance trap: mulch breaks down into soil on top of the fabric, weeds root in that layer, and now you’re hand-weeding through a mesh. Cardboard is usually the better smother layer because it decomposes and improves soil instead of lingering. Save fabric for under gravel paths if you must use it.
Example: If you inherited a bed with fabric, consider pulling it in sections as you replant; replace with cardboard + mulch so the bed improves instead of getting more “plastic-y” every year.
Mulch is one of those rare garden habits that pays you back in three currencies at once: time, water, and fewer do-over purchases. Get the depth right, keep it off stems, match the material to the job, and use the bulk/free options when it makes sense. After a season or two, you’ll notice something that feels like cheating: the garden starts behaving better with less effort from you—and that’s the kind of investment that keeps compounding.
Sources: Washington State University Extension (2020); University of California Agriculture and Natural Resources (2019).