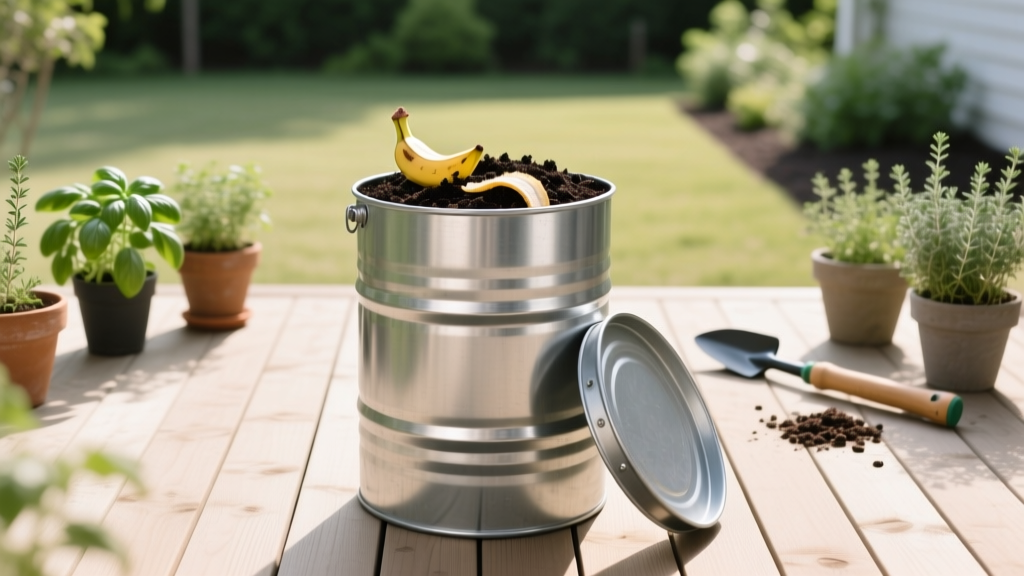
DIY Compost Tumbler from a Barrel
Most “compost tumbler” builds fail for one dumb reason: they spin beautifully… and compost terribly. A sealed barrel with no airflow turns into a soggy, smelly pickling jar, not a compost system. The fix isn’t expensive or complicated—it’s a handful of smart holes, the right fill level, and a mixing plan that matches how compost biology actually behaves.
If you want a barrel tumbler that heats up, doesn’t stink, and gives you usable compost in weeks (not seasons), use the tips below. I’ll assume you’re starting with a 55-gallon (208 L) plastic barrel, but I’ll include options for 30-gallon and even food-grade drums.
Group 1: Build choices that prevent stink, leaks, and “no-heat” compost
Tip: Pick the right barrel—food-grade beats mystery plastic
A used 55-gallon food-grade barrel is usually the sweet spot: big enough to heat, light enough to spin. Aim for HDPE with a removable lid; many areas sell them for $20–$60. Avoid barrels that held chemicals (even “cleaned”)—compost can absorb residues, and you’ll never fully trust it around food crops.
Example: One gardener in a suburban lot grabbed a “free” detergent drum; the compost smelled like perfume for months and attracted flies. A $35 pickle barrel fixed it immediately.
Tip: Drill airflow holes like you mean it (and not just on the lid)
Airflow is what separates composting from rotting. Drill 3/8-inch (10 mm) holes in a grid around the barrel—sides and ends—spaced about 4–6 inches apart. For a 55-gallon drum, that’s typically 60–90 holes, which sounds like a lot until you realize each hole is tiny and the barrel needs oxygen everywhere.
DIY alternative: If you hate drilling plastic, use a step bit and go slower—clean holes reduce cracking.
Tip: Add a leachate plan so your tumbler doesn’t “sweat” sludge
Even a well-managed tumbler can drip when greens are heavy (think fresh grass clippings). Drill 6–10 extra holes along the lowest “bottom line” of the barrel for drainage, then park the tumbler over a cheap mortar tray or shallow bin. Leachate is not compost tea—dilute it at least 10:1 with water if you use it, or just discard it.
Example: A patio tumbler placed over pavers started leaving black stains; switching to a $12 mixing tray under the barrel kept the patio clean.
Tip: Build internal “agitators” so materials actually mix
A plain barrel mostly slides contents around like laundry—outer layers move, inner clumps stay clumped. Bolt in 2–4 baffles: scrap aluminum angle, pressure-treated 1x2 strips, or even strips of corrugated plastic fastened with stainless bolts and fender washers. Make each baffle about 18–24 inches long so it lifts and drops material as the barrel turns.
Real-world win: Without baffles, shredded leaves tend to form a felted mat. Two simple baffles break that mat up and keep oxygen moving.
Tip: Keep the fill level under control (half-full is the hidden trick)
Don’t pack it full—your tumbler needs room to tumble. A good working fill is 50–65% of the barrel volume. Over that, the compost can’t fall and mix, and you’ll get wet pockets that go anaerobic.
Example: If you have a 55-gallon barrel, treat it like it’s a 30–35 gallon working chamber.
Tip: Mount it so it spins easily with one hand
If turning is a chore, you’ll stop doing it. A simple rod-through-the-center design using a 3/4-inch galvanized pipe and two sturdy supports works well; add washers/spacers so the barrel doesn’t rub. If you’re building a cradle-style roller, use two rows of outdoor-rated wheels or PVC rollers and ensure the barrel can’t “walk” sideways.
Cost note: A pipe-axle setup often lands around $25–$45 in hardware if you already have scrap lumber for the frame.
Group 2: The fast-compost “recipe” (this is where most people accidentally blow it)
Tip: Use a carbon-to-nitrogen ratio that actually heats (your nose will confirm)
If your tumbler reeks, you’re usually too “green” (too much nitrogen). A reliable target mix is roughly 2–3 parts browns to 1 part greens by volume—think two buckets of dry leaves for every bucket of kitchen scraps. Cornell University’s composting guidance commonly references an ideal C:N around 30:1 for active composting (Cornell Waste Management Institute, 2020), and that balance is what you’re aiming for in practice.
Example: For a 5-gallon pail of veggie scraps, add 10–15 gallons of shredded leaves or torn cardboard before you spin.
Tip: Chop inputs to 1–2 inches and you’ll cut weeks off the process
Compost speed is surface area. Aim to break materials down to 1–2 inch pieces—especially bulky stems, corn husks, or cabbage leaves that love to mat. A cheap “shortcut” is running leaves over with a mower (bagger on) or doing a quick chop with pruners before tossing into the tumbler.
Scenario: A household that added whole kale stalks found recognizable stalks after 8 weeks. The same volume chopped to 1-inch pieces turned crumbly in about 4 weeks.
Tip: Add a “starter” that’s alive, not magical
You don’t need expensive compost accelerators, but you do want microbes. Toss in 2–3 shovels of finished compost or garden soil when you start a new batch. That inoculates the pile and improves structure so it doesn’t clump.
DIY alternative: A handful of healthy forest leaf mold works great if you have it.
Tip: Moisture should feel like a wrung-out sponge (and you can measure it)
Too dry and nothing happens; too wet and it goes slimy. The practical target is about 50–60% moisture, which lines up with standard composting recommendations from university extension programs (e.g., University of Missouri Extension, 2019). If you squeeze a handful and get 1–2 drops, you’re close; if it streams, add browns; if it crumbles dusty, add a small splash of water and spin.
Example: After adding fresh grass clippings, immediately add an equal volume of shredded cardboard to keep moisture from spiking.
“Aeration and moisture control are the two levers you can actually pull in home composting—get those right and the biology does the rest.” — University extension composting guidance summarized from multiple programs (e.g., MU Extension, 2019; Cornell WMI, 2020)
Tip: Don’t feed it daily—batch composting heats better
Tumblers perform best as batch systems: load it over 3–7 days, then stop adding and let it run. Constantly adding fresh scraps cools the pile and keeps it from finishing. If you want continuous composting, build two barrels or keep a “holding bucket” of browns to balance each green addition.
Scenario: A family of four generating lots of scraps used two barrels: one “active” (heating), one “loading.” They got more consistent compost and fewer flies.
Group 3: Turning, temperature, and timing (how to get compost in weeks)
Tip: Spin on a schedule—more isn’t always faster
For the first two weeks (the hot phase), turn the barrel once every 1–2 days—about 8–12 full rotations. After that, drop to 2 turns per week so fungi and slower decomposers can finish the job without constantly being disrupted. Over-turning can cool the mass and slow the “finish” texture.
Example: If you’re chasing speed for spring planting, do frequent turns for 14 days, then coast.
Tip: Use a $10 thermometer to stop guessing
A compost thermometer takes the mystery out. A healthy hot batch often hits 120–150°F (49–66°C) within a week if your mix is right and the barrel is at least half-full. If you’re stuck under 100°F after 7–10 days, you’re usually too dry, too brown-heavy, or too little mass.
Money-saving note: A basic 20-inch probe compost thermometer is often $10–$20, and it pays for itself the first time you don’t “fix” the wrong thing.
Tip: Know what a “stall” means—and fix it in 5 minutes
Cold + wet + stinky means anaerobic: add browns (shredded leaves/cardboard), drill a few more holes if airflow is weak, and turn 10 rotations. Cold + dry means inactive: add a half-gallon of water, a scoop of soil/finished compost, and mix in a nitrogen bump like coffee grounds. In most cases you’ll feel heat returning in 24–48 hours.
Example: One rain-soaked batch went sour; adding 2 gallons of shredded cardboard and spinning brought it back fast.
Tip: Let it cure outside the tumbler for better texture
Even when it looks “done,” compost benefits from curing. After your tumbler batch stops heating, dump it into a simple wire bin or a breathable tote with holes for 2–4 weeks. Curing smooths out unfinished bits and reduces the chance of nitrogen tie-up in garden beds.
DIY alternative: Use a hardware-cloth cylinder (about 3 feet wide, 3 feet tall) secured with zip ties.
Group 4: Convenience hacks that keep you composting (even when you’re busy)
Tip: Pre-store browns right next to the tumbler
The best tumbler hack is making browns effortless. Keep a lidded tote of shredded leaves, torn cardboard, or wood shavings within arm’s reach—then every time you add greens, you can instantly balance them. This one habit prevents nearly all odor and fly issues.
Example: A 27-gallon tote packed with dry leaves can stabilize a tumbler for weeks of kitchen scraps.
Tip: Shred cardboard fast with a “soak and rip” method
If you don’t own a shredder, don’t fight dry cardboard. Soak boxes for 10–15 minutes, then tear into hand-sized strips; they mix more evenly and don’t form water-shedding rafts. Wet cardboard also helps rescue a too-wet batch by absorbing excess moisture as it breaks down.
Scenario: An apartment gardener with limited leaf access used mostly cardboard and coffee grounds; soaking cardboard prevented clumps and improved airflow.
Tip: Add grit/structure when your mix compacts
Tumblers love to compact, especially with lots of kitchen scraps. Mix in a “structure” ingredient: a few handfuls of small wood chips, coarse shredded stems, or even crumpled paper. You’re creating tiny air pockets so the center doesn’t go slimy.
Example: If your batch feels like heavy dough, add 1–2 gallons of wood chips and spin.
Group 5: Barrel tumbler vs. other methods (so you know what you’re trading)
A barrel tumbler is about convenience and speed in small spaces—but it’s not automatically better than a pile. Here’s the practical comparison gardeners usually wish they’d seen first:
| Method | Typical active time | Best for | Common problem | Cost range |
|---|---|---|---|---|
| DIY barrel tumbler (55-gal) | 3–8 weeks + 2–4 weeks cure | Patios, small yards, faster turnaround | Too wet/anaerobic if under-aerated | $30–$120 (depending on barrel + hardware) |
| Open pile or bin | 2–6 months (faster if hot-managed) | Big volume, leaves, branchy material | Harder turning; rodents if unmanaged | $0–$80 |
| Worm bin (vermicompost) | 2–4 months steady output | Indoor/garage composting, food scraps | Overfeeding, moisture imbalance | $50–$200 |
Group 6: Three real-life setups (copy one and you’ll avoid most headaches)
Scenario: The “tiny patio” gardener who wants zero mess
Use a food-grade barrel, drill 80-ish holes, and set a catch tray underneath. Keep a 5-gallon bucket of shredded cardboard next to the tumbler; every kitchen scrap dump gets an equal volume of cardboard. Turn every other day for 2 weeks, then twice a week—this setup keeps odors down and prevents patio stains.
Scenario: The “leaf-rich” gardener who wants compost by spring
In fall, shred leaves with a mower and stash them dry in bags; they’re your compost accelerator all winter. Start a batch with 3 parts shredded leaves to 1 part greens (coffee grounds + kitchen scraps), plus a few shovels of finished compost. Keep the barrel at 60% full and chase 130–150°F for the first week—if it doesn’t heat, you likely need more greens or moisture.
Scenario: The “grass-clipping overload” that turns into sludge
Never add more than about 20–25% grass clippings by volume at one time, because they mat and go anaerobic fast. Pair each bucket of fresh clippings with two buckets of dry browns and one “fluffy” ingredient (crumpled paper or wood chips). If it’s already slimy, open the lid, add browns until it looks like a salad—not a smoothie—then spin 10 rotations.
Extra tricks that feel like cheating (but aren’t)
Tip: Use urine (yes) as a free nitrogen boost—carefully
If your batch is cold and brown-heavy, a small nitrogen boost can wake it up. Fresh human urine is high in nitrogen; add about 1–2 cups and immediately add a couple handfuls of browns and turn. Don’t do this if the barrel already smells like ammonia—ammonia odor means you’re already nitrogen-heavy and losing nutrients to the air.
Tip: Screen only what you need, not the whole batch
If you want potting-mix texture, screen a portion through 1/2-inch hardware cloth and return the chunky bits to the next batch as “starter.” This keeps you from obsessing over perfection and speeds the next cycle. Most garden beds are happy with slightly chunky compost as a top-dressing.
Tip: Keep pests out by controlling what goes in
A barrel helps with critters, but raccoons and rats still love easy calories. Skip meat, grease, and dairy, and bury fresh scraps in the center of the mix so they aren’t sitting against air holes. If fruit flies show up, you’re usually leaving scraps exposed near the lid—cover each addition with a 2–3 inch layer of browns before you spin.
If you build your barrel with real airflow, keep it half-full, and run a simple “greens + double browns” habit, a DIY tumbler becomes one of those rare garden projects that saves both time and money. The best part is how predictable it gets: when something’s off, the smell, temperature, and texture tell you exactly what to change—usually with nothing more than a handful of dry leaves and a few extra spins.
Sources: Cornell Waste Management Institute composting guidance (2020); University of Missouri Extension composting guidance on moisture/aeration (2019).