How to Identify Your Soil Type in 5 Minutes
The most common soil “test” I see gardeners do is squeeze a handful of dirt, call it “clay,” and then spend the next season fighting drainage problems that aren’t actually there. The surprise: a lot of soils feel heavy because they’re wet, compacted, or high in organic matter—not because they’re true clay. In about five minutes, you can get a reliable read on your soil texture and drainage using stuff already in your kitchen.
Soil type matters because it controls how fast water moves, how nutrients stick around, and how often you’ll need to irrigate. Texture (sand/silt/clay) is the big one, but you’ll also want a quick sense of structure (compaction) and organic matter. Let’s do this fast, without guessing.
First, the 60-second setup that makes your results way more accurate
Tip: Sample the right spot (one bad scoop can fool you)
Don’t grab soil from right next to the compost pile, the drip line, or a spot you recently amended—those are “cheater samples.” For a bed, take 3 small pinches from different spots (front, middle, back), mix them in your hand, and test that blend. If you’re troubleshooting a specific plant, sample 6–8 inches away from the stem at 4–6 inches deep.
Example: If your tomatoes are struggling in one corner, test that corner separately—one patch of construction fill can behave totally differently than the rest of the bed.
Tip: Aim for “damp sponge,” not muddy soup
Most quick tests work best when soil is slightly moist—like a wrung-out sponge. If your soil is bone dry, add water a few drops at a time and wait 30–60 seconds for it to soak in before testing. If it’s soaked from rain, wait a day or do your sampling from a covered spot.
Specific timing: after a normal watering, the sweet spot is usually 1–3 hours later, depending on heat and wind.
The 5-minute texture ID: two fast tests that complement each other
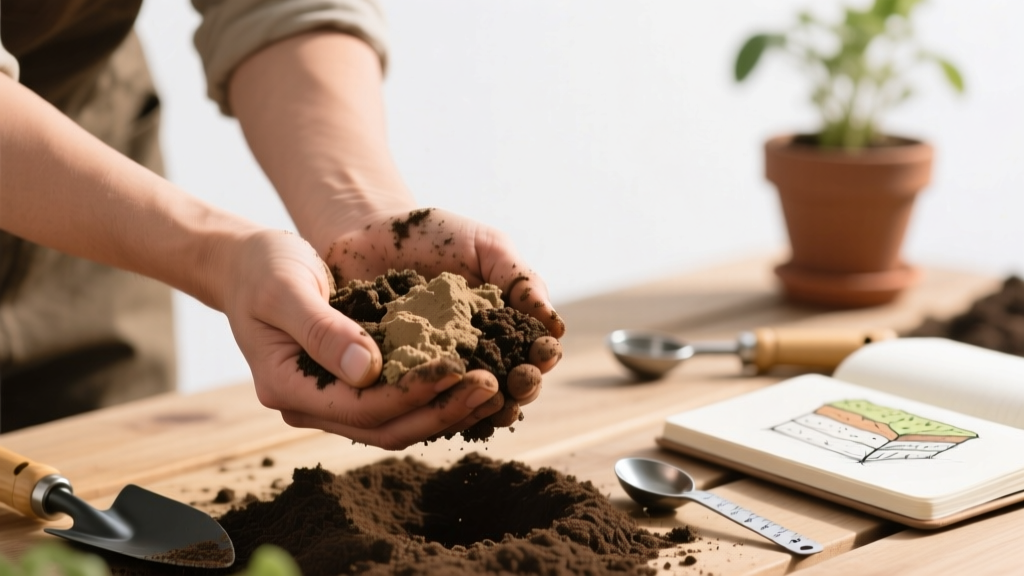
Tip: The “ribbon test” for clay vs. loam vs. sand (90 seconds)
Take a tablespoon of moist soil and knead it like dough for 10 seconds, then roll it into a ball. Pinch it between thumb and forefinger to form a ribbon; measure how long it holds before breaking. A ribbon under 1 inch usually means sandy or sandy loam; 1–2 inches points to loam/silt loam; over 2 inches typically indicates higher clay content.
Example: If you can make a 2.5-inch ribbon that bends without cracking, that’s a classic “sticky when wet, brick when dry” clay-leaning soil—great nutrient holding, but drainage needs attention.
Tip: The “grit vs. flour” feel check (30 seconds)
Rub a pinch of damp soil between your fingers. Sand feels gritty like sugar; silt feels smooth like flour; clay feels sticky and can feel “slick” when wet. This quick tactile check catches cases where the ribbon test is thrown off by high organic matter (which can also bind into ribbons).
Example: A dark, composty bed might ribbon a bit, but if it still feels gritty, you’re likely dealing with sandy soil improved by organic matter—not true clay.
Tip: Do the jar test when you want numbers (but still cheap)
If you have 10 extra minutes later, the jar test gives you approximate percentages of sand/silt/clay. Put 1 cup of soil (remove sticks and rocks) into a quart jar, add water, and a tiny squirt of dish soap (about 1/4 teaspoon) as a dispersant, shake hard for 1 minute, then let settle. Sand drops in about 1 minute, silt settles in about 2 hours, and clay can take 24 hours to fully settle.
Real-world win: This test is great when you’re deciding between building raised beds or improving what you have—if you see a thick clay layer after 24 hours, you’ll plan differently than if it’s mostly sand.
| Method | Time | Cost | What it tells you best | Best use case |
|---|---|---|---|---|
| Ribbon test | 1–2 minutes | $0 | Clay “feel” and workability | Quick decision: amend, mulch, or change watering |
| Grit vs. flour feel | 30 seconds | $0 | Sand vs. silt dominance | Dial in irrigation frequency and fertilizer leaching risk |
| Jar test | 10 minutes active + 24 hours settling | $0–$3 | Rough % of sand/silt/clay | Planning raised beds, major soil rehab, or new landscape installs |
| Lab test (extension/private) | 5 minutes to collect + 1–2 weeks turnaround | $15–$60 | pH, nutrients, organic matter, sometimes texture | When you’re fixing persistent problems or fertilizing precisely |
Drainage and compaction: the “your soil acts like…” tests
Tip: The 4-inch infiltration check (2 minutes, super telling)
Dig a small hole about 4 inches wide and 4 inches deep. Fill it with water once to pre-wet the sides, let it drain, then refill and time how long it takes to drop 1 inch. If it drops 1 inch in under 10 minutes, it’s fast-draining (often sandy); 10–30 minutes is a comfortable middle; over 30 minutes suggests slow drainage or compaction.
Example: If your hole takes 45 minutes per inch, you can still grow great veggies—but you’ll want to avoid overwatering and consider raised rows or adding coarse organic matter at the surface.
Tip: The “screwdriver test” for compaction (15 seconds)
Push a long screwdriver into the soil. If it slides in easily to 6 inches, you’ve got decent structure; if it stops hard at 2–3 inches, you likely have compaction (or a dry layer). Try the test in three spots: the path, the bed, and a bed edge—paths often become concrete over time.
Case example: A front-yard veggie patch next to a driveway often has a compacted lens from foot traffic; the screwdriver will hit a wall even if the top inch looks fluffy.
Tip: The worm-count shortcut (a living soil clue)
Flip a shovelful of soil (about a 6-inch cube) and count earthworms for 30 seconds. In many gardens, 3–5 worms in that scoop is a decent sign that organic matter and moisture are in a workable range. Zero worms doesn’t automatically mean “bad,” but it’s a nudge to check moisture, compaction, and mulch coverage.
Example: If you find worms only under mulch but not in bare soil, that’s your sign that surface cover is doing the heavy lifting for moisture and temperature stability.
“Soil texture… influences water-holding capacity, drainage, aeration, and fertility.” — USDA Natural Resources Conservation Service (NRCS), 2011
Fast identification: match your soil to the “behavior profile”
Tip: Sandy soil tells on itself by drying in hours, not days
If the top 2 inches go from moist to dusty within 4–8 hours on a warm day, that’s classic sandy behavior (or very low organic matter). Sandy soils feel gritty, don’t ribbon much, and nutrients leach quickly—meaning light, frequent feeding tends to work better than one big dose. Mulch thickness matters here: aim for 2–3 inches of straw, shredded leaves, or bark to slow evaporation.
Scenario: A coastal garden with sandy soil often needs drip irrigation run for shorter cycles more frequently; otherwise water just sails past roots.
Tip: Silty soil is the “easy mode” until it crusts
Silt-heavy soils feel silky and make a weak ribbon, and they can be very productive—until they compact and form a crust after hard rain. If you see a thin, cracked surface layer after watering, silt might be dominant. A simple hack: keep soil covered and avoid blasting with a hose; use a gentle shower nozzle and let mulch absorb impact.
Example: In a flat backyard bed, silt can seal over, causing puddles even though the subsoil drains—mulch prevents that sealing.
Tip: Clay soil isn’t “bad,” it’s just slow to forgive mistakes
Clay ribbons long, feels sticky when wet, and can hold nutrients well—sometimes too well if drainage is poor. The fastest “tell” is how it behaves after rain: if footprints linger for days and the soil smears when you step on it, treat it gently and stay off it when wet. Your best low-cost improvement is surface organic matter (compost + mulch), not deep digging when it’s sticky.
Scenario: In a new construction yard, clay subsoil often sits under a thin topsoil layer; plants do fine until roots hit that dense layer—then growth stalls mid-summer.
Shortcut fixes once you’ve ID’d your soil (without wasting money)
Tip: For sandy soil, “feed small, feed often” and save fertilizer
If your soil is sandy, big fertilizer applications can wash through before plants use them. Instead of one heavy feeding, split into 3 smaller feedings spaced 2–3 weeks apart during peak growth. This can cut wasted fertilizer noticeably—especially with nitrogen—while keeping plants steadier.
Cost note: A $15 bag of granular fertilizer lasts longer when you stop over-applying to sand; you’re paying for nutrients that might otherwise leach away after the next deep watering.
Tip: For clay, skip gypsum unless you have a sodium problem
Gypsum is often sold as a miracle cure for clay, but it’s not a universal fix. It can help in sodic (high-sodium) soils, but for typical garden clay, organic matter and minimizing compaction usually do more. If you’re tempted by gypsum, consider spending that $10–$20 on compost or leaf mulch instead.
Expert-backed nudge: University extension guidance commonly emphasizes organic matter and structure over “quick additives” for most clays (see citations below).
Tip: For silt, prevent crusting with a “soft landing” layer
Silty soil loves a gentle surface. Add 1–2 inches of compost as a top-dress, then cover with 2 inches of mulch to buffer raindrop impact and keep pores open. If you seed directly, rake in compost lightly and water with a mist or shower setting for the first 7–10 days.
Example: Carrot beds on silty soil germinate more evenly when the surface doesn’t crust; mulch between rows after sprouting to keep it that way.
Three quick case examples (so you can spot your own situation)
Case: The raised bed that “should drain” but stays soggy
A common surprise is a raised bed sitting on compacted native soil or landscape fabric that blocks downward movement. The infiltration hole test will show slow drainage even if the bed mix looks fluffy. Fix: remove fabric under beds, loosen the first 6–8 inches of native soil with a fork (not when wet), and keep the bed top-dressed with compost rather than mixing deep layers.
Case: The lawn-to-garden conversion that turns into bricks
If you tilled turf into clay soil, you often get a dense, cloddy texture as the chopped grass decomposes and the soil collapses. The screwdriver test will hit resistance at 2–3 inches, and the ribbon will be long and sticky. Fast recovery plan: stop tilling, add 2 inches of compost on top, cover with 3 inches of shredded leaves, and plant through it—soil structure improves as biology rebuilds.
Case: The container garden “soil” that won’t wet evenly
Potting mixes can become hydrophobic; water runs down the sides and leaves the center dry. If a handful won’t form a ball even when watered, it’s not a texture issue—it’s water repellency. DIY fix: soak the pot in a tub for 10–15 minutes, then top-dress with 1/2 inch compost and use a wetting cycle (water, wait 5 minutes, water again).
When to stop guessing and spend the $20
Tip: Use a lab test when the problem repeats two seasons in a row
If you’ve adjusted watering and added organic matter but still see the same chlorosis, stunting, or blossom-end rot pattern year after year, it’s time for a real soil test. Many university extension labs and private labs run $15–$60 depending on the panel, and results often include pH plus nutrient levels and recommendations. Collect from 6–8 spots in the area, mix, and submit about 2 cups of soil.
Citation note: Extension services regularly recommend lab testing for targeted nutrient and pH management rather than guessing based on symptoms alone.
Tip: Don’t buy a cheap pH probe expecting lab accuracy
$10 “stick-in-the-ground” probes are notorious for inconsistent readings, especially in dry or salty soils. If you want a DIY pH number, use a pH strip kit designed for soil slurries (often $8–$15) and follow the ratio exactly—commonly 1 part soil to 1 part distilled water. Better yet, bundle pH with a lab test and get a number you can trust.
Example: A gardener chasing “acid soil” with sulfur based on a bad probe can actually push pH too low and lock up nutrients.
Citations you can trust (and actually use)
These sources back up the basics behind the shortcuts above—texture’s role in water behavior, and why lab testing and structure-focused improvements matter:
USDA NRCS (2011) explains how soil texture influences drainage, aeration, and water-holding capacity, which is exactly why quick texture IDs (ribbon/jar tests) are so useful.
University of Minnesota Extension (2019) highlights practical soil management concepts for home gardens, including improving soil with organic matter and using testing to guide amendments rather than relying on guesswork.
Colorado State University Extension (2023) provides home soil testing and amendment guidance, reinforcing that texture and structure drive watering behavior and that lab tests are the reliable way to diagnose nutrient/pH issues.
If you only do one thing today, do the ribbon test and the 4-inch infiltration check back-to-back. Those two together tell you what your soil is and how it behaves—and that’s enough to stop guessing, stop overbuying amendments, and start making changes that actually stick.