The Best Way to Store Garden Seeds Long-Term
The most common seed-storing mistake isn’t “forgetting to label.” It’s keeping seeds too warm and too damp without realizing it—like leaving packets in a garage that swings from 45°F to 95°F (7°C to 35°C) and back again. Those temperature and humidity spikes quietly chip away at viability until the seeds look fine… and then germinate like a bad joke the next spring.
Long-term seed storage isn’t fancy. It’s basically a three-part formula: keep seeds dry, keep them cool, and keep them dark. Do those three things consistently, and you can hang onto viable seed for years—often longer than most gardeners expect.
“Seed longevity is maximized by drying seeds to low moisture content and storing them at low temperature.” — Royal Botanic Gardens, Kew, Millennium Seed Bank Partnership guidance (2018)
Start With the Big Three: Moisture, Temperature, Light
Tip: Aim for “crisp-dry,” not “probably dry”
Seeds store best when they’re dry enough to snap rather than bend (for larger seeds), and when paper packets feel bone-dry with no cool “clammy” sensation. If you saved seed yourself, air-dry it 7–14 days indoors with a fan on low, out of sun, before sealing it up. Example: bean seeds should rattle hard in the pod; if they dent under a fingernail, keep drying.
Tip: Keep storage humidity low with a cheap desiccant system
Humidity is the silent killer because seeds equilibrate with the moisture in the container. Toss in 1–2 tablespoons (15–30 mL) of silica gel (or DIY dry rice in a breathable pouch) per quart-sized container to keep everything stable. Example: I store 30+ seed packets in a 1-quart mason jar with a tablespoon of silica gel and swap the gel when its indicator changes color.
Tip: Cool beats cold—until you’re truly going long-term
A consistently cool spot (like 35–50°F / 2–10°C) extends seed life dramatically compared to a pantry that fluctuates daily. Refrigerators are great if you package correctly (airtight + desiccant) to prevent condensation. For multi-year storage (or rare varieties), freezing is an option, but only if seeds are dried well and sealed airtight before freezing to prevent ice damage.
Tip: Darkness is easy—just don’t store in clear containers without an outer cover
Light is less destructive than moisture and heat, but it still contributes to gradual deterioration. If you love seeing your organized seeds in clear jars, slip the jars into a shoebox or opaque bin. Example: clear deli containers in a dark cabinet are fine; clear containers on a sunny windowsill are not.
Packaging That Actually Works (and What Fails Quietly)
Tip: Double-pack for stability (paper inside, airtight outside)
Paper envelopes are great for keeping varieties separate and preventing trapped moisture—but paper alone breathes too much for long-term storage. Put paper packets inside an airtight container (mason jar, gasket canister, or freezer-safe zipper bag), then add desiccant. Example: I keep homemade coin envelopes inside a wide-mouth pint jar; when I open it, I open one stable microclimate instead of exposing every packet in a shoebox.
Tip: Use freezer-grade bags if you’re going cold
Thin sandwich bags leak moisture over time, especially in a fridge or freezer. If you’re storing in cold conditions, choose freezer-grade zip bags or vacuum-seal bags, and squeeze out excess air before sealing. Example: a $12 box of freezer bags lasts years and protects your seeds far better than flimsy snack bags that fog up with condensation.
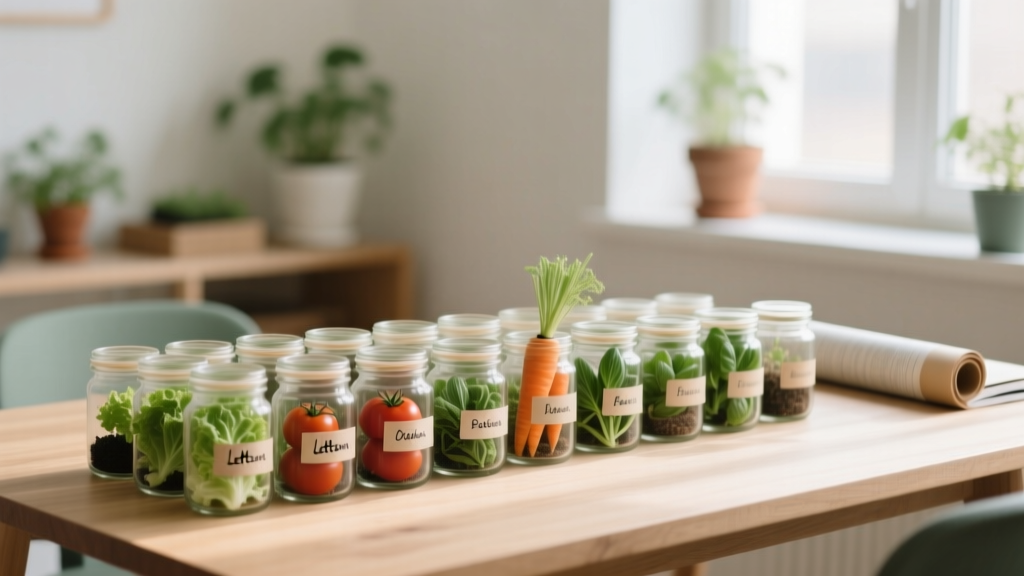
Tip: Mason jars are the best “set it and forget it” option under $2 each
Wide-mouth mason jars are hard to beat for seed storage: airtight, rodent-proof, and they don’t get brittle like plastic. In many areas, pint jars run about $1.50–$2.50 each when bought in a case, and they last essentially forever. Example: one pint jar comfortably holds 40–60 standard seed packets, plus a desiccant pouch.
Tip: Skip the “garage tote” unless it’s inside your conditioned house
Plastic totes feel organized, but they’re usually not airtight and they live where temps swing. Daily warming/cooling pumps moisture in and out, especially in sheds and garages. Example: if you must use a tote, put airtight jars or sealed bags inside it—treat the tote as a dust cover, not the real storage barrier.
Make Your Seed Storage “Climate-Controlled” Without a Lab
Tip: Refrigerate only after you’ve sealed seeds airtight
A fridge is humid by nature, and every door opening changes the air. If seeds aren’t sealed airtight with desiccant, they’ll slowly absorb moisture and age faster. Example: I keep a dedicated “seed jar” in the fridge; I take the jar out, open it once, grab what I need, and close it—no loose packets drifting around absorbing fridge humidity.
Tip: Avoid condensation by warming sealed containers before opening
Cold containers pulled into warm air can “sweat,” and that moisture can land right on your seeds if you open them immediately. Let sealed jars/bags sit at room temp for 1–2 hours before opening. Example: if you keep seeds in the freezer, set the sealed bag on the counter while you make coffee—open it later when it’s warmed up.
Tip: Use the simple “dry + cold” rule of thumb from seed science
A classic storage rule is that lower moisture plus lower temperature dramatically improves longevity, and the two effects stack together. Oregon State University Extension notes that storing seeds in cool, dry conditions extends viability compared to warm, humid storage (OSU Extension, 2019). Example: moving seeds from a 72°F kitchen drawer to a 40°F fridge (properly sealed) can mean the difference between 1–2 years of good germination and 4–8 years for many vegetables.
Labeling and Rotation That Prevents “Mystery Seed” Syndrome
Tip: Label with two dates: “packed” and “last tested”
Most gardeners write the year and call it good, but long-term storage works better when you track freshness and performance. Write the variety, source, and year harvested/packed, plus the date you last did a germination test. Example: “Tomato ‘Black Krim’ — saved 9/2024 — tested 2/2026 (80%)” tells you exactly what you’re working with.
Tip: Use a “one-jar-per-season” working stash to reduce air exposure
Every time you open a big storage container, you risk humidity exchange. Keep your master stash sealed and make a small “spring planting” jar with the few packets you’ll use often. Example: my master seeds stay in the back of the fridge; the working jar sits in a kitchen cabinet for 4–6 weeks, then gets refreshed.
Tip: Rotate by plant family, not just alphabetically
If you group seeds by family (Brassicas, Cucurbits, Solanaceae, etc.), you’ll naturally notice what you actually use and what’s been sitting. It also helps you plan crop rotations and avoid buying duplicates. Example: keeping all cucumbers/squash/melons together makes it obvious you already have six cucumber packets before you impulse-buy another.
Quick Germination Testing (So You Don’t Waste a Season)
Tip: Run a 10-seed paper towel test before you bet your garden on old seed
Testing is fast, and it’s the difference between a full bed and an empty one. Put 10 seeds on a damp paper towel, fold it, slide it into a zip bag (not sealed tight), and keep it warm; count sprouts after the normal germination window for that crop. Example: if 7 out of 10 sprout, you’ve got roughly 70% viability—either sow thicker or replace.
Tip: Adjust sowing rate based on test results (a simple math shortcut)
If germination is 50%, plant about double the normal amount to get the stand you want. If it’s 80%, sow about 25% heavier as insurance. Example: carrots can be finicky—if your test shows 60% germination, sow a thicker line and plan to thin once seedlings are 2 inches tall.
Tip: Know which seeds drop off fast (and don’t hoard them)
Some crops are notorious for shorter viability, even with good storage. Onion, parsnip, and sometimes parsley tend to decline faster than tomatoes or beans. The University of Minnesota Extension notes that seed longevity varies widely by species, with some staying viable only 1–2 years under typical conditions while others last much longer (University of Minnesota Extension, 2020). Example: I treat onion seed as “use this year,” while tomato seed I’ll confidently store and test later.
Comparison Table: Long-Term Storage Setups (Realistic and Affordable)
| Setup | Best for | Approx. cost | Moisture protection | Common failure |
|---|---|---|---|---|
| Paper packets in a shoebox in a closet | Short-term (same season) | $0–$5 | Low | Humidity swings; forgotten packets |
| Paper packets inside a mason jar + 1 tbsp silica gel | 1–5+ years for many crops | $2 jar + $0.25–$0.75 desiccant | High | Opening too often; no label dates |
| Freezer bag + desiccant, stored in refrigerator | Apartment-friendly long-term storage | $0.50 bag + $0.25–$0.75 desiccant | Medium–High | Condensation if opened cold |
| Vacuum-sealed packs stored in freezer | Multi-year, rare/expensive seed | $0.30–$1 per bag (plus sealer) | Very high | Sealing seeds that weren’t fully dry |
DIY Hacks That Work (and the Ones I Skip)
Tip: DIY desiccant: bake rice as a backup (not a forever solution)
If you’re out of silica gel, you can dry rice on a baking sheet at 250°F (120°C) for 45–60 minutes, cool it fully, then put it in a coffee filter sachet. It’s not as powerful or reusable as silica gel, but it helps stabilize a jar in a pinch. Example: I’ve used baked rice successfully for a small jar of pepper seed I needed to hold over for two seasons.
Tip: Make reusable silica packs from thrift-store supplies
Buy bulk silica gel once and make small pouches from scrap fabric or empty tea bags; you’ll spend less than constantly buying little packets. A 1-lb tub of silica gel often costs around $10–$20 and can service dozens of jars for years. Example: I sew simple 2x3-inch pouches and recharge them in the oven when the indicator shows moisture.
Tip: Recharge silica gel correctly to save money
Many indicator silica gels can be re-dried in the oven; common guidance is around 250°F (120°C) for 2–3 hours, but follow your product label for exact temps. Let it cool in a sealed jar so it doesn’t immediately suck moisture from the kitchen air. Example: I recharge a batch once each winter, then restock all my seed jars in under 30 minutes.
Real-World Storage Scenarios (What I’d Do in Your Shoes)
Scenario 1: The “too many seed packets” spring gardener
You’ve got 80 packets, half-opened, and you buy duplicates every year. Move everything into 2–3 pint mason jars with desiccant, then create a small “active” jar for the season’s crops. Example: one gardener I worked with stopped rebuying basil, cilantro, and lettuce every spring and saved about $25–$40 in one season just by seeing what she already owned and keeping it viable.
Scenario 2: Saving heirloom tomato seeds you can’t replace
Heirloom or traded seeds are worth treating like collectibles. Dry thoroughly for 10–14 days, package in paper, then seal inside a freezer bag with desiccant; store in the fridge (or freezer if you’re confident they’re very dry). Example: a friend stores a rare striped paste tomato this way and still gets strong germination after 5 years—but she tests 10 seeds each season before starting trays.
Scenario 3: Apartment living with no basement, hot summers, tiny kitchen
If your place runs warm, don’t fight it—use the fridge with good packaging. Put seed packets in a single gasket container or jar so you’re not spreading humidity exposure across the whole fridge, and let it warm before opening. Example: a shoebox in a closet might hit 80°F in summer; a sealed jar in the fridge stays steady and takes up about the space of a salsa jar.
Scenario 4: Bulk seed buyers (or community garden coordinators)
If you buy seed in bulk (like 1/4 lb packets) you need pest-proof, humidity-proof storage. Use a 1-gallon airtight container with multiple desiccant packs and keep it cool; portion seed into smaller envelopes so you aren’t opening the main stash repeatedly. Example: for a community garden, I’d store “master seed” in one jar and distribute smaller labeled envelopes—cheaper than replacing a whole bulk order after one damp summer.
Small Moves That Protect Viability Year After Year
Tip: Don’t store seeds next to onions, apples, or damp produce
Produce drawers and root cellars are humid and can expose seeds to moisture and ethylene (a ripening gas). Keep seeds in their own sealed system, not “near the garden stuff.” Example: I’ve seen seed packets go wavy and soft after a month stored near potatoes in a basement—classic humidity creep.
Tip: Handle seeds like spices: open fast, close fast
Long open-container time means more humidity exchange, especially in summer. Pull what you need, reseal immediately, and avoid leaving packets out during watering or while a humidifier is running. Example: I set out only the packets I’m sowing in the next 10 minutes; everything else stays sealed.
Tip: Write “use by” expectations directly on the packet
You don’t need perfect charts, just a practical reminder. Mark quick-decliners as “best by next season” and long-keepers as “test in 3 years.” Example: I write “ONION: use this year” and “TOMATO: test 2028” right on the envelope so I don’t pretend I’ll remember.
If you take only one shortcut from all this: build a simple “seed vault” with a mason jar, a tablespoon of silica gel, and a spot that stays under about 50°F (10°C). That tiny setup prevents the slow damage most gardeners blame on “old seed,” and it keeps your favorites ready for the year you really need them—when a variety disappears from catalogs or a friend asks for a share.
And if you’re staring at a pile of half-used packets right now, this is your sign: dry them, jar them, date them, and future-you will feel like you pulled off a gardening magic trick.