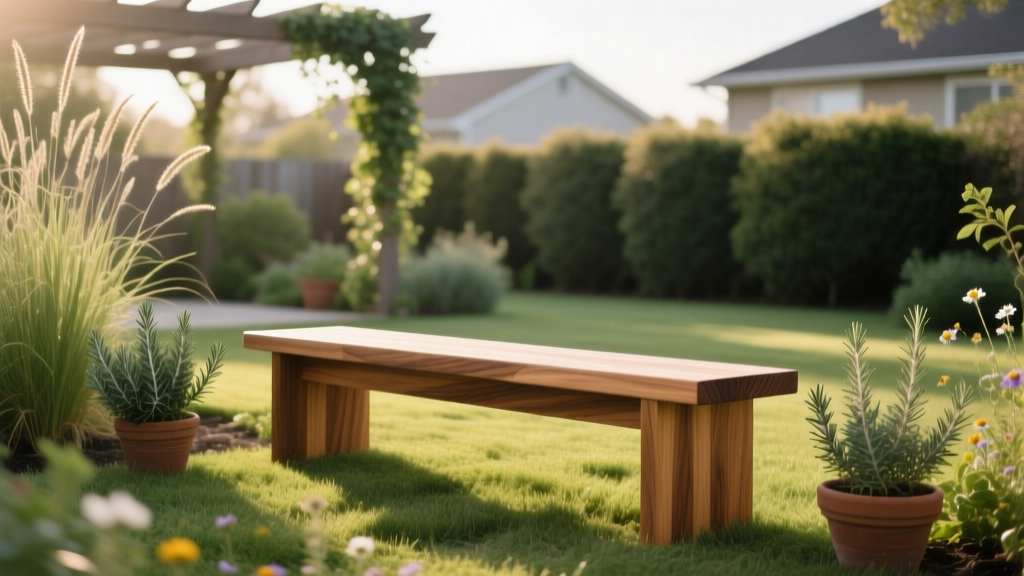
How to Build a Simple Garden Bench
The most common garden-bench mistake isn’t crooked legs or wobbly joints—it’s building with the wrong wood and then wondering why the seat boards cup, crack, or sprout splinters after the first wet season. Outdoor furniture lives in a cycle of soaking and drying, and wood moves more than most DIYers expect (especially flat-sawn boards). Get the materials and spacing right, and a “simple” bench can last 5–10 years with basic maintenance instead of looking tired in 6 months.
Start Smart: Plan the Bench Around Real Garden Use
Tip: Pick a size that actually fits bodies (and paths)
A comfortable, no-fuss bench usually lands at 48–60 inches long, 16–18 inches deep, and 17–18 inches seat height. If your main path is narrow, keep the bench depth closer to 16 inches so you’re not snagging hips and watering cans every time you walk by. Example: for a 36-inch-wide garden gate, a 16-inch-deep bench leaves enough clearance to carry a tray of seedlings through without turning sideways.
Tip: Build for the soil under it—not for your driveway
Benches fail early when legs sit in mud or mulch that stays wet; constant moisture at the base is rot’s favorite hobby. Plan on placing the bench on pavers, gravel, or two pressure-treated “runners” so the feet are at least 1 inch above soil. Real-world fix: if your bench must sit on lawn, set two 12" x 12" pavers under the legs and you’ll stop the constant sinking and wobble after rain.
Tip: Don’t skip the “drip line” check
Benches placed under roof edges or tree drip lines get hammered by repeated drips in the same spots, which accelerates staining and decay. Stand where the bench will go during a rain (or look for bare soil splash marks) and move it 12–24 inches forward if you see a consistent drip pattern. Example: under a maple, shifting the bench just 18 inches can mean the difference between dappled shade and constant leaf drip that keeps boards wet for days.
Materials That Last: Wood, Fasteners, and Finishes
Tip: Choose wood based on rot resistance, not what’s cheapest today
For a simple garden bench, your easiest long-lasting choices are cedar, redwood, or pressure-treated lumber rated for ground contact (even if the bench won’t touch soil directly). Cedar is friendly to tools and naturally rot resistant, while pressure-treated lumber is usually the budget winner. As a rough cost snapshot, a 2x6x8 cedar board might run $18–$30 in many areas, while a pressure-treated 2x6x8 can be closer to $8–$15—prices vary, but the ratio often holds.
Tip: Use exterior-rated screws; drywall screws are a heartbreak waiting to happen
Drywall screws are hard and brittle, and they snap when outdoor wood swells and shrinks. Use exterior deck screws (ceramic-coated) or stainless steel if you’re near the coast or using cedar/redwood (which can corrode some metals). Example: switching from indoor screws to #9 x 2-1/2" exterior screws can eliminate those mysterious “why is this joint loose?” squeaks by midsummer.
Tip: Pre-drill the ends—especially on 2x boards
End grain loves to split, particularly with cedar and dry lumber. Pre-drill pilot holes about 1/8 inch for typical deck screws, and keep fasteners at least 3/4 inch from board edges. Example: on a 2x6 seat board, pilot holes stop that classic split that starts at the screw and races to the edge like a zipper.
Tip: Give boards room to breathe (and drain)
Leave a 1/4 inch gap between seat boards so rainwater drains and air circulates. The USDA Forest Service notes that moisture management is key to reducing decay in wood used outdoors (USDA Forest Service, 2010). Example: three 2x6 seat boards with 1/4" gaps shed a thunderstorm faster than tight-fit boards, and they’re much less likely to grow algae where the boards touch.
“Keeping wood dry is the single most important step you can take to prevent decay outdoors—design details that shed water matter as much as the wood species itself.” — USDA Forest Service, Wood Handbook (2010)
A Simple, Proven Build: The No-Back “Park Bench” Style
This build keeps cuts simple and relies on straightforward butt joints with screws. It’s not fancy, but it’s sturdy, repairable, and forgiving if your cuts aren’t furniture-perfect.
Tip: Use a cut list that avoids complicated angles
For a 48-inch bench, a clean starter cut list is: (3) 2x6 at 48" for the seat, (2) 2x4 at 45" for long stretchers, (4) 4x4 at 17" for legs, and (2) 2x4 at 14" for short end stretchers. That yields a seat height around 18" once you add the seat thickness. Example: if you only have a circular saw, this layout keeps every cut straight and repeatable.
Tip: Build two “leg frames” first, then connect them
Make two rectangles using two 4x4 legs and two short 2x4 stretchers (top and bottom). Then connect the frames with the long 2x4 stretchers. Example: assembling frames on a flat surface (garage floor or patio) makes it easier to keep things square than wrestling the full bench from the start.
Tip: Square matters more than you think—measure diagonals
To check squareness, measure diagonally corner-to-corner on each leg frame; the two diagonal measurements should match within 1/8 inch. If they don’t, push the longer diagonal inward until they match, then drive screws. Example: this one step prevents the “rocking bench” syndrome where one leg floats just off the ground.
Tip: Add a center support if your bench is longer than 60 inches
Seats sag because boards flex over time, especially when someone plops down in the middle. For benches over 60", add a center leg or a center 2x4 support under the seat to reduce bounce. Example: in a community garden where people sit with harvest baskets, that extra support keeps the seat from developing a permanent dip by midseason.
Shortcuts That Make It Feel Pro (Without Fancy Tools)
Tip: Use a scrap-wood spacer to get perfect board gaps fast
Rip a small spacer block to 1/4 inch thick (or use a 1/4" tile spacer) and place it between each seat board as you screw them down. This keeps gaps consistent without measuring every time. Example: if you’re building solo, the spacer trick saves you from constantly re-clamping boards that drift while you drive screws.
Tip: Round over edges to stop splinters and make it comfy
A sharp 90-degree edge on a seat board is a splinter factory and it digs into thighs. If you have a router, a 1/4" round-over bit is perfect; if not, knock down corners with 80-grit sandpaper and finish with 120-grit. Example: this is the difference between a bench you sit on for 2 minutes and one you actually linger on with a cup of coffee.
Tip: Clamp like you mean it—then screw
Clamps act like an extra set of hands and prevent boards from “walking” as the screw bites. Clamp each stretcher to the legs before fastening, especially with pressure-treated lumber that can be slightly bowed. Example: two $12 bar clamps can eliminate the slow twist that creates a seat that looks straight from one side but wavy from the other.
Weatherproofing That Works (and What’s Not Worth Your Time)
Tip: If you stain/finish, do it before assembly for cleaner coverage
Pre-finishing boards means you can coat every face, including areas that will be tight once assembled. That reduces uneven moisture absorption that leads to warping. Example: one coat on all sides before assembly, then a second coat on exposed surfaces after assembly, gives noticeably better water resistance than trying to brush into corners later.
Tip: Skip film finishes if you don’t want annual scraping
Outdoor polyurethane and many “shiny” varnishes look great—until they crack and peel in sun and rain. A penetrating exterior oil or stain is usually easier to refresh: clean, dry, recoat. Example: if your bench lives in full sun, a penetrating finish you can reapply in 30–45 minutes beats a peeling film finish that takes half a day to strip.
Tip: Let pressure-treated wood dry before sealing
Fresh pressure-treated lumber often holds moisture; sealing too soon can trap water and reduce finish performance. Many extension services recommend allowing treated wood to dry before applying a finish—often several weeks depending on weather (for example, Minnesota Extension guidance on finishing pressure-treated wood emphasizes drying time; University of Minnesota Extension, 2020). Example: if the board feels cool and damp or water beads on the surface, wait another week of warm weather before staining.
Money-Saving Moves (Without Cutting Structural Corners)
Tip: Build with “good wood where it counts” and budget wood elsewhere
You can use a nicer rot-resistant wood for the seat (where hands and legs touch) and pressure-treated lumber for the hidden frame. This hybrid approach often saves 20–40% compared to building everything from cedar. Example: cedar seat boards + pressure-treated base gives you comfort and looks where it matters, and durability where it’s mostly out of sight.
Tip: Buy standard lengths to avoid paying for extra cuts and waste
Design around common 8-foot boards so offcuts become useful parts (spacers, braces) instead of trash. A 48" bench uses half of an 8' board per seat plank, which is efficient and predictable. Example: three 2x6x8 boards yield six 48" seat pieces—enough for two benches if you’ve already got framing lumber.
Tip: Don’t overbuy fasteners—count them first
A basic 48" bench often takes around 50–70 screws depending on your exact layout and whether you add braces. Buying a 1-lb box of 2-1/2" exterior screws is usually plenty, and it’s typically cheaper per screw than small packs. Example: if you’re also attaching a center support, add 10–12 screws to your count so you’re not making an extra store run mid-build.
Comparison Table: Two Simple Bench Builds
| Bench Style | Tools Needed | Typical Lumber | Build Time (1 person) | Approx. Cost Range | Best For |
|---|---|---|---|---|---|
| No-back 2x/4x bench (butt joints + screws) | Circular saw, drill/driver, square, clamps | 2x6 seat, 2x4 stretchers, 4x4 legs | 2–4 hours | $45–$150 | Quick seating near beds, fire pit, potting area |
| Backed bench (adds angled back supports) | Same + miter saw helps | More 2x4s + longer seat boards | 4–7 hours | $80–$220 | Long sits, patios, social spots |
Real-World Scenarios (and the Build Tweaks That Save You)
Scenario: The bench sits in full sun all day
Sun cooks finishes and accelerates checking (those little surface cracks). Use lighter-colored stain or leave it unfinished and plan to sand lightly once a year; darker colors heat up more and tend to show wear faster. Example: a bench on the south side of a shed will look better longer with a penetrating stain refreshed every 12–18 months than with a glossy finish that peels by the next summer.
Scenario: The bench lives under sprinklers or drip overspray
Constant water = algae, slippery seats, and faster decay. Add an extra 1/8" gap (so closer to 3/8") between boards if you know it will stay damp, and slightly slope the seat (even 1/8" front-to-back) to encourage runoff. Example: in a garden where micro-sprayers hit the bench twice daily for 10 minutes, that tiny slope and bigger gap keeps the seat from staying wet until lunchtime.
Scenario: You need movable seating for weeding sessions
If you’re dragging the bench around the garden, build shorter (36–48") and consider adding a handhold cutout in the seat board near each end. Keep weight down by using 4x4 legs only where needed and 2x4 legs if the span is short and well-braced. Example: a 36" bench moved between raised beds becomes a mobile “kneel and sit” station—far more useful than a heavy, permanent bench you never reposition.
Scenario: Coastal or high-humidity gardens
Salt air and constant humidity are rough on both wood and metal. Use stainless steel screws (often labeled 304 or 316), and prioritize naturally durable wood like cedar or redwood for exposed parts. Example: near the coast, swapping to stainless can prevent ugly black streaks around fasteners and keeps screws removable years later when you want to replace a board.
DIY Alternatives When You Don’t Have Perfect Lumber (or a Perfect Budget)
Tip: Use reclaimed decking boards—just check for hidden metal
Old deck boards can make excellent bench seats if they’re not punky or cracked through the thickness. Scan with a metal detector or at least inspect carefully for embedded nails/staples before cutting. Example: reclaimed 5/4 deck boards often cost 50–70% less than new boards if you source them from a neighbor’s remodel—just budget extra sanding time.
Tip: Swap 4x4 legs for laminated 2x4s if that’s what you have
If 4x4s are pricey or warped at the store, screw and glue two 2x4s together to create a strong leg blank (use exterior construction adhesive and clamp while it cures). This can be straighter than a single 4x4 and sometimes cheaper. Example: laminating two 2x4 offcuts from another project can produce four legs with almost zero additional lumber cost.
Tip: Use patio pavers as a “no-rot foundation” under legs
If your bench has to sit on damp ground, treat pavers like little footings. Set each leg on a paver, or lay two pavers lengthwise under each side as runners. Example: in a shaded hosta bed where soil stays moist, pavers can add years to the life of even a basic pressure-treated frame.
Final Checks Before You Call It Done
Tip: Do a 60-second wobble test and fix it the right way
Set the bench on a flat surface and press down on each corner. If it rocks, don’t “solve” it by shaving a random leg right away—first check if the frame is out of square or a stretcher is twisted. Example: tightening two screws and re-clamping a stretcher often cures wobble that looks like a leg-length problem.
Tip: Cap end grain to slow water uptake
End grain drinks water faster than any other surface, which is why legs rot from the bottom up. Brush extra finish onto leg bottoms, or use an end-grain sealer if you have it; even a second coat of stain on the cut ends helps. Example: taking 5 extra minutes to double-coat the bottom 2 inches of each leg is one of the cheapest durability upgrades you can do.
Tip: Plan a quick maintenance rhythm instead of a big rescue later
Once a year (pick a weekend in spring), wash the bench with mild soap, rinse, let it dry 24–48 hours, and lightly sand splinter spots before they become a problem. If it’s stained, a single refresher coat every 12–24 months is usually easier than waiting until it looks gray and rough. Example: a bench that gets a 30-minute touch-up each spring often stays comfortable and presentable indefinitely, even in rainy climates.
Build it simple, keep water from lingering, and don’t be shy about using spacers and clamps like a pro—your garden bench should feel like an invitation, not a future repair project. Once it’s in place, you’ll be shocked how often you use it: to set down tools, sort seed packets, admire new blooms, or just take the kind of break that makes gardening feel like a treat instead of a chore.
Sources: USDA Forest Service, Wood Handbook: Wood as an Engineering Material (2010); University of Minnesota Extension, guidance on finishing and maintaining pressure-treated wood outdoors (2020).