How to Build a Simple Garden Stool
Most “quick DIY” garden stools fail for a boring reason: the legs splay out after a few damp mornings, not because the wood “wasn’t strong,” but because the builder skipped diagonal bracing or relied on end-grain screws that loosen as wood swells and shrinks outdoors. Outdoor wood movement is real—humidity swings and repeated wet/dry cycles slowly work fasteners loose unless you build for it. The good news: a sturdy stool is one of the easiest shop projects you can knock out in an afternoon if you choose the right design, fasteners, and finish.
Below are the shortcuts and proven tricks I use to make a simple stool that can handle mud, hose spray, and the occasional “I’m just going to stand on this for one second” moment (even though you shouldn’t). I’ll give you exact measurements, low-cost options, and a few real-world builds so you can copy what works without wasting a weekend.
Start with the right stool design (so it doesn’t wobble)
Tip: Use a “braced square” design, not a plain four-leg box
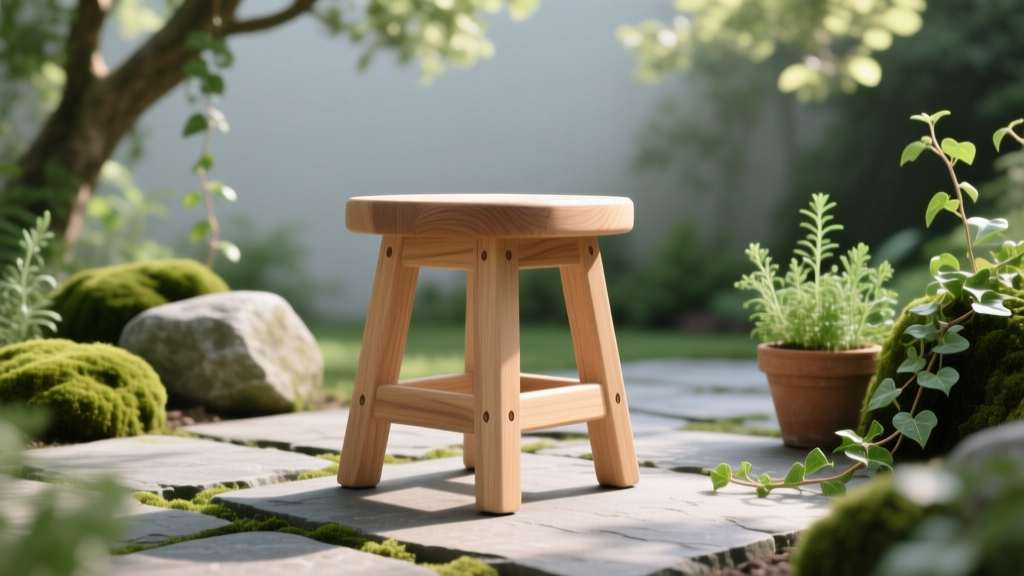
A square top with four legs needs aprons (side rails) plus at least one brace system, or it will rack (twist) over time. The simplest beginner-proof build is: a 12 in × 16 in top, four legs, and four aprons set under the top, plus two diagonal braces underneath. This adds maybe 20 minutes but can double the long-term rigidity.
Example: If you’ve ever sat on a stool that slowly “walks” on the patio, that’s racking. Two diagonals under the top stop that motion immediately.
Tip: Pick a seat height based on the task, not what looks cute
For weeding and low pruning, a 10–12 inch tall stool keeps your knees happier than squatting; for potting bench tasks, 16–18 inches works better. I like 12 inches as the do-everything garden height—easy to drag around beds and stable on uneven soil. If you’re tall (over about 6 ft), consider 14 inches so you’re not folding up like a pocketknife.
Scenario: One of my neighbors built an 18-inch stool because it matched his patio chairs—then he hated it in the veggie rows. He rebuilt it at 12 inches and stopped avoiding spring weeding.
Tip: Plan for outdoor wood movement—glue alone won’t save you
Outdoor projects need mechanical strength plus weather tolerance. Wood expands across the grain with moisture changes, which can stress joints and loosen fasteners. The USDA Forest Service notes that wood’s dimensional change is driven largely by moisture content changes (USDA Forest Service, 2010), so build like it’s guaranteed to get soaked—because it is.
Practical move: Use exterior-rated glue and screws/bolts, and avoid relying on nails or end-grain screws as primary structure.
Materials that last outdoors (without draining your wallet)
Tip: Use 2×4s for legs and aprons—cheap, strong, forgiving
A simple stool can be built from one standard 8 ft 2×4 plus a top board. A single 2×4 (actual size 1.5 in × 3.5 in) gives you sturdy legs and rails without fancy joinery. If you’re buying new, pick the straightest board you can—sight down it like a pool cue.
Cost: In many areas, one 2×4 is around $4–$8, making this one of the cheapest “shop-quality” builds you can do.
Tip: Choose a rot-resistant top board (or seal the daylights out of it)
The top takes the most water and UV, so it’s the first to crack if you use cheap untreated pine and skip a finish. Cedar, redwood, or even a scrap of exterior plywood works well. If you use plywood, go with 3/4 inch exterior-grade and seal the edges—edges are where plywood fails first.
DIY alternative: No cedar? Use a pine board and apply two coats of exterior paint plus a third coat on end grain.
Tip: Don’t use indoor screws—use exterior structural screws
Drywall screws snap and rust; deck screws rust less but can still shear under sideways stress. For the main joints, use #8 or #9 exterior structural screws, 2.5 inches long, or go even stronger with 1/4 inch carriage bolts for the legs. For outdoor fasteners, corrosion resistance matters; many extension services recommend corrosion-resistant fasteners for pressure-treated lumber and outdoor projects (Penn State Extension, 2019).
Example: If you’re using pressure-treated lumber for legs, hot-dip galvanized or stainless screws are a safer bet than “random gold screws” from the junk drawer.
Tip: Treat the feet like they’re boat parts
Stool legs sit in wet soil and get the worst of the moisture. Seal the bottom 1 inch of each leg with extra finish, or add rubber crutch tips (cheap, grippy, replaceable). If you garden on gravel or concrete, rubber tips also stop the stool from skating when you sit down fast.
Cost hack: A set of four rubber tips is often $4–$10 and can add years to the stool’s life.
A simple cut list you can actually build today
Tip: Copy this proven cut list (12-inch stool)
This layout is stable, compact, and easy to build with a circular saw or miter saw. Aim for a finished seat height of 12 inches (adjust legs if you want 10 or 14).
- Top: 1 piece, 12 in × 16 in (3/4 in thick board or plywood)
- Legs: 4 pieces of 2×4, 11 1/4 in long (top adds 3/4 in to reach 12 in total)
- Aprons (long sides): 2 pieces of 2×4, 13 in long
- Aprons (short sides): 2 pieces of 2×4, 9 in long
- Diagonal braces (optional but smart): 2 pieces of 1×2 or ripped 2×4, 14–16 in long, cut to fit
Real-world note: Those apron lengths assume they fit between the legs in a simple frame. If you prefer the aprons to wrap around the outside of the legs, your lengths change—measure twice, cut once, and label each piece with painter’s tape.
Tip: Pre-drill everything that goes near an end grain
Screws driven into the end of a board can split it, especially dry lumber. Use a 1/8 inch bit for pilot holes and add a countersink so screw heads sit flush. This is a 5-minute step that prevents the “tiny crack that becomes a full split by midsummer.”
Example: If your 2×4 leg splits at the top, it loosens the whole frame—pre-drilling avoids that chain reaction.
Fast assembly tricks (stronger stool, less swearing)
Tip: Build the leg frame upside down on a flat surface
Assemble the legs and aprons with the top facing down on a workbench, patio slab, or even a sheet of plywood on the lawn. Gravity helps keep everything square, and you’re not fighting wobble while you drive screws. Check diagonals: if both diagonal measurements match, your frame is square.
Number to use: If one diagonal is more than 1/8 inch longer than the other, push the frame into square before tightening screws fully.
Tip: Use exterior wood glue like a “gasket,” not as the only strength
A thin glue layer improves stiffness and reduces squeaks, but outdoors it’s not magic. Use a waterproof glue labeled Type I (often sold as “exterior” or “waterproof” wood glue). Apply a light bead, spread it, then screw—don’t drown the joint.
Expert note:
“For outdoor assemblies, use a waterproof adhesive and a joint design that doesn’t rely solely on glue. Mechanical fasteners and good joint geometry carry the load when weather stresses the bond.” — General guidance echoed across woodworking best practices and extension recommendations for exterior structures (Penn State Extension, 2019)
Tip: Add diagonal bracing where the stool actually fails
Most stools loosen from side-to-side motion, not vertical load. Two diagonal braces under the seat, running from one apron corner to the opposite, dramatically reduce racking. If you don’t want full diagonals, add small 3 in × 3 in corner blocks in all four corners—still a big improvement.
Scenario: A community garden volunteer group built six stools with no braces; half were wobbly by month two. They added corner blocks with leftover 2×4 chunks and got another full season without repairs.
Tip: If you want “forever sturdy,” bolt the legs
Screws are fast; bolts are confidence-inspiring. Drill a 1/4 inch hole through the apron and leg, then use 1/4 in × 3 in carriage bolts with washers and nuts. Tighten until snug—don’t crush the wood—and re-tighten once after a week of outdoor exposure.
Cost: Bolting a stool usually adds about $6–$12 in hardware, but it’s the best anti-wobble upgrade you can buy.
Comfort and garden-friendly upgrades (the stuff you’ll brag about)
Tip: Round over the seat edges so it stops biting your thighs
A hard 90° edge gets uncomfortable fast, especially in shorts. Use sandpaper (80 then 120 grit) to soften edges, or run a router round-over bit if you have one. Focus on the front edge—your legs feel that area the most.
Example: Even a quick “three passes with 80 grit” makes a plywood seat feel like a finished piece of furniture.
Tip: Add a handhold slot so you actually carry it (instead of dragging)
Cut a simple handhold: a 1 in × 4 in slot centered near one short end of the seat, about 1.5 inches from the edge. Drill two 1-inch holes and connect them with a jigsaw. Sand the inside of the slot so it doesn’t splinter your knuckles.
Scenario: If you move your stool bed-to-bed (veg rows, then roses, then pots), a handhold turns it from “one more thing to wrestle” into a grab-and-go tool.
Tip: Make it hose-proof with a simple finish schedule
Outdoor stools fail at the top surface and leg bottoms first, so concentrate protection there. A practical schedule: sand, then apply 2 coats of exterior paint or spar urethane, waiting 4–6 hours between coats (follow the label if temps are below 60°F). Add a third coat on end grain and feet.
Money saver: Leftover porch paint is usually tougher outdoors than leftover interior wall paint—use what you already own.
Tip: Add a “mud gap” under the seat if you store it outside
If your top board sits directly on aprons with no airflow, moisture can linger and rot starts in the shadowy spots. Use small spacers—like 1/8 inch washers—between the top and frame before screwing it down. That tiny air gap helps drying after rain.
Example: This is the same logic as deck boards having gaps; it’s not for looks, it’s for drying.
Build options compared (pick your level of effort)
| Option | What you build | Best for | Typical cost | Time | Durability notes |
|---|---|---|---|---|---|
| Basic Screw & Glue | 2×4 legs/aprons + top, screwed | Fast afternoon build | $15–$35 | 60–120 min | Good if you add braces and exterior screws |
| Bolted “No-Wobble” | Same frame, but legs bolted to aprons | Community garden / heavy use | $25–$50 | 90–150 min | Excellent; re-tighten once after first week |
| Bucket Stool (DIY alternative) | 5-gal bucket + lid seat + tool pockets | Mobile gardening + storage | $10–$30 | 15–30 min | Weatherproof, but less stable on slopes |
Three real-world builds (so you can steal the best ideas)
Tip: The “Raised Bed Helper” stool (wide top, extra stable)
If you garden around raised beds, make the seat a little larger: 14 in × 18 in, and widen the stance by setting legs closer to the corners. This makes it stable when you’re leaning sideways to reach the center of a 4-foot bed. Add two diagonal braces and rubber feet if the path is pavers.
Example: A friend with two 4×8 beds built this version and keeps it at the bed corner; it’s her “sit, weed, stand” station all season.
Tip: The “Greenhouse stool” (sealed hard, easy to sanitize)
Greenhouses and potting areas stay humid, so choose a non-porous finish you can wipe down. Exterior enamel paint is easy to clean; do 2 full coats plus an extra coat on the seat edges. Keep the design simple—fewer crevices means fewer places for algae to start.
Scenario: If you routinely splash fertilizer or fish emulsion, a painted stool cleans up with a quick rinse instead of absorbing smells.
Tip: The “Sloped yard stool” (shorter legs + aggressive feet)
If your garden is on a slope, stability matters more than seat height. Drop the seat height to 10–11 inches and add larger rubber feet or screw-on furniture glides with rubber. You can also slightly angle-cut the leg bottoms so they sit flat on the slope where you usually work.
Example: On a 5–10° slope, a tall stool feels tippy fast; going 2 inches shorter makes a surprisingly big difference.
Smart shortcuts and fixes (because real life happens)
Tip: If the stool wobbles, don’t “tighten everything”—diagnose the rack
Wobble usually comes from racking, not loose screws. Put the stool on a flat surface, push diagonally on the top corners, and watch which joints move. Add a diagonal brace across the moving rectangle, or install corner blocks—this targets the failure instead of chasing random screws.
Example: If the left-front to right-back direction flexes, brace that diagonal first.
Tip: Seal end grain like it’s a sponge (because it is)
End grain soaks up water far faster than face grain, so it needs extra attention. Brush on a third coat of finish on the leg bottoms and the seat edges, or use a dedicated end-grain sealer if you have it. The USDA Forest Service has long documented how moisture drives swelling and shrinkage cycles (USDA Forest Service, 2010), and end grain is where water enters fastest.
Money-saving fix: If the feet already look fuzzy or cracked, sand, dry for 24 hours, then add two fresh coats just on the bottom inch.
Tip: Make it multi-purpose with a removable kneeling pad
Stick industrial Velcro to the seat and to the bottom of a foam kneeling pad so it can pop on/off. This gives you a cushy perch for long weeding sessions but still lets you flip the stool over for repairs. A typical kneeling pad is 1–1.5 inches thick—enough comfort without making you feel unstable.
Example: If you do 45 minutes of strawberry bed cleanup, that little pad saves your sit bones and keeps you out there longer.
Tip: If you don’t want to build in wood, the 5-gallon bucket hack is legit
For gardeners who want speed and storage, a bucket stool is hard to beat. Snap on a padded lid seat and add a tool organizer sleeve; total setup time can be 20 minutes. It’s not as stable as a low wooden stool on uneven ground, but it carries hand tools and harvest gloves in one trip.
Cost comparison: A bucket you already have plus a $10–$20 lid beats buying a purpose-built garden seat for $40–$80.
A simple garden stool is one of those small builds that pays you back every week: less knee strain, less bending, and a tidy spot to park yourself while you thin seedlings or deadhead. Build it low and braced, use exterior fasteners, and put extra protection where water actually sits (seat and feet). Once you’ve made one, you’ll probably end up building a second—because the first one “mysteriously” migrates to wherever the most work is.
Sources: USDA Forest Service. (2010). Wood Handbook: Wood as an Engineering Material (dimensional change with moisture). Penn State Extension. (2019). Guidance on corrosion-resistant fasteners and exterior construction considerations for treated wood and outdoor projects.