12 Things Every Gardener Should Know About Transplanting
The most common transplant “mystery” isn’t pests or bad soil—it’s heat. A perfectly healthy plant can look fine at 8 a.m. and collapse by 3 p.m. because its roots can’t keep up with leaf moisture loss after being disturbed. The sneaky part: you can water and still lose it if you transplant at the wrong time, set the crown wrong, or skip a simple hardening step.
Transplanting is basically controlled stress. Do it with a few insider moves and your success rate jumps fast—even with finicky seedlings, bargain-bin shrubs, or that tomato you swore you wouldn’t move again.
Timing & Weather: Win the Week, Not Just the Day
1) Transplant at the “boring” time of day (and it’s not noon)
Midday transplanting is like asking a plant to run a marathon right after a haircut. Aim for late afternoon/early evening (about 4–7 p.m.) or a cloudy morning so the plant gets 12+ hours of lower light to rehydrate and settle before the next heat cycle. If you must plant on a sunny day, plan a temporary shade setup for 48 hours.
Example: Moving basil or lettuce at 6 p.m. in July, then shading with a laundry basket overnight, often prevents that next-day “melt” you see with lunchtime planting.
2) Use soil temperature, not the calendar, to decide when to move warm-season plants
Tomatoes, peppers, cucumbers, and basil don’t care what date it is—they care if the root zone is warm enough to grow. Tomatoes generally perform best when soil is around 60–65°F (15.5–18.3°C) or higher; colder soil stalls roots and invites stress. A $10 soil thermometer beats guessing and saves you the cost of replacing stunted transplants.
Example: If your bed is 52°F, wait a week or use black plastic or a dark tarp for 5–7 days to warm the soil before planting tomatoes.
3) Harden off like you mean it: 7–10 days, not “an hour on the porch”
Hardening off isn’t just sunlight exposure—it’s training plants for wind, UV, and swingy temps. Start with 1–2 hours outdoors in bright shade, then add time and sun daily over 7–10 days, bringing plants in if nights dip below their comfort zone. University of Minnesota Extension (2020) emphasizes gradual acclimation to reduce transplant shock and sunscald.
Real-world scenario: A tray of zinnias moved straight from a windowsill to full sun often gets bleached leaves by day two; hardened off seedlings usually keep their color and don’t stall.
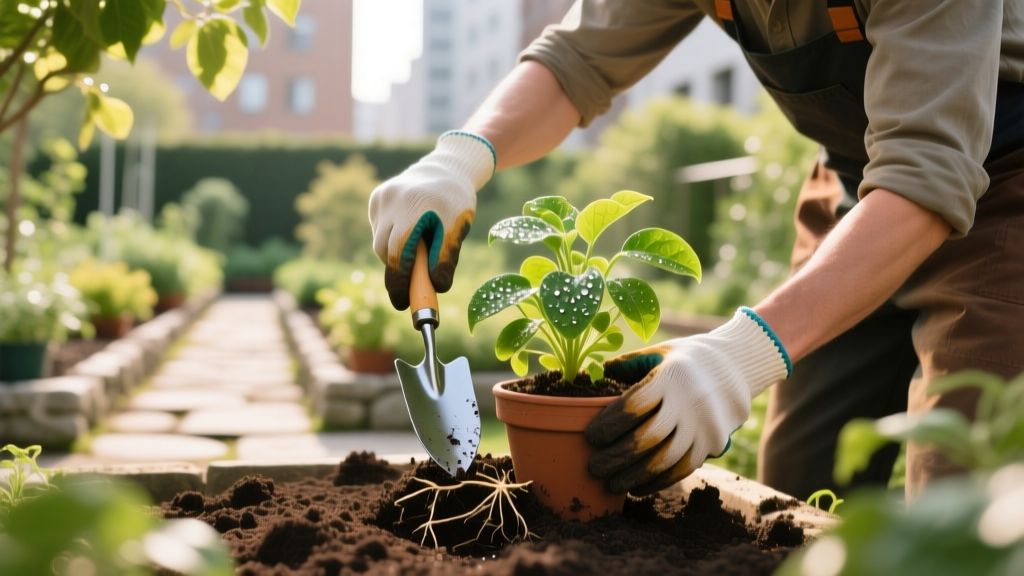
Root Handling: The Part Most People Rush (and Pay For)
4) Water the plant before you transplant, not after
Watering after planting is necessary, but pre-watering is the underrated trick: moist rootballs slide out cleanly and roots are less brittle. Give containers a deep soak 1–2 hours before transplanting so the root zone is hydrated but not dripping mud. This reduces broken roots and speeds recovery.
Example: A dry 4-inch pot of marigolds often sheds soil and tears roots when you pop it out; a pre-watered pot holds together like a firm “plug.”
5) Fix circling roots (especially in nursery pots) or you’re planting a future problem
If roots are spiraling around the pot, they can keep circling after planting, limiting water uptake and stability. For annuals and vegetables, gently tease the bottom and sides; for severe cases, make 3–4 vertical slices about 1/4 inch deep down the rootball. Clemson Cooperative Extension (2019) notes correcting girdling/circling roots at planting helps prevent long-term growth issues in woody plants.
Example: A one-gallon lavender with tight circling roots often stays small for months unless you rough up the rootball first.
6) Match hole shape to root shape (yes, it matters)
Seedlings with small plugs want a hole just a bit wider than the plug; shrubs and perennials want a broad, shallow hole that encourages roots to explore outward. For woody plants, the planting hole is often recommended to be 2–3× the width of the rootball but no deeper than the rootball height so the plant doesn’t settle too low (a common extension-service guideline).
Example: Digging a deep “post hole” for a shrub often leads to the plant sinking over a few weeks, leaving the crown too low and prone to rot.
7) Plant at the right depth: tomatoes are the exception, not the rule
Most plants should be set so the soil line matches the original soil line—burying the crown can invite stem rot and fungal issues. Tomatoes are a famous exception: you can bury them deeper (even up to the first set of true leaves) because they form roots along buried stems. Peppers, however, usually prefer being planted at the same depth they grew in the pot.
Example: Planting basil too deep often leads to a sad, dark stem at the soil line; planting tomatoes deep often creates a sturdier plant in windy gardens.
“Most transplant failures trace back to root stress—either the rootball dried out, got damaged, or was planted at the wrong depth.” — Extension horticulture guidance summarized from multiple university outreach publications
Soil Prep That Actually Moves the Needle
8) Don’t “fertilize the hole” with strong stuff—use a gentle starter approach
High-salt fertilizers in the planting hole can burn new roots, especially in dry soil. If you want a starter boost, aim for something mild: compost at 10–20% of the backfill volume, or a diluted liquid feed at 1/4 strength after the plant is settled for a few days. This is one of those areas where less is genuinely more.
Cost saver: A bag of composted manure might run $6–$10; your own finished compost is basically free and often just as effective for transplant establishment.
9) Pre-moisten the planting zone (especially in raised beds and containers)
Dry potting mix can turn hydrophobic, meaning water runs down the sides and never wets the root zone. Before transplanting into containers or raised beds, wet the soil so it’s evenly damp—think “wrung-out sponge,” not mud. In hot weather, this one step can reduce the number of rescue waterings you’ll need in the first 48 hours.
Example: When planting into a fabric grow bag, pre-wetting the mix keeps water from channeling and leaving the middle dry—classic reason patio tomatoes struggle.
Watering & Aftercare: Keep Roots in the Goldilocks Zone
10) Use a “root-zone soak” pattern for the first week (a schedule that works)
Instead of frequent splashes, aim for deep, targeted soaking that reaches the rootball and the surrounding soil. For most garden transplants, a practical pattern is: water at planting, then again the next day, then every 2–3 days for the first week (adjust for heat, wind, and soil type). Sandy soil may need shorter intervals; clay holds longer but needs slower application to prevent runoff.
Real-world scenario: A neighbor waters new shrubs with a 30-second sprinkle daily; the top stays wet, roots stay shallow, and the plant wilts in heat. Switching to a slow 10–15 minute trickle every 2–3 days often flips the script.
11) Mulch like a pro: keep it off the stem and pick the right thickness
Mulch reduces evaporation and smooths temperature swings, which is exactly what a disturbed root system wants. Use 2–3 inches of shredded leaves, straw, or bark, but keep a 1–2 inch gap around the stem/crown to prevent rot and pests. DIY option: shredded fall leaves or untreated grass clippings (thin layers) are excellent and basically free.
Example: Straw mulch around transplanted strawberries keeps the soil cooler and reduces the “midday flop” during warm spells.
Tools, Hacks & Money-Savers That Change the Game
12) Use temporary shade and wind protection for 48 hours (cheap, ugly, effective)
Shade is a transplant cheat code because it reduces leaf water loss while roots re-establish. For 2 days, rig a piece of 30–50% shade cloth, an old bedsheet, or even an upside-down plastic crate on the west side to block harsh afternoon sun. Add wind protection (a cardboard screen or a row cover) if your site is breezy—wind dries plants faster than heat alone.
Cost comparison: A small shade cloth might cost $15–$25, while a free DIY option is a laundry basket or salvaged window screen; both can save a $4–$6 transplant from frying.
A Quick Comparison: Which Transplant Method Fits Your Situation?
| Method | Best for | Speed | Success rate (typical) | Cost |
|---|---|---|---|---|
| Planting in the evening + 48-hour shade | Hot climates, tender seedlings (lettuce, basil), summer planting | Fast | High (often dramatically fewer wilted plants) | $0–$25 |
| Morning planting + no shade | Cool, cloudy stretches; hardy perennials | Fastest | Medium (weather-dependent) | $0 |
| Cloudy/rainy-day planting + light mulch | Most situations; trees/shrubs and perennials | Medium | Very high (best “easy mode”) | $0–$10 |
| Midday planting + fertilizer in the hole | Basically none (only if you enjoy replacing plants) | Looks fast, fails slow | Low | Higher (wasted plants/fertilizer) |
Three Real-World Transplanting Plays (Steal These)
Scenario 1: The leggy tomato seedling you’re embarrassed about
Bury it deeper. Strip the lower leaves, plant so only the top cluster of leaves is above soil, and stake immediately to prevent wind-rock. Add 2 inches of mulch after the soil warms, and use evening planting plus shade for two days if it’s over 85°F.
Scenario 2: The discounted nursery shrub with roots circling like spaghetti
Pull it out, inspect the roots, and don’t be timid: tease aggressively and slice if needed (those 3–4 vertical cuts). Plant at the same depth as the root flare, then water with a slow trickle so the entire root zone is wetted. This is where fixing roots at planting pays you back for years.
Scenario 3: A tray of seedlings that keeps wilting even though you “watered”
Check wind and sun exposure first—then check whether the rootball actually got wet. Use a slow pour right at the base, or bottom-water the bed area by making a shallow basin around each plant and filling it twice so it soaks in rather than running off. If the soil is hydrophobic (common in peat-based mixes), pre-wet with a gentle sprinkle for a minute, wait 5 minutes, then water again slowly.
Transplanting gets a lot easier when you treat it like a short recovery window: reduce leaf stress, protect the roots, and give the plant a couple of calm days to reconnect with the soil. Nail those basics—especially timing, root correction, and temporary shade—and you’ll stop “mysteriously” losing plants that looked perfect in the pot.
Sources: University of Minnesota Extension (2020) guidance on hardening off and reducing transplant shock; Clemson Cooperative Extension (2019) recommendations on correcting circling/girdling roots and proper planting practices for long-term establishment.