Making Seed Tape from Toilet Paper
The most common seed-starting mistake isn’t bad soil or “old seeds”—it’s sowing too many at once and then promising yourself you’ll thin later. You might thin… or you might end up with a carrot patch so crowded it looks like grass and yields a handful of pencil-thin roots. Toilet-paper seed tape fixes that problem in one sitting: you place seeds at the right spacing once, then plant the whole strip like a pro.
Homemade seed tape also solves a sneaky second issue: uneven moisture. Tiny seeds (carrots, lettuce, onions) need consistent contact with damp soil, and when they’re sprinkled loosely, some land too shallow, some too deep, and some dry out before germinating. A paper tape holds them where you put them and helps wick moisture along the row—especially helpful in sandy beds or breezy spring weather.
Start With the Right Materials (and Avoid the Paper Trap)
Tip: Pick “fast-melt” toilet paper—2-ply is usually perfect
Go for plain, unscented toilet paper with no lotion or heavy embossing; it breaks down quickly and won’t leave a weird film. Ultra-thick “luxury” rolls can stay intact longer than you want, which may slow emergence for very small seeds. If you’re unsure, tear off a square and drop it in water—if it turns to mush in under 30 seconds, it’s a good candidate.
Example: For carrots in cool spring soil, a quick-breakdown paper helps seedlings pop through without getting snagged under a stubborn layer.
Tip: Use a simple flour-and-water paste (skip glue sticks)
A basic paste made from flour and water holds seeds well and dissolves easily in soil. Mix 1 tablespoon flour with 2 tablespoons water to start, then add drops of water until it’s the consistency of school glue (not runny). Glue sticks and craft glues can work, but some are slow to break down and can leave hard beads in the row.
Example: If you’re making tape for beets (which are actually clusters of seeds), flour paste grips the irregular “seedball” better than watery mixtures.
Tip: A toothpick beats a paintbrush for seed placement
Dip a toothpick into paste, dot the paper, then pick up a seed with the slightly sticky tip and place it right on the dot. This keeps paste amounts tiny—important because big blobs can dry like little rocks. A small artist paintbrush works too, but toothpicks give you more control for seeds smaller than sesame.
Example: Lettuce seed is so light it can stick to your fingers; a toothpick placement is faster than fighting static and sweat.
Spacing Rules That Actually Match Real Plants
Tip: Use extension-service spacing, not what “looks right”
Seed packets are decent, but extension recommendations are often clearer and backed by trial data. The University of Minnesota Extension lists typical garden spacings for vegetables (including carrots, lettuce, onions), and those numbers exist for a reason: light, airflow, and root room matter. When you build seed tape, you’re pre-committing to a spacing plan—so it pays to pick a good one.
Citation: University of Minnesota Extension (2020), vegetable spacing recommendations for home gardens.
Tip: Standardize your tape with a quick spacing “jig”
Make a spacing ruler once and reuse it all season. Mark dots on a strip of cardboard at 1 inch, 2 inches, and 4 inches intervals (label them), then slide it under the toilet paper as a guide. This makes long runs accurate without measuring every single dot.
Example: A 10-foot carrot row at 2-inch spacing needs about 60 seeds—a jig keeps you from ending up with 40 on one end and 90 on the other.
Tip: Use these spacing numbers as your default
These are practical “home garden” targets that reduce thinning while keeping yields solid. Adjust a little based on variety (mini vs. full size) and how intensively you fertilize, but don’t wing it.
- Carrots: 1 seed every 2 inches
- Lettuce (leaf): 1 seed every 6 inches (or 3 inches if you’ll harvest baby greens)
- Green onions/scallions: 1 seed every 1 inch
- Radishes: 1 seed every 2 inches
- Beets: 1 “seedball” every 3–4 inches
Example: If you always forget to thin beets, go with 4-inch spacing—each seedball can sprout multiple seedlings, and wider spacing reduces the guilt later.
Build the Tape So It Plants Cleanly (No Seed Loss, No Tangles)
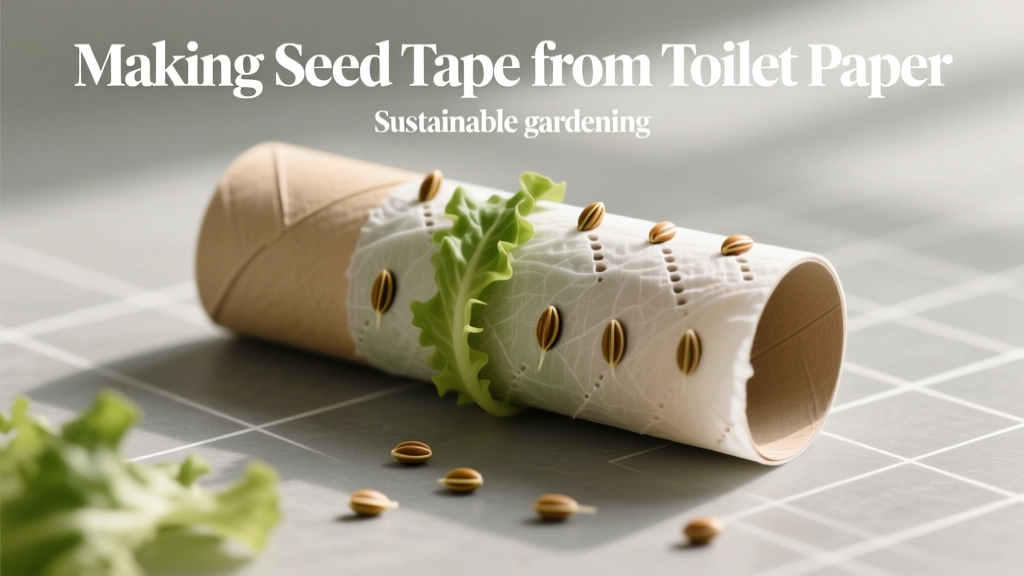
Tip: Make tapes 1 to 1.5 inches wide so they don’t twist
Single-ply strips can curl and flip when you try to plant them, especially in wind. Tear toilet paper into strips about 1–1.5 inches wide; that width lays flatter in the trench. If your toilet paper tears unevenly, fold it once lengthwise and tear along the fold for a straighter edge.
Example: A windy March day is not when you want to wrestle a ribbon-thin strip that’s trying to become a paper rope.
Tip: Fold-over method = faster planting and better seed protection
Instead of dotting and leaving seeds exposed, place seeds on paste dots along one edge, then fold the strip over like a hotdog bun and press gently. The seed ends up sandwiched between layers, which protects it during handling and makes planting smoother. Use just enough paste to tack; you don’t need to laminate it.
Example: If you’re making tape indoors at the kitchen table with curious kids or pets, fold-over tapes keep seeds from being brushed off.
Tip: Let tapes dry at least 12 hours before rolling
Even if the surface feels dry, paste can stay damp inside the fold. Give your tapes 12–24 hours on a baking rack or parchment-lined tray so air circulates. Rolling too soon can glue the tape into a solid cylinder (ask me how I know).
Example: Make tapes after dinner, leave them overnight, and roll them the next morning with coffee—zero stress.
Tip: Label like you mean it (variety + date)
Write the crop, variety, and year on a small piece of masking tape and stick it to the rolled strip. Seeds can look identical once they’re taped, and mixing varieties is a real problem with carrots and lettuces (different maturity times and sizes). If you’re using saved seed, add the source (“2025 backyard”) so you remember what worked.
Example: “Carrot—Napoli—2026” beats “orange things??” every time.
Planting Tricks That Make Seed Tape Worth the Effort
Tip: Plant at the shallow end of the depth range
Most tiny seeds fail because they’re planted too deep. When using seed tape, aim for about 1/8 inch soil cover for carrots and lettuce, and up to 1/4 inch for onions and radishes (adjust for your soil texture). The tape already improves seed-to-soil contact, so you don’t need a heavy burial.
Example: In heavy clay, scraping a shallow groove and barely covering the tape can dramatically improve emergence compared to a deeper furrow that crusts over after rain.
Tip: Pre-moisten the trench, then cover—don’t water hard afterward
Before you lay the tape, lightly water the furrow so the soil is damp a couple inches down. After covering, mist or use a gentle shower setting; a hard spray can float the tape or wash soil off the row, leaving seeds exposed. This “wet trench” method is especially helpful with lightweight toilet paper that wants to shift.
Example: If you’re planting on a slope, pre-moistening reduces the need for heavy watering that can send the tape downhill.
Tip: Use a board to firm the row—fast and oddly effective
After covering the tape, press a straight board (like a 1x4) along the row with gentle foot pressure. You’re not compacting the whole bed—just ensuring consistent seed-to-soil contact along the tape. Consistency is what gives you even germination instead of patchy clumps.
Example: A 6-foot board firms a long row in seconds and leaves a neat, slightly flattened line that’s easy to keep evenly moist.
Tip: For carrots, “covering” matters as much as watering
Carrot seed can take 10–21 days to germinate depending on soil temperature, and that’s a long time for the surface to stay evenly damp. A classic trick is to lay a piece of burlap, cardboard, or a board over the row until sprouts appear, checking daily. This reduces surface drying and crusting, two big reasons carrot rows fail.
Citation: University of California Agriculture and Natural Resources (UC ANR), Carrot production guidance (2015) notes germination is slow and uneven under suboptimal moisture/temperature conditions.
“Uniform soil moisture is essential during germination; short dry periods can reduce stands of small-seeded crops.” — University Extension guidance on direct seeding and emergence management (various crops)
Seed Tape vs. Other Sowing Methods (Real Tradeoffs)
| Method | Best for | Time upfront | Thinning needed | Typical cost (per 25 ft row) |
|---|---|---|---|---|
| DIY toilet paper seed tape | Carrots, lettuce, onions; precise spacing | 30–60 min | Low (often none) | $0–$2 (paper + flour) |
| Commercial seed tape | Convenience; consistent factory spacing | 5–10 min | Low | $6–$12 |
| Pinch-and-sow (by hand) | Fast planting, bigger seeds | 5–10 min | High for small seeds | $0 |
| Seed shaker (spice jar method) | Broadcasting baby greens | 5–10 min | Medium | $0–$3 |
If you’re planting one short row, hand sowing can be totally fine. But if you’re doing multiple rows of fussy seeds (carrots + scallions + lettuce), DIY seed tape is the sweet spot: almost as cheap as hand sowing, with a big reduction in thinning and do-overs.
DIY Variations That Solve Specific Problems
Tip: “Two-seed insurance” for older seed lots
If your seed is more than 2 years old (especially onions), germination may drop enough to leave gaps. Instead of replanting later, place 2 seeds per dot and increase spacing slightly (for carrots, move from 2 inches to 3 inches). If both come up, snip one at soil level with scissors rather than yanking and disturbing roots.
Example: For a half-used onion packet from 2023, double-seeding prevents a row that looks like missing teeth.
Tip: Switch to napkins or paper towels for ultra-wet beds
If your soil stays soggy (low spots, heavy spring rains), toilet paper can break down so fast it turns to pulp when you plant it. In that case, use a thin paper towel or plain dinner napkin—still biodegradable, just a little sturdier. Keep strips narrower (about 1 inch) so they don’t create a barrier.
Example: In a rain-prone garden bed, sturdier paper makes it possible to lay tape without it tearing into confetti mid-planting.
Tip: Add a pinch of cinnamon to paste if mold is a recurring issue
If you store tapes in a humid garage or basement, paste can sometimes develop a musty smell. A small pinch of cinnamon in your paste (think 1/8 teaspoon per batch) can help discourage mold during drying and storage. The real fix is drying thoroughly and storing in a breathable paper envelope, not plastic.
Example: If last year’s seed tape got spotty and weird in storage, cinnamon plus better airflow is a simple upgrade.
Real-World Scenarios (How This Plays Out in Actual Gardens)
Scenario: The busy gardener planting in 20-minute chunks
If you only get small windows to garden, seed tape is basically time travel. Spend one evening making tapes for 3 crops (carrots, lettuce, scallions), then plant them in short sessions without measuring or fiddling. The payoff is no “I’ll thin later” backlog—your spacing is already done.
Scenario: The windy, sandy yard where seeds vanish overnight
In sandy soil, top layers dry fast and wind can move loose seeds before they ever germinate. Seed tape anchors seeds exactly where you want them, and the paper helps hold a micro-layer of moisture right at the surface. Combine it with a light cover (burlap or a board) for the first 7–10 days and you’ll see a much steadier stand.
Scenario: Teaching kids to plant without wasting half a seed packet
Kids love planting, but “sprinkle the seeds” often becomes “dump the seeds.” Seed tape turns planting into placing a strip in a trench—easy, tactile, and hard to mess up. Let them help make tape too: one person dots paste, one places seeds, and you’ve got a kitchen-table garden project that actually improves your harvest.
Money-Saving Moves (and When to Just Buy It)
Tip: DIY tape is cheapest when you’re doing multiple rows
A roll of toilet paper and a spoonful of flour are basically pennies, while commercial tape adds up fast. If you’re planting four 10-foot rows, DIY can stay under about $2 total (not counting seeds), while commercial tapes can easily hit $20–$40 depending on brand and crop. The bigger your garden, the more this hack pays for itself.
Example: If you plant carrots every 2 weeks for succession harvests, DIY tape keeps you from buying repeated tape packs all season.
Tip: Buy commercial tape for “rare” varieties you only plant once
If you’re only doing one short row of an unusual variety and you want perfect spacing with zero prep, commercial tape can be worth it. Think of it like paying for convenience on a one-off crop. For your everyday staples (carrots, lettuce, scallions), DIY is the better long-term play.
Troubleshooting: Fix the Few Things That Can Go Wrong
Tip: If germination is patchy, check depth and crust first—not the tape
When seed tape “fails,” the culprit is usually planting too deep or soil crusting after a hard rain. For tiny seeds, even an extra 1/4 inch of soil can be the difference between success and nothing. Next time, plant shallower and cover the row during germination to prevent crust.
Example: A gardener blames the tape, but the row was buried under a thick mulch layer—seedlings never had a chance.
Tip: If seeds sprout on the tape roll, your storage is too humid
Seed tape should be stored cool, dry, and dark—think a closet inside the house, not a damp shed. If you live in a humid climate, toss a small packet of silica gel in the storage container and keep tapes in paper envelopes, not sealed plastic. Seeds can begin to swell if humidity stays high for weeks.
Example: If your basement smells “earthy,” store your tapes upstairs with your seed box instead.
Tip: If the tape won’t stay down in the furrow, you’re planting too dry
Dry soil plus a light strip of paper equals a tape that shifts, curls, or blows away. The fix is simple: mist the furrow, lay the tape, then mist again before covering. In very dry beds, pre-wet the trench and wait 5 minutes for moisture to soak in before placing the tape.
Example: In raised beds that dry out faster, that 5-minute pause keeps the tape from acting like a spring-loaded ribbon.
Once you’ve made a couple rolls, you start seeing seed tape for what it is: a tiny upfront investment that pays you back every time you don’t thin, re-seed gaps, or wonder why one end of the row is crowded and the other is bare. Keep a few rolls ready in your seed box, and the next time you catch yourself about to “just sprinkle and hope,” you’ll have a better option sitting right there.