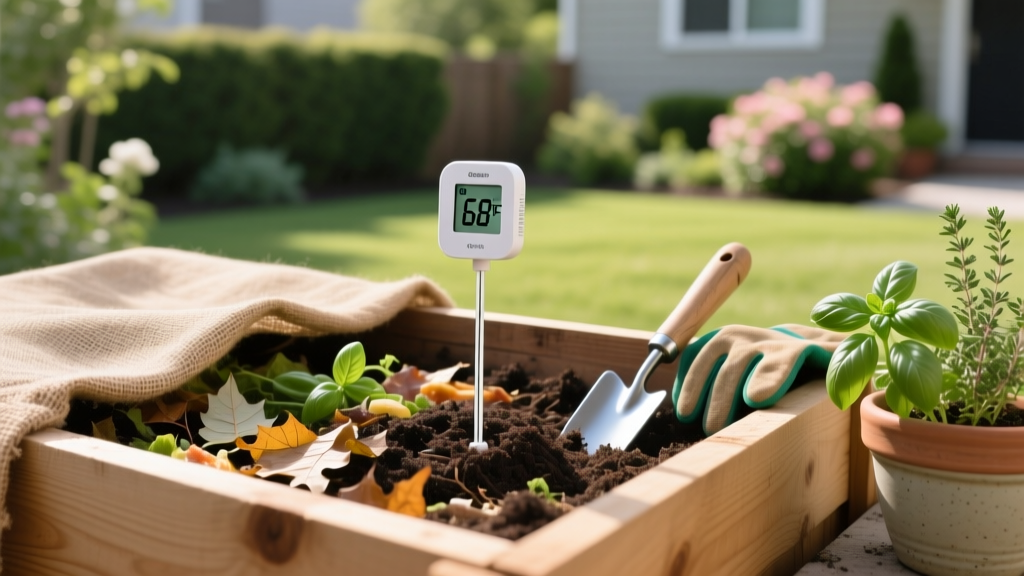
DIY Garden Compost Thermometer Setup
The biggest composting mistake I see isn’t “wrong ingredients” or “not turning enough”—it’s trusting the outside of the pile. A compost heap can feel cool to the touch while the center is cooking at 140°F, or it can feel warm on top while the middle is bone-dry and stalled. A $12 thermometer (or a clever DIY stand-in) turns composting from guessing into repeatable results—and it can save you months of waiting on a pile that’s quietly doing nothing.
If you want shortcuts and proof, this is it: temperature is your dashboard. It tells you when to turn, when to water, when to add browns, and when you’re done. Below are practical, build-it-this-weekend setups plus tricks for getting reliable readings without buying fancy gear.
Get the thermometer part right (before you build anything)
Tip: Pick a probe length that actually reaches the “engine room”
Most backyard piles are 3–4 feet wide, and the hot core sits roughly 12–24 inches in from the surface. A probe that’s only 6 inches long will mostly read the “weather,” not the compost. Aim for a 20-inch (50 cm) compost thermometer for bins and small piles, or 36 inches if you routinely build 5x5-foot piles.
Example: If your pile is a 4-foot diameter cone, a 20-inch probe lets you measure the true center without digging a crater every time.
Tip: Use a temperature range that matches compost reality (not kitchen candy)
Active composting commonly runs 110–160°F (43–71°C); below ~100°F it’s usually sluggish, and above ~170°F you can start killing off helpful microbes. Look for a dial that reads at least 0–200°F (or 0–100°C) with clear marks at 120, 140, and 160°F. Compost thermometers are designed for this zone; meat thermometers often aren’t long enough and their dials are harder to read at arm’s length.
Tip: Calibrate once—then stop doubting every reading
Before you blame your compost, verify the tool. Stick the probe tip in a glass of ice water for 2 minutes; it should read about 32°F (0°C). Then test in boiling water (212°F / 100°C at sea level; subtract ~2°F per 1,000 feet of elevation). If you’re off by more than 2–3°F, note the offset with a piece of tape on the handle.
Example: At 5,000 ft elevation, boiling water is around 202°F. If your thermometer reads 198°F there, you know it runs ~4°F low.
Tip: Read at a consistent depth, or your log is useless
Compost piles have temperature layers; 4 inches can be 20 degrees cooler than 16 inches. Choose two standard depths: one “core” reading (typically 18–20 inches) and one “mid” reading (10–12 inches). Write the depth next to the temperature every time so you can spot real trends instead of depth changes.
“The most efficient composting occurs when the pile is managed to maintain temperatures between 131°F and 160°F for several days, with adequate moisture and aeration.” — Cornell Waste Management Institute (2020)
DIY setups that keep the thermometer easy to use (so you actually use it)
Tip: Build a “parking spot” so the probe doesn’t disappear or get bent
The fastest way to stop checking temperature is losing the thermometer under a tarp or snapping the probe in a shed. Screw two large cup hooks into a fence post or bin wall, spaced 2 inches apart, and hang the thermometer horizontally like a tool. Total cost is about $2–$4, and your thermometer becomes a grab-and-go habit.
Example: Put the hooks right above your compost fork; every time you grab the fork, the thermometer is staring at you.
Tip: Make a “core access port” with a piece of PVC so you don’t fight dense material
If your pile is heavy with wet leaves or food scraps, pushing a probe in can feel like stabbing a mattress. Drive a 1-inch PVC pipe (about 24 inches long) into the pile at a slight angle, then pull it out—this creates a pilot channel. When you take readings, slide the thermometer into that channel; it hits the core without bending or forcing.
Costs: A 10-foot stick of 1-inch PVC is often $8–$15 and makes 4–5 access ports for multiple bins.
Tip: Use a “thermometer sleeve” to protect the dial from rain and UV
Dials fade fast in full sun, and moisture sneaks into cheap housings. Cut a 6-inch piece of 2-inch PVC and cap one end; slide it over the dial end when stored outdoors. It’s a 10-minute job that can double the life of a $15–$35 thermometer.
Tip: Mark your probe like a dipstick for consistent placement
Use a permanent marker or wrap a thin zip tie at 12 inches and 18 inches from the tip. Now you can insert to the exact same depth every time, even if you’re checking in a hurry. Consistency is what turns random readings into a useful pattern.
What temperature targets actually mean (and what to do next)
Tip: Treat 120–160°F as your “working zone,” and react fast outside it
If the core is below 110°F during the first 1–2 weeks, you likely need more nitrogen (greens) or moisture. If it’s above 165–170°F, you’re burning off nitrogen and risking a stall—turn the pile and mix in browns. This simple threshold approach prevents the most common “it stopped heating” scenario.
Example: A pile at 175°F on day 3 often drops hard by day 6 unless you turn it once and add a bucket of dry leaves or shredded cardboard.
Tip: Use “temperature drop timing” to schedule turning (instead of calendar guilt)
Instead of turning every Saturday because someone said so, turn when the core temperature drops by about 20°F from its peak. That drop often indicates the microbes have used the most available oxygen and easy fuel in that area. Turning at the drop is a cheat code: you get faster compost with fewer turns.
Example: If your pile peaked at 150°F and slips to 128°F two days later, that’s your moment—turn it and watch it rebound.
Tip: Hit pathogen/weed-seed temps intentionally (and safely)
If your goal is to reduce weed seeds and potential pathogens, aim for at least 131°F (55°C) for several consecutive days, then turn so outer material moves into the hot center. The U.S. EPA Process to Further Reduce Pathogens (PFRP) standard for composting references 131°F for multiple days depending on method (e.g., 3 days in-vessel, longer for windrows) (EPA, 2003). You don’t need to “sterilize” a backyard pile, but you do want consistent hot cycles if you’re composting weeds or garden disease debris.
Tip: Don’t chase heat if your pile is too small to hold it
A pile under roughly 3x3x3 feet (about 1 cubic yard) loses heat too fast, especially in cool weather. If you’re stuck with a small bin, focus on steady moisture and chopped materials rather than obsessing over 150°F. Small piles can still make great compost—just on a slower timeline.
Example: A 2x2-foot tumbler might hover at 95–115°F in spring; that’s normal, and it still breaks down kitchen scraps well if you keep the mix balanced.
Shortcut diagnostics: what your thermometer is trying to tell you
Tip: Cool core + wet smell = not enough air (fix with structure, not more turning)
If the core is under 100°F and it smells sour or like ammonia, your pile is likely anaerobic from compaction or excess moisture. Mix in a structural brown like wood chips, chopped straw, or shredded cardboard at about 1 part structure to 3 parts wet material by volume. Then turn once to distribute—don’t keep spinning it daily like a washing machine.
Case example: A rainy-week pile made mostly of grass clippings hit 90°F and smelled like a swamp. Adding two 5-gallon buckets of shredded cardboard and turning once brought it back to 130°F within 48 hours.
Tip: Hot core + dry outer zone = you’re composting only the center
A hot center with cool edges usually means the outside is too dry or too coarse to join the party. When you turn, lightly sprinkle water as you rebuild so the whole pile reaches “wrung-out sponge” moisture—moist but not dripping. This is one of the fastest ways to shorten compost time without adding anything fancy.
Example: If the core reads 145°F but 6 inches in reads 85°F, your next turn should include watering each forkful for 2–3 seconds with a hose nozzle.
Tip: Temperature spikes above 165°F usually mean too much nitrogen in one pocket
Grass clumps, manure layers, or a big dump of kitchen scraps can create a hot spot. Break up clumps and “salt” the pile with browns as you rebuild—think a thin layer of shredded leaves after every 2–3 inches of greens. You’ll keep heat in the productive range without cooking the pile.
Tip: If the pile never heats, measure the ingredients with a bucket (not vibes)
For fast hot compost, a simple starting point is roughly 2–3 parts browns (dry leaves, shredded paper/cardboard) to 1 part greens (fresh grass, kitchen scraps) by volume. Extension guidance often points to a carbon-to-nitrogen ratio near 25–30:1 as a practical target for active composting (University of Illinois Extension, 2019). You don’t need lab math—just use a 5-gallon bucket and keep the ratios steady.
Case example: A gardener adding “some leaves” to a full bucket of kitchen scraps got repeated 95°F readings. Switching to 3 buckets of shredded leaves per 1 bucket of scraps pushed the pile to 135°F by day 2.
Set up a simple monitoring routine (the lazy way that works)
Tip: Take readings at the same time of day for cleaner data
Ambient temperature can nudge the outer zone reading, especially in shallow bins. Check at roughly the same time—morning is great—so your log reflects compost activity, not midday sun. Two checks per week is enough for most home piles; daily checks are only useful during the first week of a hot build.
Tip: Keep a 30-second “compost log” on painter’s tape
Stick a strip of painter’s tape on the bin lid and write: date, core temp, and one quick note (e.g., “turned,” “added leaves,” “watered 1 gal”). This beats phone apps because it’s right where you’re working and takes under a minute. When something stalls, you can usually see why at a glance.
Tip: Use two-point measuring to decide if turning is worth your effort
Measure the core and mid-depth. If the core is still above 130°F and mid-depth is climbing, don’t bother turning yet—you’re building heat outward. If the core has dropped and mid-depth is flat, turn to re-oxygenate and mix materials.
Money-saving options: buy vs DIY (and when each makes sense)
| Option | Typical Cost | Best For | What You Give Up |
|---|---|---|---|
| 20" analog compost thermometer | $12–$35 | Most backyard bins/piles | Manual reading only |
| 36" analog compost thermometer | $25–$60 | Large 4x4+ ft piles, windrows | More awkward storage |
| Digital probe (BBQ style) + long skewer guide | $15–$40 | Budget setup if you already own one | Probe length limits; moisture risk |
| DIY “pilot port” (1" PVC) + any long probe | $2–$5 per port | Dense piles, easy repeat readings | One extra step to install |
Tip: If you already own a digital meat thermometer, use it—just add a guide tube
You can get surprisingly usable compost readings with a digital probe if it’s long enough to reach 4–6 inches into the pile—great for tumbler compost and small bins. Pair it with a bamboo stake or metal rod to pre-poke a hole, so you don’t stress the probe. Just don’t leave electronics outdoors; store it inside to avoid moisture damage.
Tip: Don’t overspend on “smart” sensors unless you’re managing multiple piles
Wireless compost sensors are convenient, but a basic dial thermometer plus a routine will get you 90% of the benefit for 20% of the price. If you’re running two or more bays and doing batch composting, smart sensors can help you track peaks and drops without walking out daily. Otherwise, put the money toward a shredder or extra bin space—those speed compost more than apps do.
Real-world setups that solve common compost headaches
Scenario: The suburban bin that never heats above 105°F
Tip: Shrink particle size to “thumb joint” pieces for a quick temperature bump
Cold piles are often a surface-area problem: big leaves and chunky stems break down slowly and don’t pack closely enough for microbial action. Run leaves over with a mower, tear cardboard into 1–2 inch strips, and chop kitchen scraps roughly. Many gardeners see a 10–30°F increase within 2–3 days after resizing materials and rebuilding with the same ingredients.
Example: A 32-gallon bin stuck at 102°F jumped to 128°F after the owner rebuilt it with mower-shredded leaves and chopped veggie scraps, keeping the same 3:1 brown-to-green bucket ratio.
Scenario: The rainy-season pile that turns into sludge
Tip: Install a tarp “roof” with a 6-inch overhang and keep a dry-browns emergency stash
Rain doesn’t just add water—it pushes air out of the pore spaces compost needs. Hang a tarp so it sheds water but still allows side airflow, and keep one trash can of dry browns (shredded leaves, torn paper) nearby. When temps drop below 110°F and the pile looks glossy-wet, mix in 1–2 buckets of dry browns during the next turn.
Cost hack: A $6–$12 tarp plus a $0 stash of fall leaves often prevents the need to “start over” on a slimy pile.
Scenario: The big, beautiful pile that gets too hot (170°F+)
Tip: Cool it down by turning into a wider, lower shape and adding 10–20% browns
Oversized or nitrogen-heavy piles can run hotter than you want. Turn the pile and rebuild it a little wider and lower (think 4 feet wide and 3 feet tall instead of a tall cone), which releases heat faster and improves airflow. Add browns at roughly 10–20% of the pile volume during the rebuild to stabilize temperatures without killing activity.
Example: A 5x5-foot pile with fresh chicken manure hit 172°F. After one turn, reshaping, and adding three wheelbarrows of dry leaves (about 15% of volume), it steadied at 150°F for the next 5 days.
Scenario: The “is it finished yet?” pile that looks done but keeps reheating
Tip: Use temperature + a bag test to avoid spreading half-finished compost
Compost can look dark and crumbly while still having active pockets. If the pile reheats above 110°F after turning, it’s still working. For a quick check, seal a handful in a zip bag for 24 hours; if it smells sour or sharply ammonia-like when opened, let it cure another 2–4 weeks with occasional mixing.
Small build tweaks that make temperature readings more meaningful
Tip: Put your probe in from the side, not straight down from the top
Top-down readings often hit a dry crust or a cold cap layer and make you think the whole pile is cooler than it is. Insert the probe horizontally from the side at mid-height so the tip lands in the core. It’s also easier on your wrists and reduces bending the probe on sticks.
Tip: Avoid “layer cakes” unless you’re going to mix soon
Perfect stripes of greens and browns look tidy but create temperature confusion—your probe might land in a cold dry layer or a hot wet layer and mislead you. A better trick is rough mixing as you build: toss in a forkful of browns every time you add a bucket of greens. You get more even temperatures and fewer stink zones.
Tip: If you compost in a tumbler, measure right after spinning—then wait 15 minutes
Tumblers mix in outside air and can temporarily cool the mass. If you measure immediately, you’re partly reading fresh airflow. Spin, wait about 15 minutes for temperatures to stabilize, then take your reading for a more honest “core” number.
Sources you can trust (and why they matter)
Temperature targets aren’t folklore; they’re tied to microbial activity and sanitation standards. Cornell’s composting resources emphasize maintaining hot composting ranges for efficiency and management (Cornell Waste Management Institute, 2020). The U.S. EPA outlines time/temperature combinations used to reduce pathogens in composting systems (EPA, 2003). For practical mix targets, many extension services reference balancing carbon and nitrogen around the 25–30:1 neighborhood to support active decomposition (University of Illinois Extension, 2019).
If you build one simple thermometer habit, make it this: check the core twice a week for the first month and turn when the temp drops about 20°F from its peak. That single pattern catches nearly every compost problem early—before you’ve spent weeks feeding a pile that’s basically taking a nap.
Citations: Cornell Waste Management Institute (2020); U.S. Environmental Protection Agency (EPA) Process to Further Reduce Pathogens guidance (2003); University of Illinois Extension composting guidance on C:N targets (2019).