Indoor Plant Propagation Station
The kitchen counter is already crowded: a coffee maker, a drying rack, yesterday’s mail. And yet there they are again—three jars of pothos cuttings leaning toward the window like they’re trying to escape. You meant to “propagate a few plants,” but the cuttings multiplied, the labels disappeared, and now the whole operation looks like a science fair project with no plan. A propagation station fixes that. Not with fancy gadgets, but with a layout that gives your cuttings consistent light, stable warmth, and a clean workflow so you can start, track, and pot up plants without turning your home into a tangle of jars and soil.
I’m going to walk you through setting up an indoor propagation station like I would for a small patio redesign: we’ll pick a site, map the zones, match the plants to the conditions, and keep the maintenance realistic. This works for homeowners with a spare room and for renters who need something that breaks down in 10 minutes on moving day.
Start with the room’s “microclimate,” not the furniture
Propagation succeeds when you control three variables: light, temperature, and moisture. You don’t need a greenhouse—you need a consistent corner.
Light: decide between window light and grow light
If you have a bright window, measure it in hours, not vibes. Most leafy cuttings root best with 10–14 hours of bright, indirect light per day. A south- or east-facing window can work, but winter light often drops below what cuttings need to stay energetic. A simple LED grow light makes the station reliable year-round.
For context, university extension guidance commonly recommends long-day supplemental lighting for indoor plant growth; for example, Clemson Extension notes that many indoor plants respond well to extended photoperiods using artificial light when window light is inadequate (Clemson Cooperative Extension, 2020).
Temperature: aim for steady, not tropical
Most houseplant cuttings root faster at 70–75°F. If your home drops to 62°F at night, you can still propagate—just expect slower rooting. Heat mats are helpful for stubborn plants or chilly apartments, but they’re optional if your station sits away from drafty doors and HVAC vents.
Moisture: separate “wet work” from “dry work”
This is the biggest design upgrade. Wet work (water jars, rinsing perlite, misting domes) should happen over a tray or near a sink. Dry work (labels, pruning, potting mix storage) needs a clean surface so you’re not writing plant names on damp tape with muddy hands.
Layout strategy: build a station with three zones
Think of your propagation station like a tiny workshop. The best ones have a clear flow: prepare → root → pot up. That flow prevents the two classic mistakes: losing track of what’s what, and leaving rooted cuttings languishing in water for months.
Zone 1: Prep + tools (the “clean bench”)
Allocate a 24" × 18" clear surface for cutting, labeling, and tool storage. This can be a shelf, a rolling cart top, or a folding table. Keep it bright and uncluttered so you’re less likely to crush stems or mislabel.
- Must-haves: sharp snips, rubbing alcohol, waterproof labels, a pencil (ink runs), and a small bin for used leaves/stems.
- Nice-to-haves: rooting hormone, a headlamp for evening work, and a small cutting board that’s easy to sanitize.
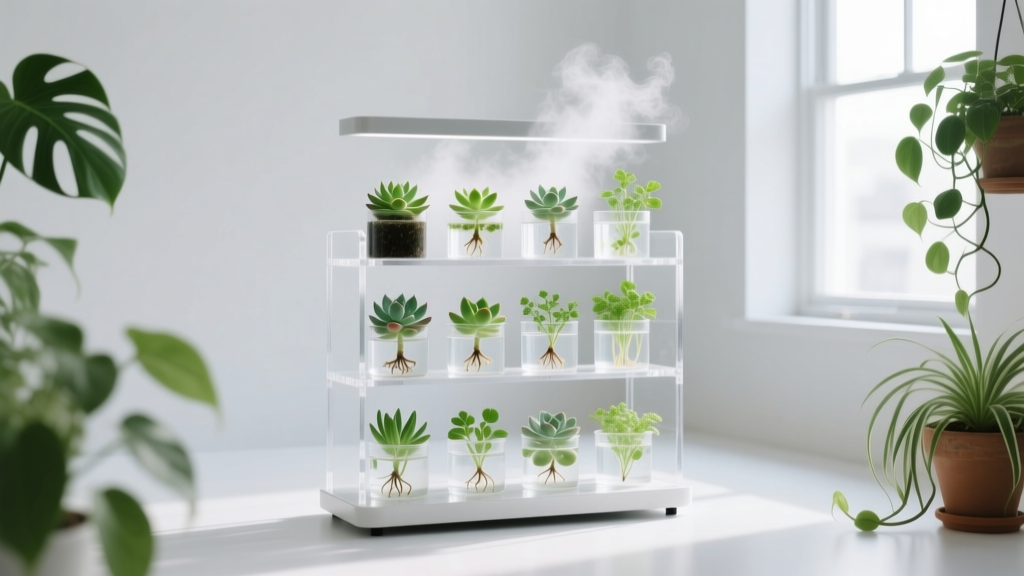
Zone 2: Rooting shelf (the “nursery”)
This is where cuttings live for 2–8 weeks. You’re designing for stability: steady light, no tipping jars, and enough headroom for plant growth.
A practical footprint is a 36" wide shelf section with 12–14" depth. On that, you can run:
- One light bar (or two) mounted under the shelf above.
- Two trays (10" × 20" standard nursery trays) to corral jars and pots.
- Humidity dome space for fussier plants (optional, but very useful).
Zone 3: Potting + quarantine (the “transition lane”)
Rooted cuttings need a smooth transition into soil—and a short “watch period” to catch pests before they mingle with your collection. Give yourself one tray or one shelf dedicated to newly potted starts for 7–14 days.
If you’re tight on space, Zone 3 can be a lidded tote with potting supplies and a clip-on light you only set up during potting sessions.
Three propagation station footprints (pick what fits your life)
Below are three real-world footprints I use when planning indoor plant work areas. The goal is to match your station to your space and your tolerance for visual clutter.
| Station Style | Best For | Footprint | Capacity | Typical Cost |
|---|---|---|---|---|
| Windowsill + tray | Renters, minimal gear | 36" × 6–10" | 6–12 cuttings | $15–$40 |
| Rolling 3-tier cart | Apartments, flexible layouts | 18" × 30" | 20–40 cuttings | $45–$120 |
| Wire shelf + grow lights | Plant people, high output | 36" × 14–18" | 50–100+ cuttings | $120–$280 |
Step-by-step setup (a propagation station you can actually maintain)
Set this up once, then let the routine do the work. Here’s the build sequence I recommend so you don’t end up rearranging everything three times.
- Pick the location. Choose a spot with stable temperatures and access to an outlet. Avoid placing the station directly over a heat vent or within 3 feet of an exterior door that gets frequent winter drafts.
- Define your footprint with painter’s tape. Mark the floor or countertop area you’re willing to dedicate (for example, 18" × 30" for a cart). This prevents “propagation creep.”
- Add containment first. Place one or two waterproof trays (10" × 20") before anything else. Trays are your insurance against water rings and spilled perlite.
- Install lighting. If using LEDs, hang or mount lights so the bulbs sit 8–12 inches above the top of your cuttings. Put them on a timer set to 12–14 hours daily.
- Stage your jars and propagation media. Group water-prop jars on one tray. Keep perlite/soil pots on the other. This keeps algae-prone water away from your potting mix.
- Create a labeling system. Keep labels and pencil in a small cup. Label at the moment you cut, not later. Include plant name + date.
- Set a “pot-up” trigger. Decide now: pot up most cuttings when roots reach 2–3 inches long or when you see secondary branching.
- Add a small waste bin. A simple countertop compost bin or a reused container prevents leaf debris from accumulating and attracting fungus gnats.
Plant selection: varieties that root well indoors (and what they teach you)
The best plants for an indoor propagation station are forgiving, fast, and resilient in average home humidity. Mix a few “confidence builders” with a couple of slower, more valuable plants so you get both momentum and payoff.
Fast, reliable water propagators
These are ideal if your station starts with jars and a sunny window.
- Pothos (Epipremnum aureum ‘Golden’): Roots quickly, tolerates lower light, and the nodes are obvious—excellent for learning correct cutting placement.
- Heartleaf philodendron (Philodendron hederaceum): Similar ease to pothos, but with thinner stems—good practice for gentle handling.
- Tradescantia zebrina: Extremely fast rooting; great for filling pots quickly. Also teaches you how to pinch tips to encourage bushiness.
- Scindapsus pictus ‘Exotica’: Slightly slower than pothos but still reliable. Benefits from warmer temps (closer to 72–75°F).
Best for perlite or sphagnum (cleaner roots, fewer rot issues)
If you’re tired of slimy stems or water that turns cloudy, these often do better in airy media.
- Monstera adansonii: Roots readily, but perlite reduces the chance of node rot and supports faster transition to soil.
- Hoya carnosa (green form): Slow-and-steady rooting; perlite in a small pot keeps moisture balanced. Patience required, but the cuttings store well without collapsing.
- Begonia (cane types like Begonia ‘Lucerna’): Can root in water, but perlite/sphagnum often yields sturdier roots and fewer mushy failures.
Leaf and rosette propagation (space-efficient, higher count per tray)
When space is limited, leaf props give you volume without needing tall jars.
- African violet (Saintpaulia ionantha): Leaf cuttings root well in warm, bright conditions. Keep humidity modestly elevated with a dome.
- Echeveria (many hybrids): Leaf propagation works best with bright light and a dry-to-slightly-moist rhythm. Your station needs excellent airflow; skip domes.
For propagation best practices like sanitation and timing, the Royal Horticultural Society emphasizes starting with clean tools and healthy stock plants (RHS, 2023). That’s not just formal advice—it’s what keeps your station from becoming a disease distribution center.
“Cuttings root best when you reduce stress: consistent light, clean tools, and a stable moisture level. The station isn’t about speed—it’s about repeatability.” — Interior plantscape designer’s studio note used in client installations
Scenario plans: three real homes, three different stations
Here’s how the same design principles play out in different spaces. Use the scenario closest to yours, then borrow details from the others.
Scenario 1: The renter with one bright window (no drilling allowed)
You have a 36-inch windowsill in an east-facing window that gets about 4–5 hours of morning sun. The trick is to avoid cooking cuttings in direct rays while still using that free light.
Layout: A single waterproof tray on the sill with a second tray on a nearby shelf for potting supplies. Use a sheer curtain to soften direct sun. Choose mostly pothos, philodendron, and tradescantia—plants that tolerate slight swings.
Budget: $20–$35 (tray, jars, labels). DIY alternatives: reuse pasta sauce jars; cut up an old mini-blind for plant tags.
Pro tip: Rotate jars every 2–3 days so stems don’t lean hard toward the light and kink.
Scenario 2: The homeowner with a laundry room corner (low natural light)
You’ve got an unused corner near the washer: convenient water access, but almost no sunlight. This is where a grow-light shelf shines—literally.
Layout: A 36" wide wire shelf with two levels. Top level: rooting tray with jars and perlite pots. Bottom level: potting mix bin and a quarantine tray. Add an LED light per shelf on a 14-hour timer.
Budget: $150–$250 total (shelf $60–$100, lights $40–$120, trays $10–$20, timer $10–$15). DIY alternative: use a sturdy bookcase you already own and mount inexpensive under-shelf LEDs with adhesive strips.
Plant picks: Add hoya and scindapsus here—consistent light will outperform a dim living room corner.
Scenario 3: The small-space plant collector (a “pretty” station in the living room)
You want function, but you also want the station to look intentional—something like a bar cart, not a lab bench.
Layout: Use a rolling cart (18" × 30") with a stylish tray on top for water props. Clip a grow light to the cart handle or a nearby shelf. Keep matching jars (same height) for visual calm. Hide perlite, sphagnum, and labels in a lidded box on the lower shelf.
Budget: $70–$160. DIY alternative: thrift a cart and spray-paint it; use a simple plug-in timer rather than a smart system.
Plant picks: Tradescantia zebrina for fast fullness, Monstera adansonii for statement cuttings, and African violet leaves under a small dome for a “nursery shelf” vibe.
Materials list with practical costs (and smart places to save)
The goal is to spend where it increases consistency: light control, spill control, and labeling. Everything else can be improvised.
- Waterproof trays (10" × 20"): $5–$12 each
- LED grow light bars: $20–$60 each (often 1–2 per station)
- Outlet timer: $10–$20
- Wire shelf (36" wide): $60–$100
- Humidity dome: $10–$25
- Heat mat (optional): $20–$40
- Perlite or sphagnum: $8–$18
Where to save: Jars, cups, and clear containers are almost always free if you reuse food jars. Also, skip branded propagation stands unless you love the look—your tray is doing the real work.
Where not to save: Cutting tools. A sharp pair of snips reduces crushing (and rot). If you only upgrade one tool, make it the pruners.
Spacing rules that keep the station tidy and the plants healthier
Crowding is sneaky indoors: airflow drops, algae blooms in jars, and you stop checking water levels because it’s annoying to move everything. Use these spacing rules:
- Jar spacing: Leave at least 2 inches between jars so you can lift one without bumping others.
- Light distance: Keep LEDs 8–12 inches above foliage; adjust as cuttings grow so leaves don’t touch the fixture.
- Tray capacity: A 10" × 20" tray comfortably holds about 8–12 standard jars or 12–18 small (2–3") nursery pots.
Maintenance rhythm: what it really takes each week
A propagation station shouldn’t add stress. If it takes more than a short loop each week, it’s oversized for your current season of life.
Weekly time estimate
Plan on 20–40 minutes per week for an active station (more if you’re potting up lots of plants). That includes changing water, checking for rot, topping up perlite moisture, and wiping trays.
Weekly checklist
- Water props: Refresh water every 7–10 days (or sooner if cloudy). Rinse jars to reduce algae.
- Perlite/sphagnum props: Check moisture every 3–4 days; the media should be lightly damp, not soggy.
- Sanitation: Wipe the work surface and snips with alcohol. Remove yellowing leaves promptly.
- Pest scan: Inspect leaf undersides and nodes. New cuttings can carry pests even when the mother plant looks fine.
Seasonal adjustments
Winter: Increase light hours to the upper end (closer to 14 hours) and keep cuttings away from cold glass. Expect slower rooting unless your room stays warm.
Summer: Watch for overheating near windows. If your station regularly exceeds 80°F, move it back from the glass or rely more on grow lights with curtains drawn.
Small upgrades that make a big difference (without making it complicated)
If your station is working but feels messy, these are the upgrades I reach for first.
- Standardize container heights. Matching jars reduce tipping and make it easy to set lights at a consistent height.
- Add a “ready to pot” tray. The moment roots hit 2–3 inches, move the jar to this tray. It becomes your visual to-do list.
- Use a simple log. A note on your phone with dates (cut, first roots, pot up) helps you learn your home’s rooting speeds.
Designing for renters: stability without wall anchors
Renters often avoid shelves because they don’t want holes in walls. You can still build a stable station.
- Choose a cart or freestanding shelf with a footprint no narrower than 18 inches.
- Place the heaviest items (bags of mix, extra pots) on the bottom shelf for ballast.
- Use cord clips and a power strip mounted with removable adhesive so cords don’t snag and tip jars.
When your station is “too successful” (and how to keep it from taking over)
The best problem is abundance: suddenly you have 30 rooted cuttings and nowhere to put them. The fix is to design a cap.
Set a maximum: for example, two trays of active propagation at any time. If a tray is full, you pot up before you start new cuttings. This keeps your station a steady pipeline rather than an ever-expanding backlog.
Once your station is dialed in, it becomes quietly satisfying: a place where plant projects start and finish, where tools live, where light is predictable, and where your living space stays livable. Instead of scattered jars on every ledge, you’ll have one intentional corner that turns a single pruning session into a handful of healthy new plants—rooted, labeled, and ready for their next pot.