Kitchen Pick-and-Cook Herb Garden
The pasta water is boiling over, you’ve got a pan warming, and the recipe calls for “a handful of fresh basil.” You glance at the fridge: a limp clamshell from last week, blackened around the edges. The nearest store is 12 minutes away—longer if you’re barefoot and already mid-sauté. This is the moment a pick-and-cook herb garden earns its keep: not a showpiece, not a weekend hobby, but a compact, reachable planting designed around how you actually cook.
I’m going to walk you through a layout that behaves like an extension of your kitchen—fast to harvest, tidy to maintain, and flexible for renters and homeowners. We’ll work from design principles first (so you can scale the idea to a balcony, patio, or backyard), then move into plant varieties, build steps, budgets, and three real-world scenarios.
Design principles: make the garden function like a pantry
Start with the “three-step harvest rule”
If you have to put on shoes, walk across wet grass, and hunt for snips, you’ll stop harvesting. Aim for a path from stove to herbs in roughly 30–60 seconds. For homeowners, that might be a bed within 10–20 ft of the back door. For renters, it might be a rail planter outside the kitchen window or a rolling cart by a bright patio door.
Place your herb zone where you already pause—near the grill, next to the back steps, or by the most-used exterior door. Keep a small hook or caddy nearby with snips and a towel. Convenience is a design feature.
Sunlight: design around your best 6 hours
Most culinary herbs perform best with 6–8 hours of sun daily, especially basil, rosemary, thyme, oregano, and sage. Some herbs tolerate less: mint, chives, parsley, and cilantro can handle 4–6 hours (and appreciate afternoon shade in hot climates). If you only have 3–4 hours of direct light, lean into shade-tolerant herbs and keep expectations realistic—harvest “accents,” not armfuls.
Practical check: watch the site on a weekend and note when sun hits and leaves. If the area gets strong morning sun (say 8 a.m.–1 p.m.), you’re in excellent shape.
Keep heights and habits from becoming a tangle
A pick-and-cook garden works when plants don’t crowd each other into an unlabeled thicket. Use a simple height map:
- Back or center (tall/woody): rosemary, sage, lemongrass, bay (in a pot)
- Middle (mounding): oregano, thyme, marjoram, basil
- Front edge (low/clumping): chives, parsley, cilantro, creeping thyme
Also separate “runners” (mint, lemon balm) into their own pots so they don’t colonize the bed. This isn’t a moral judgment about mint—it’s just plant behavior.
Design for clean harvesting: edges, access, and labels
You want to be able to pinch basil with one hand while holding a spoon in the other. That means:
- Bed width: keep beds to 3–4 ft wide so you can reach the center from either side without stepping into soil.
- Path width: allow at least 18–24 in for comfortable foot traffic and kneeling.
- Labeling: one weatherproof tag per plant group; it prevents accidental “mystery oregano” harvesting when you meant marjoram.
Layout strategies that scale to your space
The “Doorstep L” bed (best for small yards and townhomes)
This is my favorite homeowner layout: a raised L-shaped bed tucked near the kitchen exit. It turns a dead corner into a working station and keeps harvesting close.
Suggested dimensions: two runs—6 ft x 2 ft and 4 ft x 2 ft, 12 in tall. That’s enough room for 10–14 herb plants with breathing space.
Edge the inside corner with a flat stepping stone so you can pivot and harvest without compacting soil. If your door opens outward, keep the bed at least 36 in from the swing so it feels comfortable, not cramped.
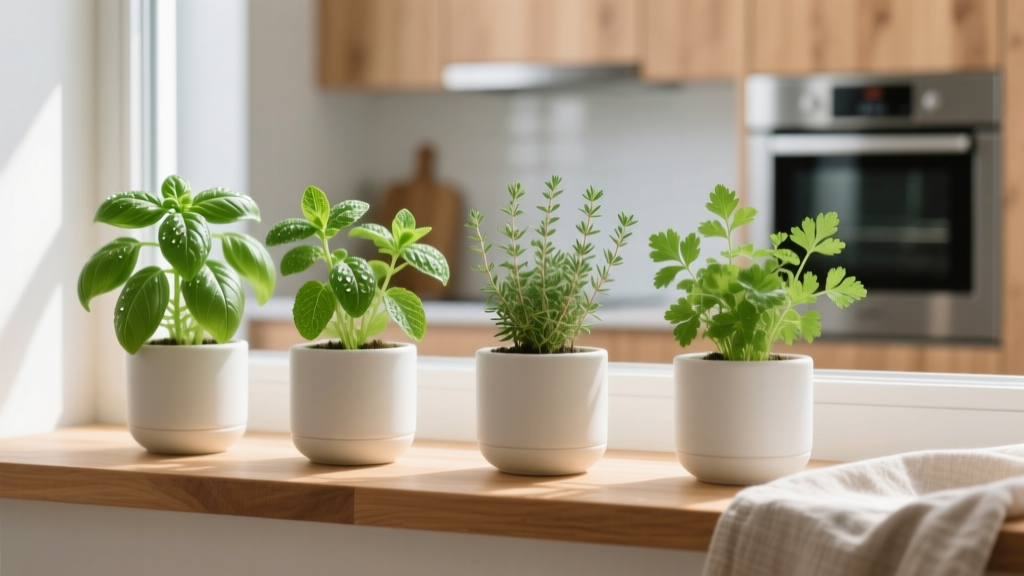
The “Balcony pantry” (best for renters and small patios)
If you rent or can’t build beds, use vertical and movable pieces:
- Rail planters: two 24 in rail planters for basil/parsley and thyme/oregano.
- One deep pot: 12–16 in diameter for rosemary or sage (they like room for roots).
- One shallow trough: 18–24 in long for cilantro and chives.
Keep a saucer under every pot if you’re on a balcony to avoid drips. Add a small folding stool to make harvesting comfortable—if it’s awkward, you won’t use it daily.
The “Grill-side strip” (best for families who cook outdoors)
Place herbs where they’re used: right by the grill. A 2 ft x 8 ft in-ground strip along a fence can handle heat-loving herbs. Use drought-tolerant picks (thyme, oregano, rosemary, sage) and add basil in a pot you can move if it gets scorched.
Design tip: keep the strip 12–18 in away from the grill pad so you’re not brushing plants with elbows or tools.
Plant selection: specific varieties that cook well and grow cleanly
Flavor matters, but so do growth habit and reliability. These varieties are widely available and behave predictably in home gardens.
Basil (fast, high-yield, wants warmth)
- ‘Genovese’ basil: classic Italian flavor, large leaves for pesto; harvest weekly to keep it branching.
- ‘Prospera’ basil: bred for downy mildew resistance (a common basil heartbreak in humid summers); useful for gardeners who’ve had basil fail mid-season.
Spacing: 10–12 in between plants. Sun: 6–8 hours.
Parsley (steady production, cold-tolerant)
- ‘Giant of Italy’ (flat-leaf): strong flavor and easy chopping.
- ‘Moss Curled’: decorative edging if you want a neater look, still useful in the kitchen.
Spacing: 8–10 in. Parsley tolerates 4–6 hours sun and keeps going into cool weather.
Thyme and oregano (structure plants that don’t flop)
- English thyme (Thymus vulgaris): compact, woody, and dependable.
- Greek oregano (Origanum vulgare subsp. hirtum): strong culinary flavor; more “pizza shop” than mild ornamental oregano.
Spacing: thyme 10–12 in, oregano 12–18 in. Both prefer 6+ hours of sun and well-drained soil.
Chives (tidy clumps, early harvest)
- Garlic chives: broader leaves, mild garlic note, white flowers that are also edible.
- Common chives: classic onion flavor, purple blooms that pollinators love.
Spacing: 8–10 in. Great “front edge” plant; tolerates part sun.
Rosemary and sage (woody anchors, best in pots in cold zones)
- Rosemary ‘Arp’: one of the more cold-tolerant selections (still benefits from protection in harsh winters).
- Sage ‘Berggarten’: broad leaves, strong kitchen flavor, tidy habit.
Spacing: rosemary 24–36 in (or dedicate a 14–18 in pot), sage 18–24 in. Full sun, lean soil, don’t overwater.
Cilantro (quick spring/fall herb with a heat switch)
- ‘Slo-Bolt’ cilantro: slower to flower in warming weather; extends harvest.
Spacing: 6–8 in. Best with morning sun and afternoon shade in hot climates. Succession sow every 2–3 weeks for steady leaves.
A quick comparison: match herbs to your conditions
| Herb | Sun Need | Typical Spacing | Best Container Size | Notes for Pick-and-Cook Use |
|---|---|---|---|---|
| Basil (‘Genovese’, ‘Prospera’) | 6–8 hrs | 10–12 in | 10–12 in pot | Harvest weekly; pinch tips to prevent flowering |
| Parsley (‘Giant of Italy’) | 4–6+ hrs | 8–10 in | 8–10 in pot | Cut outer stems; steady all season |
| Thyme (English) | 6+ hrs | 10–12 in | 8–10 in pot | Stays compact; great edging herb |
| Oregano (Greek) | 6+ hrs | 12–18 in | 12 in pot | Can spread; shear after bloom for fresh growth |
| Rosemary (‘Arp’) | 6–8 hrs | 24–36 in | 14–18 in pot | Woody anchor; avoid soggy soil |
Step-by-step setup: build a pick-and-cook bed in an afternoon
This sequence assumes a small raised bed near the kitchen door, but the logic works for containers too: stable base, good soil, smart spacing, then irrigation.
- Choose the harvest route. Stand at your kitchen prep area, walk to the intended spot, and time it. If it’s more than 60 seconds, consider moving the garden closer or switching to containers by the door.
- Mark the footprint. For a simple bed, outline a 4 ft x 6 ft rectangle with stakes and string. Keep at least 18 in clearance for a path on the working side.
- Build or place the frame. A 12 in tall raised bed is a sweet spot: enough soil depth for herbs, comfortable to kneel beside. DIY option: untreated cedar boards or a modular kit. Renter option: skip the frame and use 3–5 large pots grouped tightly like a “bed.”
- Add soil mix. Use a blend that drains well. A practical target is roughly 60% compost + 40% topsoil, plus a few handfuls of perlite if your soil holds water. Herbs hate “wet feet.”
- Place plants in their positions (before digging). Set pots on top of the soil to test spacing: rosemary/sage at the back, basil mid-bed, parsley/chives front. Ensure each plant has its spacing buffer (for example, oregano needs 12–18 in).
- Plant and water in thoroughly. Water until moisture reaches the full depth—then let the surface dry slightly between waterings for Mediterranean herbs.
- Add a thin mulch. Use 1 in of fine bark or shredded leaves, keeping mulch away from crowns. This cuts splashing (cleaner leaves) and reduces watering frequency.
- Install simple irrigation (optional but powerful). A soaker hose or drip line on a timer saves herbs during hot weeks. Even one $25–$45 timer can prevent the “I forgot” basil crash.
- Add labels and a snip station. A $10 container with snips and plant tags removes friction—your future self will thank you mid-recipe.
Budget and DIY alternatives (with real numbers)
A pick-and-cook garden doesn’t need designer materials. It needs decent soil and repeatable access.
- Budget container setup (balcony/patio): 4–6 pots at $6–$15 each, potting mix $12–$25, 6 herb starts at $3–$6 each. Expect roughly $60–$140 total depending on what you already have.
- Small raised bed setup (4 ft x 6 ft x 12 in): bed kit or lumber $80–$180, soil/compost fill $60–$120, plants $30–$70, mulch and labels $10–$25. Typical total: $180–$395.
- DIY savings: use food-safe buckets (drilled) for herbs like basil and parsley; repurpose a wooden wine crate lined with landscape fabric for a shallow trough (best for cilantro and chives). Source compost from municipal programs if available.
Spacing and yield: the practical math that keeps it usable
If you plant too tightly, you’ll get a lush look for three weeks—then airflow drops, mildew rises, and harvesting becomes annoying. The simplest rule: space for the mature plant, not the nursery pot.
Example for a 4 ft x 6 ft bed (24 sq ft):
- 2 basil plants at 12 in spacing
- 1 oregano at 18 in
- 2 thyme at 12 in
- 2 parsley at 10 in
- 2 chives at 10 in
- 1 sage at 24 in (or keep sage in a pot to free bed space)
That’s 10 plants with room to harvest around each. If you want cilantro, tuck it into a front corner and plan to re-sow as it bolts.
“The right plant in the right place is the foundation of sustainable landscapes.” — U.S. Environmental Protection Agency (EPA), WaterSense program materials (2023)
Citations you can trust (and why they matter here)
Herbs are simple, but two things consistently make or break them: light and drainage. Cooperative Extension resources are especially reliable for home-scale growing.
- University of Maryland Extension notes most herbs prefer full sun and well-drained soil, with some tolerance for partial shade depending on the herb (University of Maryland Extension, 2021).
- Colorado State University Extension emphasizes matching herbs to site conditions and highlights drainage and sun needs as key success factors (Colorado State University Extension, 2020).
Three real-world scenarios (and how I’d design each)
Scenario 1: The renter with a 6 ft balcony and only morning sun
You get sun from about 8 a.m. to 12 p.m. (4 hours), and wind dries containers quickly. I’d build a “balcony pantry” cluster: a deep pot for rosemary only if you can give it the brightest corner; otherwise, skip rosemary and go heavier on parsley, chives, thyme, and mint (mint in its own pot).
Use two 24 in rail planters: one for parsley + chives (they tolerate part sun), one for thyme + oregano (they still want light, so put them where sun is strongest). Add a 12 in pot of ‘Prospera’ basil and be prepared to water more often—containers can need watering 3–5 times per week in summer.
Scenario 2: The townhouse with a narrow side yard and a hose bib 30 ft away
There’s sun, but watering is annoying—classic reason gardens fail. Here I’d use a long “grill-side strip” approach even if you don’t grill: a 2 ft x 8 ft bed with a soaker hose run from the bib and a simple timer. Put drought-tolerant herbs (thyme, oregano, sage) in the ground and keep basil in two pots you can carry closer to the hose for quick watering.
Design detail: lay a 24 in stepping-stone path alongside the strip. You’ll harvest more if your feet stay clean and stable.
Scenario 3: The family backyard where kids and dogs cut through everything
If traffic is constant, protect the herbs with a defined edge. I’d do a 12 in tall raised bed with a 24 in mulch path around it, placed just outside the main run line from door to play area. Choose sturdier herbs that bounce back from occasional brushing: chives, thyme, oregano, sage. Basil can work, but it’s more delicate—plant it toward the inside of the bed rather than the edge.
Add one “sacrificial” stepping stone at the corner closest to the door. That small detail keeps people from stepping into soil when they lean in for a quick pinch of herbs.
Maintenance expectations: how much time it really takes
A functional herb garden should feel like light upkeep, not a second job. For a 4 ft x 6 ft bed or an equivalent container cluster, plan on about 20–40 minutes per week during the main growing season.
- Weekly (10–20 minutes): harvest and pinch basil tips, snip thyme/oregano lightly, remove yellow leaves, quick weed pull.
- Weekly (10–20 minutes): water check (more often for containers), and look for aphids on parsley and basil tips. A firm spray of water often solves minor outbreaks.
- Monthly (15 minutes): shear oregano after flowering to keep it tender; top-dress with a thin layer of compost (especially in containers).
Seasonal tasks:
- Spring: plant after frost for basil; direct sow cilantro and dill early; refresh potting mix in containers by replacing the top 2–3 in.
- Summer: succession sow cilantro if you use it often; provide afternoon shade for parsley in hot regions.
- Fall: cut back woody herbs lightly (don’t prune rosemary hard into old wood); pot up rosemary to bring indoors if winters are cold.
- Winter (if growing indoors): prioritize chives and parsley under a bright window; expect slower growth unless you add a small grow light.
Small design upgrades that make it feel like a chef’s garden
If you want the space to feel intentional (not just a cluster of pots), focus on three upgrades that don’t require much money:
- A hard surface landing: one 18 in x 18 in paver by the bed gives you a clean place to stand and harvest.
- A consistent container look: matching pots (even inexpensive ones) makes the garden read as a “set,” which looks calmer and more designed.
- A dedicated “cutting bowl” hook: hang a small metal bowl or basket nearby for harvested sprigs so you don’t walk back inside dripping soil or water.
The best compliment a pick-and-cook herb garden can earn is that you forget it’s a garden. It becomes a habit: open the door, pinch what you need, and toss it straight into the pan while it’s still fragrant. When that happens, you’ve designed it right—close, clear, and planted with herbs that behave as well as they taste.