Bone Meal Benefits for Cucumbers
Every summer I hear the same complaint: “My cucumber vines look fantastic… but I’m barely picking any cucumbers.” The leaves are big, the vines are running, and the flowers show up—then they drop, or the fruit starts and stalls. In many backyards, that story traces back to one thing: the plant is growing fast but doesn’t have the right nutrition balance to support steady flowering and fruit set. Bone meal can help—sometimes dramatically—but only when you use it for the right reason, at the right time, and in the right soil.
Bone meal is not a magic powder. It’s primarily a slow-release source of phosphorus and calcium. Cucumbers don’t need huge amounts of phosphorus compared to, say, root crops—but phosphorus matters at planting and early growth for root development, flowering, and overall energy transfer inside the plant. The catch is that phosphorus is stubborn in soil: too little can limit production, but too much can lock out micronutrients and contribute to runoff pollution. So we’ll treat bone meal like a tool, not a habit.
This guide is written the way I’d talk you through it at the garden gate: practical steps, real measurements, and the troubleshooting I’ve learned after watching cucumbers thrive (and flop) in raised beds, clay yards, and containers.
What bone meal actually does for cucumbers (and what it doesn’t)
Most bone meal products analyze around 3-15-0 (N-P-K) or 4-12-0. That means it’s high in phosphorus, low in nitrogen, and has little to no potassium. It also adds calcium. For cucumbers, the big benefits show up when:
- Your soil test shows low phosphorus (common in brand-new beds filled with low-fertility topsoil, or sandy soils).
- Your pH is in a range where phosphorus is available (roughly pH 6.0–7.0 is a sweet spot for most vegetables).
- You apply it where roots can reach it and give it time to break down (bone meal is slow, especially in cool soil).
Bone meal won’t fix:
- Pollination issues (lots of flowers but no fruit)
- Irregular watering (bitter fruit, misshapen cucumbers)
- Low potassium (weak fruiting, poor disease tolerance)
- Cold soils (slow growth early on)
If you only remember one thing: bone meal is best used as a pre-plant or early-season amendment, not a mid-season “rescue” for already-stressed vines.
“Phosphorus is relatively immobile in soil, so placement near the root zone is important—broadcast applications can be much less efficient than banding.” — University of Minnesota Extension soil fertility guidance (2019)
Start with the basics cucumbers demand: soil temperature, light, and water
Before we talk feeding, get the fundamentals right. Cucumbers are quick to punish you if any one piece is off.
Soil temperature and planting window
Cucumbers want warm soil. If you plant too early, roots sit cold and bone meal breaks down slowly.
- Plant outdoors when soil is consistently at least 65°F (18°C).
- Air temps should be reliably above 60°F (16°C) at night.
- Ideal growth range is roughly 70–90°F (21–32°C).
This isn’t fussiness; it’s biology. Warmth drives root activity, microbial action, and nutrient uptake—especially phosphorus.
Light requirements
For strong flowering and fruiting:
- Give cucumbers 8+ hours of direct sun.
- In hot climates, a little late-afternoon shade can reduce stress, but too much shade = lots of leaves, fewer cucumbers.
Watering: keep it even or pay the price
Uneven moisture is one of the biggest reasons gardeners end up blaming fertilizer. For cucumbers:
- Aim for about 1–1.5 inches of water per week from rain + irrigation.
- In containers or heat waves over 90°F (32°C), you may water daily.
- Water at the base early in the day; avoid wetting leaves at night to reduce mildew.
Consistency matters more than volume. Fluctuating wet/dry cycles can trigger bitterness and odd shapes.
Soil prep for cucumbers: where bone meal fits best
Cucumbers love a fertile, well-drained soil with plenty of organic matter. If your soil is compacted clay, amend structure first. If it’s sand, focus on building water-holding capacity.
Target soil conditions
- pH: aim for 6.0–6.8 (up to 7.0 is typically fine)
- Texture: crumbly, drains well, but holds moisture
- Organic matter: generous compost, especially in raised beds
Here’s the key with phosphorus: availability drops when soil is too acidic or too alkaline. Many gardeners toss in bone meal without checking pH, then wonder why nothing changes.
Soil testing is worth it. Many university labs and county extension offices offer tests that show phosphorus levels and pH. The University of Massachusetts Soil and Plant Nutrient Testing Laboratory emphasizes basing phosphorus additions on soil test results to prevent unnecessary buildup (UMass Extension guidance, 2023).
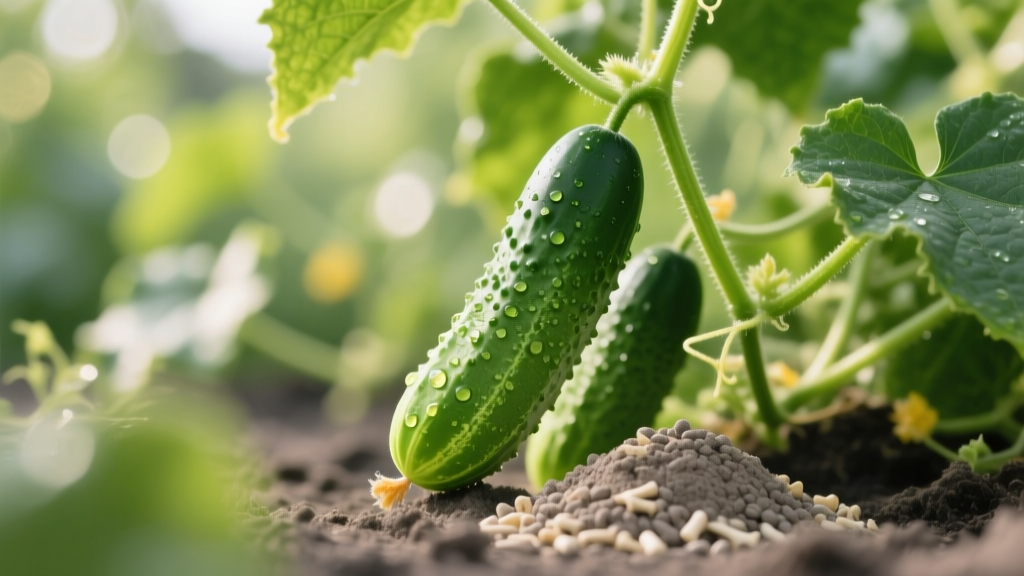
How to apply bone meal correctly (garden beds)
Bone meal works best when placed where roots will grow—mixed into the planting zone, not sprinkled on top.
- Before planting, loosen soil 8–10 inches deep.
- Mix compost in (about 1–2 inches of compost over the bed).
- Apply bone meal at 2–3 tablespoons per planting hole for transplants, or 1/2 cup per 10 square feet for rows/beds (adjust down if your soil test shows medium-to-high phosphorus).
- Blend it thoroughly into the soil so it’s not concentrated in a lump.
- Water in well to settle soil around roots.
Timing: Apply 1–2 weeks before planting if you can, especially in cooler spring soils. That gives microbes time to start breaking it down.
How to apply bone meal in containers
Containers are their own world. Potting mixes can be low in minerals and nutrients, so bone meal can help—if your mix isn’t already “pre-fertilized.”
- For a 5-gallon container, mix in 1–2 tablespoons of bone meal before planting.
- Use a potting mix that drains well; cucumbers hate soggy roots.
- Pair bone meal with a balanced fertilizer that includes potassium, or plan to supplement later.
Note: Bone meal is not a complete fertilizer. In containers, you’ll almost always need additional feeding once vines start flowering.
Feeding cucumbers: bone meal compared to other options
Think of cucumber nutrition in phases: early root establishment, then vine growth, then flowering/fruiting. Bone meal shines in the first phase. After that, cucumbers need steady nitrogen (not too much) and strong potassium for fruit quality.
| Amendment / Fertilizer | Typical N-P-K | Release speed | Best timing for cucumbers | What it’s best for |
|---|---|---|---|---|
| Bone meal | 3-15-0 (varies) | Slow (weeks to months) | Pre-plant / early season | Root support, flowering support when P is low |
| Balanced organic fertilizer | 4-4-4 (example) | Moderate | Planting + midseason | All-around nutrition |
| Fish emulsion | 5-1-1 (example) | Fast | Early vine growth, rescue feed | Quick nitrogen boost (easy to overdo) |
| Sulfate of potash | 0-0-50 | Moderate | At flowering / fruiting | Fruit quality, stress tolerance (potassium) |
| Compost | Low, variable | Slow | Anytime; best pre-plant | Soil structure, steady nutrition, microbes |
A practical feeding schedule that actually works
Here’s a simple, reliable approach for home gardens (assuming you start with compost and decent soil):
- At planting: compost + bone meal (only if soil test indicates low P, or your bed is new/poor).
- 2–3 weeks after planting: side-dress with a balanced fertilizer (follow label rate; common organic granular rates are around 2–4 tablespoons per plant, but labels vary).
- At first female flowers / fruit set: prioritize potassium. If leaves are lush but fruiting is weak, go light on nitrogen.
Colorado State University Extension notes that excess nitrogen can push heavy vegetative growth at the expense of flowers and fruit (CSU Extension vegetable fertility guidance, 2020). This is a common way gardeners accidentally reduce cucumber harvests: they “feed” with high-N lawn fertilizer or too much fresh manure, and the vine turns into a leaf factory.
Three real-world scenarios: when bone meal helps (and when it’s the wrong tool)
Scenario 1: New raised bed with bland soil, weak flowering
What you see: Healthy vines but slow flowering; plants seem to “idle” after transplanting.
What’s often happening: New bed mixes (topsoil + peat/wood products) can be low in phosphorus and calcium, and microbial life hasn’t stabilized yet.
What to do:
- Before planting next round, mix 1/2 cup bone meal per 10 sq ft into the top 8 inches.
- Add 1–2 inches compost to build biology.
- Mulch after the soil warms to keep moisture steady.
Scenario 2: Container cucumbers that flower but stall out
What you see: Flowers appear, tiny cucumbers form, then abort; leaves look “okay,” but production is low.
Likely causes: Containers dry fast, and nutrients leach out. Bone meal alone won’t carry a container planting through peak fruiting.
What to do:
- Use bone meal 1–2 tbsp per 5-gallon pot at planting (optional if your mix already contains fertilizer).
- Switch to a consistent liquid feed once flowering begins (often every 7–14 days, depending on product strength).
- Make watering boring and regular; in heat, that might be daily.
Scenario 3: Old garden bed with repeated fertilizing and disappointing cucumbers
What you see: Vine growth is strong, but cucumbers are pale, production is inconsistent, and leaves show odd deficiency patterns even though you “feed a lot.”
What’s often happening: Phosphorus buildup. Repeated bone meal or high-P fertilizers can push soil P high enough to interfere with micronutrient uptake.
What to do:
- Stop adding bone meal until a soil test says you need it.
- Shift to compost + balanced fertilizer, and add potassium if needed for fruiting.
- Check pH; correct toward 6.2–6.8 if it’s outside that range.
Common cucumber problems bone meal gets blamed for (and how to actually fix them)
Bone meal is slow, and cucumbers are fast. That mismatch leads to confusion. Below are the issues I see most, with fixes that work in real gardens.
Troubleshooting: lots of flowers, no cucumbers
Symptoms: Flowers open, then drop; you don’t see baby cucumbers swelling.
Most likely causes: Pollination problems, heat stress, or too much nitrogen—not a phosphorus shortage.
Fix:
- Encourage pollinators: avoid spraying insecticides, add nearby blooms.
- Hand-pollinate in the morning for 3–5 days to test the theory.
- If vines are extremely leafy and dark green, back off nitrogen and focus on steady watering and potassium.
Troubleshooting: misshapen cucumbers (fat on one end, skinny on the other)
Symptoms: Curved, lopsided fruit; one end doesn’t fill out.
Cause: Incomplete pollination is the #1 culprit; uneven watering can make it worse.
Fix:
- Hand-pollinate early in the day when flowers first open.
- Keep soil moisture even: aim for the 1–1.5 inches/week guideline.
- Mulch with straw or shredded leaves once soil is warm.
Troubleshooting: bitter cucumbers
Symptoms: Bitter taste, especially near the stem end.
Cause: Stress—most often drought swings or heat stress.
Fix:
- Water consistently; don’t let plants wilt regularly.
- Harvest younger: many slicers taste best around 6–8 inches long (variety-dependent).
- Provide afternoon shade in extreme heat, especially above 95°F (35°C).
Troubleshooting: yellow leaves, slow growth even after adding bone meal
Symptoms: Overall pale plant, older leaves yellowing, weak growth.
Likely cause: Nitrogen deficiency, cold soil, or root stress—not something bone meal fixes quickly.
Fix:
- Check soil moisture (too wet can suffocate roots; too dry limits uptake).
- Warm the bed with black plastic or plant later next time if soil is under 65°F.
- Use a quick, light nitrogen feed (like fish emulsion) at label rates, then return to balanced feeding.
Troubleshooting: powdery mildew mid-to-late season
Symptoms: White powdery coating on leaves, reduced vigor, declining harvest.
Reality check: Bone meal doesn’t prevent powdery mildew. Overfeeding nitrogen can make foliage more susceptible, though.
Fix:
- Improve airflow: trellis vines, prune only enough to reduce tangles.
- Water at soil level; avoid night watering on foliage.
- Remove heavily infected leaves; don’t compost diseased foliage if your compost stays cool.
Bone meal application tips that prevent the common mistakes
I’ve seen bone meal used in ways that waste money or cause side effects. These habits keep it useful and safe.
Don’t guess—use a soil test when possible
Phosphorus is one of the nutrients most likely to build up with repeated applications. If you’ve fertilized for years, get a test. Many university extension programs recommend adding phosphorus only when needed based on soil tests to reduce