Curing Blight in Citrus Trees
You walk out to the citrus tree you’ve babied for years, and the canopy looks… tired. A few twigs are bare. Leaves are yellowing in patches. The fruit that should be swelling up nicely is staying small, or dropping. Then you notice it: a dark, sunken spot on a twig, or a crusty lesion on the trunk that looks like it’s been there forever. Most home gardeners call all of this “blight,” and I get why—citrus problems can look the same at first glance. The trick is that “blight” in citrus is usually a mix of stress (watering, soil, roots) plus a disease organism taking advantage of the opening.
This article is about curing “blight” the way a seasoned gardener actually does it: by tightening the basics, identifying the most likely culprits, and using targeted treatments only when they’ll make a real difference. If you do the steps below in order, you’ll stop the slide and—more importantly—keep it from coming back.
First, what gardeners mean by “blight” on citrus
“Blight” isn’t a single citrus disease. In home landscapes it commonly describes one (or more) of these:
- Root and crown rot (often Phytophthora) causing canopy thinning, yellow leaves, dieback, and gumming at the crown.
- Citrus canker (bacterial) causing raised lesions with yellow halos on leaves and fruit.
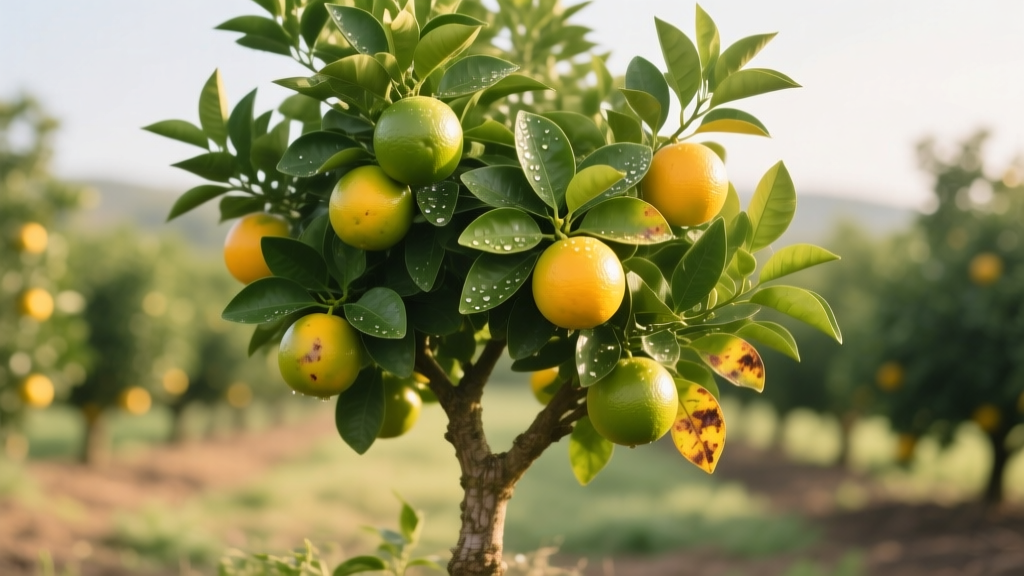
- Melanose (fungal) causing rough, sandpapery spots on fruit and leaves, especially in humid weather.
- Greasy spot (fungal) causing yellow blotches and leaf drop, often worse in late summer/fall.
- Twig dieback triggered by stress, sunburn, borers, pruning wounds, and opportunistic fungi.
Your cure depends on which one you’re dealing with. But the same foundation—watering, drainage, light, and cleanup—supports every recovery plan.
“Most disease outbreaks in the home orchard start with stress: saturated roots, dense shade, or lingering wet foliage. Fix the stress, then treat the pathogen.” — Extension plant pathology guidance summarized from University of Florida IFAS materials (2023)
Quick diagnosis: match the symptom to the likely cause
Before you spray anything, do a 10-minute inspection. Bring hand pruners, a rag, and rubbing alcohol (70%). Look at leaves (top and underside), small twigs, trunk/crown (where trunk meets soil), and fruit.
Symptom checker (fast)
- Yellow leaves + wilted look even when soil is wet: suspect Phytophthora root/crown rot or overwatering.
- Gumming (amber sap) at trunk base, bark cracking, darkened tissue: crown rot / foot rot (Phytophthora).
- Raised corky leaf spots with yellow halos; fruit spots; defoliation: citrus canker.
- Rough “mud-splatter” specks on fruit/leaves, often on older wood: melanose.
- Black sooty coating on leaves: sooty mold (not a blight itself) from honeydew—scale, whiteflies, aphids.
- Dieback on the sunny side after a heat wave: sunburn + drought stress; secondary infections may follow.
If you can’t decide, start with the least risky actions: correct watering and drainage, prune dead wood, sanitize tools, and manage insects. Those steps help no matter what the lab diagnosis would be.
Watering: the #1 lever for curing citrus “blight”
Citrus wants deep watering and then a chance to breathe. Roots that sit wet invite root rot organisms, and once fine feeder roots are gone, the canopy looks “blighted” fast.
How much water (real numbers that work)
Use this as a starting point for in-ground trees during warm weather (adjust for your climate and soil):
- Young trees (1–3 years): 5–10 gallons per watering, 2–3 times per week in hot weather.
- Established trees (4+ years): 15–25 gallons per watering, about once every 7–10 days in summer if there’s no rain.
In winter, many home landscapes can cut watering by 50–70% (or shut it off entirely during rainy periods). Citrus roots slow down in cool soil, and “helpful” winter watering is a classic way to set up spring root problems.
The finger test + the shovel test
Don’t trust the surface. Use these checks:
- Finger test: If the top 2–3 inches are dry, that’s a green light to check deeper.
- Shovel test: Dig 6–8 inches down near the dripline. Soil should feel cool and slightly moist—not soggy and not dusty.
Stop watering the trunk
If your irrigation hits the trunk or keeps the crown wet, fix it today. Keep emitters or hose flow 8–12 inches away from the trunk and water out toward the dripline. A constantly damp crown is a welcome mat for Phytophthora.
Soil and drainage: cure the cause, not just the symptoms
Most citrus “blight” cases I see in home gardens trace back to poor drainage—especially trees planted a little too deep, in heavy clay, or in lawn areas that get frequent irrigation.
Check planting depth (this is huge)
The root flare (where the trunk widens at the base) should be visible. If soil or mulch is piled against the trunk, pull it back. Exposed crown + airflow is your friend.
Do a simple percolation check
Dig a hole 12 inches wide and 12 inches deep near the tree (not right against the trunk). Fill it with water. If water is still sitting there after 4 hours, you have drainage issues that can fuel root disease.
Mulch, but keep it off the trunk
Mulch helps stabilize moisture and supports beneficial soil life, but mulch volcanoes cause crown rot.
- Apply 2–4 inches of wood chip mulch under the canopy.
- Keep a bare ring 6 inches away from the trunk.
Light and airflow: stop the leaf-wetness cycle
Fungal and bacterial problems explode when foliage stays wet. Dense canopies dry slowly, and shaded trees struggle to outgrow disease damage.
Sun requirements
For recovery, aim for 6–8 hours of direct sun. If a citrus tree is limping along in 3–4 hours of sun, it becomes a magnet for issues (and fruit quality drops, too).
Pruning for airflow (without overdoing it)
Prune to remove:
- Dead, twiggy interior growth
- Crossing branches that rub
- Suckers below the graft
- Branches touching soil or mulch
Make cuts back to healthy wood. Disinfect pruners with 70% isopropyl alcohol between suspicious cuts, especially if you see canker-like lesions.
Feeding: help the tree regrow without pushing weak, disease-prone flush
A “blighted” citrus tree often looks like it needs fertilizer yesterday. Sometimes it does. But heavy nitrogen on a stressed root system can backfire—soft flush attracts pests and can worsen foliar disease cycles.
Practical feeding schedule
For most home gardeners, this works well:
- Timing: Feed in early spring as new growth starts, then again in late spring/early summer. In mild-winter climates, a third light feeding in late summer can help.
- Amount: Follow your fertilizer label rates based on tree age/size. For a typical backyard tree, avoid exceeding 1 pound of actual nitrogen per year for mature trees unless a soil test says otherwise.
If leaves are pale with green veins (interveinal chlorosis), consider micronutrients—especially iron or zinc—but don’t guess. A local soil test and/or leaf tissue test is worth it when symptoms persist.
University of Florida IFAS notes that nutrient problems are common in citrus grown on high pH soils and can mimic disease stress (University of Florida IFAS Extension publication, 2023).
Method comparison: what actually works against “blight” symptoms
When gardeners ask me “Should I spray copper?” my answer is: sometimes, but it depends. Here’s a practical comparison of common approaches.
| Method | Best for | Typical timing | Pros | Cons / limits |
|---|---|---|---|---|
| Watering correction + drainage fixes | Root/crown rot symptoms, general decline | Start immediately; reassess in 2–4 weeks | Highest success rate; prevents relapse | Requires patience; canopy recovery can take 6–12 weeks |
| Sanitation pruning (dead/diseased twigs) | Twig dieback, melanose sources, airflow issues | Dry weather; avoid heavy pruning in extreme heat | Fast improvement in airflow; reduces inoculum | Overpruning can sunburn bark; disinfect tools |
| Copper sprays | Canker suppression, some fungal leaf/fruit spots | Often during new flush or before wet periods | Reliable protectant when timed right | Not curative on existing lesions; can russet fruit if mis-timed |
| Phosphite/phosphonate products | Phytophthora management (root/crown rot) | Often spring/fall per label | Useful tool when combined with drainage correction | Not a substitute for fixing wet soil; must follow label |
Research and extension guidance consistently emphasize that protectant sprays (like copper) work best when applied before infection pressure peaks, and they won’t erase old damage (UC IPM Guidelines for Citrus, 2022).
Troubleshooting: specific symptoms and exactly what to do
Problem: Leaves yellowing and dropping, soil stays wet
Most likely: Overwatering, poor drainage, or Phytophthora root rot.
Do this (in order):
- Turn off irrigation for 7–10 days (unless you’re in extreme heat and the soil dries fully).
- Pull mulch back from trunk to expose the crown.
- Check for gumming or darkened bark at the base. If present, gently scrape a tiny area: healthy tissue is green; infected tissue is brown.
- Improve drainage: redirect runoff, break up berms that trap water, and avoid watering nearby lawn zones.
- If crown rot is suspected and conditions favor it, consider a labeled phosphonate treatment and follow the label exactly.
Problem: Raised leaf spots with yellow halos; fruit lesions
Most likely: Citrus canker (bacterial).
Do this:
- Prune out badly affected shoots if the infection is localized; bag debris (don’t compost it).
- Avoid working the tree when foliage is wet; bacteria spreads by splashing and tools.
- Use copper as a protectant if canker is known in your region and label allows—timing around new flush and wet weather matters.
Citrus canker management in many areas is focused on sanitation and protectant copper applications, not “curing” existing lesions (UC ANR and UC IPM citrus resources, 2022).
Problem: Black sooty coating on leaves, ants climbing the trunk
Most likely: Sooty mold growing on honeydew from scale, whiteflies, or aphids.
Do this:
- Control ants first (they “farm” sap-suckers). Use a sticky trunk barrier or bait stations appropriate for your yard.
- Inspect undersides of leaves for scale/whiteflies.
- Apply horticultural oil thoroughly (covering undersides), ideally when temperatures are below 85°F to reduce leaf burn risk. Follow label intervals (often 7–14 days for repeat coverage).
- Wash off sooty mold with a gentle spray once pests are controlled; new growth should emerge clean.
Problem: Twig tips die back after a heat wave; bark looks bleached
Most likely: Sunburn and drought stress, followed by opportunistic dieback.
Do this:
- Whitewash exposed limbs with a 50/50 mix of interior white latex paint and water (paint only the exposed bark, not leaves).
- Deep-water in the early morning; don’t “sip” daily.
- Prune dead tips back to healthy wood once the weather moderates; avoid heavy pruning during extreme heat.
Three real-world recovery scenarios (what I’d do and why)
Scenario 1: The lemon tree planted in a lawn
You’ve got a 6-year-old lemon surrounded by turf, and the sprinklers run 10 minutes every morning. The tree looks chronically pale, drops leaves, and produces small fruit.
Fix: Separate irrigation zones. Lawn watering is shallow and frequent; citrus wants deep and infrequent. Create a mulched basin under the canopy (keeping mulch off the trunk), cap or redirect nearby sprinklers, and switch to drip emitters delivering about 20 gallons every 7–10 days in summer. Most “blight” symptoms ease within 4–8 weeks as feeder roots recover.
Scenario 2: The orange tree with trunk gumming at the base
You see amber gum and cracked bark right where the trunk meets the soil. Leaves are thinning, and some branches are dying back.
Fix: Expose the root flare, pull back soil/mulch, and stop any water from hitting the crown. If drainage is poor, address it (grading, raised planting area, or redirecting runoff). If symptoms fit Phytophthora, a labeled phosphonate treatment can help—but only alongside the moisture correction. If the trunk is girdled extensively, recovery is harder; focus on preventing further spread and protecting remaining canopy.
Scenario 3: The tangerine with spotted fruit after a wet spring
Tree looks vigorous, but fruit is speckled and rough, and some leaves have spotty lesions. This often shows up after extended wetness and lots of dead twig material in the canopy.
Fix: Prune out dead wood (a common melanose inoculum source), open the canopy for faster drying, and avoid overhead watering. A protectant copper spray timed to early fruit set can reduce future damage if disease pressure is known and the product is labeled for your use. You won’t “heal” existing spots, but you can protect the next flush and next fruit set.
Step-by-step: a practical 14-day action plan
If you’re standing in the yard staring at a stressed citrus tree right now, here’s a plan you can execute quickly.
- Day 1: Check soil moisture at 6–8 inches. If wet, pause irrigation.
- Day 1: Pull mulch and soil back 6 inches from the trunk. Expose the crown/root flare.
- Day 2: Prune dead twigs/branches on a dry day. Disinfect tools with 70% alcohol between suspect cuts.
- Day 3: Inspect for pests (scale/whiteflies). If present, begin ant control and plan an oil spray when temps are <85°F.
- Day 7: Re-check moisture. If soil is drying appropriately, water deeply (target 15–25 gallons for mature trees).
- Day 10–14: If new growth looks healthier (better color, less wilting), continue the corrected irrigation schedule. If decline continues and crown symptoms are present, consult local extension for confirmation and consider a labeled disease treatment.
Common mistakes that keep “blight” coming back
- Mulch volcanoes piled against the trunk.
- Daily watering that never lets the root zone breathe.
- Over-fertilizing a stressed tree (lots of weak flush, more pests).
- Overpruning, which exposes bark to sunburn and triggers more stress.
- Spraying without timing—protectants applied after disease is established don’t erase symptoms.
When to call in local help (and what to bring)
If you’ve corrected watering and drainage and the tree is still declining after 6–8 weeks, it’s time to get a sharper diagnosis. Bring clear photos of:
- Whole tree (for canopy pattern)
- Trunk base/crown
- Leaf tops and undersides
- Fruit lesions (if present)
Local Cooperative Extension offices can often help identify citrus diseases from photos and symptom descriptions, and they’ll know what’s active in your county that season. UC IPM’s citrus guidelines (2022) are also a solid reference for symptom-based management decisions.
Citrus trees are tough when their roots are happy. If you take nothing else from this: keep the crown dry, water deeply but not often, and prune for light and airflow. Do that, and most “blight” problems stop being mysterious—and start being manageable.