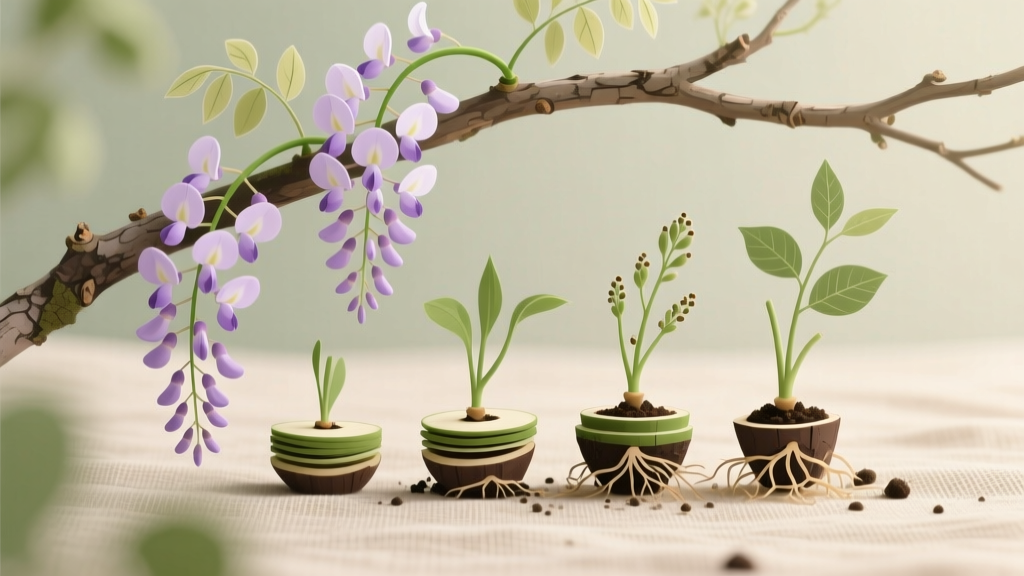
Layering Wisteria for Easy Propagation
One spring, a neighbor asked why her 15-year-old wisteria “refused” to give her a second plant. She’d taken cuttings every June, fussed over humidity domes, and still ended up with a tray of brown sticks. Meanwhile, the original vine was swallowing a pergola like it had something to prove. Here’s the surprising part: wisteria is often far easier to propagate by layering than by cuttings—because you’re letting the stem grow roots while it’s still attached to the mother plant, still fed and hydrated, and far less likely to dry out.
Layering isn’t glamorous, but it’s dependable. If you can bend a stem to the ground (or into a pot), you can make a new plant with a high success rate—often in one growing season, sometimes by the following spring. Below is how I do it at home, including the watering, soil, light, feeding, and troubleshooting details that make the difference between “it didn’t work” and “I’ve got three new vines to share.”
Before You Start: Set Yourself Up for Success
Two quick realities to keep you out of trouble:
- Wisteria can be invasive in some regions. Chinese wisteria (Wisteria sinensis) and Japanese wisteria (W. floribunda) are listed as invasive in parts of the U.S. If you’re in an area where they’re problematic, consider native American wisteria (W. frutescens) or don’t propagate at all. The USDA National Invasive Species Information Center notes the invasive behavior of non-native wisterias (USDA NISIC, 2023).
- Seed-grown wisteria may take 10–15 years to bloom. Layering produces a clone of the parent, so you keep the bloom characteristics and usually get flowering sooner. This long juvenile period is widely noted in extension guidance; for example, North Carolina State Extension describes delayed flowering from seed in wisteria (NCSU Extension, 2022).
Best timing: Start layering in early spring after the soil thaws, or in early summer while stems are flexible. In many gardens, that’s April–June. You can also do it in early fall in mild climates, but rooting slows as temperatures drop.
Layering Methods Compared (and When to Use Each)
Layering is not one single technique. Here’s how the main options stack up in a home garden, with real-world differences you’ll actually feel.
| Method | Where Roots Form | Typical Time to Root | Best Season | Success Rate (home garden reality) | When I Recommend It |
|---|---|---|---|---|---|
| Simple (ground) layering | Buried section of a low stem | 8–16 weeks | Spring–early summer | High (often 70–90% if kept moist) | You can bend a stem to soil and have space to leave it |
| Serpentine layering | Multiple buried nodes along one long stem | 10–20 weeks | Late spring–summer | Moderate–high (more points of failure, more plants) | You want several plants from one long runner |
| Pot layering (ground layer into a pot) | Buried section inside a container | 8–16 weeks | Spring–summer | High (easier moisture control) | Your soil is rocky/clayey or you want an easy lift-and-sever later |
| Air layering | Wounded section wrapped in moist media | 12–24 weeks | Late spring–summer | Moderate (can dry out or overheat) | You can’t bend stems down (high trellis, rigid wood) |
Method A vs Method B, with actual data: If your biggest problem is drying out, pot layering usually beats air layering because the media is buffered by a larger soil mass. In my experience (and in many home gardens), a pot layer that’s watered 2–3 times per week in hot weather roots more reliably than an air layer that can bake in full sun. Air layers can work beautifully, but they often need checking moisture every 2–4 days during heat spells above 85°F (29°C).
“Layering is one of the most dependable propagation methods for woody plants because the shoot remains attached to the parent plant while rooting occurs.” — Royal Horticultural Society propagation guidance (RHS, 2021)
Step-by-Step: Simple Ground Layering (My Go-To)
This is the method I’d teach on a Saturday morning to a friend who wants results without fancy gear.
What you’ll need
- A flexible wisteria stem from the current or last season (pencil-thick is ideal)
- Soil or a prepared rooting pocket
- A U-shaped landscape staple, a bent wire hanger, or a small rock/brick
- Hand pruners
- Optional: rooting hormone (0.1–0.3% IBA), not required but can help
Steps
- Choose a stem long enough to reach the ground with a gentle bend. Avoid brittle, old wood that cracks when flexed.
- Pick a rooting spot about 8–12 inches from the tip of the stem (or at a node). You’ll bury that section.
- Wound the underside of the stem: make a shallow slice 1–2 inches long, or lightly scrape a patch of bark. Don’t sever the stem.
- Optional hormone: dust the wound lightly with rooting hormone.
- Bury the wounded section under 2–4 inches of soil. Keep the tip of the stem (the last 6–10 inches) above ground and pointed upward.
- Pin it down with a staple or rock so it can’t spring up.
- Water deeply right away, then keep evenly moist.
- Mark the spot with a label. You will forget where it is once the garden gets busy.
When to sever from the mother plant: Don’t rush. I usually wait until I see strong resistance when I tug gently and/or new top growth looks sturdy. Many layers are ready by late summer, but it’s perfectly fine to leave it attached until the following spring for a stronger root system.
Soil: Get Rooting Without Rot
Wisteria is tough, but new roots are not. The sweet spot is soil that holds moisture yet drains well.
- Ideal texture: loam or amended clay that doesn’t stay waterlogged.
- Target pH: roughly 6.0–7.0 (wisteria tolerates more, but rooting is smoother in a near-neutral range).
- Easy rooting pocket mix (in-ground): dig a small pocket and blend 2 parts garden soil with 1 part compost and 1 part perlite (or coarse sand).
- Pot-layering mix: use a 2:1 mix of quality potting soil and perlite. You want it airy, not heavy.
Real-world scenario #1 (heavy clay): If your garden soil is sticky clay that stays shiny-wet a day after rain, do pot layering. Sink a 1–3 gallon pot into the ground near the mother plant, fill it with airy mix, and bury the wounded section inside the pot. You’ll get the stability of in-ground temperature with the drainage control of a container.
Watering: The Make-or-Break Detail
Layering fails more often from inconsistent moisture than from anything else. Your job is to keep the buried section evenly moist—not soggy, not bone dry.
How much to water
- Week 1: water the layer site thoroughly at setup, then check moisture daily. If the top 1 inch is dry, water.
- Weeks 2–8: in moderate weather, water 1–2 times per week. In heat above 85°F (29°C), expect 2–3 times per week, especially for pot layers.
- Rainy periods: don’t “top up” automatically. If the soil is cool and wet, leave it alone.
Simple check: push a finger into the soil near the buried stem. If it’s dry at knuckle depth, water. If it’s cool and damp, wait.
Real-world scenario #2 (vacation week): If you’ll be away for 7–10 days during hot weather, mulch the layer site with 2 inches of shredded bark or leaf mold and water deeply the day you leave. For pot layers, move a drip emitter to the pot or place the pot where it gets morning sun and afternoon shade to reduce demand.
Light: Keep the Parent Happy, Keep the Layer Calm
Light affects layering in two ways: it powers the parent plant to feed the attached stem, and it affects moisture and temperature at the rooting site.
- For the mother plant: wisteria flowers best in full sun—aim for 6+ hours daily.
- For the rooting zone: avoid baking the buried area. If the layer site is in harsh afternoon sun, a simple mulch layer helps keep soil temperatures steadier.
- Air layers: protect from direct blasting sun; wrap the foil outer layer to reflect heat.
Temperature note: Rooting generally moves faster when soil temps are roughly 65–75°F (18–24°C). Much cooler slows callusing; much hotter increases rot risk and moisture stress.
Feeding: Less Is More While Roots Are Forming
Overfeeding is a classic wisteria mistake. Too much nitrogen gives you vigorous leafy growth and fewer flowers—and it can also distract the plant from putting energy into rooting at your layered node.
- Avoid high-nitrogen fertilizers (like lawn fertilizer) near wisteria.
- If the mother plant is weak: top-dress with 1 inch of compost in spring, keeping it a few inches away from the trunk.
- If you must fertilize: choose a balanced or lower-nitrogen option (for example, something close to 5-10-10) and apply lightly once in spring—don’t repeat all summer.
Many extension resources emphasize avoiding excess nitrogen for flowering woody vines. If your wisteria is all leaves and no blooms, feeding is often part of the story (NCSU Extension, 2022).
Three Common Layering Setups (Pick One That Fits Your Yard)
1) Simple ground layering along a fence line
Best when you have a low runner that can reach a bare patch of soil. Bury one node, pin it, mulch lightly, and leave it alone except for watering checks.
2) Pot layering beside a patio (clean and controllable)
Best when you don’t want to dig up the yard later. Sink the pot so it doesn’t tip, layer into it, and keep it watered. When roots are ready, you can lift the pot and sever the connection with minimal disturbance.
3) Serpentine layering for multiple plants
If you have one long, flexible stem 6–10 feet long, you can bury alternating nodes like a gentle wave: buried node, exposed section, buried node. Each buried node can root. Use small staples at each buried section.
Common Problems (and How to Fix Them)
Here are the issues I see most often, with the exact symptom-to-solution approach that saves a season.
Symptom: The buried section turns black and mushy (rot)
- Likely causes: waterlogged soil, heavy clay, too-deep burial, poor airflow in an air layer.
- Fix:
- Re-layer using a shallower cover—aim for 2–3 inches of soil.
- Switch to pot layering with a mix amended with 30–40% perlite.
- Water less frequently; check moisture first.
Symptom: No roots after 12–16 weeks, but the stem is alive
- Likely causes: not enough contact with soil, no wounding at the node, stem too woody, soil too dry, temperatures too cool.
- Fix:
- Re-pin firmly so the wounded section can’t lift.
- Add a fresh, shallow wound 1 inch long on the underside and re-bury.
- Mulch and adjust watering frequency.
- If it’s late season and cool, leave it attached through winter and check again in spring.
Symptom: The tip growth wilts on hot afternoons
- Likely causes: the layer site is too dry; the stem is stressed; pot layer drying out fast.
- Fix:
- Deep-water at the base and at the layer site.
- Add 2 inches of mulch to reduce evaporation.
- For pot layers, move to morning sun/afternoon shade temporarily.
Symptom: The layered stem snaps when you bend it
- Likely causes: using old, stiff wood; bending too sharply; cold morning stiffness.
- Fix:
- Choose a younger, more flexible stem (last season’s growth is often ideal).
- Try mid-day when tissues are more pliable.
- If you can’t bend stems down, switch to air layering.
Air Layering Wisteria (When You Can’t Bend a Stem Down)
Air layering is a useful plan B for wisteria trained high on an arbor where stems don’t reach soil.
Basic air-layer steps
- Select a healthy stem about pencil thickness.
- Remove a ring of bark about 1 inch wide (or make a slanted wound and prop it open with a toothpick).
- Wrap moist sphagnum moss around the wound (a handful is plenty) and cover with plastic wrap.
- Seal ends with tape, then wrap foil around it to block light and reflect heat.
- Check moisture every 3–5 days during warm weather; re-moisten if the moss feels barely damp.
- When you see a good mass of roots pressing against the plastic (often 12–24 weeks), cut below the root ball and pot it up.
Real-world scenario #3 (high pergola, no low stems): If your wisteria’s growth starts at 7–8 feet up and everything below is woody trunks, air layering is usually your only realistic option. Do it on the shaded side of the pergola if possible so the wrap doesn’t cook in afternoon sun.
Aftercare: Potting Up and the First Year
Once your layer has rooted, the transition is where many new plants get set back. Treat it like a young shrub, not like an established vine.
How to sever and transplant
- Water the day before you plan to separate it.
- Cut the stem between the mother plant and the new rooted section using sharp pruners.
- Lift carefully with as much soil around the roots as possible (easy with pot layering).
- Pot it up into a 1–2 gallon container if roots are modest, or plant directly if you have a strong root ball.
- Water in slowly until water drains from the bottom (for pots) or until the planting area is soaked (in-ground).
Light and watering for the first season
- Give morning sun and afternoon shade for the first 2–3 weeks if the plant looks stressed, then move toward full sun.
- Water when the top 1–2 inches of potting mix dries. In hot weeks, that may be every 2–3 days in containers.
- Stake gently if needed so wind doesn’t rock the root ball loose.
Feeding the new plant
Skip heavy fertilizer the first year. If growth is pale or slow, a light top-dress of compost or a half-strength balanced liquid feed once in late spring is plenty. You’re building roots, not chasing length.
Troubleshooting: Flowering and Growth After Propagation
Layering gives you a genetic copy of the parent, but young plants still need time to settle.
Problem: My new wisteria grows but doesn’t flower
- What’s normal: a young layered plant may spend a year establishing before blooming.
- What helps:
- Full sun: aim for 6–8 hours.
- Avoid nitrogen-heavy fertilizer.
- Prune strategically: summer prune long whips back to about 6 inches after flowering, and winter prune side shoots to 2–3 buds (timing varies by training system).
Problem: Leaves yellowing in mid-summer
- Likely causes: water stress (too wet or too dry), root disturbance after severing, or nutrient lockout in very high pH soil.
- Fix:
- Check soil moisture first; adjust watering cadence.
- Mulch lightly to stabilize moisture and temperature.
- If you suspect high pH, consider a soil test before adding amendments.
Common Pests and Diseases to Watch During Layering
Layering itself doesn’t invite problems, but stressed plants attract attention.
- Aphids: clustered on tender tips; hose off with a strong spray of water every few days until controlled.
- Scale insects: small bumps on stems; prune out heavily infested sections and use horticultural oil during dormant season if needed.
- Root rot: usually a soil drainage issue; fix the environment rather than spraying anything.
If you’re layering in a pot and see fungus gnats, let the top inch dry slightly between waterings and use a grittier mix next time. They’re a sign of consistently wet media.
A Few Hard-Won Tips That Save Time
- Label everything. Put the date on the tag. “I think I layered that sometime in spring” is how people accidentally sever too early.
- Don’t baby it to death. Once the layer is pinned, your main job is steady moisture. Constant poking and lifting breaks fine new roots.
- Choose the right parent plant. If the mother vine is weak, chlorotic, or struggling in deep shade, fix that first. A strong parent roots layers faster.
- Check local rules and ethics. In areas where non-native wisteria is invasive, propagating and sharing it can create real ecological problems (USDA NISIC, 2023).
Layering wisteria is one of those propagation skills that feels almost too simple—until you’ve watched it quietly work. Pin a stem down, keep it evenly moist through the heat, and give it time. By the time you’re ready to cut it free, you’re not crossing your fingers over a tray of cuttings; you’re lifting a young plant that already knows how to live.
Sources: Royal Horticultural Society propagation guidance (RHS, 2021); North Carolina State Extension wisteria cultivation notes (NCSU Extension, 2022); USDA National Invasive Species Information Center wisteria information (USDA NISIC, 2023).