How to Inspect Marigolds for Early Signs of Trouble
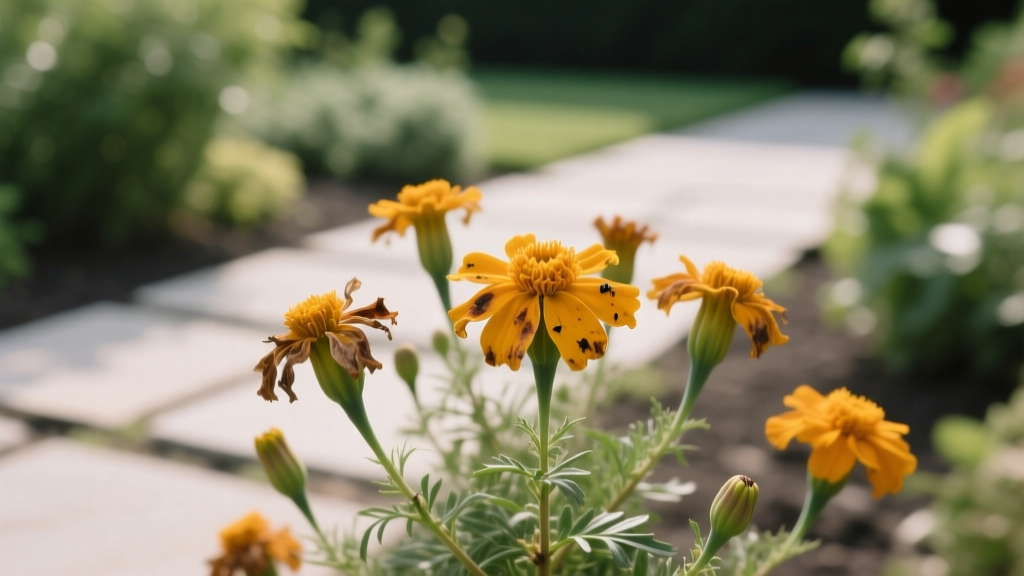
You walk out with your coffee and your marigolds look “fine” from the patio—bright flowers, a lot of green. But when you crouch down, you notice the newest leaves are puckering, a couple of buds look like they’ve been pinched, and there’s a faint sticky shine on the stems. A week later those “fine” plants can look tired, patchy, and half-bloomed. The frustrating part is marigolds are usually tough—so when they struggle, it’s often because a small, early warning sign got missed.
Marigolds (Tagetes spp.) give you a lot of information if you know where to look. The trick is to inspect them on purpose, on a schedule, and with a simple checklist—before the problem gets loud. Below is the same inspection routine I use in beds, borders, and containers, plus the specific red flags that tell you whether you’re dealing with a watering issue, light stress, nutrient imbalance, or pests/disease.
Your 5-minute marigold inspection routine (what to check first)
Do this inspection once a week in mild weather and twice a week during hot spells or heavy rain. It’s easiest in the morning (before heat stress makes everything look limp).
- Stand back 3–6 feet: look for uneven color, gaps, or plants that lag behind neighbors.
- Check the top 10% of growth: new leaves show problems early (puckering, distortion, pale growth).
- Flip 3 leaves per plant: underside is where mites, thrips, and aphids hang out.
- Inspect 5 buds/flowers: look for chewed edges, brown tips, or buds that don’t open.
- Touch the soil: check moisture 2 inches down; don’t guess from the surface.
Keep a small notebook or a note on your phone. If you write “yellowing lower leaves + wet soil” one week and it’s worse the next, you’ll know you’re not dealing with a one-day blip.
Watering: spotting trouble before marigolds collapse
Most marigold problems I diagnose start with watering—either too much, too little, or the wrong timing. Marigolds like evenly moist soil while establishing, then they prefer to dry slightly between waterings.
How much water is “right”?
- In-ground beds: aim for about 1 inch of water per week total from rain + irrigation during typical summer weather.
- Containers: water when the top 1 inch of potting mix is dry; in heat, that can mean daily.
- Deep check: moist at 2 inches down is the sweet spot—damp, not muddy.
If you want a reliable system, use a simple rain gauge and note totals weekly. For containers, lift the pot—light pot equals thirsty plant.
Early warning signs of underwatering
- Leaves look slightly dull or gray-green (not glossy)
- New growth is smaller than last week
- Lower leaves crisp at edges before the plant fully wilts
- Flowers fade fast, especially after a hot afternoon
Fix: Water early in the day at the base of the plant, soaking the root zone. In beds, water long enough to moisten 6–8 inches deep. Then check again in 48 hours—don’t assume one soak solved it if the soil is hydrophobic or sandy.
Early warning signs of overwatering (and what it looks like first)
- Lower leaves turn pale yellow, then drop
- Plant looks “soft,” with weak stems
- Soil smells sour or stays wet for more than 48 hours after watering
- Random wilting even though soil is damp (roots can’t breathe)
Fix: Back off watering and improve drainage. In containers, make sure there are drainage holes and empty saucers after 20–30 minutes. In beds, loosen crusted soil and add compost (not peat-heavy mixes) to improve structure over time.
Soil and drainage: the root-zone clues most gardeners miss
Marigolds aren’t fussy, but they resent soggy feet. Drainage problems don’t always show as puddles. Sometimes the surface dries while the root zone stays wet, especially in heavy clay or in pots with compacted mix.
Fast drainage test you can do today
- Dig a hole about 6 inches wide and 6 inches deep near the marigolds.
- Fill it with water and let it drain completely once (pre-soak).
- Refill and time how long it takes to drain.
- Good: drains in 1–2 hours
- Borderline: 3–4 hours
- Poor: still holding water after 4+ hours
If drainage is poor, your inspection focus should shift toward root-rot symptoms, fungal leaf issues, and stress-related pests.
Soil pH and texture: what to watch for
Marigolds generally grow well in slightly acidic to neutral soils. If you’ve had recurring yellowing or weak growth despite decent care, a soil test is worth it. Many Extension offices recommend testing every 2–3 years for home gardens.
According to the University of Minnesota Extension (2023), soil testing is the most reliable way to determine nutrient needs and avoid over-fertilizing, especially with nitrogen-heavy products that encourage soft growth and pest pressure.
Light and temperature: stress patterns that show up on leaves
Marigolds are sun-lovers, but “full sun” doesn’t mean the same thing in every yard. Six hours of direct sun is often workable; eight is better for heavy bloom. Heat and reflected light can be a different kind of problem.
Light checklist during inspection
- Count real sun hours: not “it’s bright,” but direct sun on leaves. Track it once, then you’ll know.
- Look for leaning: plants stretching toward light show long internodes and fewer blooms.
- Check flower production: lush foliage with few buds often points to too much shade or excess nitrogen.
Heat stress vs. drought stress (they can look similar)
On days above 90°F, marigolds may wilt mid-afternoon even with adequate soil moisture. The difference shows up in the morning:
- Heat stress: plant perks up by 9–10 a.m. and soil is moderately moist 2 inches down.
- Drought stress: plant stays limp in the morning and soil is dry 2 inches down.
In extreme heat, give plants a deep morning watering and consider temporary shade cloth during the hottest 3–5 days of a heat wave—especially for containers that bake on patios.
Feeding: how to inspect leaves for nutrient signals (without overdoing it)
Marigolds bloom best when they’re not pampered with constant feeding. Too much fertilizer—especially high nitrogen—pushes leafy growth and invites aphids and fungal problems. The goal is steady, moderate fertility.
Practical feeding plan (with numbers)
- In beds with compost: mix in 1–2 inches of finished compost before planting. Often that’s enough.
- In containers: use a slow-release fertilizer per label rates (commonly incorporated at planting), or feed with a balanced liquid fertilizer at 1/2 strength every 2–4 weeks once blooming starts.
- Avoid “quick green-ups”: if you use a high-nitrogen lawn fertilizer nearby, keep it off flower beds.
What nutrient stress looks like during inspection
- Nitrogen excess: very dark green leaves, thick soft stems, fewer flowers, more aphids.
- Nitrogen deficiency: overall pale plant, older leaves yellow first, slow growth.
- Iron/micronutrient issues (often pH-related): newer leaves yellow while veins stay greener (interveinal chlorosis).
If you suspect nutrient imbalance, correct gently. One measured feeding beats repeated “little splashes” of fertilizer. And if you haven’t tested soil in a while, get a soil test—guessing is expensive and often wrong. Penn State Extension (2022) emphasizes that soil testing helps match fertilizer to actual need, reducing excess growth and nutrient runoff.
Common problems: how to catch pests and diseases early
Early detection is everything. Most marigold pest issues are easy when populations are small. Same for disease—if you catch it at the first spotting, you can often prevent spread without harsh measures.
Comparison table: symptom patterns that help you diagnose faster
| What you see | Most likely cause | Where to look next | First response |
|---|---|---|---|
| Sticky stems, curled new growth | Aphids | Undersides of new leaves, buds | Strong water spray; insecticidal soap if needed |
| Fine stippling (tiny pale dots), leaf bronzing | Spider mites | Leaf undersides; webbing in hot/dry weather | Rinse foliage; increase humidity; miticide/soap as last resort |
| Silvery streaks on petals/leaves, deformed buds | Thrips | Inside flowers and tight buds | Remove damaged blooms; sticky traps; targeted spray |
| White powdery coating on leaves | Powdery mildew | Shady/humid areas; crowded plants | Increase airflow; avoid overhead watering; remove worst leaves |
| Lower leaves yellow, plant wilts with wet soil | Root stress/rot | Soil moisture, drainage, root color | Reduce water; improve drainage; replant if severe |
Aphids: the “shiny plant” clue
Aphids are often the first pest you’ll see on marigolds, especially if you’ve been generous with nitrogen. The earliest sign isn’t the insects—it’s the sticky honeydew and the way new growth curls or looks cramped.
Inspection tip: Look at the newest growth and the undersides of young leaves. If you see ants climbing the plant, that’s another clue—ants farm aphids for honeydew.
Step-by-step control:
- Blast aphids off with a firm water spray, aiming under leaves. Repeat every 2–3 days for a week.
- Pinch off heavily infested tips (don’t baby them—remove them).
- If they keep coming back, use insecticidal soap, coating undersides thoroughly, and reapply per label (often every 7–10 days).
“Most soft-bodied insect pests can be managed effectively when populations are small—regular scouting is more important than product choice.” — Integrated Pest Management guidance, University of California Agriculture and Natural Resources (UC ANR) publication (2019)
Spider mites: the hot-weather sneak attack
If marigolds start looking dusty or “sandblasted,” suspect spider mites. They explode during hot, dry stretches and are easy to miss until the leaf color shifts.
Early symptoms:
- Tiny pale speckles on leaves (stippling)
- Bronzing that starts on older leaves
- Fine webbing near leaf veins in severe cases
What works in real gardens: Rinsing the foliage (especially undersides) every few days can knock populations down. If you’re growing in a container on reflective concrete, move the pot so it gets morning sun and afternoon shade during heat spikes; mites love stressed plants.
Thrips: when blooms look “scratched”
Thrips are tiny and frustrating because they hide in flowers. You’ll often see the damage before you see the pest: petals get brown edges, buds deform, and blooms may open poorly.
Inspection move: Tap a flower over white paper. If tiny slivers move, you’ve got thrips.
Fix: Deadhead damaged blooms promptly and dispose of them. Sticky traps help you monitor. Targeted sprays can work, but they have to contact the insect—coverage inside buds is the challenge.
Powdery mildew: the airflow problem
Powdery mildew shows up as white dusting on leaves, especially in crowded plantings, shaded beds, or late summer when nights cool and humidity rises.
Early clues: small white patches on lower leaves, then a general dullness and yellowing.
What to do:
- Thin overcrowded marigolds to improve airflow; don’t be afraid to remove a plant to save the rest.
- Water at soil level, not overhead, and water early so leaves dry fast.
- Remove the worst affected leaves (don’t compost if disease is active).
Troubleshooting by symptom: quick diagnoses that save plants
This is the section I wish every gardener kept on the potting bench. When you inspect, match what you see to a likely cause, then act the same day if possible.
Symptom: buds turn brown or fail to open
- Likely causes: thrips, botrytis in cool/wet spells, or drought stress during bud formation.
- What to check: open one damaged bud—if you see tiny insects or brown streaking, suspect thrips; if it’s gray and fuzzy, suspect botrytis.
- Fix: remove affected buds; improve airflow; water consistently (deep watering, not frequent sips).
Symptom: lower leaves yellowing while top stays green
- Likely causes: overwatering, poor drainage, or mild nitrogen deficiency late in the season.
- What to check: soil moisture at 2 inches; drainage; smell of soil; root color if you can gently inspect (healthy roots are light-colored, not brown and mushy).
- Fix: let soil dry slightly between waterings; improve drainage; if soil is lean, feed lightly once and reassess in 10–14 days.
Symptom: leaves are pale and growth is slow (no pests seen)
- Likely causes: too much shade, cool soil early in the season, or nutrient lockout due to pH.
- What to check: sun hours (aim for 6–8 hours); nighttime temperatures (growth slows when nights stay below about 50–55°F); consider a soil test.
- Fix: move containers to more sun; wait out cool spells; avoid heavy fertilizing as a “fix” unless you know it’s needed.
Three real-world scenarios (and how to inspect your way out of them)
Scenario 1: “My marigolds were perfect, then suddenly looked tired after a rainy week.”
This one is common in clay soil or tightly packed beds. After prolonged rain, oxygen in the root zone drops. Plants can look wilted even though the soil is wet.
- Inspection clues: yellowing lower leaves, limp stems, soil that stays wet more than 48 hours.
- What I do: stop watering entirely until the top 1–2 inches dry; gently cultivate the soil surface to break crust; remove mulch temporarily if it’s keeping things too wet.
- Prevention: amend beds with compost (1–2 inches worked in) and avoid planting marigolds in the lowest, soggiest pocket of the garden.
Scenario 2: “Container marigolds on my patio keep getting mites every July.”
Patios create a heat island. Containers dry faster, reflect heat, and plants get stressed—spider mites love that.
- Inspection clues: stippling and bronzing on older leaves; mites on undersides; worst damage on the side facing hot reflected light.
- What I do: rinse leaves every 3–4 days during hot spells; water deeply in the morning; move pots to get morning sun and a break from late-afternoon blast; avoid high-nitrogen feeds.
- Prevention: use a larger pot (at least 10–12 inches wide for a full marigold plant) so moisture is steadier, and don’t let pots sit bone-dry.
Scenario 3: “Lots of leaves, hardly any flowers.”
This is nearly always a light or nitrogen story. Marigolds in too much shade will stay green and lazy about blooming. Too much fertilizer does the same.
- Inspection clues: deep green foliage, long soft stems, few buds; maybe aphids.
- What I do: count actual sun hours; if under 6 hours, relocate containers or thin nearby plants; stop nitrogen-heavy feeding; deadhead regularly to encourage new buds.
- Prevention: feed lightly and only when plants show they need it; choose a sunnier spot for next season.
Method A vs. Method B: two inspection styles compared (with real data)
Gardeners often ask if they really need to inspect that closely. Here’s a straightforward comparison I’ve seen play out repeatedly in home gardens.
| Inspection method | Time per week | When problems are usually noticed | Typical intervention | Expected plant impact |
|---|---|---|---|---|
| Method A: Quick glance from standing height | ~1 minute | After visible wilting, heavy yellowing, or major bloom loss | Stronger response (broad spraying, heavy feeding, big pruning) | More setback; blooms often pause 7–14 days |
| Method B: Weekly 5-minute checklist (undersides, buds, soil at 2") | ~5–10 minutes | At first distortion, early spotting, small pest colonies | Gentle response (water adjustment, rinse pests off, remove a few leaves) | Minimal setback; blooms usually continue with only minor gaps |
The point isn’t to turn gardening into homework. It’s to trade a few minutes of scouting for fewer emergencies.
Small habits that prevent big marigold problems
- Deadhead on schedule: every 3–7 days in peak bloom. It keeps plants flowering and lets you notice bud damage early.
- Water at the base: wet leaves invite disease; wet roots at the wrong time invite rot.
- Give them air: don’t cram plants. Crowding hides pests and holds humidity.
- Keep a “plant triage” spot: if one container plant is clearly infested, move it away for treatment so pests don’t spread.
If you take nothing else from this: inspect the newest growth, flip leaves, and check soil moisture at 2 inches. That simple habit catches aphids before they curl the plant, catches mites before bronzing spreads, and catches watering mistakes before roots start failing.
Marigolds are forgiving, but they’re not mind readers. When you learn their early signals—and respond with small corrections instead of big rescues—you’ll get the kind of steady color they’re famous for, right up until frost.
Sources: University of Minnesota Extension soil testing guidance (2023); Penn State Extension soil fertility/soil testing resources (2022); University of California Agriculture and Natural Resources Integrated Pest Management publications (2019).