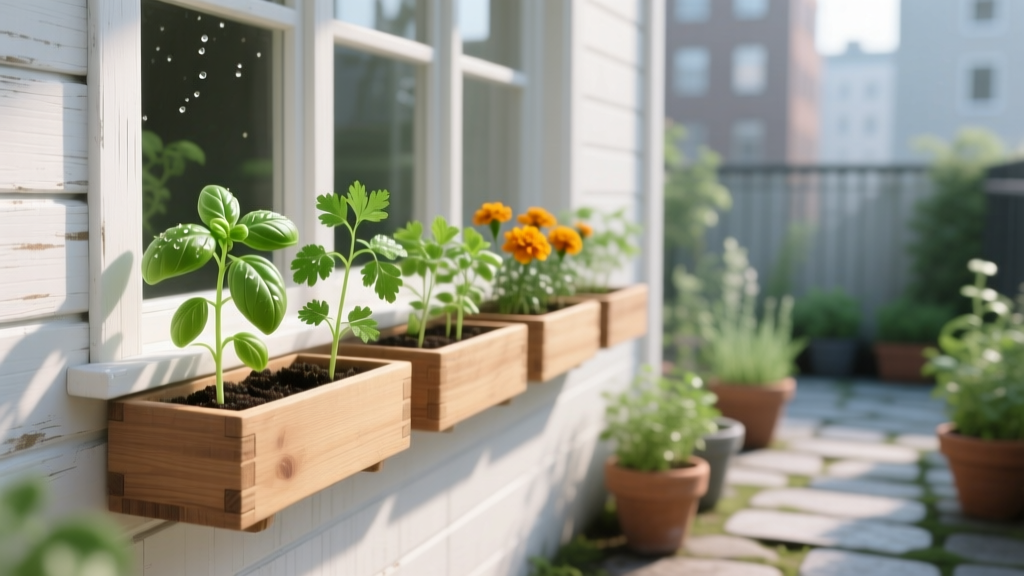
How to Harden Off Window Boxes Seedlings
You do everything right: you start seeds indoors, they germinate like champs, and your window box looks ready to spill over with basil, petunias, lettuce, or trailing lobelia. Then you carry those tender seedlings outside for “a little fresh air,” and by dinner they’re flopped over like wet tissue. The leaves look bleached, the stems kink, and you’re left wondering how a few hours outdoors could undo weeks of careful growing.
That’s the hardening-off gap—seedlings raised indoors aren’t trained for full sun, wind, temperature swings, or dry air. Window boxes make the gap bigger because they’re elevated, windier, and often warmer (or colder) than garden beds. The good news: hardening off is predictable. When you control light, water, and temperature in a deliberate schedule, your seedlings adapt fast—and they transplant into window boxes without sulking.
I’ll walk you through a practical, repeatable routine I use for my own porch boxes, plus fixes for the common things that go wrong (scorched leaves, stalling, wind whip, and soggy roots).
What “hardening off” really means (and why window boxes are different)
Hardening off is the gradual exposure of indoor-grown plants to outdoor conditions so they can thicken leaf cuticles, strengthen stems, and adjust water use. Indoors, light intensity is low, wind is basically zero, and temperatures are steady. Outdoors you get:
- Much stronger light (even “shade” outdoors can be brighter than a sunny windowsill).
- Wind stress, which increases transpiration and can physically damage soft stems.
- Temperature swings—window boxes cool and heat quickly because there’s less soil mass.
- Faster drying—containers can dry out in a single warm, breezy day.
Most seedlings need 7–10 days to harden off. Fast growers like lettuce can sometimes manage in 5–7 days; tender warm-season plants (basil, tomatoes, zinnias) often benefit from the full 10–14 days if spring weather is erratic.
University Extension guidance consistently recommends gradual exposure over about a week, and warns that direct sun and wind are the big shock factors (University of Minnesota Extension, 2020; NC State Extension, 2023).
Before you start: quick checklist so hardening off actually works
Hardening off goes smoother when seedlings are truly “ready.” If they’re too small or too hungry, outdoor stress hits harder.
Seedling readiness
- 2–3 sets of true leaves (not counting cotyledons).
- Stocky stems (if they’re leggy, fix light indoors for 3–5 days first).
- Root ball holds together when you gently slide the plug out—roots visible but not circling into a tight knot.
Weather window (numbers that matter)
- Aim for a stretch where nighttime lows stay above 50°F (10°C) for warm-season seedlings (basil, coleus, impatiens).
- Cool-season plants can handle lower lows, but avoid frost; keep them protected if it dips below 35°F (1–2°C).
- Skip hardening off on days with winds above 15 mph if seedlings are still in the early stages.
If you only remember one rule: sun + wind + dry soil is the knockout combo. Avoid stacking all three stressors at once.
The 7–10 day hardening-off schedule (step-by-step)
This schedule is built for window box life—windy, exposed, quick-drying. Adjust times if your balcony is extra harsh or your “outdoor spot” is sheltered.
- Day 1–2: Put seedlings outdoors in bright shade for 1–2 hours, then bring them back in. Keep them out of wind (behind a chair, wall, or temporary screen).
- Day 3–4: Increase to 3–4 hours. Add 30–60 minutes of gentle morning sun (before 10 a.m.).
- Day 5–6: Increase to 5–6 hours. Morning sun can extend to 2–3 hours total. Protect from mid-day sun if skies are clear.
- Day 7–8: Full day outside (8–10 hours), with sun exposure matching their final window box location (full sun plants get more sun; shade plants stay mostly shaded).
- Day 9–10 (optional but wise): Leave outside overnight if temperatures are safe for that crop. If nights are still chilly, “overnight” them in an unheated garage or enclosed porch to ease the jump.
Pro tip: If a day turns harsh—unexpectedly hot (above 80°F / 27°C), windy, or bright—hold at the current level rather than pushing forward. Hardening off isn’t a race.
“A sudden move from indoor conditions to full sun and wind can cause sunscald and desiccation in a matter of hours. Gradual exposure over about a week allows the plant’s protective layers to adjust.” — NC State Extension (2023)
Light management: prevent sunscald before it starts
Sunscald on seedlings looks like bleached patches, crispy edges, or a washed-out, papery look—especially on tender greens and basil. It’s not “burn” in the human sense; it’s tissues failing under more light than they’re built to handle.
Use shade strategically
- Start in open shade (bright light, no direct rays) for the first 2–3 days.
- If you don’t have natural shade, drape 30–50% shade cloth over a chair or drying rack.
- Morning sun is safer than afternoon sun; begin with 30 minutes and increase gradually.
Window box placement matters
South- and west-facing boxes can be brutally reflective, especially near light siding or glass. If your final site is west-facing full sun, harden off longer and avoid first-day afternoon exposure.
Watering during hardening off (this is where most people lose plants)
Seedlings in trays dry out fast outdoors. But overwatering in response can cause weak roots and damping-off style collapse. The goal is steady moisture, not sogginess.
Practical watering targets
- Water seedlings thoroughly until water drains out the bottom, then let them drain for 10–15 minutes before setting them outside.
- Check moisture at least twice daily during days 3–10, especially if it’s windy.
- If the top 1/2 inch (1–1.5 cm) feels dry and the tray feels light, water.
Bottom watering vs top watering: which is better outdoors?
| Method | How it works | Best for | Risk | Real-world result (typical) |
|---|---|---|---|---|
| Bottom watering | Set trays/pots in 1–2 inches of water for 10–20 minutes | Reducing leaf wetness; steady uptake; preventing fungus splash | Can stay too wet if left sitting | More even moisture; fewer collapsed stems when nights are cool |
| Top watering | Water from above until it drains | Quick resets on hot/windy days | Soil surface crusting; leaf wetness; knocks tiny seedlings over | Fast recovery mid-day, but more algae/fungus if overdone |
My rule: Bottom water in the morning when possible, top water only as a rescue if they’re wilting and the mix is dry.
Soil and container strategy for window boxes (drainage is non-negotiable)
Hardening off isn’t just about the outdoors—it’s also about what you transplant into. Window boxes punish bad drainage and compacted mix because roots have limited room and oxygen.
Use the right potting mix (not garden soil)
- Choose a quality container potting mix with perlite or similar aeration.
- Avoid “topsoil” or heavy bagged garden soil—it compacts in boxes and stays waterlogged.
- If your mix is very peat-heavy and water-repellent when dry, pre-moisten it before filling boxes.
Box depth guidelines
- For shallow-rooted annuals and greens: 6–8 inches soil depth minimum.
- For herbs like basil/parsley and larger flowers: 8–10 inches is better.
Drainage check
Every window box should have clear drainage holes. After watering, you should see water exit within 30–60 seconds. If it trickles slowly or not at all, fix it before planting.
Feeding: don’t push soft growth right before outdoor stress
Overfeeding during hardening off creates lush, thin-walled growth that scorches and wilts faster. Underfeeding, though, leaves seedlings too weak to rebound from minor stress.
A simple feeding plan that works
- 3–7 days before hardening off: feed once with a balanced liquid fertilizer at 1/4 to 1/2 strength.
- During hardening off: skip heavy feeding. If seedlings pale, use 1/4 strength once.
- After transplant into the window box: wait 7 days, then start regular feeding (often weekly at label rate for flowering annuals; every 2–3 weeks for many herbs).
This aligns with the general extension advice to avoid forcing growth during acclimation and transplanting stress (University of Minnesota Extension, 2020).
Method comparison: carrying trays in/out vs “outdoor cold-frame style” hardening
Most home gardeners use one of two approaches. Here’s how they compare with real numbers you can plan around.
| Approach | Daily effort | Typical hardening time | Temperature control | Best use case |
|---|---|---|---|---|
| Carry in/out | 2 trips/day (out + in); 5–10 minutes | 7–10 days | High control (you decide when they’re out) | Apartment/balcony growers; unpredictable spring weather |
| Protected outdoor setup (cold frame, mini greenhouse, clear tote with vents) | 1 check/day; venting 1–2 times | 5–8 days (often faster) | Medium control (can overheat if unvented) | Many seedlings at once; a sheltered yard/porch |
Actual data point to respect: small covered setups can overheat quickly. Even when the air is 65°F (18°C), a closed clear tote in sun can shoot much higher. Vent early and often; if it feels warm to your hand inside, it’s too warm for seedlings.
Three real-world hardening-off scenarios (and exactly what to do)
Scenario 1: The windy second-story balcony
Problem: Seedlings look fine in shade, but wilt fast once moved, even with moderate sun.
What’s happening: Wind is stripping moisture faster than roots can replace it.
- Harden off behind a windbreak (a chair, railing panel, or a temporary screen of cardboard clamped to the railing).
- Shorten exposure time by 25–50% on windy days.
- Water thoroughly before outdoor time, then check again after 60–90 minutes the first few days.
- Pinch or brush your hand lightly across seedlings once a day indoors for 30 seconds for a week prior—this encourages sturdier stems (a classic grower trick).
Scenario 2: A west-facing window box that bakes in late afternoon
Problem: Leaves bleach or get crisp edges after transplant, despite hardening off “all week.”
What’s happening: Afternoon sun + heat reflected off walls can be more intense than what they experienced during hardening.
- Time your transplant for an overcast day or late afternoon.
- Provide temporary shade for 3–4 days after planting (30–50% shade cloth or even a piece of lattice).
- Water the box in the morning; on hot days above 80°F (27°C), check moisture again mid-afternoon.
Scenario 3: Cool nights, warm days (classic spring trap)
Problem: Seedlings stop growing, turn purple-ish (especially tomatoes/basil), or look “stuck.”
What’s happening: Chilly nights slow nutrient uptake and stress warm-season plants.
- Bring warm-season seedlings in at night until lows stay above 50°F (10°C).
- If you must leave them out, group pots together and wrap them with a breathable cover; avoid sealing them in airtight plastic overnight.
- Hold fertilizer until nights warm; feeding into cold stress can backfire.
Transplanting into the window box: timing, spacing, and first-week care
Hardening off is only half the job. The transplant day and first week determine whether seedlings take off or stall.
Best timing
- Transplant in the late afternoon or on a bright overcast day to reduce immediate sun stress.
- Water seedlings 1–2 hours before planting so root balls slide out intact.
Spacing (common window box crops)
- Small flowers (alyssum, lobelia): 4–6 inches apart
- Petunias, marigolds, compact zinnias: 6–8 inches apart
- Basil/parsley: 6–8 inches apart
- Lettuce: 4–6 inches apart (or tighter for cut-and-come-again harvest)
First-week watering in the box
- Day 1: water slowly until you see steady drainage; don’t just wet the surface.
- Days 2–7: check daily. In wind or sun, you may water every day; in cool cloudy weather, every 2–3 days might be enough.
- Use your finger: if the top 1 inch (2.5 cm) is dry, water.
Common problems while hardening off (symptoms and fixes)
Symptom: Wilting during outdoor time, but soil is moist
Likely cause: Wind + low humidity shock, or roots not keeping up yet.
Fix:
- Move to sheltered shade for 48 hours, then restart with shorter exposures.
- Reduce sun exposure and increase shade; sun drives water loss even when soil is damp.
- Check if roots are bound in the cell pack—if circling, pot up for 5–7 days before continuing.
Symptom: Bleached patches or crispy, tan areas on leaves
Likely cause: Sunscald from too much direct sun too soon.
Fix:
- Remove the most damaged leaves if they’re collapsing, but keep partially damaged leaves to photosynthesize.
- Go back to bright shade for 2–3 days, then reintroduce morning sun in 30-minute increments.
- After transplant, provide temporary shade for 3–4 days if the box is full sun.
Symptom: Stems look pinched, bent, or seedlings topple
Likely cause: Wind whip; sometimes aggravated by leggy growth.
Fix:
- Use a windbreak and keep them low to the ground (on the floor of the balcony, not on a table) for the first week.
- For floppy seedlings like tomatoes, pot up deeper to support stems.
- Avoid top watering that splashes and knocks them around.
Symptom: Leaves turn yellow after moving outdoors
Likely causes: Overwatering (oxygen-starved roots), nutrient deficiency, or cold nights.
Fix:
- Let the mix dry slightly between waterings; ensure drainage is free.
- If nights are below 50°F (10°C) for warm-season seedlings, bring them in.
- If the plant is otherwise perky, feed once at 1/4 strength and reassess in 5–7 days.
Symptom: Mold/algae on soil surface in trays
Likely cause: Too wet + low airflow.
Fix:
- Increase airflow; don’t crowd trays tight together.
- Water in the morning so the surface dries by evening.
- Scrape off the top thin layer and top-dress with dry potting mix if needed.
Hardening off by plant type: a few crop-specific tips
Cool-season seedlings (lettuce, kale, pansies)
- They can handle cooler air sooner, but still need gradual sun exposure.
- Watch for drying winds; leafy greens wilt fast but usually recover if shaded promptly.
Warm-season seedlings (basil, tomatoes, zinnias)
- Don’t rush nights outdoors until lows are reliably above 50°F (10°C).
- They’re more prone to stall from cold soil and cold nights in window boxes.
Shade lovers (impatiens, coleus)
- Hardening off is more about wind and temperature than sun, but even they can scorch in bright morning sun if moved abruptly.
- Keep them in bright shade most of the time; test only small doses of sun if they’ll receive any in the final spot.
A practical “no-regrets” routine I recommend
If you want one approach that works in most homes, do this:
- Days 1–3: Bright shade only, 1–4 hours, sheltered from wind.
- Days 4–6: Add morning sun starting at 30 minutes, working up to 2 hours.
- Days 7–10: Match the final light exposure; start leaving out longer, and overnight only when temperatures are crop-appropriate.
During the whole process: keep soil evenly moist, avoid blasting them with fertilizer, and don’t be afraid to “pause” for a day when weather turns ugly. Seedlings don’t care about your calendar—they care about the conditions you give them.
Once your seedlings have spent a couple full days outside without wilting, scorching, or collapsing in wind, they’re ready for the window box. Plant them, water them deeply, and give them a few days of gentle treatment. After that, they’ll start acting like outdoor plants—because now, they are.
Sources: University of Minnesota Extension (2020), “Hardening transplants”; NC State Extension (2023), guidance on hardening off and transplant shock.