Lasagna Mulching Around Hostas
You plant a gorgeous hosta in spring, it looks perfect for about six weeks, and then summer hits: the soil bakes, the leaves get ragged from slugs, and the plant that was supposed to be “low maintenance” turns into a daily chore. If that sounds familiar, you’re not failing—hostas are thirsty, shallow-rooted perennials, and they punish inconsistent moisture. Lasagna mulching is one of the most reliable ways I’ve found to keep hostas steady through heat and drought while also improving the soil year after year.
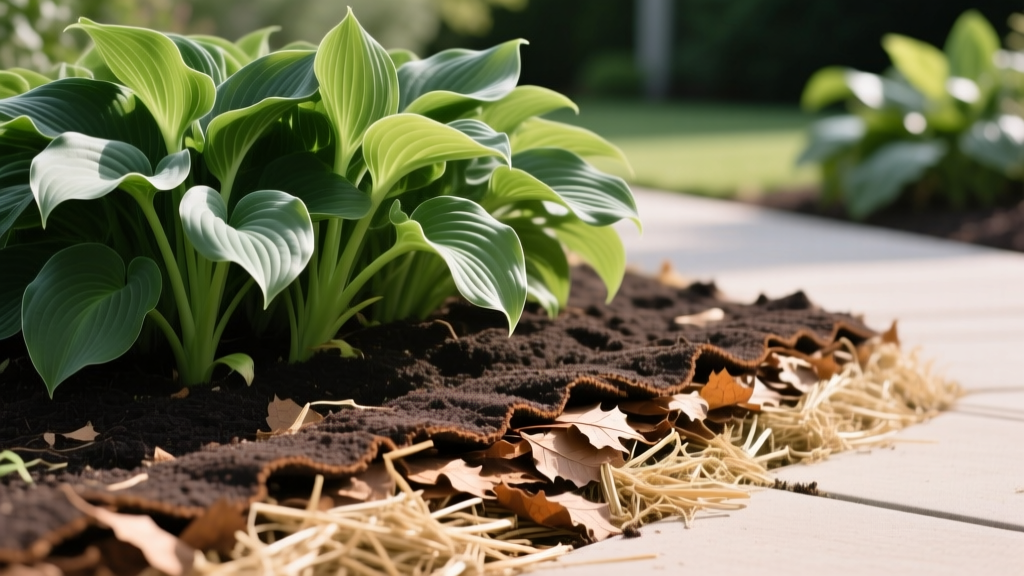
“Lasagna mulching” (sheet mulching) is simply layering different organic materials like you’d layer a casserole: carbon-rich “browns” and nitrogen-rich “greens,” topped with a finishing mulch. Done correctly around hostas, it buffers soil temperature, reduces evaporation, and feeds the soil biology that does the heavy lifting for you.
What Lasagna Mulching Actually Does for Hostas
Hostas have a dense crown and a fibrous root system that sits mostly in the top 6–8 inches of soil. That’s exactly the zone that dries out fastest and gets hottest under summer sun. A layered mulch works like insulation: it slows moisture loss, keeps roots cooler, and gradually turns into humus—hosta heaven.
There’s also a practical weed angle. If you’ve ever tried to hand-weed between hosta crowns, you know how easy it is to snap new shoots. A properly layered mulch can cut weeding dramatically.
“Organic mulches moderate soil temperature and reduce evaporation from the soil surface, improving moisture availability to plants.” — Penn State Extension (2023)
That’s the point with hostas: stable moisture. Not soggy, not bone-dry, not swinging between extremes.
When to Lasagna Mulch Around Hostas (Timing That Matters)
You can layer mulch almost any time, but timing changes how well it behaves.
Best windows
- Early spring: Right as hosta “noses” emerge 1–2 inches. You can mulch without burying foliage, and it’s early enough to suppress weeds.
- Early fall: After heat breaks, while soil is still warm (often 55–70°F). Microbes stay active longer, and the mulch starts breaking down before winter.
Times to avoid
- Right before a week of heavy rain: New layers can mat down and hold too much moisture at the crown.
- When hosta leaves are fully unfurled and dense: It’s harder to keep layers off the crown, and you’ll trap humidity where slugs and rot thrive.
If you’re mulching in summer, keep layers thinner and fluffier and give the crown extra breathing room.
Step-by-Step: Lasagna Mulch Recipe for Hostas
This is the method I use in established hosta beds. It’s designed to improve soil without smothering crowns or encouraging rot.
Tools and materials
- Hand rake or gloved hands
- Cardboard (plain, non-waxy) or 6–8 sheets of newspaper
- Compost (finished)
- Leaf mold or shredded leaves
- Fine bark mulch or shredded hardwood
- Optional: grass clippings (dry/half-dry), aged manure
Thickness targets (use these numbers)
- Weed cleanup: Pull or cut weeds to the soil line first. Don’t leave tall stems that poke through.
- Cardboard/newspaper layer: 1 layer of cardboard (overlap seams by 4–6 inches), OR 6–8 sheets of newspaper. Stop the barrier 3 inches away from the hosta crown.
- Compost layer: 1 inch of finished compost. Keep compost 2–3 inches away from the crown.
- “Brown” layer: 2 inches of shredded leaves or leaf mold.
- Top mulch: 2 inches of shredded bark or hardwood mulch.
That gives you roughly 5–6 inches total of layered material in the bed area, while leaving a clear breathing ring around each hosta crown.
Critical detail: the crown gap
Hostas rot when their crown stays wet and airless. Always leave a 2–3 inch mulch-free ring around the crown. You can narrow that gap slightly in very sandy soil, but in clay or irrigated beds, keep it generous.
Watering: How Lasagna Mulch Changes Your Routine
The biggest mistake I see after mulching is assuming you can stop watering. Mulch reduces evaporation, but it doesn’t create water. What it does is help you water less often and more effectively.
Weekly water targets
Hostas generally perform best with about 1 inch of water per week from rain or irrigation during active growth. In heat waves (above 85°F for several days), many gardens need closer to 1.5 inches per week, especially in sandy soil.
These numbers align with common extension guidance for perennials and mulched beds. The key is not the calendar—it’s what’s happening 4–6 inches down.
How to check moisture under layers
- Push your finger down through the mulch. If the soil is dry at 2 inches deep, it’s time to water.
- Better: use a soil probe or trowel and check at 4–6 inches. Hostas want that zone evenly moist, not mud.
Best way to irrigate a lasagna-mulched hosta bed
- Use soaker hoses or drip lines under the top mulch when possible.
- Water slowly so moisture penetrates through the layers: plan on 30–60 minutes depending on flow rate.
- Water in the morning to reduce slug activity and leaf disease pressure.
Mulch can shed water if it gets hydrophobic (especially bark). If you see water running off, gently rake the top inch to open it up, then water again.
Soil: Building the Hosta Bed Without Digging Up Crowns
Hostas aren’t picky, but they are honest: if the soil is compacted, nutrient-poor, or dries fast, you’ll get smaller leaves, scorched edges, and stunted clumps.
Ideal soil conditions (practical targets)
- Texture: Moisture-retentive but draining (loam is perfect; amended clay can work well).
- pH: Slightly acidic to neutral, roughly 6.0–7.0.
- Organic matter: The more the better, but add it on top in layers rather than digging around crowns.
Lasagna mulching is gentle: earthworms and microbes incorporate the layers. You avoid slicing hosta roots with a spade, and you steadily improve tilth.
Material choices that work (and a few to avoid)
- Best “browns”: Shredded leaves, leaf mold, pine needles (thin layers), shredded paper (small amounts).
- Best “greens”: Grass clippings (thin, dry-ish), fresh garden trimmings (chopped), coffee grounds (thin).
- Go easy on: Thick mats of grass clippings (they can go slimy), uncomposted manure (can burn), and sawdust (ties up nitrogen unless balanced).
If you only have one good material, choose shredded leaves. They settle nicely and break down into the kind of humus hostas love.
Light: Matching Mulch Strategy to Sun Exposure
Light drives water use. The same hosta in dappled shade can look lush on modest water, while one in morning sun can crisp up fast.
Shade and part shade (ideal)
In bright shade or filtered light, a standard 2-inch top mulch is usually enough on top of your layers. Keep the bed evenly moist and you’ll get thick, clean foliage.
Morning sun or hot edge-of-bed locations
If your hostas get 3–5 hours of sun (especially morning sun), lasagna mulching helps a lot, but you may need to:
- Bump top mulch to 3 inches (still keep crown clear).
- Water deeper, less often—don’t “sip” daily.
- Choose thicker-leaved cultivars for those spots.
Afternoon sun (tough setting)
In regular afternoon sun, mulch alone won’t prevent scorching. You’ll need either more shade (shrubs, a small tree canopy, or shade cloth) or a different plant. If you insist on hostas there, expect watering at least 2–3 times per week during hot spells and accept some cosmetic damage.
Feeding: How to Fertilize Hostas in a Lasagna-Mulched Bed
Most people over-fertilize hostas. Lasagna mulching slowly releases nutrients as it breaks down; compost contributes a steady baseline. The goal is steady growth, not forced, soft tissue that slugs love.
Simple feeding plan
- Spring: Top-dress with 1 inch finished compost (already part of the lasagna). That’s often enough.
- If growth is pale or slow: Apply a balanced slow-release fertilizer (something like 10-10-10) at label rate once when shoots are 3–6 inches tall.
- Stop feeding by mid-summer: After about July 15 in many temperate climates. Late nitrogen can encourage soft growth and stress going into heat or fall.
Extension services routinely emphasize mulch and compost as soil builders and recommend keeping mulch off trunks/crowns to reduce disease risk. For example, fine mulch management guidance is outlined by Washington State University Extension (2020) and Penn State Extension (2023).
Lasagna Mulch vs. Standard Mulch: What Changes in Real Use
If you’ve only ever used a simple 2-inch bark mulch, lasagna mulching feels like extra work. The payoff is fewer weeds, better moisture retention, and soil improvement that compounds over time.
| Method | Typical Depth | Weed Suppression | Moisture Holding | Soil Improvement Over 12 Months | Risk if Done Wrong |
|---|---|---|---|---|---|
| Standard bark mulch | 2 inches | Moderate (weeds still seed in) | Moderate | Slow (mostly surface) | Low–Moderate (can still smother crowns if piled) |
| Lasagna (sheet mulching) + top mulch | 5–6 inches total (layered), 2 inches top | High (barrier + layers) | High (reduced evaporation + improved soil) | High (composting in place) | Moderate (rot/slugs if packed against crown) |
| Gravel/stone mulch | 1–2 inches | Moderate | Low–Moderate (often heats soil) | None (no organic matter) | Moderate (heat stress; hard to remove) |
Common Problems (and How Lasagna Mulch Helps—or Hurts)
Lasagna mulching isn’t magic. It fixes some issues and can worsen others if you ignore the biology of a cool, moist bed—exactly what slugs adore.
Problem: Slugs and snail damage
Symptoms: Ragged holes, shredded edges, slime trails, damage worst on tender new leaves.
Why it happens: Thick, damp mulch is a daytime hideout. Hostas are prime slug food.
Fix:
- Keep a clear 2–3 inch ring around the crown (less hiding space right where they feed).
- Water in the morning, not evening.
- Use iron phosphate bait as needed, reapplying after heavy rain per label.
- Set traps for monitoring: a board or overturned pot saucer. Check at dawn.
Problem: Crown rot / soft crown
Symptoms: Shoots collapse, crown feels mushy, foul smell, leaves yellow then fall.
Why it happens: Mulch piled against the crown + frequent irrigation + poor airflow.
Fix:
- Pull mulch back immediately; expose the crown to air.
- Stop overhead watering; switch to soaker hose.
- If the crown is badly rotted, dig and discard affected sections. Replant healthy divisions into better-drained soil.
Problem: Leaf edge scorch
Symptoms: Brown, crispy margins, especially on white- or yellow-variegated types; worst in hot, bright weather.
Why it happens: Too much sun, low soil moisture, or hot wind.
Fix:
- Maintain about 1–1.5 inches of water per week during heat spells.
- Add shade (even a temporary shade cloth during a heat wave helps).
- Increase top mulch to 3 inches in sunny exposures (without touching the crown).
Problem: Weeds punching through
Symptoms: Nutsedge, bindweed, or grass popping up through layers.
Why it happens: Perennial weeds with strong roots don’t care about cardboard; they detour around it.
Fix:
- For tough perennials, dig them out before layering.
- Double-cardboard in the worst areas (still keep it away from crowns).
- Top up the mulch each year with 1 inch compost + 1 inch shredded leaves as maintenance.
Troubleshooting by Symptom (Quick Diagnoses)
Hosta looks smaller each year, despite mulch
- Likely cause: Tree roots stealing water; mulch is helping, but competition is winning.
- What to do: Water deeper (1.5 inches/week in dry periods), and consider planting hostas in a slightly raised, amended pocket or switching to more competitive shade plants.
Mulch stays wet and smells sour
- Likely cause: Layers are too thick/packed; poor airflow; too much “green” material.
- What to do: Rake the top layer to fluff it, remove slimy mats, and replace with shredded leaves or bark. Keep total depth closer to 4–5 inches until conditions balance.
Lots of fungus/mushrooms popping up
- Likely cause: Wood and leaf layers are decomposing (usually normal).
- What to do: Leave them unless pets/kids might ingest them. Improve airflow and avoid burying crowns. Mushrooms are typically a sign the system is breaking down organic matter as intended.
Three Real-World Scenarios (How I’d Handle Each One)
Scenario 1: Mature hostas under maples (dry shade)
This is the classic “why won’t my hostas thrive?” spot. Maples are greedy with surface roots.
- Skip thick cardboard right up to the clumps—tree roots make it hard to lay flat. Use smaller pieces in open zones.
- Use a moisture-focused stack: 1 inch compost + 3 inches shredded leaves + 2 inches bark.
- Water with a soaker hose long enough to wet 6 inches deep, not just the mulch surface.
In dry shade, lasagna mulching is less about weed suppression and more about building a sponge layer.
Scenario 2: New hosta planting in spring (bare soil bed)
New plantings need special care because roots haven’t explored beyond the planting hole.
- Plant hostas with the crown at soil level (not buried).
- Water in with 1–2 gallons per plant.
- Mulch lightly at first: 1 inch compost + 2 inches shredded leaves. Hold off on thick cardboard right next to young plants.
- After 4–6 weeks, expand the lasagna layers outward as the plant establishes.
This avoids smothering while still stabilizing moisture.
Scenario 3: Slug-heavy garden with expensive blue hostas
If slugs are already a problem, lasagna mulching must be paired with slug strategy.
- Keep the crown ring extra wide: 4 inches clear.
- Use a drier top mulch (shredded bark) rather than a thick, soft leaf layer right at the plant.
- Scout weekly in spring when shoots are tender. If you wait until leaves are shredded, you’re behind.
- Combine iron phosphate bait with morning watering and hiding-place traps.
You can absolutely use lasagna mulching in slug country—you just can’t pretend mulch is neutral habitat.
Maintenance: Keeping the Layers Working Year After Year
Lasagna mulching isn’t a one-and-done event. The layers settle and decompose; that’s the whole point. Plan to refresh rather than rebuild.
- Each spring: Pull mulch back from crowns, check for heaving, and top-dress with 1 inch compost if needed.
- Each fall: Add 1–2 inches shredded leaves over the bed (not packed into crowns). If you have heavy leaf drop, this is the easiest “free mulch” you’ll ever get.
- Every 3–5 years: Divide crowded clumps if centers thin out. Mulch won’t prevent overcrowding.
One more practical note: avoid piling mulch like a volcano around hostas. That advice is common for trees and shrubs too—keep mulch off stems and crowns to reduce rot and pest issues. Washington State University Extension (2020) emphasizes keeping mulch from contacting plant trunks to prevent moisture-related damage; the same principle applies to hosta crowns.
If you start with the crown gap, use the right thicknesses, and water with intention, lasagna mulching turns hosta care into something closer to what people promised you in the first place: a lush shade bed that mostly takes care of itself—without you hovering with a hose every time the forecast looks dry.
Sources: Penn State Extension (2023), “Mulching Landscape Trees”; Washington State University Extension (2020), “Wood Chip Mulch: Best Management Practices for Trees and Shrubs.”