Self-Watering Pot Review for Tomatoes
Last July I watched a neighbor’s patio tomatoes go from “loaded with green fruit” to “crispy, curled leaves and blossom-end rot” in less than a week. The plants weren’t neglected—she watered when she remembered. The problem was the gaps: two hot afternoons, one missed morning, and the containers dried down like a brick. Tomatoes don’t forgive uneven moisture, especially in pots. Self-watering containers (SWCs) can smooth out those gaps—but only if you set them up like a gardener, not like a gadget.
This is a practical review of self-watering pots for tomatoes: what they do well, where they fail, and how to run them so you get steady growth, fewer cracked fruits, and less blossom-end rot. I’ll use real numbers, real scenarios, and the small “container hacks” that matter more than brand names.
What a Self-Watering Pot Actually Does (and What It Doesn’t)
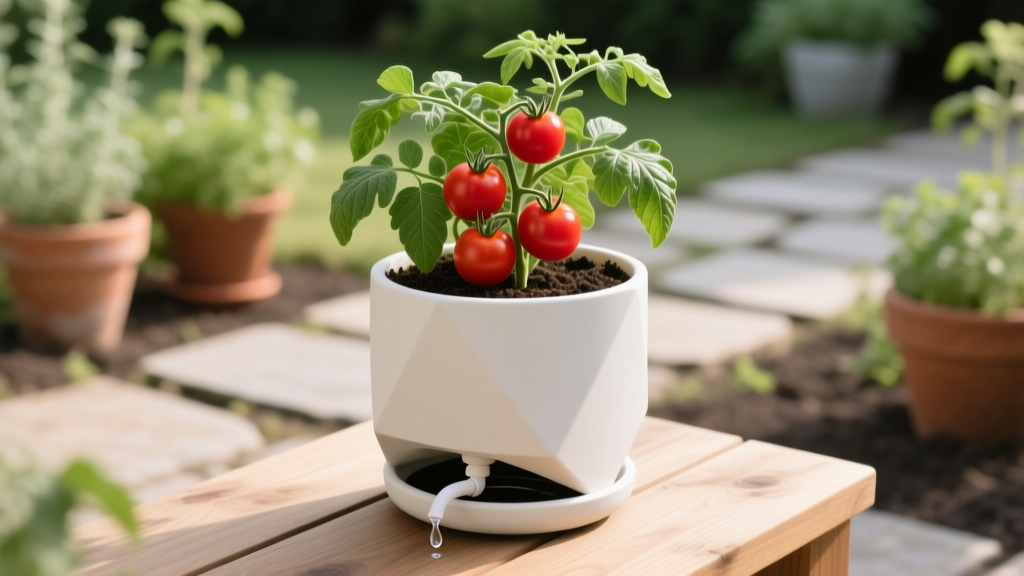
A typical self-watering pot has a water reservoir in the bottom, a wicking system that pulls moisture up into the soil, and an overflow hole so roots don’t drown. Done right, it keeps the root zone evenly moist for days at a time. Done wrong, it creates a soggy lower layer, a dry upper layer, and a plant that looks “mysteriously stressed” even though the reservoir is full.
Think of SWCs as a moisture buffer, not a “set it and forget it” system. You still have to manage:
- Root space (tomatoes are not petite)
- Heat (containers overheat faster than beds)
- Fertility (nutrients wash, wick, and salt up differently)
- Water quality (salts build up in closed-ish systems)
One point worth grounding in research: consistent moisture matters. Tomatoes are prone to disorders like blossom-end rot when water availability swings. Penn State Extension (2023) notes that uneven watering is a major contributor to blossom-end rot because it disrupts calcium movement in the plant.
Comparison: Self-Watering Pots vs Standard Containers vs Grow Bags
I’ve grown tomatoes in all three on patios and driveways. Here’s the honest comparison using practical, measurable differences you’ll notice in a home setup.
| Container type | Typical volume for 1 tomato | Watering frequency in hot weather (85–95°F) | Moisture stability | Common failure mode |
|---|---|---|---|---|
| Self-watering pot (with reservoir) | 15–25 gallons | Refill every 1–3 days (often daily at peak fruiting) | High (when wicking column is built right) | Salt buildup; anaerobic lower layer if overfilled/no overflow |
| Standard plastic/ceramic pot (drain holes) | 15–25 gallons | Daily; sometimes 2x/day during heat waves | Medium to low (depends on mulch and pot material) | Dry-down swings → cracking/BER; missed watering collapses plants |
| Fabric grow bag | 15–30 gallons | Daily; 2x/day common in windy heat | Low to medium (excellent drainage, fast drying) | Chronic drought stress unless closely managed; nutrient leaching |
My take: a self-watering pot is the best tool when you can’t reliably water at the same time every day. But if your patio bakes in full sun and wind, you may still refill daily—just with far fewer plant-damaging dry spells.
Watering: Getting the Reservoir System to Work for Tomatoes
How much water does a tomato actually use in a self-watering pot?
At peak summer growth, a healthy indeterminate tomato in a 20-gallon SWC can drink 1–2 gallons per day in hot, breezy weather. In milder weather (70–80°F), it may be closer to 0.5–1 gallon per day. That’s why reservoir size matters: a tiny reservoir gives you the worst of both worlds—extra complexity without enough buffering.
Research backs the “big reservoir” preference in container culture more broadly. University of Florida IFAS Extension (2022) emphasizes that containers dry quickly and require frequent watering; the goal is to avoid drought cycles that stress plants and reduce yield.
Step-by-step: setting up a self-watering pot for even moisture
- Confirm an overflow hole exists and is clear. The overflow should be 1–2 inches below the soil platform so excess water exits before saturating the soil layer.
- Pre-moisten the potting mix before filling. It should feel like a wrung-out sponge. Dry mix can resist wicking and leave the top half dry for days.
- Build a real wicking column (if your pot requires it). Pack the wicking column firmly with moistened mix—no airy fill. Air gaps break the wick.
- Mulch the soil surface with 1–2 inches of straw, shredded leaves, or fine bark. SWCs stabilize moisture, but mulch stabilizes temperature and reduces top evaporation.
- Top-water for the first 7–10 days after transplanting. Roots need time to find the moisture gradient. After that, switch mostly to reservoir filling.
Reservoir habits that prevent cracked fruit and blossom-end rot
- Refill before it runs bone dry. Letting the reservoir empty completely increases swings. In heat, check every morning.
- Use a fill tube you can see into (or a float indicator). Guessing leads to either drought or saturation.
- Once every 2–3 weeks, flush from the top until water runs out the overflow for 30–60 seconds. This helps wash out fertilizer salts that accumulate with bottom-watering.
“The biggest benefit of a self-watering container is reducing moisture stress, but gardeners still have to manage fertility and salt buildup because water moves upward and leaves minerals behind.” — Extension container gardening guidance, University of Minnesota Extension (2021)
Soil: What Potting Mix Works Best in Self-Watering Pots
Tomatoes need air at the roots as much as they need water. In SWCs, the bottom stays consistently moist, so a heavy mix can become stagnant. Skip garden soil. Use a peat/coco-based potting mix with perlite or pine bark for structure.
A practical recipe that works well in most self-watering pots:
- 70–80% high-quality potting mix (peat- or coir-based)
- 20–30% extra aeration (perlite or fine pine bark)
- Optional: 1–2 cups of worm castings mixed into the top half (not the wicking column)
If you use compost, keep it modest—no more than 20–25% of the total volume. Too much compost can compact, hold excess water, and encourage fungus gnats. The goal is a mix that wicks but still breathes.
Soil level and planting depth
Tomatoes love deep planting, and SWCs can handle it as long as you maintain airflow. Plant the tomato so 6–10 inches of stem is buried (strip leaves off that section). Keep the final soil line at least 1 inch below the rim for watering and mulch.
Light and Temperature: SWCs Don’t Fix Shade
No container design compensates for weak light. Tomatoes need 8+ hours of direct sun for strong growth and good flavor; 6 hours can work for some cherry varieties but yields drop. Also watch nighttime temperatures: fruit set slows when nights are consistently above 75°F, and pollen viability can drop during extreme heat.
Container tomatoes also suffer from root-zone overheating. Dark pots in full sun can cook roots. If your SWC is black and sits on concrete, you’re stacking heat. Helpful moves:
- Place pots where they get morning sun and a little late-afternoon relief during heat waves.
- Wrap the outside with a light-colored barrier (even cardboard) leaving airflow.
- Mulch the surface and avoid bare, dark soil.
Feeding Tomatoes in Self-Watering Pots (Without Overdoing It)
This is where many self-watering pots “disappoint.” It’s not the container—it’s feeding. Tomatoes in containers are entirely dependent on what you provide, and SWCs can concentrate salts because water evaporates while minerals remain.
A simple, reliable feeding schedule
Pick one approach and stick with it; mixing methods often causes overfertilizing.
- Controlled-release fertilizer: At planting, mix in a slow-release product labeled for vegetables at the container rate. For a typical 20-gallon pot, that’s often around 1/2–1 cup total (follow your product label). Top up at 6–8 weeks if the label calls for it.
- Liquid feeding: Start 2 weeks after transplant. Apply a tomato-friendly fertilizer at 1/2 strength every 7 days, or full strength every 14 days. In SWCs, I prefer lighter, more frequent doses.
Aim for a fertilizer that includes calcium and magnesium (or supplement with a cal-mag product if your water is very soft). But remember: calcium only helps if watering is consistent—another reason SWCs can reduce blossom-end rot when managed well.
Signs you’re overfeeding in a self-watering pot
- Leaf edges look burned or crispy even though the plant isn’t dry
- White crust on soil surface
- Sudden wilt on hot days that doesn’t match reservoir level
Fix: top-flush until overflow runs clear, then pause fertilizing for 7–10 days and resume at a lower rate.
Common Problems in Self-Watering Pots (Symptoms and Fixes)
Blossom-end rot (dark, leathery spot on bottom of fruit)
What you see: Fruit develops a brown/black patch on the blossom end, often on the first big set.
What’s happening: Calcium can’t move reliably into developing fruit when water supply fluctuates. Penn State Extension (2023) highlights uneven watering as a key driver.
Fix it:
- Keep the reservoir from running empty; check daily during fruit fill.
- Mulch the surface 1–2 inches to reduce evaporation swings.
- Avoid heavy pruning during heat; it increases plant stress.
- Don’t overdo nitrogen; it pushes leafy growth that outpaces calcium delivery.
Top stays dry while reservoir stays full
What you see: Plant wilts midday, soil surface looks dusty, but the reservoir still has water.
Cause: The wicking column isn’t packed, the mix is hydrophobic (dried peat), or the potting mix is too coarse to wick consistently.
Fix it:
- Top-water slowly for 3–5 days to rehydrate the soil column.
- Use a chopstick to gently poke a few vertical channels (don’t shred roots) to help water move.
- Next season: pre-moisten mix thoroughly before potting and increase peat/coir fraction slightly for better wicking.
Lower leaves yellowing fast, soil smells “off”
What you see: Yellowing leaves, slow growth, sometimes fungus gnats; when you sniff near the soil you get a sour/rotten odor.
Cause: Anaerobic conditions—too much water and not enough air, often from a heavy mix or a blocked overflow hole.
Fix it:
- Check and clear the overflow immediately.
- Stop filling reservoir for 48 hours and let the system drain down.
- If the mix is compost-heavy, consider repotting into a lighter mix (painful, but sometimes the only real fix).
Cracked tomatoes (radial or concentric cracking)
What you see: Fruit cracks after a refill or rainstorm.
Cause: Water uptake spikes after a dry spell. SWCs reduce this, but if the reservoir runs dry then gets refilled, you can still see cracking.
Fix it:
- Refill before the reservoir empties—especially when fruit is sizing up.
- Harvest near-ripe fruit a day early during heat waves.
Real-World Scenarios: When Self-Watering Pots Shine (and When They Don’t)
Scenario 1: The weekend traveler (gone 2–3 days at a time)
If you leave Friday morning and return Sunday night, a standard pot can be a gamble in summer. A well-sized SWC with a 2–4 gallon reservoir can bridge that gap for a single plant—if the weather isn’t extreme and the plant isn’t at peak fruiting. In a heat wave (90–95°F), even SWCs may need a midweek refill or partial shade.
My practical advice: if you’re often away, use a 20–25 gallon SWC, mulch heavily, and choose a variety with manageable leaf mass (many paste or compact indeterminates behave better than huge beefsteaks in containers).
Scenario 2: The south-facing balcony with reflected heat
Balconies can be hotter than the forecast due to reflected sun from walls and railings. In this setting, SWCs help, but the limiting factor becomes root temperature, not just moisture. I’ve seen plants with full reservoirs still wilt at 3 p.m. because roots were too hot to function well.
Solutions that actually work:
- Elevate the container slightly so air can move under it.
- Use a light-colored outer wrap and keep the reservoir topped up earlier in the day.
- Add temporary shade cloth (30–40%) during the hottest 2–3 weeks of summer.
Scenario 3: The enthusiastic feeder (high fertilizer + self-watering)
This is the most common SWC failure I see: a gardener feeds like it’s a raised bed and then wonders why the container “burns” the plant. With bottom-watering, salts migrate and concentrate. If you’re using liquid fertilizer weekly at full strength, you may be overdoing it without realizing.
Better approach: fertilize lighter and flush from the top every 2–3 weeks. If you see leaf edge burn plus a white crust, stop feeding and flush twice over a week.
Practical Review Notes: What to Look For in a Self-Watering Pot for Tomatoes
I’m not reviewing a single brand here; I’m reviewing the features that matter in real tomato-growing conditions.
Reservoir size and refill access
For tomatoes, I like a reservoir that holds at least 2 gallons for one plant, preferably more. The fill tube should be wide enough that you can pour quickly without back-splash. If you can’t easily check water level, you’ll either forget or overfill.
Overflow design
A proper overflow hole is non-negotiable. If the pot relies on you “not overfilling,” you will overfill at some point. Overflow should be easy to find, easy to clear, and positioned so it actually protects the soil layer.
Stability and trellis support
An indeterminate tomato with fruit is top-heavy. If your SWC is narrow or light, it will tip in wind. Look for a wide base, or plan to anchor a trellis separately. A flimsy built-in cage is rarely enough once the plant hits 5–6 feet.
Troubleshooting Quick Reference (Symptom → Fix)
- Wilting midday but wet soil: heat stress or root zone overheating → shade cloth (30–40%), light wrap, water early.
- Wilting with dry top and full reservoir: wicking failure → top-water 3–5 days, improve mix next cycle.
- Lots of leaves, few flowers: too much nitrogen or too little sun → reduce N, ensure 8+ hours sun.
- Flower drop in heat: temps too high (especially warm nights) → provide afternoon shade, keep moisture steady, wait for cooler window.
- Small fruit, pale leaves: underfeeding or root restriction → consistent feeding at half strength weekly; use 15–25 gallon size.
My Working Recipe for Reliable SWC Tomato Success
If you want a simple plan that works with most self-watering pots, here’s the one I use when someone tells me, “I just want tomatoes without babysitting them.”
- Use a container equivalent of 20 gallons for indeterminates; 15 gallons minimum for compact varieties.
- Use a potting mix with extra aeration (add 20–30% perlite or fine bark).
- Plant deep: bury 6–10 inches of stem.
- Top-water for 7–10 days, then switch to reservoir filling.
- Mulch 1–2 inches on top.
- Fertilize lightly and consistently; flush from the top every 2–3 weeks.
- Support the plant early—don’t wait until it flops.
Self-watering pots won’t make tomatoes effortless, but they do make them forgiving. If your biggest challenge is missed waterings, they’re a real upgrade. Treat the reservoir like a steady drip system, keep the mix airy, and manage fertilizer salts with an occasional flush—then you’ll get the kind of patio harvest that makes you look like you’ve got more time than you actually do.
Sources: Penn State Extension (2023) on blossom-end rot and uneven watering; University of Florida IFAS Extension (2022) on container vegetable watering needs; University of Minnesota Extension (2021) container growing guidance on moisture and fertility management.