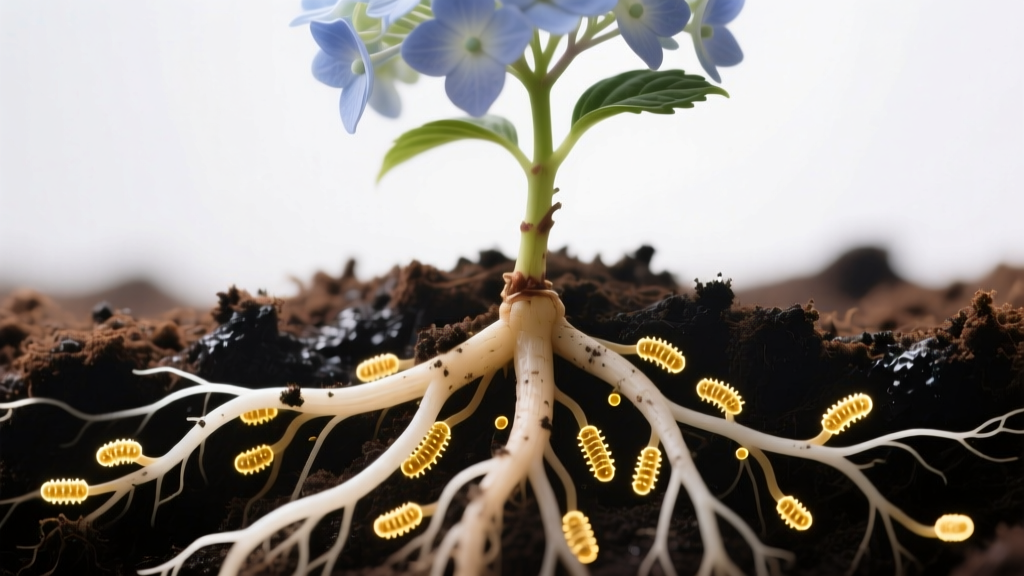
Beneficial Bacteria for Hydrangeas Root Zone
The hydrangea looked fine in May—lush leaves, lots of new shoots. Then June heat hit, and it started to sulk: midday wilting, browned leaf edges, fewer blooms, and that “I swear I watered yesterday” frustration. Here’s the surprise: in a lot of gardens, the issue isn’t a lack of water or fertilizer. It’s that the root zone is missing the right microbial help—especially beneficial bacteria that keep roots fed, protected, and able to handle stress.
I’ve watched two hydrangeas planted the same day, same variety, same sun exposure, behave completely differently because one bed had a living soil (mulch, compost, stable moisture) and the other was essentially sterile (compacted soil, frequent salty fertilizers, and the surface baked dry). Beneficial bacteria don’t replace good gardening—but when you pair them with sensible watering, mulch, and the right soil acidity, they can be the difference between “barely surviving” and “blooming like it means it.”
What “beneficial bacteria” actually do in a hydrangea root zone
Beneficial bacteria live around the roots (the rhizosphere) and do three big jobs that matter to hydrangeas:
- Nutrient cycling: They help convert organic matter and some fertilizers into forms roots can use, especially nitrogen and micronutrients like iron and manganese.
- Root protection: Some species crowd out or inhibit disease organisms (think of them as “bouncers” in the soil).
- Stress buffering: Healthy microbial communities improve soil structure and root function, which helps hydrangeas cope with heat, brief drought, and transplant shock.
In practical terms, bacteria are most helpful when your hydrangea is stressed: after planting, during hot spells, in heavy clay that stays wet too long, or when you’re trying to correct chlorosis (yellow leaves from nutrient lockout).
“Healthy soil biology is central to plant health because it drives nutrient cycling and can suppress soilborne diseases.” — USDA Natural Resources Conservation Service Soil Health guidance (USDA NRCS, 2020)
Start with the basics: bacteria can’t outperform bad root-zone conditions
If the root zone is waterlogged, bone-dry, compacted, or salty from over-fertilizing, beneficial bacteria won’t stick around. Think of them like good neighbors: they’ll move in if the neighborhood has food, moisture, and oxygen.
Soil texture and structure (the “oxygen question”)
Hydrangea roots need moisture, but they also need oxygen. Most beneficial bacteria also do better when soil isn’t compacted.
- Ideal texture: Moist, crumbly loam with lots of organic matter.
- Heavy clay: Improve structure with a 2–3 inch (5–7.5 cm) layer of compost on top each spring (don’t till deeply into roots).
- Sandy soil: Bacteria can struggle because it dries fast. Mulch and steady watering matter more here.
If you can push a screwdriver into the soil only 1–2 inches before hitting resistance, compaction is limiting roots—and the microbes that support them.
Soil pH matters (especially for bigleaf hydrangeas)
Beneficial bacteria live across a range of pH levels, but hydrangea nutrition is strongly tied to pH. Bigleaf hydrangea (Hydrangea macrophylla) color changes are the classic example, but even panicle and smooth hydrangeas suffer if pH drives nutrient lockout.
- General target pH: 5.5–6.5 for most hydrangeas.
- Blue blooms (bigleaf types): typically easier around pH 5.2–5.5 with available aluminum.
- Pink blooms: more common around pH 6.0–6.5.
For pH guidance and hydrangea color management, see Clemson Cooperative Extension’s hydrangea resources (Clemson Cooperative Extension, 2021).
Watering: how to irrigate so bacteria and hydrangea roots both thrive
Hydrangeas have a reputation for being thirsty. What they really need is consistent moisture—not daily splashes that wet the surface and leave deeper roots dry. Beneficial bacteria also prefer steady moisture and moderate temperatures.
Deep watering targets (real numbers that work)
- Weekly water goal: about 1 inch of water per week from rain + irrigation during the growing season (more in heat or sandy soil).
- How much is that? Roughly 0.6 gallons per square foot (about 2.3 L per 0.09 m²) to equal 1 inch of water.
- Heat adjustments: If daytime highs are consistently above 85°F (29°C), plan on 1.5 inches per week, split into 2–3 deep waterings.
Simple test: Water, wait 2 hours, then dig a small hole 6 inches deep near (not into) the root zone. If it’s moist at 6 inches, you’re watering deeply enough.
A watering schedule that supports microbial life
- Morning watering (before 10 a.m.) to reduce disease pressure and evaporation.
- Soaker hose or drip under mulch—keeps the rhizosphere evenly moist, which bacteria love.
- Mulch 2–3 inches deep (bark, leaf mold, or pine fines). Keep mulch 2 inches away from stems to prevent rot.
Avoid: blasting the root zone with a high-pressure hose and washing soil away from the crown; frequent shallow watering; and letting containers dry to the point of wilting repeatedly (it’s hard on roots and microbes).
Light: bacteria won’t fix the wrong exposure
Light is one of those factors gardeners try to “fertilize” their way out of. Hydrangeas in too much sun scorch and wilt; in too much shade they bloom poorly. Beneficial bacteria won’t change that.
- Bigleaf hydrangeas: morning sun + afternoon shade is the sweet spot in many climates.
- Panicle hydrangeas: tolerate (and often prefer) more sun, especially in cooler regions.
- Smooth hydrangeas: handle sun if soil stays evenly moist.
If your plant gets 6+ hours of hot afternoon sun and the leaves crisp even with watering, the fix is usually shade (a strategically placed shrub, shade cloth during heat waves, or relocating in fall), not more products.
Feeding: how to fertilize without disrupting your bacteria
Overfeeding is one of the quickest ways to wreck a healthy root zone—especially with high-salt synthetic fertilizers. Hydrangeas do best with moderate fertility and lots of organic matter.
Baseline feeding plan (grounded and repeatable)
- Early spring: 1–2 inches of compost as a top-dress (no digging into roots).
- If you use fertilizer: a slow-release, balanced product around 10-10-10 or similar, applied once in spring at label rates.
- Stop timing: avoid nitrogen-heavy feeding after mid-summer (around July 15 in many regions) so new growth can harden before cold.
Many Cooperative Extension programs emphasize soil testing before amending, because “guessing” often leads to excess phosphorus or the wrong pH corrections. A good reference for science-based home lawn and garden practices is University of Minnesota Extension soil guidance (University of Minnesota Extension, 2023).
How beneficial bacteria fit into feeding
Beneficial bacteria products for gardens usually contain species like Bacillus subtilis, Bacillus amyloliquefaciens, Bacillus pumilus, and related organisms. In the root zone, they:
- help compete with disease organisms
- support root growth through natural metabolites
- improve nutrient availability when organic matter is present
Important: bacteria are not “fertilizer.” They’re support staff. If the soil is depleted and you never add compost or nutrients, bacteria alone won’t produce blooms.
A practical comparison: bacteria inoculant vs compost top-dressing vs doing both
Here’s how I think about the common options. These are realistic, home-garden scales, with costs and time framed in a way that matches what gardeners actually do.
| Method | Typical application rate | Best timing | What you’ll notice first | Most useful when… |
|---|---|---|---|---|
| Bacteria inoculant (root drench) | Follow label; often 1–2 tsp per gallon (3.8 L) as a drench | At planting, and again 2–4 weeks later | Less transplant stall; improved root recovery | You’re planting, recovering from stress, or fighting mild root disease pressure |
| Compost top-dress | 1–2 inches (2.5–5 cm) over the root zone | Early spring; optionally again in fall | Better moisture holding, steadier growth | Your soil is sandy, low in organic matter, or “hard” and lifeless |
| Both (inoculant + compost) | Drench + 1 inch compost + 2–3 inches mulch | Planting time or spring wake-up | Most consistent improvement across seasons | You want the quickest path to a resilient root zone (especially in new beds) |
Comparison analysis with actual data: If you only pick one practice for long-term results, compost and mulch usually beat a one-time inoculant because they continually feed microbes and stabilize moisture. A 2-inch compost top-dress plus 3 inches of mulch can reduce watering frequency noticeably in summer—often shifting from every 2 days to every 4–5 days in loamy soil during 80–90°F (27–32°C) stretches, because evaporation drops and infiltration improves. Inoculants help most at transition moments (planting, recovery after stress), but without organic matter and consistent moisture, their populations tend to fade.
Three real-world scenarios (and what actually works)
Scenario 1: Newly planted hydrangea that wilts every sunny afternoon
What’s happening: New roots haven’t explored the surrounding soil yet. The plant is running on a small root ball that heats up and dries quickly. Microbes are sparse in disturbed planting soil.
What to do (step-by-step):
- Water the root ball deeply right after planting: 2–3 gallons slowly over 10–20 minutes.
- Apply a bacteria drench (label rate) the day of planting and again 14 days later.
- Mulch 2–3 inches deep, keeping it off the stems.
- For the first 3 weeks, water every 2–3 days in warm weather (adjust for rain).
Pro tip: If the plant perks up in the evening but wilts midday, that’s often heat stress—not necessarily drought. Shade the west side temporarily (a piece of burlap or shade cloth) during the first hot spell.
Scenario 2: Established hydrangea with yellow leaves (chlorosis) and weak growth
What’s happening: Often iron is present in soil but unavailable due to pH being too high, or the root zone is stressed (too wet, too compacted). Beneficial bacteria help, but you must fix the root cause.
Triage checklist:
- Test soil pH. If it’s above 6.8, iron chlorosis becomes more likely.
- Check drainage: if water stands longer than 4 hours after a heavy soak, roots may be oxygen-starved.
Fix plan:
- Top-dress with 1 inch compost and mulch.
- Use an acidifying fertilizer formulated for acid-loving plants (per label) if pH is high.
- If leaves are very yellow with green veins, apply chelated iron as a soil drench (label rate) and re-check pH.
- Add a bacteria drench 1–2 weeks after correcting pH or drainage, to help roots rebound.
Scenario 3: Hydrangea in a container that keeps “crashing” mid-season
What’s happening: Potting mixes can swing from wet to dry fast, and summer heat can push root-zone temps above 90°F (32°C), which stresses roots and reduces microbial activity. Fertilizer salts build up in containers, which can suppress beneficial microbes and burn roots.
Container rescue plan:
- Move the pot so it gets morning sun and afternoon shade.
- Water until it runs out the bottom, then repeat 5 minutes later (this re-wets dry pockets).
- Flush salts once a month in summer: run water through the pot for 2–3 minutes to leach buildup.
- Apply a bacteria drench after flushing (label rate), when the mix is moist but not saturated.
- Keep mulch on the soil surface even in pots: 1 inch of fine bark helps a lot.
Common problems in the root zone (symptoms, causes, and fixes)
Problem: Sudden wilt that doesn’t recover at night
Likely causes: root rot, severe drought, or stem/root damage.
What to look for:
- Soil soggy and smells sour
- Blackened, mushy roots (if you gently check a small section)
- Base of stems soft or discolored
What to do:
- Stop watering for a few days and check drainage.
- Pull mulch back to let the crown breathe.
- If in a pot, repot into fresh, well-draining mix; trim dead roots.
- After conditions improve, apply a Bacillus-based bacteria drench to help suppress opportunistic pathogens (follow label directions).
Problem: Brown leaf edges and “crispy” tips
Likely causes: heat + dry wind, inconsistent watering, or fertilizer salt burn.
Solutions that actually help:
- Increase mulch depth to 3 inches (don’t pile against stems).
- Switch to deep watering 2x per week instead of daily splashes.
- If you used quick-release fertilizer recently, flush the root zone with a slow soak (especially in containers).
Where bacteria fit: After you stabilize moisture and reduce salt stress, beneficial bacteria can help roots rebuild fine root hairs, which improves water uptake over the next few weeks.
Problem: Poor blooming on a healthy-looking plant
Likely causes: wrong light, pruning at the wrong time (bigleaf types bloom on old wood), excess nitrogen, or winter bud damage.
Fix approach:
- Confirm variety and pruning needs before cutting anything.
- Reduce nitrogen; don’t apply high-N lawn fertilizer near hydrangeas.
- Improve root-zone health with compost + mulch (bacteria benefit indirectly).
How to apply beneficial bacteria the right way (so you don’t waste money)
Most failures I see come from applying microbes to dry soil, applying them and then letting the area bake, or expecting instant flowering changes. Use bacteria as a root-zone tool.
Best practices for application
- Start with moist soil: Water the day before, or water lightly first.
- Apply in cool parts of the day: morning or evening when soil temps are under about 80°F (27°C).
- Drench the root zone, not the leaves: you want it where the roots are.
- Follow with mulch: it buffers temperature and moisture—key for microbial survival.
- Skip harsh inputs for a week: avoid applying strong fungicides or high-salt fertilizers right after inoculating.
When to reapply (timing that makes sense)
- At planting and again 2–4 weeks later
- After stress events (heat wave, repotting, over-drying)
- Early spring as plants wake up, especially if your soil is low in organic matter
If you’re already top-dressing compost annually and mulching faithfully, you may find you only “need” bacteria inoculants for new plantings or recovery periods.
Feeding the bacteria: the low-tech habits that make the biggest difference
Here’s the part gardeners underestimate: bacteria populations stay healthier when you feed them and protect their habitat.
- Mulch year-round: maintain 2–3 inches.
- Add compost annually: even 1 inch helps.
- Avoid bare soil: bare soil overheats and crusts, which is hard on roots and microbes.
- Go easy on pesticides: spot-treat when needed instead of blanket applications.
A living root zone is built with boring consistency. Once you see how a mulched, compost-fed bed holds moisture and keeps plants steady during heat, it’s hard to go back.
Quick troubleshooting: match the symptom to the fix
If you only remember one thing, make it this: beneficial bacteria work best when you pair them with steady moisture, oxygen in the soil, and moderate feeding.
- Symptom: Wilts daily, perks up at night
Try: deeper watering + 3 inches mulch; temporary afternoon shade; bacteria drench at planting or during recovery - Symptom: Yellow leaves with green veins
Try: pH test; correct pH; chelated iron if needed; compost top-dress; bacteria after root zone stabilizes - Symptom: Leaf edges brown and crunchy
Try: consistent deep watering; salt flush in containers; reduce fertilizer rate; mulch thicker - Symptom: Growth stalls after transplant
Try: 2–3 gallons slow soak; bacteria drench day-of + 14 days; keep root zone evenly moist for 3 weeks
Hydrangeas will always be a bit dramatic in summer. But when the root zone is alive—mulched, evenly moist, and microbially active—the drama is mostly just leaves drooping a touch at 3 p.m., not a plant spiraling downhill. Get the basics right, use beneficial bacteria at the moments they matter most, and your hydrangeas will reward you with stronger stems, healthier foliage, and blooms that hold on longer through the heat.
Sources: USDA Natural Resources Conservation Service Soil Health guidance (USDA NRCS, 2020); Clemson Cooperative Extension hydrangea resources (Clemson Cooperative Extension, 2021); University of Minnesota Extension soil management resources (University of Minnesota Extension, 2023).